Hyper-V is the option integrated in Windows 10 with which it will be possible to create and manage virtual machines in Windows 10, remember that the advantages of having a virtual machine range from savings in economic resources to the possibility of testing both new operating systems and applications without affecting the production environment. Therefore, the use of virtual machines, in this case with Hyper-V, simplifies many tasks that we must perform in person..
Hyper-V Windows 10 is part of the Windows 10 features and by default this feature is disabled, so we must enable this feature in the system and although it is possible to do it from the Control Panel but this time TechnoWikis will explain how to activate Hyper-V Windows 10 and thus enable this Hyper-V function from Windows PowerShell.
What is Hyper-V
Virtualization tools and technologies are used to create standard environments that replace physical ones, thus saving infrastructure costs. Among the hypervisors, one of the best known is the Hyper-V by Microsoft. With Hyper-V we can fully manage our virtual machines. In a virtual machine we can run systems without running the risk that these changes affect our computers. Since Hyper-V is an integrated tool, let's see how to easily activate it with commands.
We also leave you the video tutorial to activate Hyper-V Windows 10 PowerShell..
To stay up to date, remember to subscribe to our YouTube channel! SUBSCRIBE
Activate Hyper-V Windows 10 PowerShell
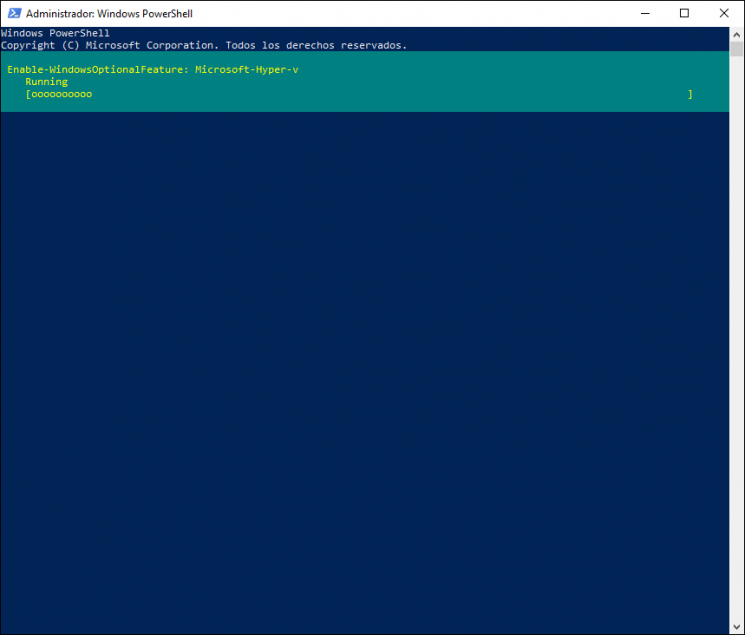
For this process we must resort to the cmdlet "Enable-WindowsOptionalFeature" which has the task of enabling or restoring an optional feature from the Windows 10 image integrated into the system.
Step 1
To make use of this function, we access Windows PowerShell as administrators and in the console we are going to execute the following line:
Enable-WindowsOptionalFeature -Online -FeatureName Microsoft-Hyper-v –All
Step 2
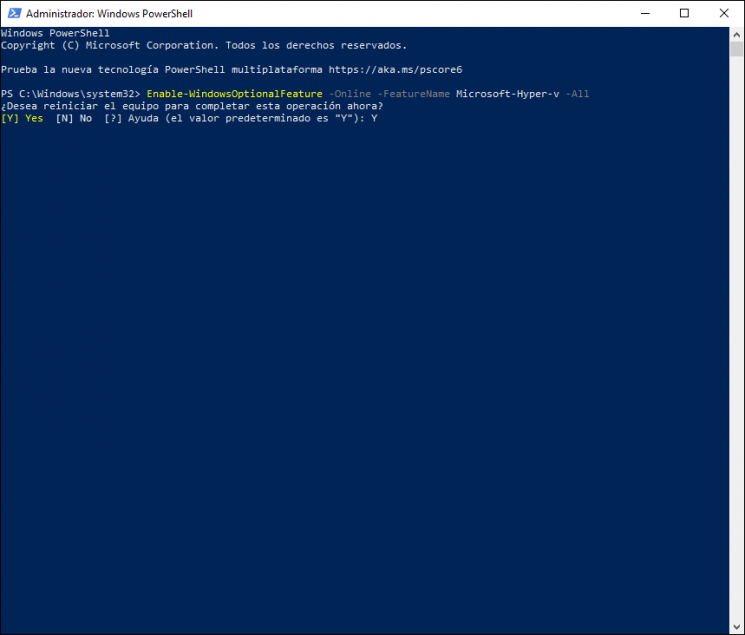
We hope that the progress bar comes to an end to see the following: We enter the letter "Y" to confirm the restart of the system and with it, after Windows 10 starts, we will have Hyper-V enabled to make use of its functions.
Step 3
As an optional method we can run the following in PowerShell also to activate Hyper-V Windows 10:
DISM / Online / Enable-Feature / All / FeatureName: Microsoft-Hyper-v
With these simple steps we can easily activate Hyper-V Windows 10 PowerShell using only commands.