One of the most versatile operating systems to manage through the terminal is undoubtedly Linux in any of its available distributions and this thanks to the integration of numerous commands available in your console. It does not matter if we use a terminal-based system (such as server versions) or a GUI-based environment (such as desktop versions), in all of them the terminal and its commands will always be a reliable source of management and support..
Within our daily activities is the creation and editing of folders and files, which can be numerous depending on the role played. This at some point of support is normal that in one way or another adversely affects the search for elements not only by the number of files but by the location where they are hosted.
To help manage this type of activities in a much simpler way, we have two essential commands for both searching and viewing objects in Linux and these are the Grep and Tree commands. TechnoWikis will explain in detail its use and how to apply them in an integral way in the distribution that we use of Linux..
1. What is the GREP command
What is the Grep command?
Grep is a command developed in order to execute text search tasks, Grep is responsible for looking in the file to indicate the lines where a match is detected either with the words or the string that we assign during the execution of this. Its name is derived from the UNIX editor g / re / p. During the execution of Grep, it will be possible to indicate a name of a file or it is possible to leave the standard input, thus, Grep is in charge of generating the lines that agree.
Grep variables
There are three (3) variables managed during the Grep process which are:
- -G, --basic-regexp: this is responsible for interpreting the pattern as a basic regular expression, it is the default value.
- -E, --extended-regexp: this option is valid for the pattern as an extended regular expression.
- -F, --fixed-strings: with this option the pattern is interpreted as a list of fixed character strings, separated by line breaks where the match will be searched in any of them.
Step 1
The general syntax, which can contain multiple parameters, is as follows:
grep [-AB] num] [-CEFGVbchiLlnqsvwxyUu] [[-e] pattern | -f file] [--extended-regexp] [--fixed-strings] [--basic-regexp] [--regexp = PATTERN] [--file = FILE] [--ignore-case] [--word -regexp] [--line-regexp] [--line-regexp] [--no-messages] [--invert-match] [--version] [--help] [--byte-offset] [- -line-number] [--with-filename] [--no-filename] [--quiet] [--silent] [--files-without-match] [--files-with-matcces] [- count] [--before- context = NUM] [--after-context = NUM] [--context] [--binary] [--unix-byte-offsets] files ...
Step 2
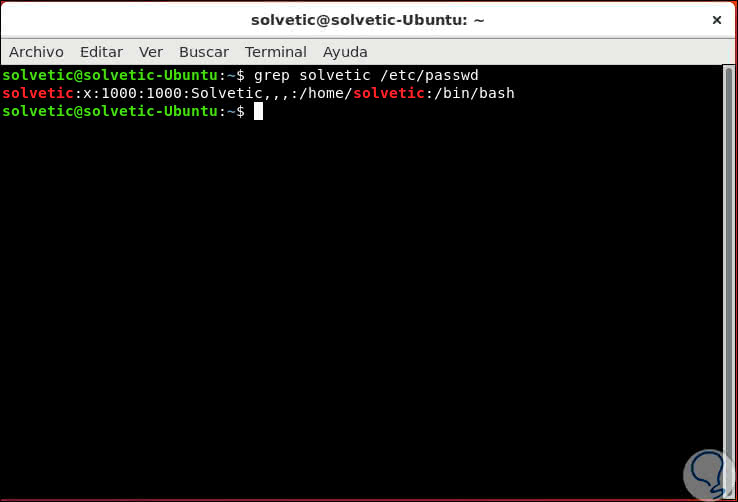
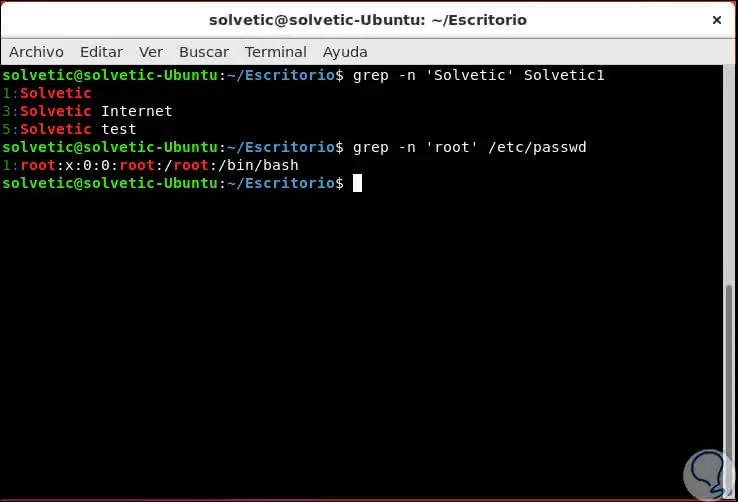
We will see some examples of using Grep before knowing its parameters. If we want to search the / etc / passwd directory for everything related to a particular user, we can execute the following:
grep "user" / etc / passwd
Step 3
The result will be the following:
Step 4
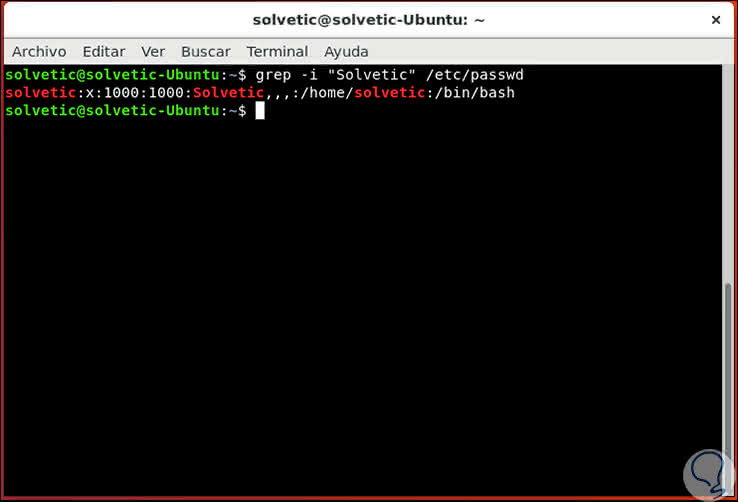
It will also be possible to force the Grep command to ignore uppercase and lowercase letters, that is, allow solvent, TechnoWikis or SOLVETIC matching together with all combinations using the -i parameter:
grep -i "solvetic" / etc / passwd
Step 5
This option can also be executed using the cat command like this:
cat / etc / passwd | grep -i "solvetic"
2. How to use the Grep command recursively in Linux
Step 1
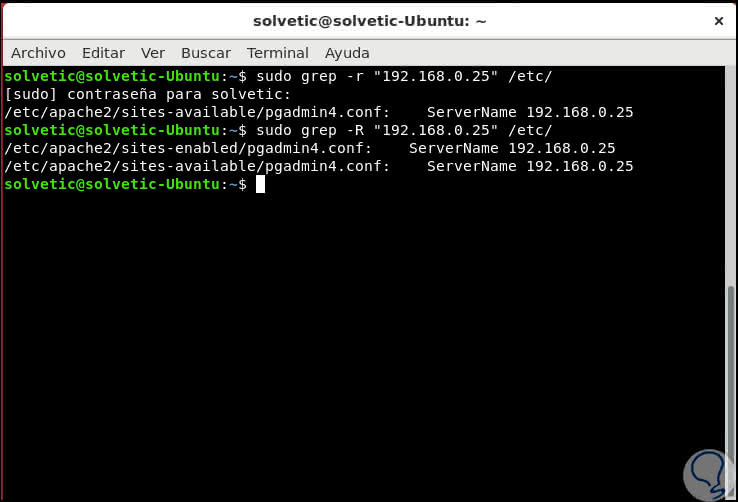
Grep gives us the possibility to execute a recursive search, that is to say, that this search reads all the files in each directory for a specific chain, for example, the IP address of the team, we can execute any of the following options:
grep -r "192.168.0.25" / etc / o grep -R "192.168.0.25" / etc /
Note
There we can enter the current IP address of the equipment in use.
Step 2
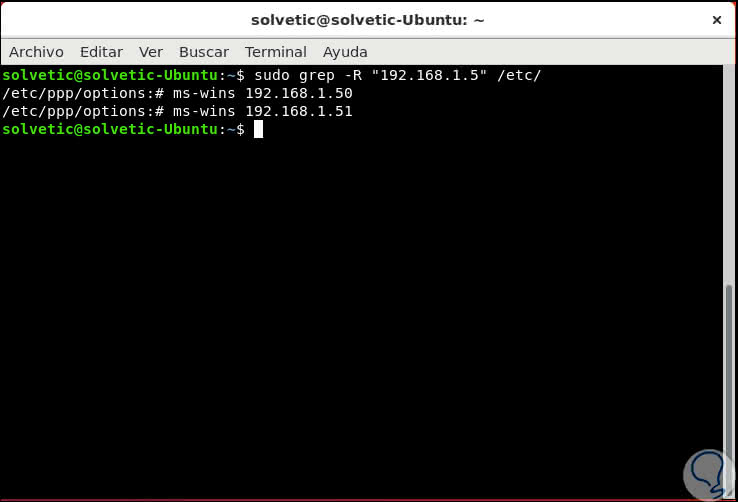
We can also execute the same with the IP 192.168.1.5 which the system uses for standard outputs:
Step 3
We can notice that with both IP addresses a separate line is displayed preceded by the name of the file in which it was detected, if we want to eliminate the inclusion of this value, it will be possible to suppress it using the
-h option like this:
grep -h -R "192.168.1.5" / etc / or grep -hR "192.168.1.5" / etc /
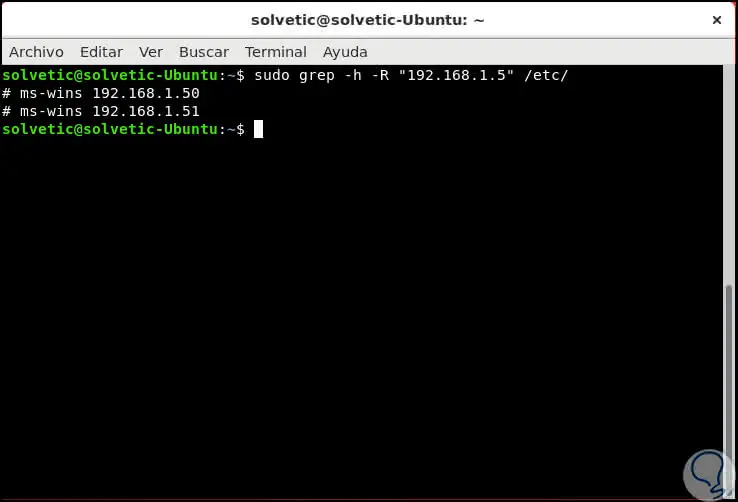
Note
This command must be run as root or sudo before the command.
3. How to use the Grep command to execute word searches on Linux
Step 1
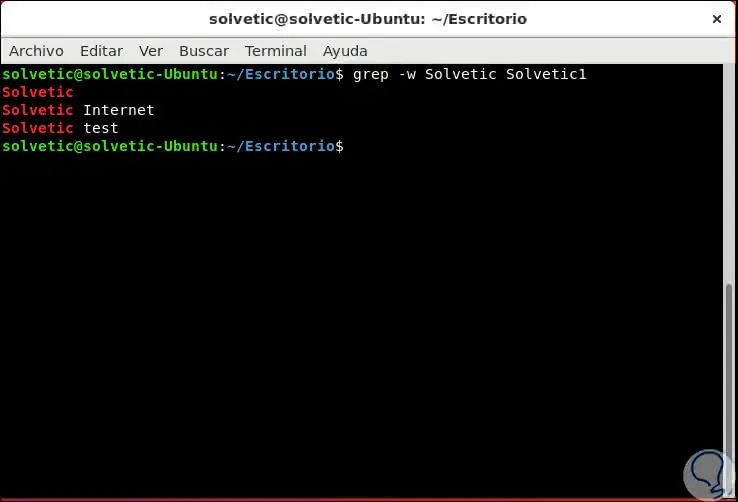
Grep is useful to search terms in a certain file, so the result will highlight each line where the search term is found, as well as the words (not highlighted) that accompany the search term, the syntax to use is as follows . In this case, 3 matches have been detected in the TechnoWikis1 file.
grep -w "word" file
Step 2
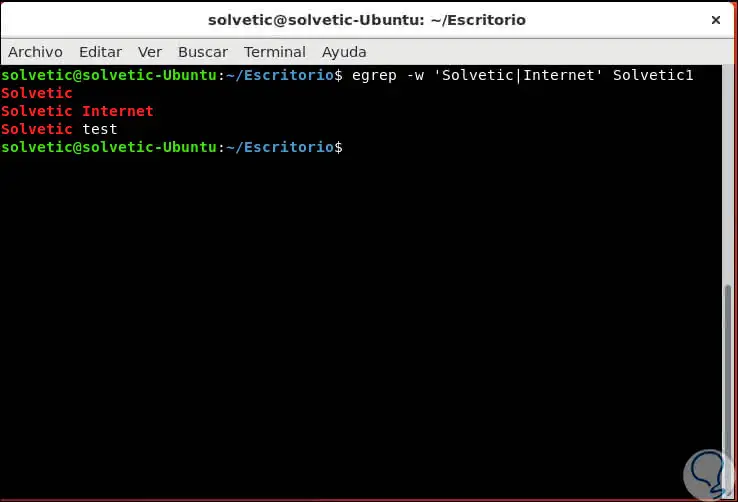
In the case of wishing to search for two terms in a file we must execute the following syntax using the command egrep. As we see the searched words will be highlighted in the result.
egrep -w 'term1 | term2' file
4. How to use the Grep command to count words in Linux
Step 1
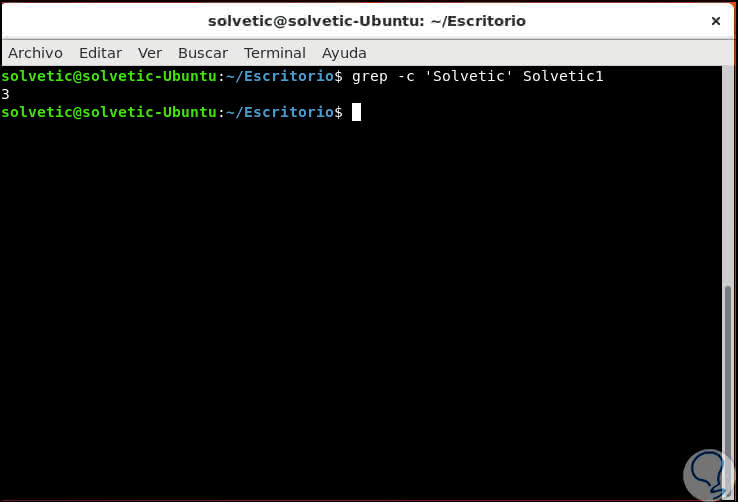
Another of the practical options of Grep is the possibility of knowing how many times a word is repeated in a specific file, this is achieved thanks to the -c parameter like this:
grep -c 'word' file
Step 2
Alternatively we can use the -n parameter to precede each line of output the number of the line in which it is entered in the selected file:
grep -n 'word' file
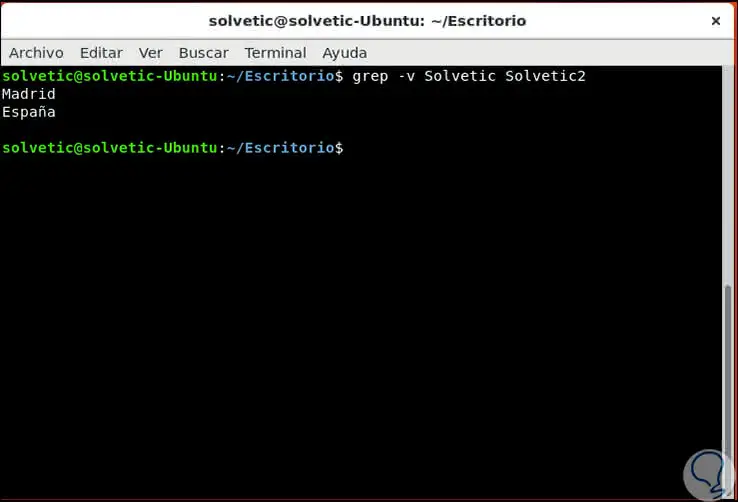
5. How to force the inverted Grep search
With reverse search we mean that the Grep command will only display results from those lines that do not contain the defined word, this is achieved with the -v parameter like this:
grep -v "I finish" file
6. How to use UNIX / Linux Pipes next to the Grep command
Step 1
The Grep command in Linux can be combined with UNIX shell pipes, for example, if we want to list the name of the hard disk devices we will execute the following line:
dmesg | egrep '(s | h) d [az]'
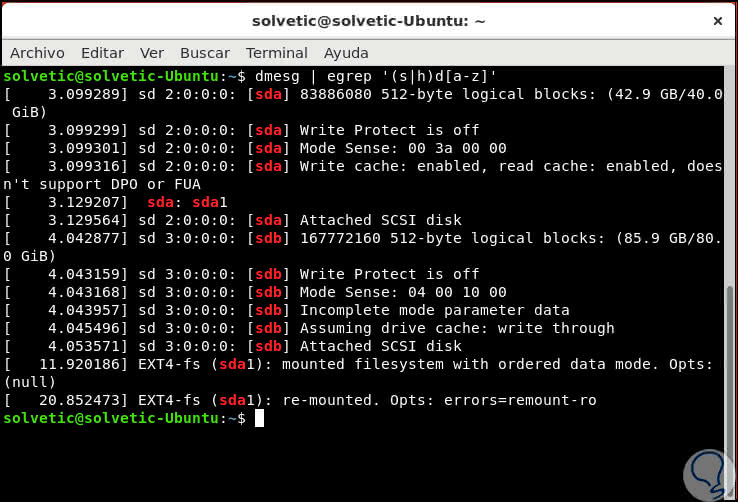
Step 2
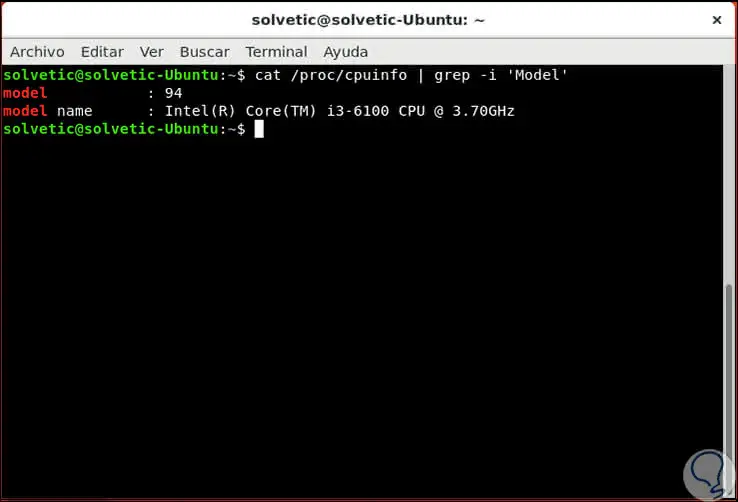
There the results will be displayed with all the respective information. To deploy the CPU model we execute:
cat / proc / cpuinfo | grep -i 'Model'
Step 3
For this same result we can also execute the following:
grep -i 'Model' / proc / cpuinfo
Step 4
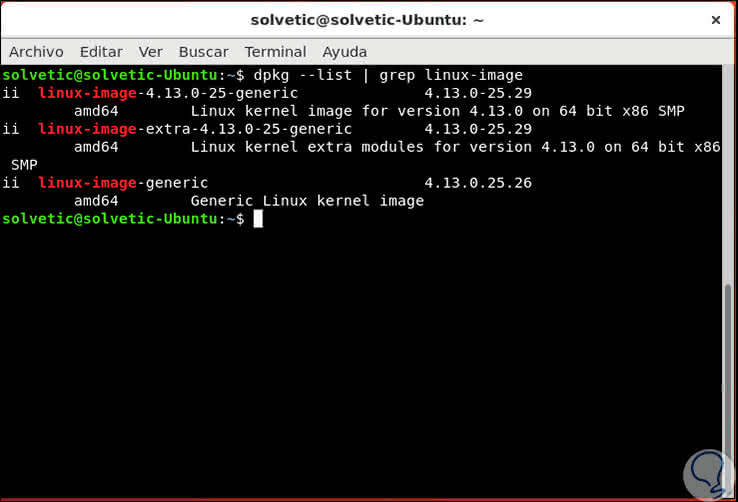
One of the most special uses of the Grep or egrep command is the ability to filter the output of traditional commands such as yum, dpkg, apt or apt-get. For example, we can run the following line to look for Linux images with dpkg:
dpkg --list | grep linux-image
Step 5
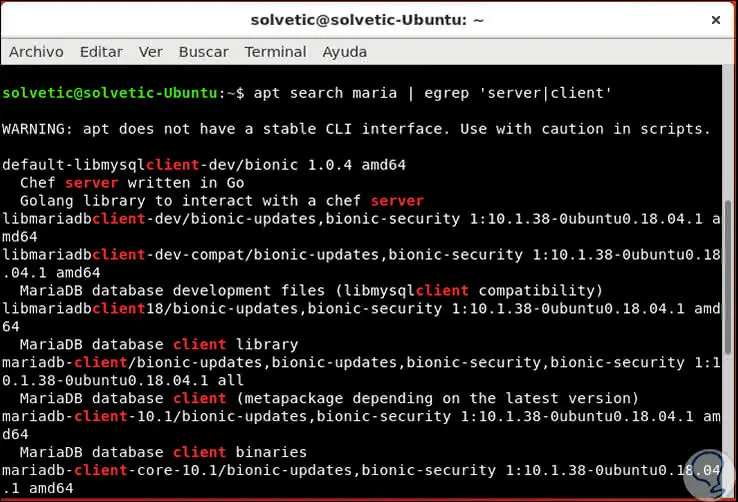
It will be possible to run the search with apt:
apt search maria | egrep 'server | client'
7. How to list only the names of the files that match Grep
For this purpose we can use the -l option in order to list the name of the file in which its content will be highlighted like this:
grep -l 'end' * .c
Grep command parameters
Next, we will see the various variables that Grep offers us for its management in Linux:
- -núm: With this option, the concordant lines will be next to the numbers of previous and subsequent lines.
- -A num, --after-context = NUM: Display the number of context lines after they match the indicated ones.
- -B num, --before-context = NUM: When using this option, the context lines before those matching the search will be displayed.
- -V, --version: Displays the version number of grep used.
- -b, --byte-offset: This parameter displays the offset in bytes from the beginning of the input file before each line of output from it.
- -c, --count: Counts the number of lines that match the indicated term.
- -h, --no-filename: Deletes the printing of the file names in the result.
- i, --ignore-case: It does not take into account if the letters are uppercase or lowercase.
- -L, --files-without-match: This option shows the name of each input file where no match is found.
- -l, --files-with-matches: Shows the name of each input file that can generate some result.
- -n, --line-number: Assign each line of output with the respective line number in the search file.
- -q, --quiet: Activates the silent mode which suppresses the normal output and the search ends in the first match.
- -s, --silent: Deletes the error messages.
- -v, --invert-match: This option reverses the meaning of the search, that is, it will display the results that do not match the search term.
- w, --word-regexp: This parameter selects only the lines that contain concordances that form complete words.
- -x, --line-regexp: This option selects only the concordances that consist of the entire line.
8. How to use and install Tree on Linux
Now we will talk a little about the Tree command, as the name implies, this has been developed to show the directories of the system in the form of a tree, facilitating its management.
The Tree command acts with a recursive command of directory listings which results in the tree format designed with a series of colors only if the environment variable LS_COLORS is set and the output is at tty, if no arguments are assigned, this command will list the files in the current directory.
Step 1
Its general syntax is the following:
tree [-acdfghilnpqrstuvxACDFQNSUX] [-L level [-R]] [-H baseHREF] [-T title] [-o filename] [--nolinks] [-P pattern] [-I pattern] [--inodes] [ --device] [--noreport] [--dirsfirst] [--version] [--help] [--filelimit #] [--si] [--prune] [--du] [--timefmt format ] [--matchdirs] [-] [directory ...]
Step 2
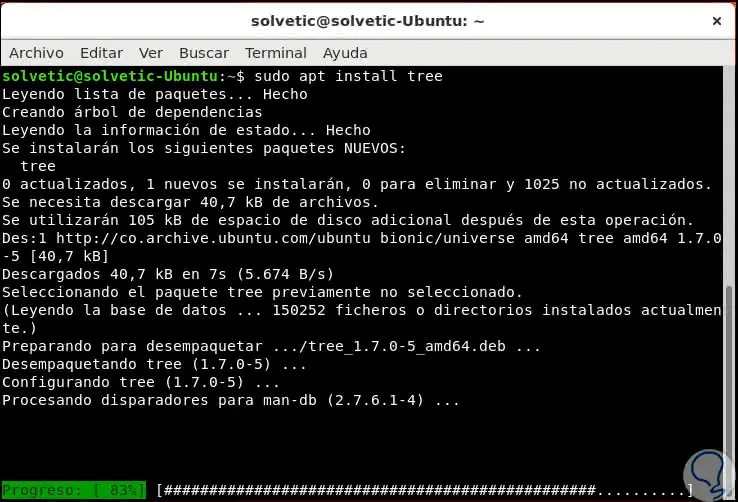
The first step is to install the Tree command by executing the following command:
sudo apt install tree
Step 3
Once installed, we directly execute the "tree" command to list the current directory in tree format:

9. How to work with files using the Tree command in Linux
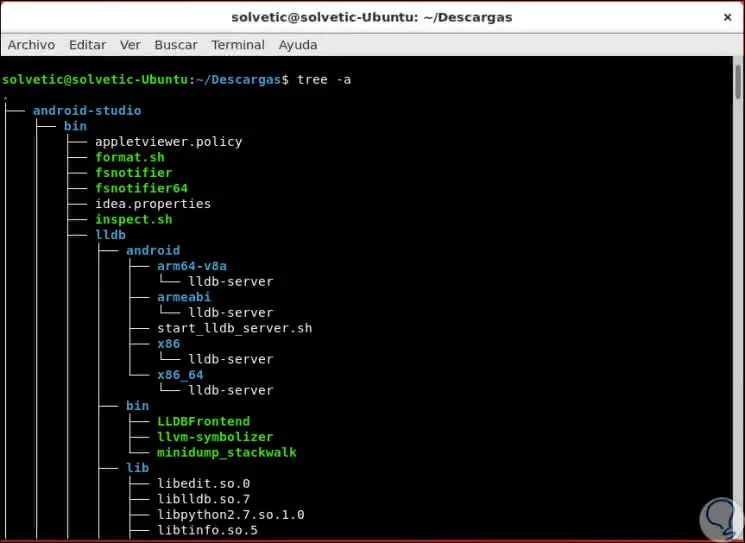
See hidden files with Tree
By default, the Tree command will not display the hidden files for security reasons, if we want to visualize them in the result, it will be possible to add the -a parameter for this purpose:
tree -a
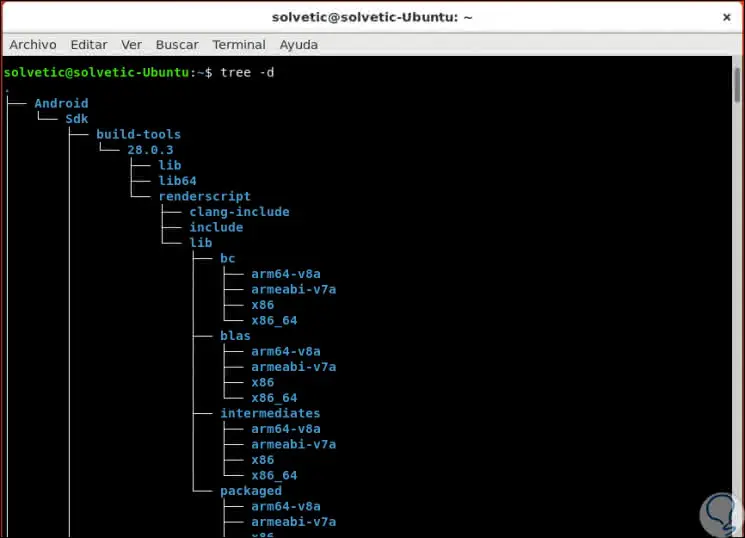
Display only directories with Tree
In case you want Tree to only generate the directory entries it will be possible to do it using the -d parameter like this:
tree -d
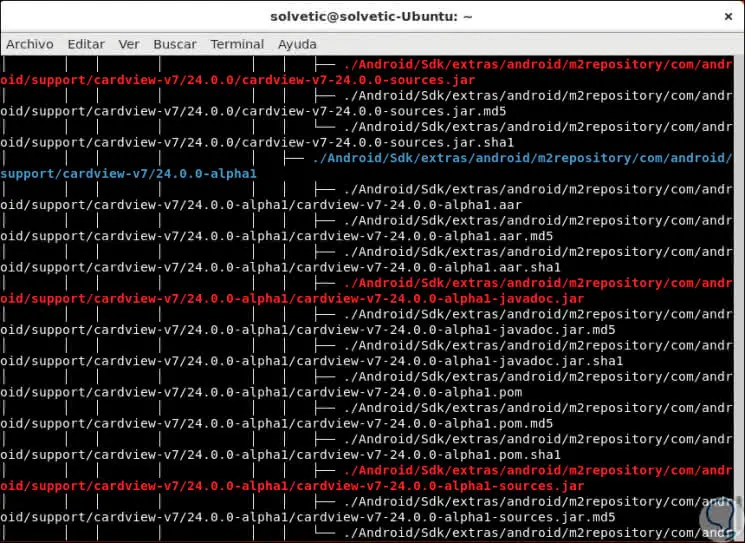
See the complete path of the files with Tree
The Tree command gives us the possibility to print the prefix of the complete path for the files in the directory using the -f parameter:
tree -f
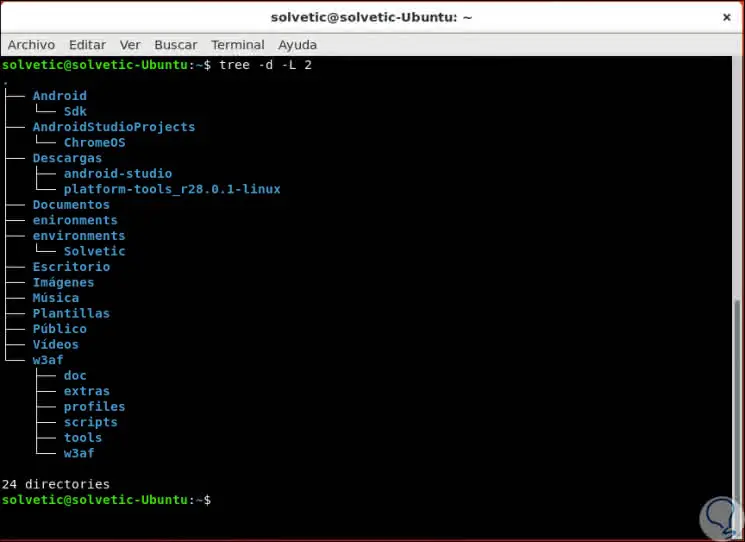
Control the dimension of the result with Tree
In some cases it is possible that the generated result is extremely long, tree allows us to control the depth of the directory tree for its output, for this we must use the -L parameter which requires a numeric value that would indicate the allowed depth of directory:
tree -d -L 2
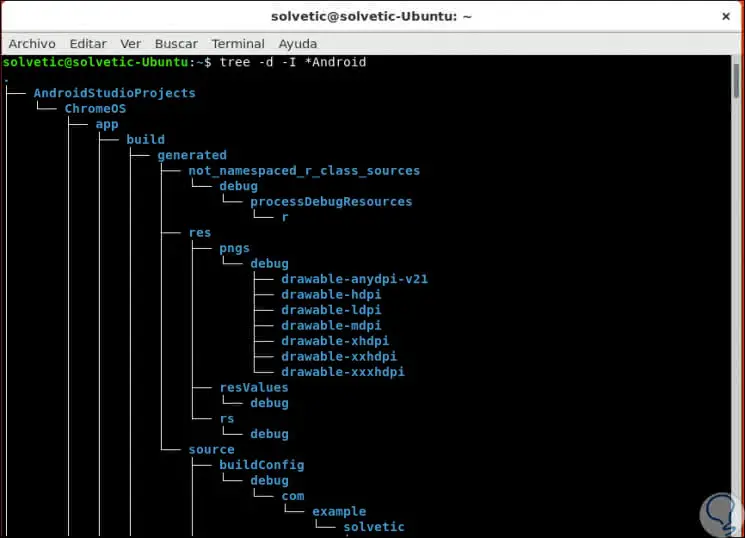
Use selective names with Tree
With the -l parameter it will be possible to exclude from the results generated by Tree certain words, for example, we can execute the following line to generate results, but without the term Android:
tree -d -I * Android
10. Parameters to be used with the Tree command in Linux
Parameters to use with Tree
Next, TechnoWikis will explain the available parameters to use with Tree:
- -a: Print all files, remember that by default tree does not print hidden files.
- -d: List the directories only.
- -l: Continue the symbolic links if they point to directories, simulating directories.
- -f: Prints the prefix of the complete path of the objects.
- -x: Remains alone in the current file system.
- -L Level: allows to define the maximum depth of visualization of the directory tree in the result.
- -R: Acts recursively by crossing the tree in the directories of each level and in each of them will execute. again the tree by adding `-o 00Tree.html '.
- -P pattern (pattern): Lists only the files that match the wildcard pattern.
- -I pattern: It does not list the files that match the wildcard pattern.
- --matchdirs This option specifies a match pattern which allows the pattern to apply only to directory names.
- --prune: This parameter removes empty directories from the output.
- --noreport: Ignores the printing of the file and directory report at the end of the list of the executed tree.
General Tree Options
These are the general available options of Tree, but we also have exclusive parameters for the files, these are:
- -q: Prints non-printable characters in file names.
- -N: Prints non-printable characters.
- -Q: Its function is to assign the names of the files in double quotes.
- -p: Prints the file type and permissions for each file in the directory.
- -u: Print the user name, or UID of the file.
- -s: Prints the size of each file in bytes, just like its name.
- -g Prints the name of the group, or GID of the file.
- -h: Its function is to print the size of each file in a legible way for the user.
- --du: Acts in each directory generating a report on its size including the sizes of all its files and subdirectories.
- - yes: It makes use of powers of 1000 (SI units) for the deployment of the size of the files.
- -D: Prints the date of the last modification of the files.
- -F: Your task is to add a `/ 'for directories, a` =' for socket files, a `* 'for executable files, a`>' for doors (Solaris) and an `| ​​' for FIFO's.
- --inodes: Prints the inode number of the file or directory.
- --device: Prints the device number to which the file or directory belongs in the result.
- -v: Sort the output by version.
- -U: It does not order the results.
- -r: Sort the output in reverse order.
- -t: Sort the results based on the last modification time instead of alphabetically.
- -S: Activates the line graphics CP437
- -n: Disable the colorization of the result.
- -C: Activate the colorization.
- -X: Activate the XML output.
- -J: Activate the JSON output.
- -H baseHREF: Enables HTML output, including HTTP references.
- --help: Access Tree's help.
- --version: Shows the used version of the Tree command.
With the use of these two commands it was possible to manage in a much more integral way each task to be performed on the files in Linux, complementing the tasks of search or management on these and accessing integral results as necessary..