Surely on more than one occasion you wanted to attach a screenshot when posting to a forum or social networks, but finally you have been lazy to open an image editor and upload it to the internet. After reading this tutorial on
how to create screenshots and upload them to the internet to share them
, you will no longer have excuses to attach images.

The tutorial is very simple and is based on the use of the ShareX program, which is from my point of view
the best program to make screenshots and share them quickly
. As always, I have selected a free and open source program.
ShareX has more than 9 years of development behind it, which makes it a mature and stable product that guarantees proper operation. You can download it from its official website
https://getsharex.com/
.
How to create screenshots and upload them to the internet to share them.
ShareX has a multitude of functionalities, but we are going to focus on the task of creating a screenshot and sharing it quickly. This process will be done in a few seconds, but I will divide the explanation into two parts, one referring to screen capture and another in the possibilities to share the image.
First step, create screenshots quickly.
To
create a screenshot with ShareX
we have multiple options and the fastest way to access some of them is to use keyboard shortcuts:
-
Ctrl + Impr Pant
: capture a rectangular region of the screen. In addition, a circle will be shown as a magnifying glass to precisely establish the corner of the rectangle we capture.
-
Impr Pant
: capture the entire screen. This button by default captures the entire screen and saves the image to the clipboard.
-
Alt + Impr Pant
: capture the active window. When we run an application that occupies a foreground window, we can capture only the area of "‹"‹the screen that window occupies.
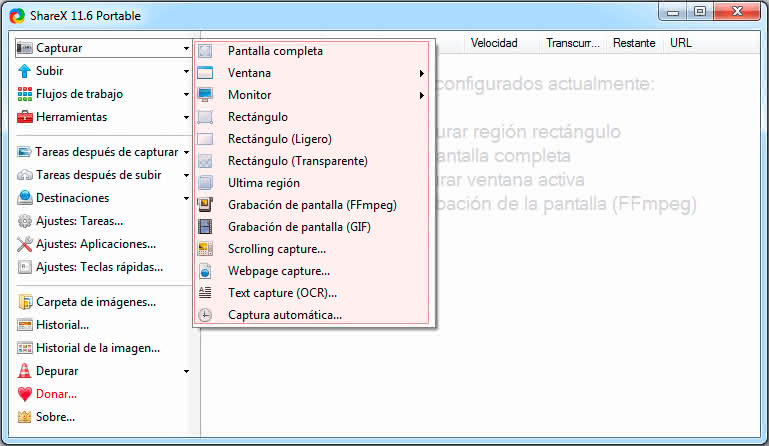
These three features are the most used, so I show you the keyboard shortcuts, but in reality with ShareX we have many more options
(shaded in red)
as you can see in the following image.
Second step, share the screenshot.
Although I put it as a second step to make the explanation,
the process of uploading the image to some free hosting or sharing it, is done by ShareX itself automatically just after capturing
.
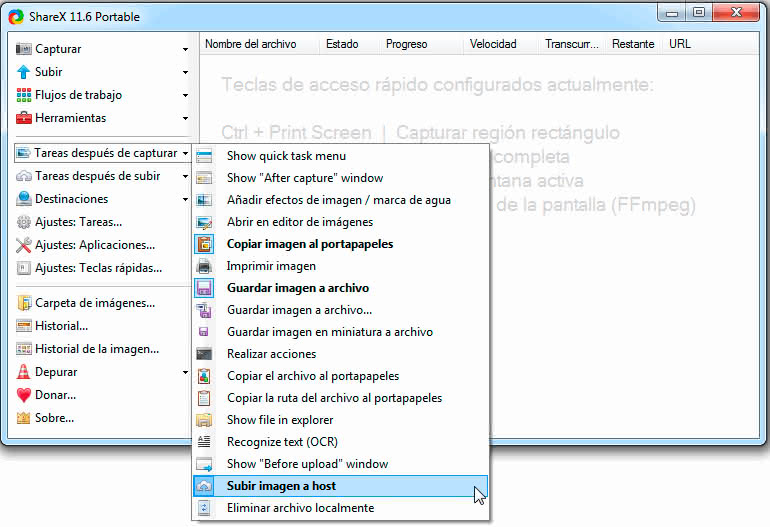
Now we must set the task or tasks that the program will perform after capturing the screen. By default, the options
"Copy image to clipboard"
and
"Save image to file" are selected
. The program offers many more options, but to be able to share the image quickly, we select the option
«Upload image to host»
.
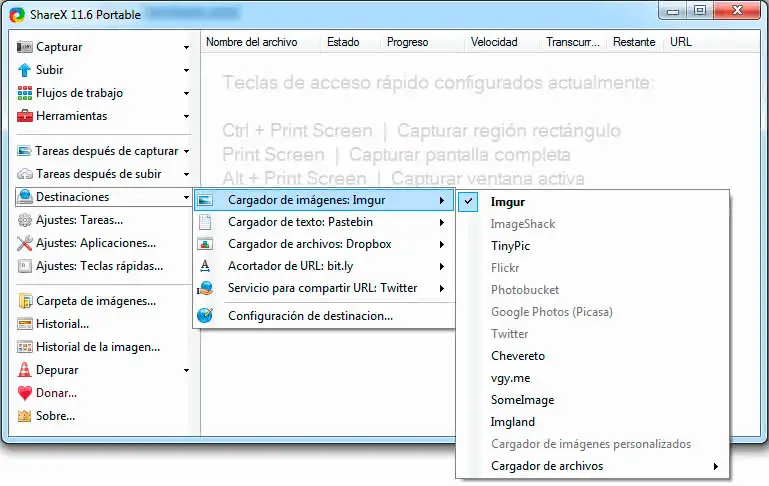
By default the image will be uploaded to the free Imgur hosting, but in the section
"Destinations → Image Loader"
we can configure other accommodations, both for images and files
(Google Drive, DropBox, FTP, etc.)
Personally Imgur seems perfect for images and I don't usually change it.
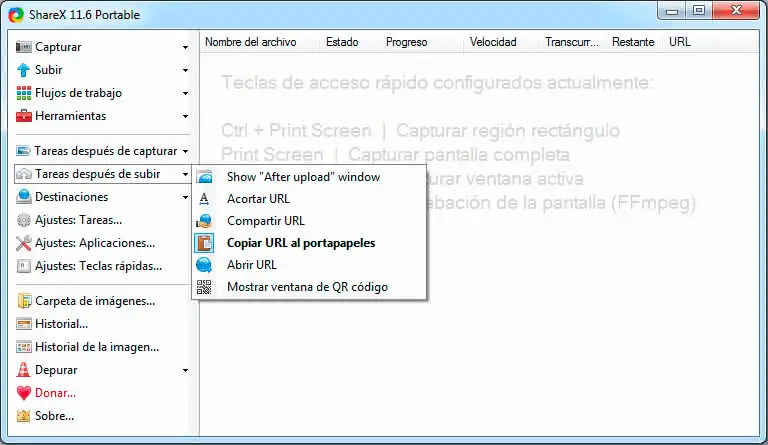
Finally,
ShareX is enabled by default to automatically copy the URL of the image uploaded to Imgur to the clipboard
. We can change this setting from the
"Tasks after uploading" section
.
With these steps we already have a URL with our image ready to share and all automatically. This tutorial on how to create screenshots and upload them to the internet to share them shows only a small part of everything we can do with this fabulous tool.