Surely on more than one occasion you had to use the screenshots to share or save some information. The drawback is when the information leaves the screen and you have to scroll with the scroll bars to see all the content. Therefore, today we are going to show you
how to capture full screen with scroll directly from the PC
.

Throughout this tutorial we will differentiate between making the
screenshot of a web page
or in a
desktop application
, since each situation can be addressed in different ways.
How to make screenshot of a complete web page with scroll.
In this first situation we are going to
capture a web page
. To access the website we will need a browser, in our case we will use
Chrome or FireFox
.
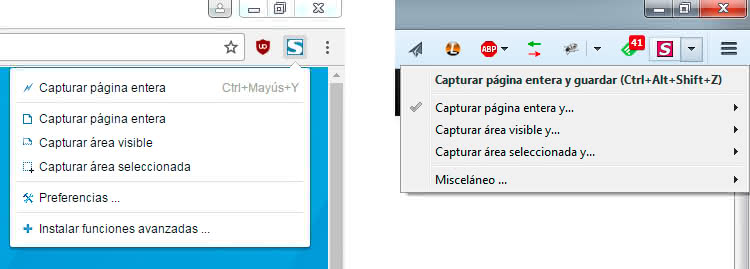
First of all we will have to install an extension or complement in our browser that allows us to capture web pages in an image. The most used extension is called FireShot and is available for
Chrome
and
FireFox
.
Once the extension or add-in is installed, we just have to access the web page that we want to capture and use the entire
capturar página
functionality accessible through the extension icon.

We will only choose the destination folder where the image will be saved and voila.
How to capture full screen with scroll in any application.
This second method is more general and works in any application
, so we can capture web pages or even information from desktop applications. Some examples of using this method is to
capture the contents of a folder in an image
,
capture a PDF
,
capture a Word file
, etc. The possibilities are endless.
The program that we will use is an old acquaintance that we already use in the tutorials of
how to combine images
and
how to create screenshots
to share them on the internet, it is ShareX.
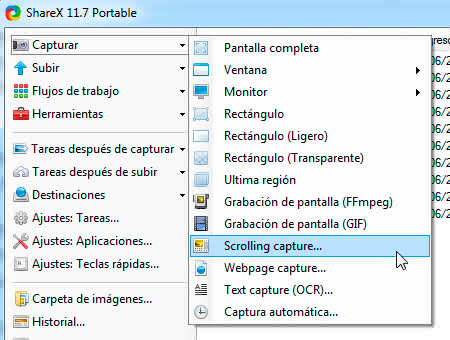
Once ShareX is installed and running, we open the window of the desktop program that we want to capture and select the option
Capturar → Scrolling Capture
. Now the crosshead will be shown on the screen and we can select the window or region in which we want ShareX to automatically scroll.

When the capture process is finished it will show us a preview of the captured image and if everything is correct we proceed to save it by pressing the
Upload/save depending on after capture settings
button
Upload/save depending on after capture settings
.
This method is sometimes not infallible and can fail giving erroneous results. If you do not get the desired results you can choose to try some other application. A highly recommended capture application is Snagit from TechSmith, but it is paid.