Every electronic device such as a Mac with OSx connects to the internet using a kind of "identity number" known as the IP name. This IP consists of a series of numbers separated by periods and that identifies your Mac OSx within the network to which you are connected to access the internet. This makes it recommended or necessary to know the IP address of your Mac.
Related: How to know IP address, renew IP and change IP on Windows 10 PC.
The IP address can be used to identify which equipment has performed a certain action within a WiFi or Lan Network. It may also be necessary in case you receive an error message such as "Another device on the network is using the IP address of your computer."
However this may lead us to a question: How can I find out the IP address of my Mac OSx? The truth is that it is quite easy to check the IP address of your Mac OSx and even change it if you decide to do so..
That said, below we show you how to know the IP address of your Mac OS as well as change it automatically or manually in case you want to do it for pleasure or because another device is using your same IP address:
How to know the IP address of your Mac OS
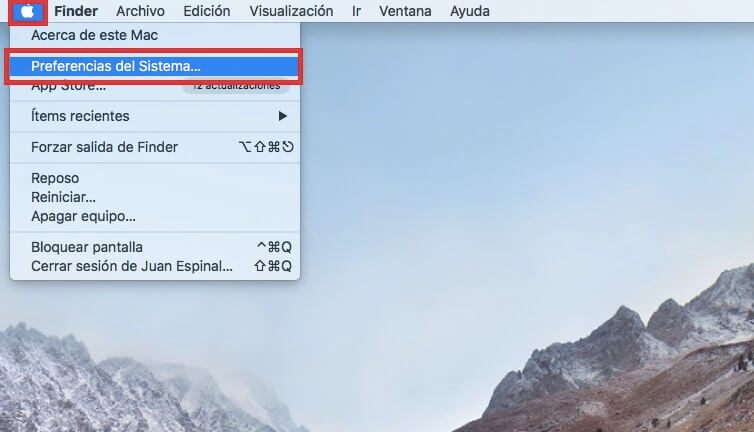
1. Click the apple icon in the upper left corner of the desktop.
2. In the displayed menu click on the option: System Preferences
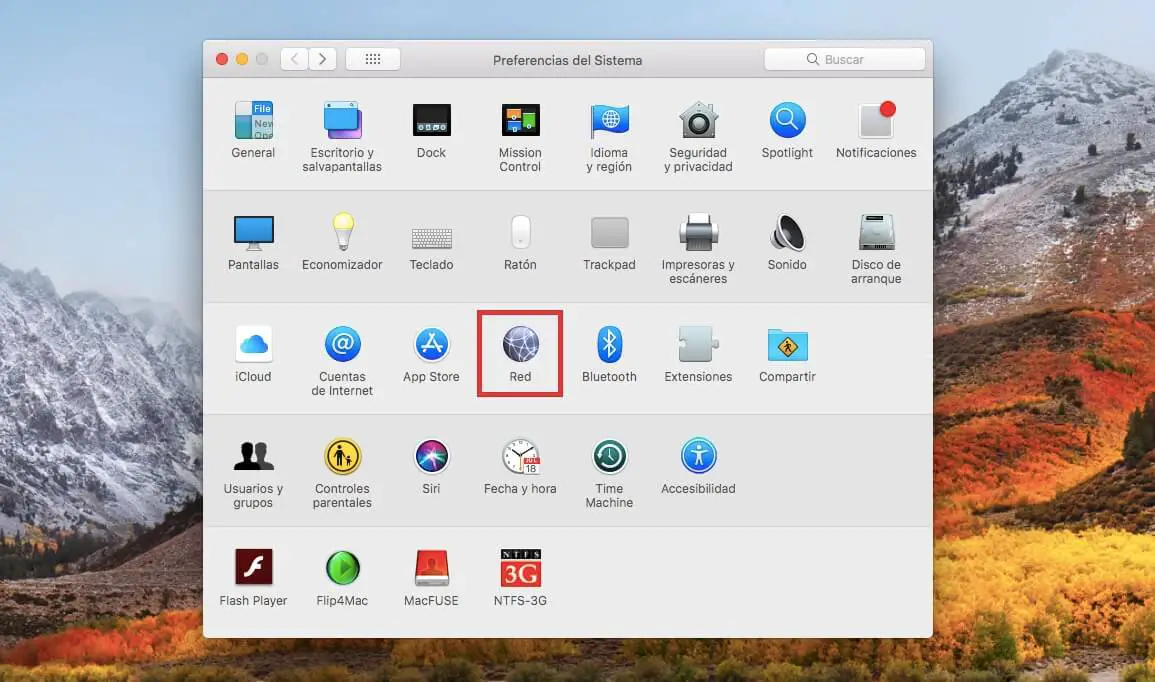
3. When the new window opens, go to: Network
4. In the left part of the window you will have to select the network connection to which you are currently connected..
5. Now in the central part of the window, next to the status you will see the text: It is connected to "Network Name" and has the IP address assigned "IP Number"
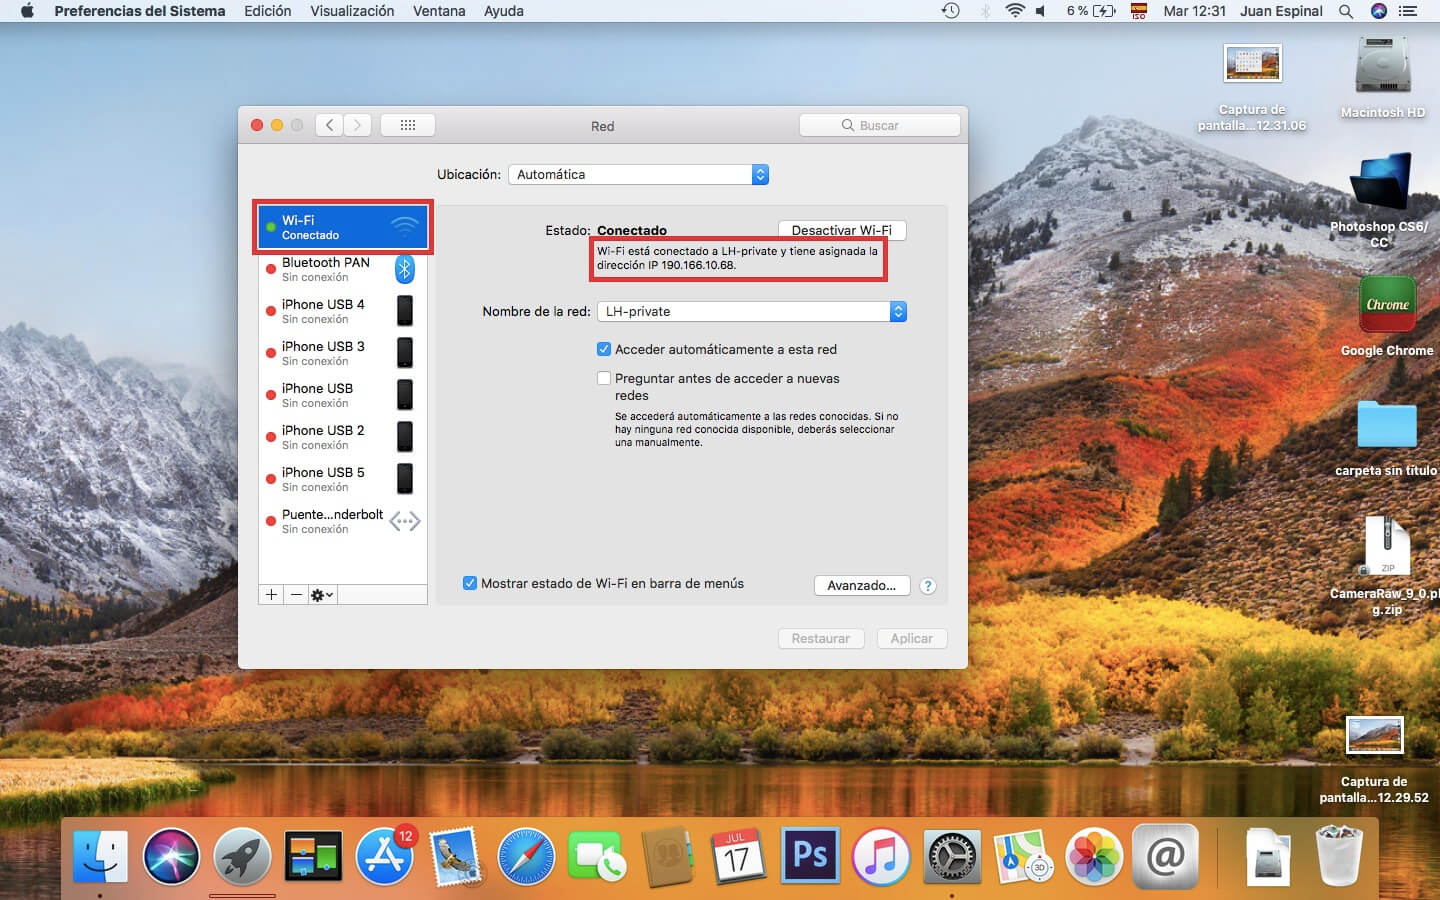
6. This will be the IP currently used by your Mac OS when connecting to the network.
How to find out the IP address of your Mac OS using the Terminal tool.
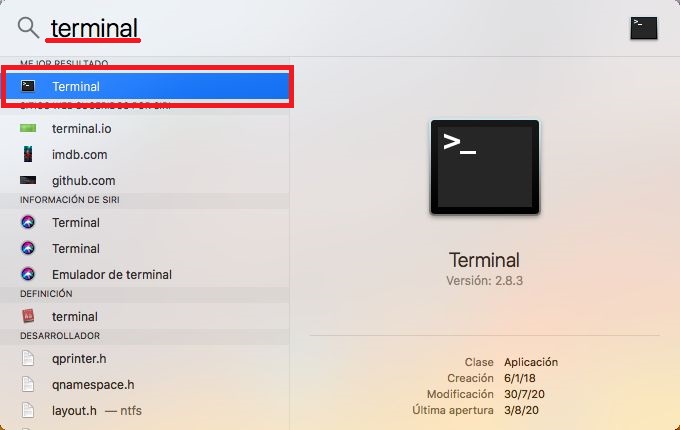
1. Click on the magnifying glass icon in the upper right bar of the screen
2. Now the Spotlight will be displayed where you must search for the term: Terminal
3. When the Terminal tool is displayed in the search results, you must double-click on it to open it..
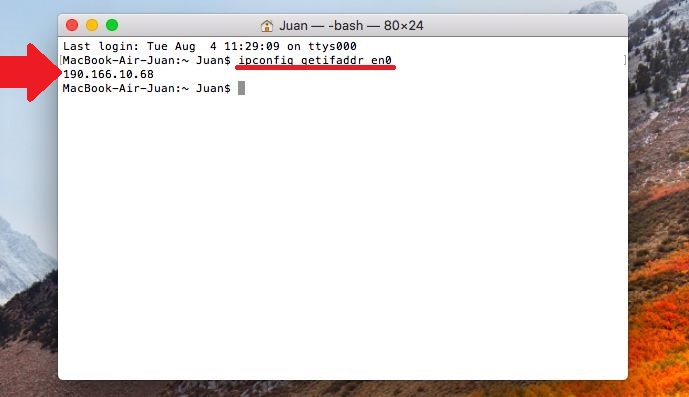
4. When the Terminal opens, you will have to enter and execute one of the following commands depending on whether it is connected to the internet through a Wi-Fi or Ethernet network:
- Wifi
- Ethernet
5. After pressing Enter, the IP address will be automatically displayed on the next line.
How to change the IP address of your Mac OS automatically.
1. The first thing we will have to do is access the network configuration as mentioned in the first Method.
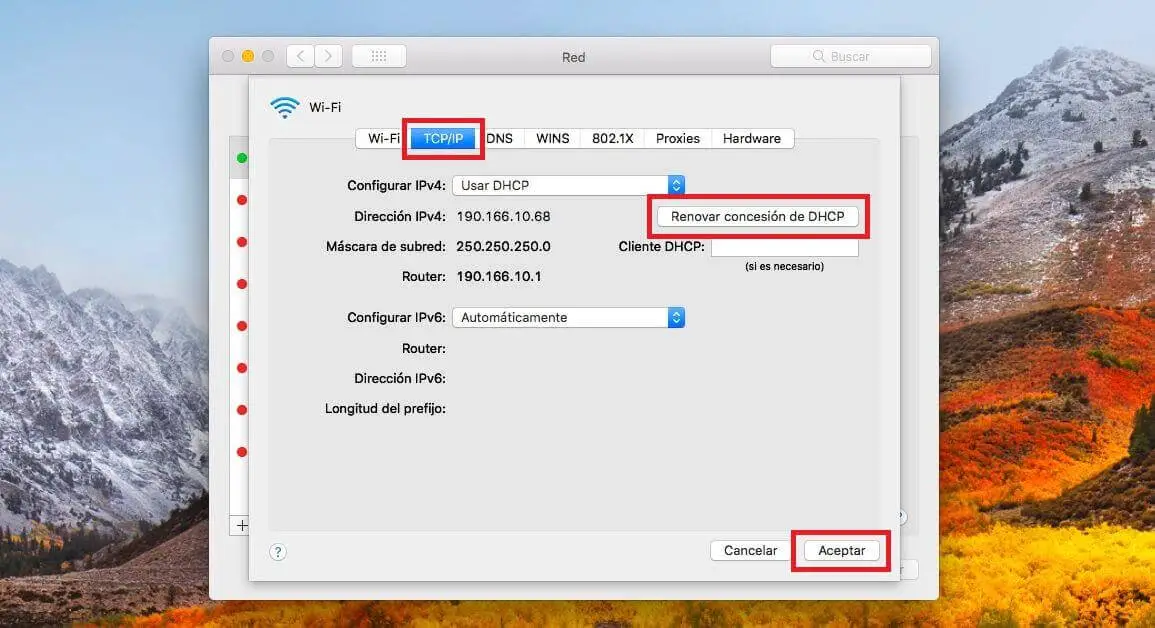
2. Once the network window is displayed, you will have to click on the button: Advanced.
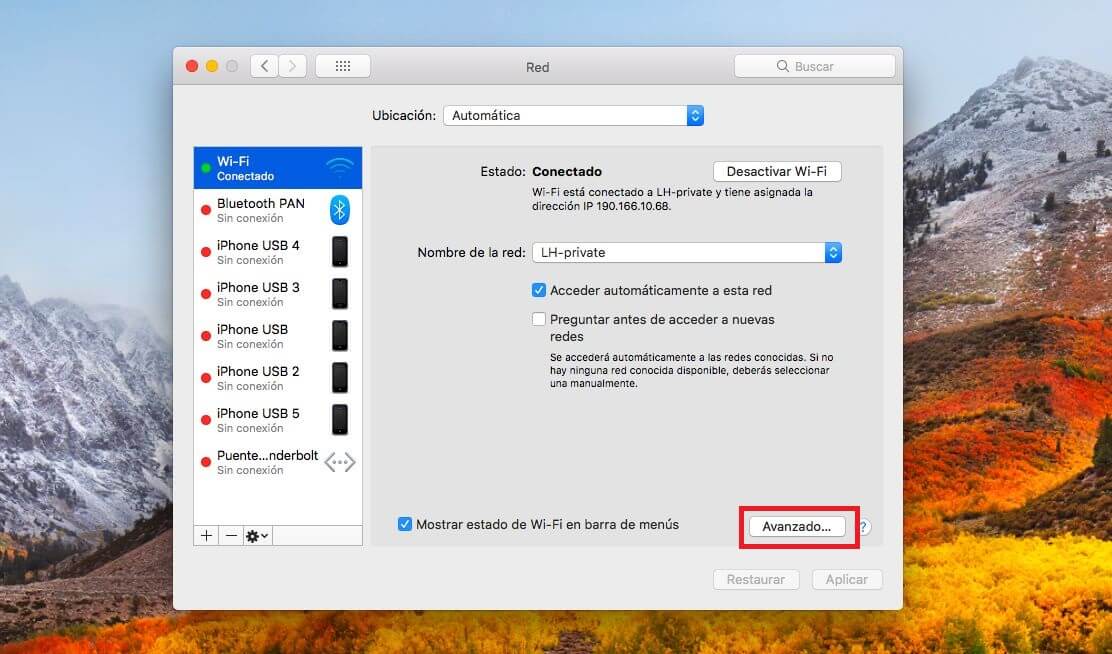
3. This will bring up another screen where you will have to select the TCP / IP tab.
NOTE: Next to Configure IPv4, you will probably see: Use DHCP. This means that your route will automatically distribute and manage the IP addresses. Therefore, when you connect your Mac to the network, you will not have to manually choose an IP address that is free since the router will do it automatically.
4. If you want to obtain a new IP address from your router you will have to click on the button: Renew DHCP lease.
5. This will make your Mac OS release your current IP address and get a new one automatically.
How to change the IP address of your Mac OS manually.
1. The first thing we will have to do is check what IP addresses are available in our router. If you use an IP that is already being used by another user, you may suffer from duplication problems.
2. Although you can log in to your router to verify the IP addresses, we can also do it using the Mac OS Terminal
3. Open Terminal using the keyboard shortcut: cmd + Spacebar .
4. When the terminal opens you will have to enter the following command:
ping "the IP address you want to use"
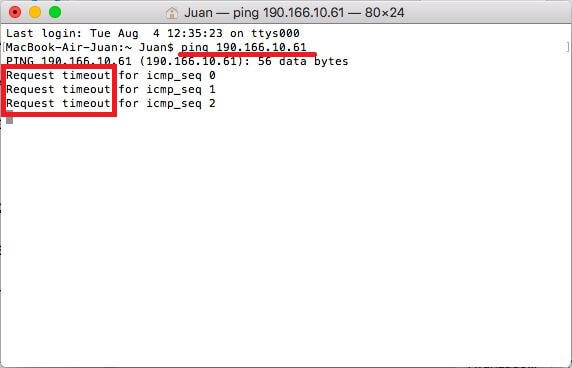
5. If this IP address is not in use, you must read several lines in the terminal with the text: Request timeout. This will mean that this IP can be used when available.
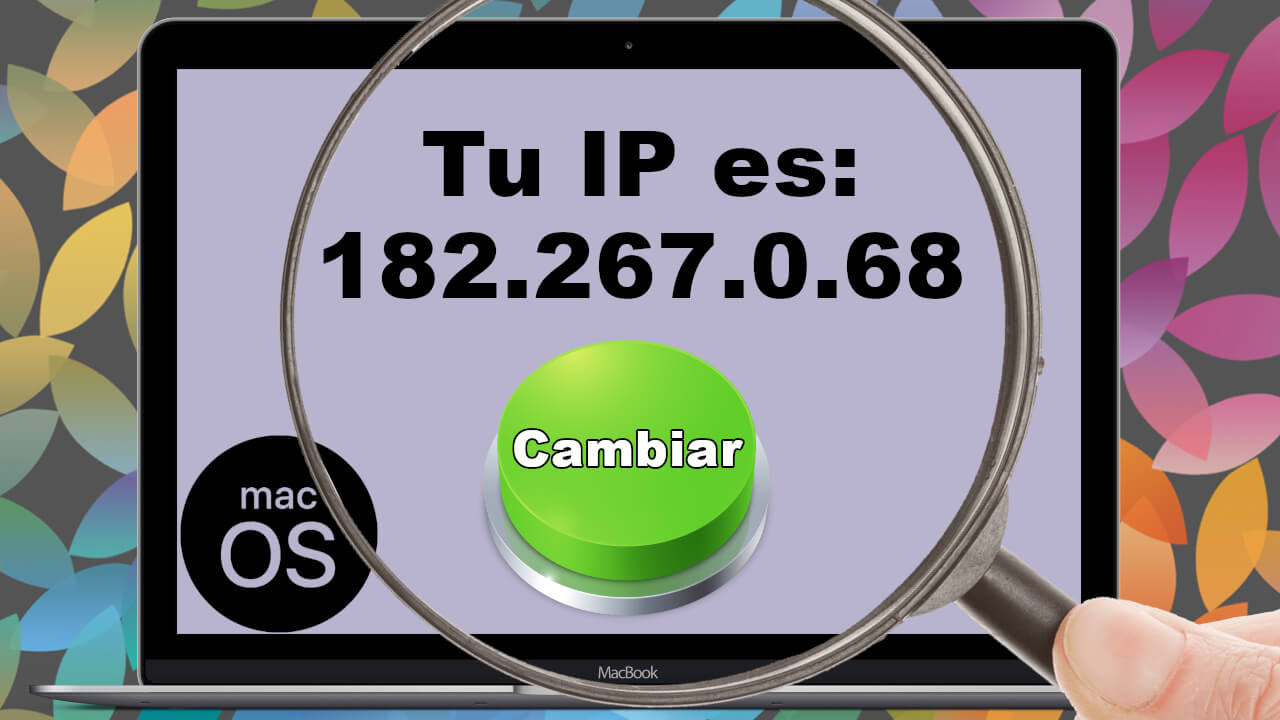
Important Note: you must check what the format of your IP is, for this you will have to know your current IP which you can know by following the steps indicated at the beginning of this tutorial. If for example your IP is 182.267.0.68, you should check free IP addresses by replacing the last number "68" with another (182.267.0.X)
6. Copy the IP address just verified and access the configuration window: Network.
7. Here you have to select the button: Advanced
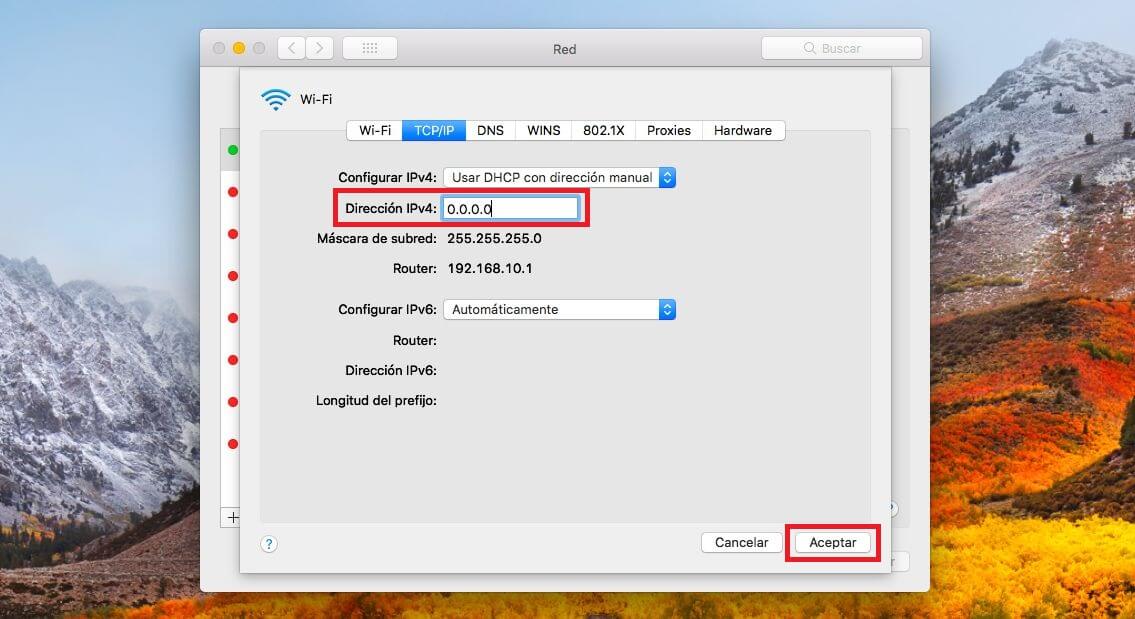
8. Once in the new window you will have to go to the tab: TCP / IP
9. In the Configure IPv4 field we will have to configure: Use DHCP with manual address.
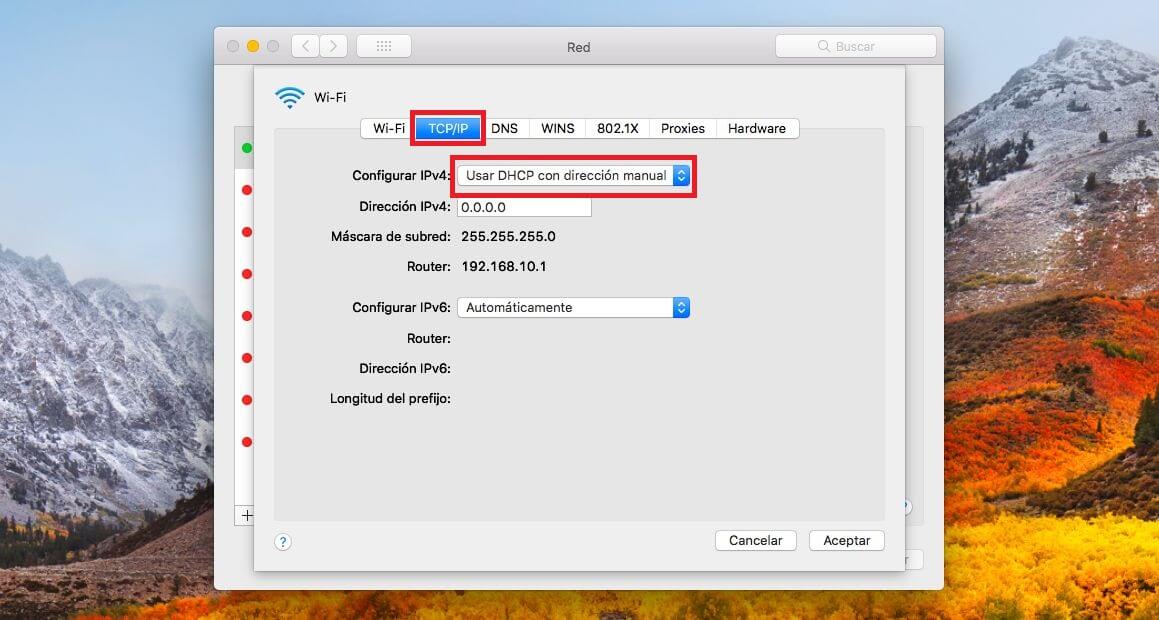
10. Now in the IPv4 Address field you must paste or write the IP just checked.
11. Finally, to save the configuration, you only have to click on the button: Accept.