The Hyper Text Markup Language (HTML) is strictly speaking not a programming language, but a markup language - and therefore super easy to master. Here is everything you need to get started.
Note : This article is the first part of a tutorial. You can read in part two how you can give your HTML page a stylish layout with CSS and DIV.
How does HTML work?
For many, HTML is the first point of contact with some form of source code. On the one hand, websites show their source code much more voluntarily than programs, and on the other hand, HTML is really super simple. HTML is not a programming language and consequently there are no complicated logics, loops, variables and so on. It's a markup language that basically only does one thing: Specifying how exactly a piece of text should look and be formatted..
Additional media such as videos, images or audio files can also be integrated via HTML. But here, too, it's just a matter of saying: Now comes a picture in the following size and with the following frame. With HTML5, there are finally even more complex elements, for example the so-called "canvas", an area on which the user can draw.
Basically, a piece of HTML code looks like this, for example:
<h1>Dies ist eine Überschrift der Stufe 1.</h1>
In HTML, content is always in so-called tags with angle brackets. In the example, "<h1>" introduces a level 1 headline and "</h1>" ends the distinction. This combination of introductory and expiring tag is standard for almost all elements. The slash (/) is always found in the end tag..
Introductory tags can also have other options, as the example of a hyperlink shows:
<a href="www.heise.de">Ein Link zu heise.</a>
The a-tag turns the text between the tags into a link. The link target is determined by "href" (hyperlink reference). This means that the basic structure of the markup language has already been dealt with in full! Of course there are a number of elements, some with many options, so that in the end it is not always trivial to achieve the desired result. But there will be more to the most important elements later, now the basic structure of every HTML page is going to be dealt with.
In this tipps + tricks article, we explain to you what you can use to create an HTML file.
HTML editors
To generate HTML code and generate working HTML documents, you should use an HTML editor. These offer developers clear user interfaces and color coding of the code. The development environment Visual Studio Code is ideally suited for this and is also available free of charge:
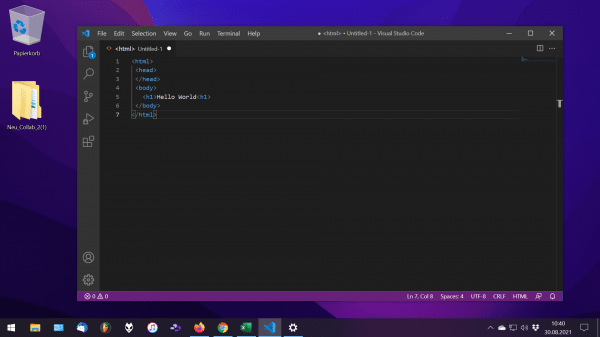 Microsoft's Visual Studio Code is a free programming tool that you can also use to create HTML documents. The software is one of the most popular on the market and impresses with its convenient color highlighting of the syntax, adaptability through themes and the support of so-called extensions with which you can expand the development environment. Visual Studio Code is constantly being developed and updated. Visual Studio Code is available for download free of charge for MacOS, Windows and Linux.
 The basic structure of each side
<!doctype html>
<html>
<head>
<meta charset="utf-8">
<meta name="viewport" content="width=device-width, initial-scale=1.0">
<title>Der Seitentitel</title>
</head>
<body>
<p>Ein simpler Paragraph mit beliebigem Text.</p>
</body>
</html>
Every HTML document should start with " <!doctype html> ". This is simply a message to calling programs such as the browser that the document is in the HTML standard.
This is followed by the introductory HTML tag " <html> " - all of your HTML code ends up between this and the opening tag " </html> ". In a sense, this is the big bracket that holds everything together. This is followed by two more such brackets: Metadata are specified in the HEAD area and the entire content ends up in the BODY area.
In this example, three important pieces of information are made in the HEAD area: The title should always be present; Incidentally, this appears in the title bar of the browser. In the meta tags, the character encoding is initially set to the usual UTF-8 - which ensures, for example, that umlauts are displayed correctly. The second meta tag defines the so-called viewport. This means the display size of the page, in this case the page should be as wide as the displaying device (device-witdh) and displayed in its original size (initial-scale = 1.0). Both meta tags are optional, but should be appropriate in almost all cases.
Now finally comes the exciting part where you can live out your creativity: In the BODY area, there is only a single paragraph, identified by the p-tag. To start with, you could simply copy the text above into a text file, name it, for example, "my-first-page.html" and drag and drop it onto the browser - a boring but correct HTML page appears.
The main elements
You are now familiar with the structure of HTML pages and tags - time to learn about a few key elements of content and their associated tags. A typical text structure could look something like this: Heading, paragraph, picture, sub-heading, list, sub-sub-heading, table. You can use it to create quite complex websites. You already know the heading of the highest hierarchy level, all others follow the same pattern:
<h1>Überschrift der Stufe 1</h1>
<h2>Überschrift der Stufe 2</h2>
<h3>Überschrift der Stufe 3</h3>
The headings get smaller from step to step, much like you might know from text editors like Microsoft Word or LibreOffice Writer. We already had paragraphs per p-tag, pictures are new:
<img src="ein-bild.jpg" width="1000" height="1000" alt="Ein Beispielbild" />
The img tag for images has something new to begin with: The separate final tag is missing - instead, the image tag is directly here by " /> "closed. Why? Quite simply: There is no content that could be between two tags. The image is specified using the" src "(source) option. If the image and the HTML file are in the same folder, the file name is sufficient, otherwise the complete path to the image would have to be given. "width" and "height" are used to specify width and height. Instead of absolute pixel values, for example, "50%" could be used here to show the image over half the screen size. The alt option should never be left out: if an image cannot be displayed, this alternative text is displayed instead - which should be appropriately descriptive. These tags are also extremely important for visually impaired users.
And something else can be learned on the picture day: nesting. How about linking the image to a website?
<a href="https://www.heise.de"> <img src="ein-bild.jpg" /> </a>
Instead of a text, there is simply an image tag within the a-tags and the image can be clicked on.
Another popular item is the list - initially as a numbered version:
<ol>
<li>Erster Punkt</li>
<li>Noch ein Aspekt</li>
<li>Und so weiter</li>
</ol>
The ol tag introduces a numbered list, each list element is surrounded by an li tag. And if you'd rather have an unnumbered bullet list, just swap the ol tags for ul tags - web layout can be that easy! But not everything is that simple. Therefore, at the end, a somewhat more elaborate design element, a table with two columns and three rows:
<table>
<tr>
<th>Kopf Spalte 1</th>
<th>Kopf Spalte 2</th>
<th>Kopf Spalte 3</th>
</tr>
<tr>
<td>Zelle 2/1</td>
<td>Zelle 2/2</td>
<td>Zelle 2/3</td>
</tr>
<tr>
<td>Zelle 3/1</td>
<td>Zelle 3/2</td>
<td>Zelle 3/3</td>
</tr>
</table>
The table tag encloses the entire table. The tr-tags stand for "Table Row" and each tr-tag pair defines a row of the table. The columns are defined within these lines: In the first line, the column headings are first defined using the "Table Head" tags (th). In the other lines, the individual cells are filled with content via "Table Data" tags (td).
Tables can take a long time - just nest all the content elements you know a little here and you will quickly see that HTML is not always trivial.
What's next
You should be able to create very simple HTML pages by now. Two things are still missing so that you can actually set up an entire homepage. First of all the publication: If you have a webspace, it is sufficient to put the HTML files in the main directory (mostly "www", "www-root" or "htdocs") and to name the start page "index.html".
You should also be able to link pages, which works just like external links:
<a href="seite2.html">Ein Link auf die nächste Seite.</a>
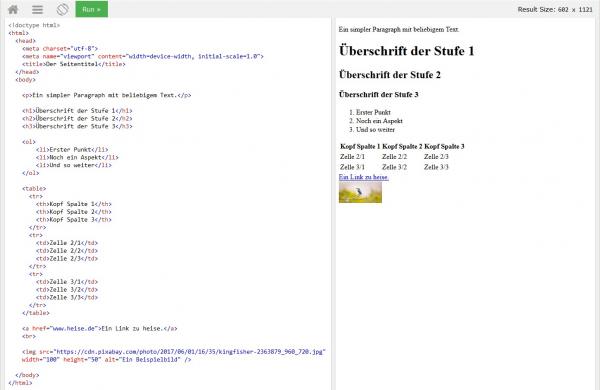
If you prefer to test your HTML code in the browser immediately, you can of course also do so online, for example at w3chools.com .
 w3schools
 All code examples mentioned here in the online editor at w3schools.com.
In order to create "real" websites, you will probably ask yourself a few questions. For example, how you can specify fonts and colors (keyword CSS), how content can be brought into a clean layout (container elements) or how, for example, search forms are created. And of course: Include videos. You can find the answers here.