Individual labels or a page with identical labels 1st step: 2nd step: 3rd step: 4th step: 5th step: 6th step: Create different labels on one page 1st step: 2nd step: 3rd step: 4th step: 5th step: Quick start guide: Individual labels or a page of identical labels Quick Start Guide: Create Different Labels on One Page
The practical solution for envelopes without viewing windows and a uniform design of the folder spine: With Microsoft Word you can easily create your own labels. The Office application Word offers you settings for the commercially available print sheets and can access the addresses of your Outlook account. You can either print a single label or fill a page with identical copies. With the help of Word, you only have to position the content once and the Office application will apply the settings for the entire sheet.
Individual labels or a page with identical labels
Follow our step-by-step instructions or take a look at the brief instructions .
1st step:
 After you have opened Word, switch to the " Mailings " tab . Here click on the icon titled " Labels ".
2nd step:
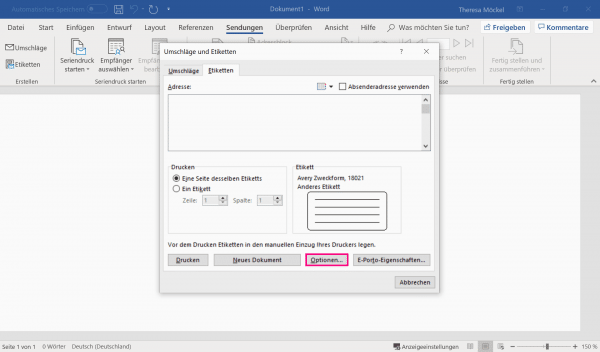 In the newly opened " Envelopes and Labels " dialog box, click on the " Options " field.
3rd step:
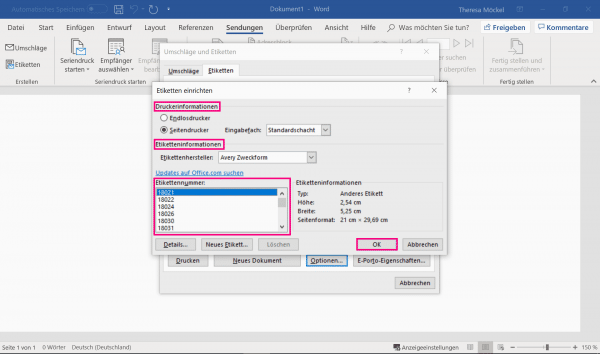
 The " Set up labels " window opens. Under " Printer information ", set whether it is a " continuous printer " (prints a complete line at a time and uses paper webs) or a " page printer " (conventional laser printer that prints individual pages). The " Label Information" can be found on the packaging of your label sheet. Select " Manufacturer and Label Number ". Then click on " OK " when you have made all the necessary settings.
4th step:
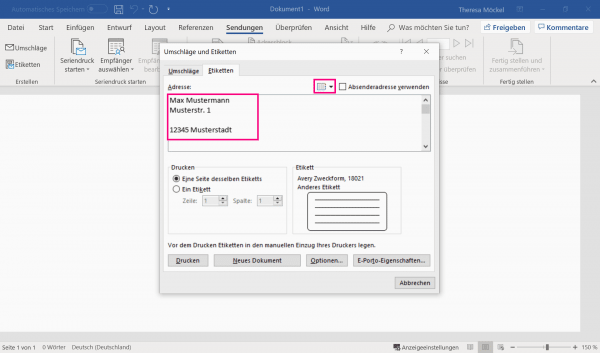 Now you can enter the appropriate data in the " Address " field . You can also use addresses from Outlook by clicking on the address book symbol at the top right. Select your desired address from the Outlook address book that is now displayed .
5th step:
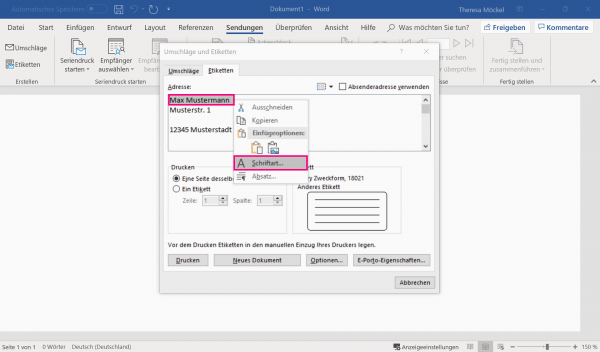 If you want to format the entry , mark the area, right- click to open the context menu and click on " Font ". In the new dialog window you can now make your desired formatting .
6th step:
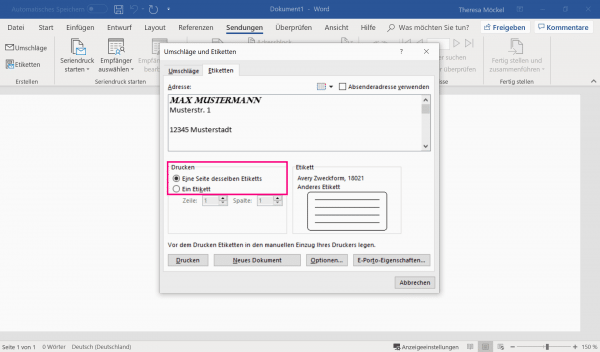 If you like the end result of your label, you can then select under " Print " whether you want to print " One side of the same label " or " One label ". Then click on the " New Document " button to transfer the label to Word.
Tip: If you want to use addresses from your Outlook address book, we will explain here how you can first import contacts into Outlook..
Create different labels on one page
Follow our step-by-step instructions or take a look at the brief instructions .
1st step:
 Open Word and go up there in the " program " on the " labels ".
2nd step:
 In the new " Envelopes and Labels " window click the " Options " button below.
3rd step:
 Then set all parameters of your labels here . Information such as label dimensions and manufacturer can be found on the packaging of your labels if you want to print pre-made labels. You can also use the " New Label " button to create your own format templates. You can also specify your printer type in this step. For example, we choose the formatting from the manufacturer " Avery Zweckform " with the number " 18012 ". If all parameters are set to your satisfaction, confirm with " OK ".
4th step:
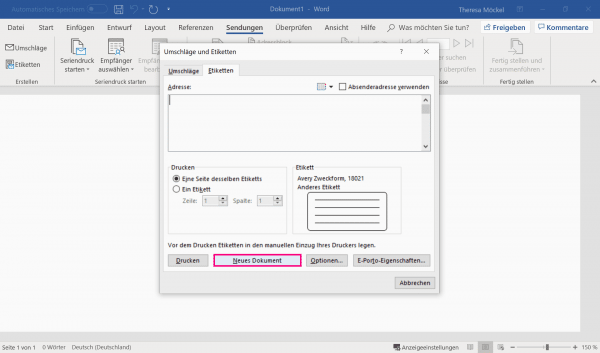 Back in the " Envelopes and Labels " dialog box , you can then choose to print " One Side of the Same Label " or " One Label " only . Now click on " New Document ". The previously set format is then inserted into your Word document as a table with the appropriate dimensions.
5th step:
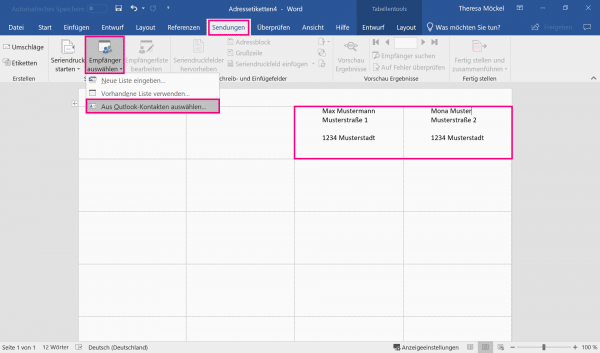 Now you can for each label individually the content type or the " program " "on the Select Recipients " and then "From Outlook contacts Select " automatically be registered from your Outlook contacts the contact details. You can also change the size, font and color of the label as you wish. You can then print the labels with the key combination [Ctrl] + [P] .
Quick start guide: Individual labels or a page of identical labels
- Click the tab " broadcasts " to " labels ".
- Then go to the " Options " field in the new window .
- Now you can enter " Printer information ", " Label manufacturer " - these are noted on the packaging of the printing sheets - and " Label number ". Confirm with " OK ".
- Now enter the desired address or call it up from your Outlook address book using the address book symbol .
- Format the address by marking the required area and right-clicking on it and selecting " Font ".
- If you are satisfied with the result, then choose between " One side of the same label " and " One label " your print quantity.
- The label is then transferred to Word with " New Document ".
Quick Start Guide: Create Different Labels on One Page
- In Word, under Mailings, go to the icon titled " Labels ".
- In the new window click on " Options ".
- Then set " Printer Information ", " Label Information " and " Label Number ". You will find the manufacturer's specifications on the packaging of your printed sheet. Then confirm with " OK ".
- Now click on " New Document ". Your format specifications are displayed as a table in the Word document.
- Now you can add your own content . If you want to import addresses from Outlook, go to the tab " broadcasts " to " Empänger Select " and " From Outlook contacts Select ".