Do you want to set up your own, manufacturer-independent smart home center? For lights, heating, multimedia? With your own rules and configurations? openHAB offers you exactly that - assuming you have a little tinkering with it. Read here what openHAB can do, how it works and how you can incorporate the first things.
What is openHAB?
openHAB is open source software for controlling a smart home - in short. Over 200 products or manufacturers are currently supported, for example AVM, Bose, LG, Minecraft, Hue, Tesla, ZigBee, macOS, somfy, Alexa, Chromecast, Gardenia and many more. Not all properties of the individual " things ", as they are called in openHAB parlance, are not always supported, but in general many smart home users should find themselves here. All these things ( why not "things"? More on that later. ) Can be monitored in the openHAB interface, in the simplest case, for example, to see whether they are online. They can also be combined in groups, for example to depict a room in the house.
 openHAB supports a number of well-known manufacturers.
 Above all, however, devices can be controlled. On the one hand, this can be done manually, with Philips Hue lights, for example, via a simple widget. On the other hand, rules can be created - the core of openHAB. Today we speak of smart home, in the past it was more often called home automation. And the point of automation is reflected in the rules: "As soon as Peter's smartphone is online, the light should go on" would be a typical, simple application. Of course, this could also be implemented with some of the manufacturer's own tools, including the Hue app. But openHAB can connect a wide variety of manufacturers and protocols with one another and thus offers much more leeway. In addition, the system has a modular structure and is constantly being expanded - typically open source. Speaking of which: the additional level of competence that is required of the user is also quite typical..
openHAB says straight away on the homepage that a little hacking is required. In other words: The concept is not entirely self-evident and text files have to be processed in many places. This applies in particular to rules that are not as simply clicked together as with IFTTT, but are real little scripts - simple scripts, but only suitable for those who want to do handicrafts.
openHAB concept
openHAB already scores with a very coherent overall concept - the reason for the above " Things ": Things actually mean things, but in openHAB it is used like a proper name (especially since in German running software is rarely referred to as a thing). A thing can be a lamp, a smart TV, a heating controller, but also a web server service. Let's take a Philips Hue light as an example as a thing. The Thing Hue light has several properties , such as brightness and color temperature - called " Channels " in openHAB . Such channels have status (on / off, 50 percent etc.). Via a so-called " binding "the Thing Hue light with its channels can now be adopted / activated in openHAB..
In openHAB, the properties / channels of the Hue light are then called " Items ": Items are virtual representations of the individual setting options. So if you change the temperature of a Hue light in the openHAB interface, for example, the following happens: You change the status of the item " Hue light 1 / color temperature " which is then passed on to the color temperature channel of the Things Hue light via the binding will. The big advantage : In rules and text configurations, you only work with items. If the IP address of a thing changes at some point or if you switch from Hue lights to Osram lights, you only have to reconfigure the connection - your rules still work.
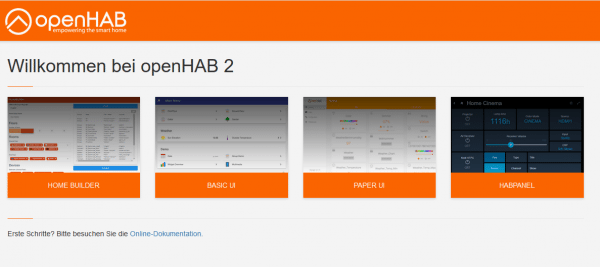 openHAB offers different interfaces for different purposes.
 Basis: Raspberry Pi?
openHAB runs pretty much everywhere: Windows, Linux, macOS, PINE64, Docker, Synology and other systems are supported. And of course there is also a ready-made system for the Raspberry Pi, which can be used as a basis for such projects over and over again. The new 4 Pi is also supported. The procedure is the same as for all other Raspi projects - the system must be flashed onto an SD card :
- Download the openHAB imge as an xz file .
- Insert a memory card with at least 4 GB .
- Start the imaging tool Win32 Disk Imager or alternatively balenaEtcher .
- Select the xz file as " Image " or " Source " and the memory card as " Target " - start the process.
- Connect the Raspi with a network cable and boot from the card. The setup should be completed after - according to openHAB - 15 to 45 minutes.
You can then reach openHAB via port 8080 and the IP of the Raspis , i.e. " 192.168.178.100:8080 " in the browser. When you start it for the first time, the wizard asks you for the type of installation - just select " Standard " here.
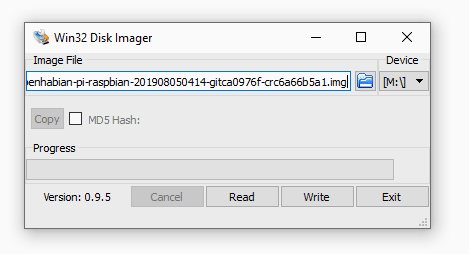 openHAB is flashed via Win32 Disk Imager.
 For testing purposes, however, we recommend the Windows version: a double click on the " start.bat " file and openHAB can be reached under " localhost: 8080 " - the Raspberry Pi images have unfortunately caused quite a few problems here . And now a quick run-through to set up two things / channels via bindings as items.
Setup of network device and Hue light
At first, something slightly unusual awaits you in the browser: First of all, you get several UIs to choose from. Unlike in the rest of the world, this does not mean alternative / substitutable user interfaces. They are GUIs for different purposes . You only need the " Paper UI " for configuration . You can always set up the Thing network device. The Thing Hue light is supposed to sketch a (!) Quite simple variant for "real" smart home products.
- First activate the " Simple Mode " option under " Configuration / System / Item Linking ". This means that items are automatically created for newly created things.
- Now switch to " Add-ons " and there to the " Bindings " tab . Install the " Network Binding " from here .
-
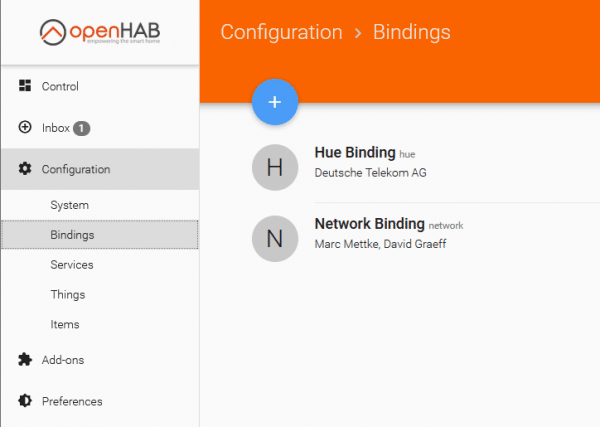 Installed bindings.
- Once installed, go to " Inbox ", click there on the plus symbol and then on the entry " Network Binding " - a network scan starts immediately, which will display at least some " pingable network devices" , i.e. devices / things that simply and are poignantly present. In addition, some entries " Network device with service " should appear, for example with the web server of a NAS or the like. Add any things using the tick icons .
- In the navigation, switch back to " Configuration / Things ": You will now find the newly added thing here - by clicking on it you will get to the channels and other properties. All channels are selected by default (openHAB sometimes calls them linked), but you can also deactivate individual information such as " Last seen " .
- Now you leave the world of real things and the configuration: Switch to " Control " in the sidebar . Here you can now see your network device with the individual items " Online ", " Ping time " and " Last seen ", each with the associated status data.
- For the Hue example: First reinstall the binding (" Hue Binding ") - but initially you will not find anything in the inbox! You first have to press the button on the Hue Bridge : openHAB can then create a Hue Bridge user and save the access data . The Hue devices then appear in the inbox and can be added as things .
And now openHAB is really fun for the first time: In the " Control " area, you no longer just see status information, but can control the lights immediately using simple widgets . The next step would be automation, i.e. the writing of scripts, which would go beyond the scope at this point. Basically, these are quite trivial " if-this-then-that " constructs. What exactly works, however, and how, depends on each individual binding or thing - and currently only reading, reading, reading helps. The add-on lists always take you to the documentation of the extensions .
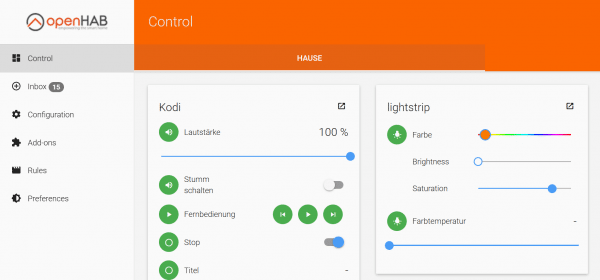 A fully configured dashboard in openHAB.
 The whole thing was really just a quick run-through now. The other UIs still require attention, the smartphone apps for access as well and concepts such as sitemaps - again text work - should be explored in more detail before you link your 199 smart devices with 350 rules. A tip for the connection: With the add-ons you will find the tool " Rule Engine (Experimental) " under " Misc " - with this you can create rules via the web interface. However, a little willingness to experiment is required.