One of the most important aspects on any server, regardless of the operating system used, is the time ; Since many services, processes and applications depend on this and if the time fails in just one second we can be giving rise to a major problem in various aspects, not only at the system level but also at the administration level..
To help keep these time aspects in Linux at the best standards, a protocol called NTP (Network Time Protocol) has been developed, which is a protocol that runs through port 123 UDP in the Transport layer and its function is to allow the teams to synchronize the time in the networks to obtain a precise time. In addition to this we have a utility called Chrony, which is ideal to make the best use of everything that NTP gives us.
It is for this reason that through this tutorial TechnoWikis will explain in detail how to install and use Chrony on Linux..
What is chrony?
The Chrony utility is defined as a dynamic implementation of the Network Time Protocol (NTP), which allows us to synchronize the system clock with NTP servers, reference clocks and manual input through the keyboard. In addition, Chrony can also be used as an NTPv4 server (RFC 5905) for the purpose of providing a time service to other computers on the network.
Thanks to its versatile Chrony design, it can function correctly in various conditions, including intermittent network connections, congested networks, variable temperatures and systems that do not run continuously or run in a virtual machine, thus allowing data generated from Time is always correct.
Chrony includes two programs that are:
Chronyd
Which is a demon that can be started at boot time.
Chronyc
Which is a command line interface program that can be used to monitor Chronyd's performance and to change various parameters during execution as needed.
Chrony can be installed on operating systems such as Linux, FreeBSD, NetBSD, macOS, and Solaris.
1. How to install Chrony on Linux
Step 1
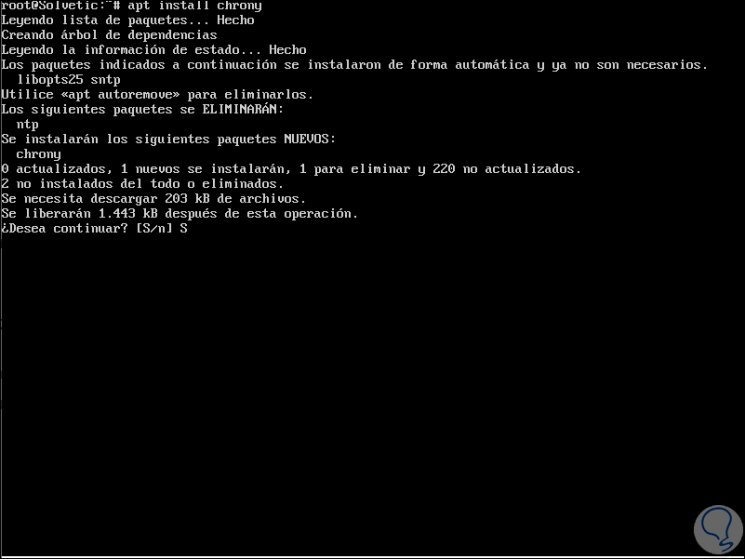
In some distributions of Linux, Chrony is already installed by default, if not, we can use any of the following lines for installation:
Enter the letter "S" to confirm the download and installation of Chrony, in this case in Ubuntu 18 Server..
Step 2
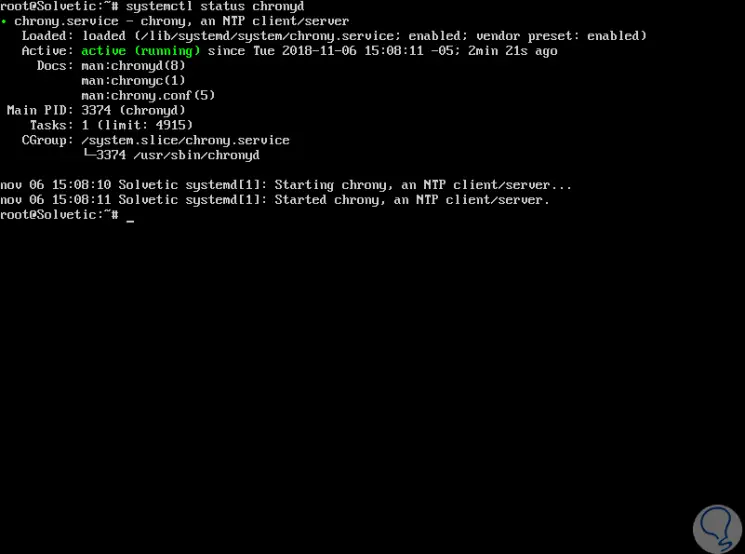
Then, we can check the status of Chrony with the following lines:
systemctl status chronyd (SystemD) /etc/init.d/chronyd status (Init)
Step 3
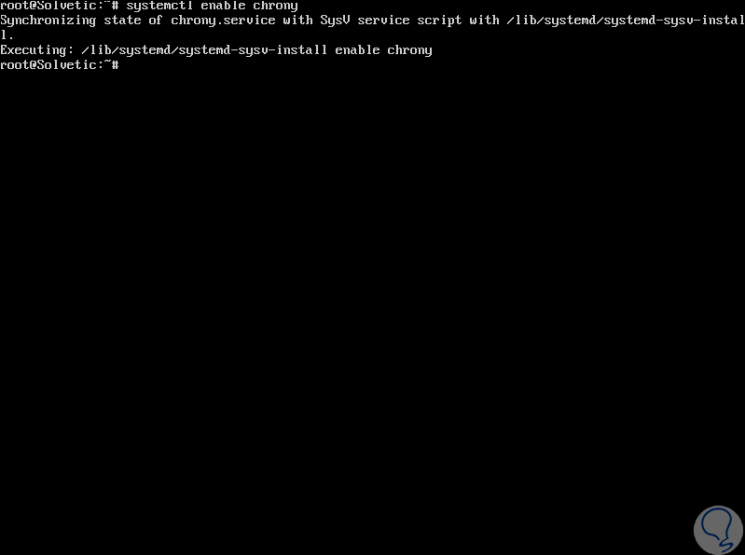
If you wish to enable the Chrony daemon at boot, we must use the following command:
systemctl enable chrony (SystemD) chkconfig --add chronyd (Init)
2. How to check Chrony sync
In order to verify if Chrony is carrying out its synchronization task correctly, we must make use of the chronyc command line program, which has the option of tracking with relevant information.
Step 1
To do this we execute the following:
chronyc tracking
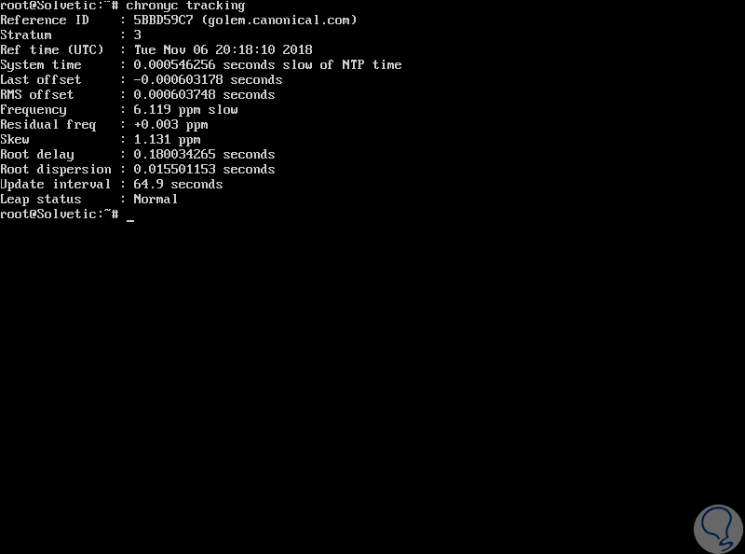
The information generated is as follows:
Indicates the reference ID and the name with which the selected device is currently synchronized.
Refers to the number of jumps to a team using a reference clock attached.
It is the UTC time in which the last measurement of the reference source used was made.
It is the system clock delay from the synchronized server.
Indicates the offset of the last update of the NTP clock
It is the long-term average of the time compensation value
It is the speed at which the system clock would be wrong in case chronyd does not adjust it. It is provided in ppm (parts per million)
Indicates the difference between the measurements of the reference source and the frequency that is currently being used
Refers to the estimated error limit of the frequency
It is the total of the network route delays to the equipment from which it is currently synchronizing.
Indicates frequency dispersion by external and internal factors
It is the update of the synchronization intervals
There the jump status is indicated, we have options such as normal, insert second, delete second or not synchronized
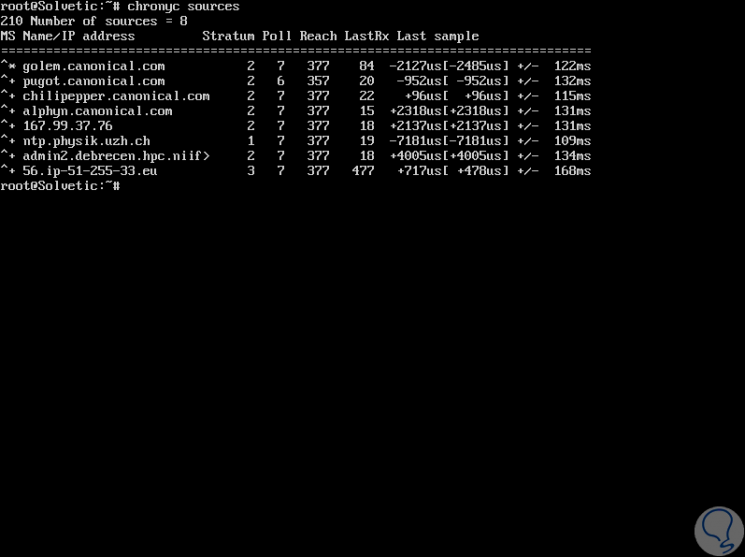
If we want to get information about Chrony sources, we can use the following command
3. How to configure Chrony on Linux
The chrony configuration file is hosted on the path:
/etc/chrony.conf or /etc/chrony/chrony.conf
The configuration file will look like this:
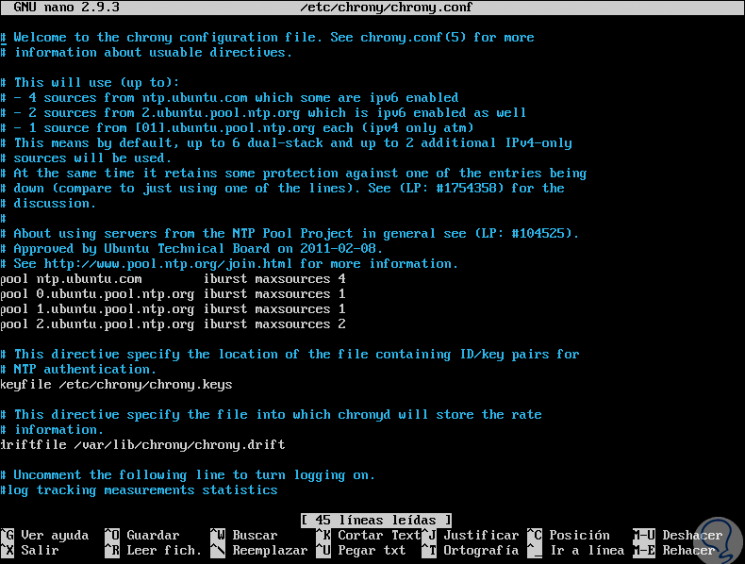
There we have the following information:
It allows to describe an NTP server which will be the starting point for synchronization tasks
It is the distance that must be added per stratum to the synchronization source. The default value is 0.0001
Indicates the location and name of the file that contains drift data
Thanks to this directive, Chrony is allowed to gradually correct the time compensation during the process of accelerating or slowing down the clock as necessary.
It is the path to the chron log file
To advance the system clock immediately and ignore any current setting, we must use the following command
To stop the Chrony service we can use any of the following lines:
Thanks to Chrony we can be sure that our server will be within the correct time range according to our location.