The use of presets in Lightroom Mobile will allow us to speed up our work processes where we want personalized results quickly and without complications. If you're not an expert in digital photo and video editing or just want to speed up your workflow, using pre-existing settings can be a good starting point for your photo edits. Many times when we want to edit our videos and photos we do not have the necessary knowledge about the tool or about the processes that these editions require. That is why knowing alternatives such as the use of profiles or color presets can help us make these workflows much more comfortable and efficient for us..
What is a profile in Lightroom Mobile
Profiles are a set of presets that you can find in Lightroom Mobile and are usually organized by categories. In this way we can apply color adjustments quickly and automatically that we can later complement with more adjustments if we want.

Advantages of using profiles or presets
When we want to edit our video and we don't have the necessary knowledge or time to be able to do a complete edition, we can resort to the use of already preset profiles that will provide us with a color configuration that can save us later editing time. If we mention advantages that we can find we could say:
- It allows us to save time since we only have to click on the profile to apply it.
- It allows us to give a homogeneous and coherent style to all our images since it will always be the same configuration.
- They have the possibility to be edited and complemented with other settings.
- It allows you to work on editing, even if your knowledge is minimal.
- It can help you boost your creativity when editing.
- You can learn how to achieve a certain effect by looking at the settings for that profile.
Today I want to show you how we can add a profile to videos in Lightroom Mobile, thus achieving a previous color configuration from which to start in our video editions from mobile devices.
To stay up to date, remember to subscribe to our YouTube channel!
SUBSCRIBE ON YOUTUBE
Add Color Profile to Videos in Lightroom Mobile
As we are seeing, the use of profiles and presets helps us to be able to start from an editing base. This means that there will be modifications to our image that we no longer have to look for because they will have been established automatically when clicking on a certain profile. Many times there are profiles or presets that already have a configuration similar to the one we are looking for and where we will only need a couple more adjustments to leave it as we like.
By using profile templates with previous configurations, in addition to saving time, we will achieve that if we want a final look that is the same in the rest of our photographs, we can have a homogeneous aesthetic by always applying the same profile. Also, the positive thing is that, although you admit a profile, you don't have to stop your editing there and you will be able to continue editing your video in a personalized way, although at the same time starting from an initial but established configuration, you will have already saved yourself many steps. The variety of profiles that Lightroom Mobile presents allows us to have different options when starting an editing process..
Next, we are going to see how we can apply the presets or color profiles in our videos from Lightroom Mobile and how to manage these profiles to adapt them to our tastes and needs. Remember that after applying one of these profiles, you can always continue modifying the different elements that you prefer within your video with the different options that the application offers.
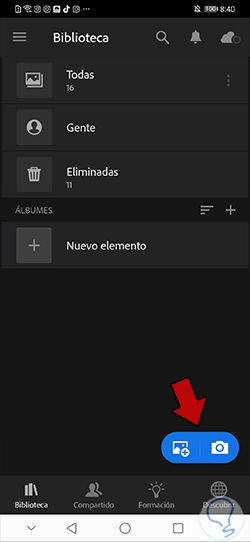
Step 1
The first thing we are going to do is open our video from an album or folder where we have already imported it or we can click on the import icon to import it for the first time.
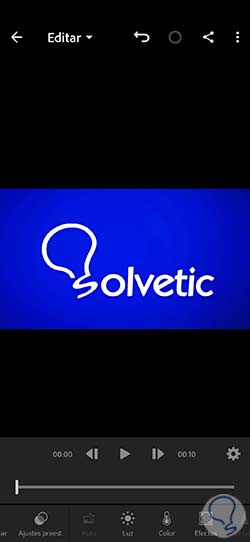
Step 2
As you already know when entering this editing panel of our video we will have different lower options with which to edit our video clip in a personalized way.
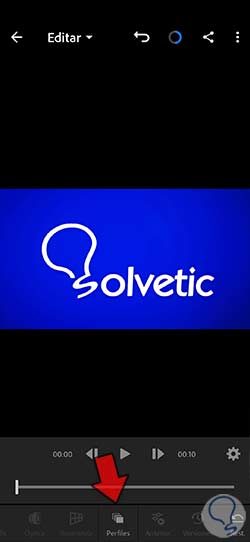
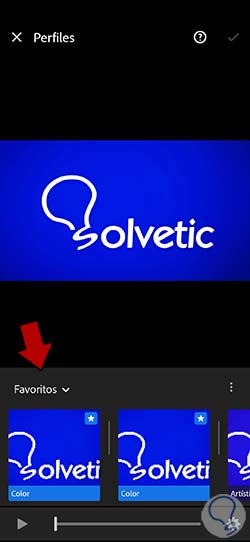
Step 3
In this case we are going to use the option that appears at the end of all the options called “Profiles”.
Step 4
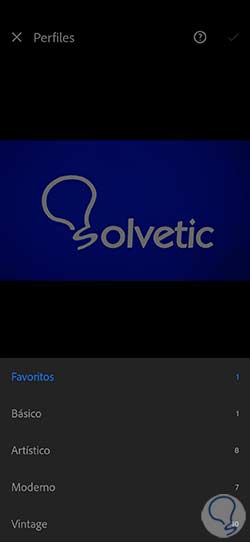
Here we will see the panel for choosing the predefined profiles for our video. If we want to see the different possible categories of profiles we can click on the current name to see the list.
step 5
Here we will see the different categories of profiles that we have available to be able to choose one within each of them. We can find the following categories:
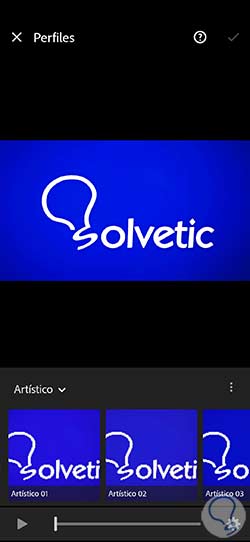
step 6
To see the examples of profiles that are in each category, click on one of them and we will see the different possibilities of profiles to apply.
step 7
To apply a specific effect, we are going to click on it and we will see that that specific profile is applied directly to our video.
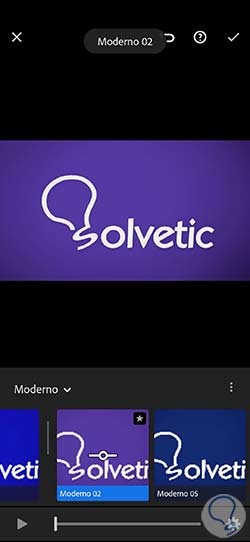
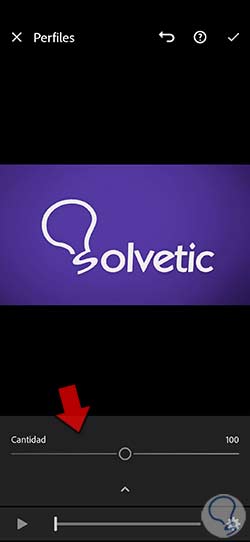
step 8
We can adjust the intensity level of that applied profile thanks to the regulator that includes each profile example. To use it, we will click on one of the profiles and we will see a regulator where we can establish the amount of filter that we want to apply by moving to the right or left.
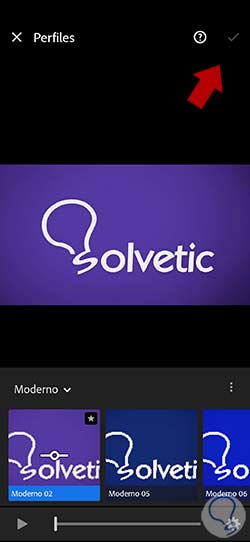
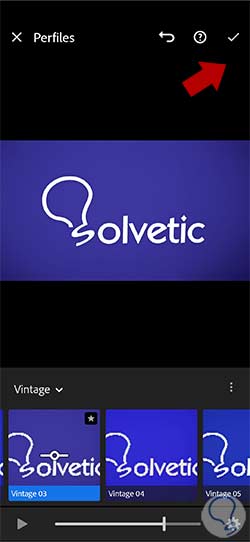
step 9
Apply the changes with the upper right check that will appear in the same window and thus continue editing your video without losing settings.
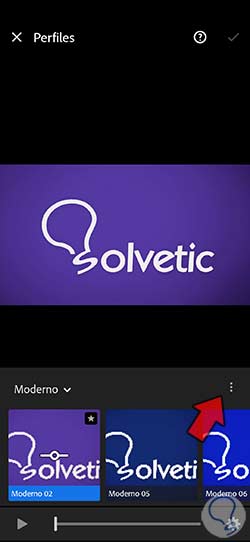
step 10
We would already have our profile applied to the video. We can also manage our profiles by clicking on the three points that you will see in the lower panel.
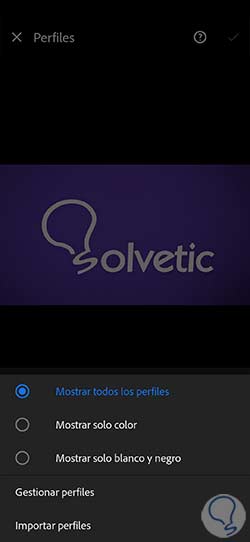
step 11
Here we will see different options. We can filter the types of profiles that we want to show depending on whether they have color or black and white, or show them all directly.
step 12
If we want to manage to activate or deactivate the profiles that will be actively displayed in your Profiles panel, you can click on "Manage profiles".
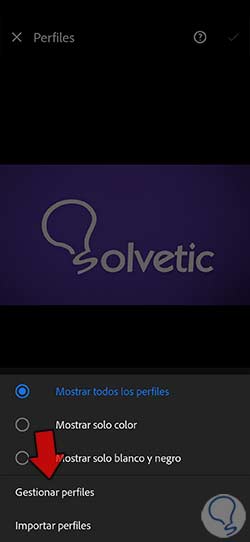
step 13
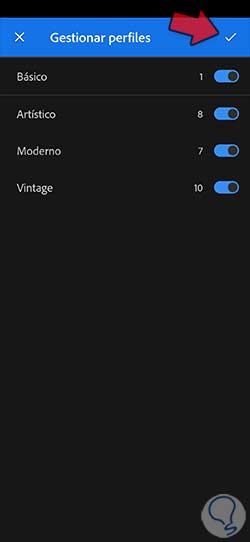
Then we can activate or deactivate a category of profiles depending on whether or not we want them to be displayed in our main panel. If you make changes, finish applying them with the upper check.
step 14
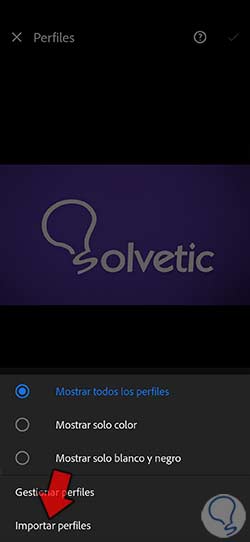
In case you have profiles that you can import, you can use the "Import profiles" option and search for them on your mobile device to add them.
step 15
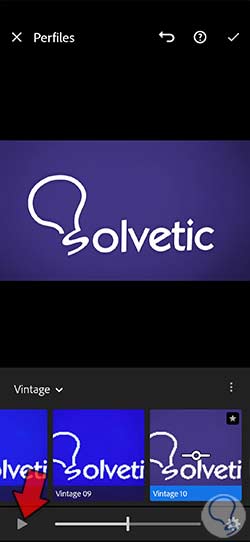
Once you have your profile applied you can play the video to see it complete with the profile we have chosen applied. To do this you can use the lower play button that you will see on the screen.
step 16
Once you finish editing your video with profiles you can exit this window and apply the changes from the upper check box that will confirm the applied modifications.
In this way we will be able to apply predefined profiles to our videos in Lightroom Mobile, being able to configure the color of our videos automatically when we need quick but effective editions in our videos using Lightroom Mobile..