To stay up to date, remember to subscribe to our YouTube channel!
SUBSCRIBE ON YOUTUBE
At the moment we open Google Chrome to browse the desired sites in the background, a series of processes are carried out so that everything works correctly and one of the most vital processes is that the network is available, simple, without a network there will be no navigation , the network also needs certain parameters for correct operation. In case of having some type of wrong configuration, we will find connection errors in browsers like Chrome..
An error that is present today in Google Chrome is suddenly we can see the error "ERR_NETWORK_CHANGED" which indicates a change in the network that affects navigation and access to sites, TechnoWikis brings a series of solutions to correct this error and with it navigate completely in Chrome.
Note
Before doing any of these options, check the status of your Internet connection.
1 Repair Chrome from Terminal
From the terminal we seek to reset some network parameters that may be affected and result in the network change.
Step 1
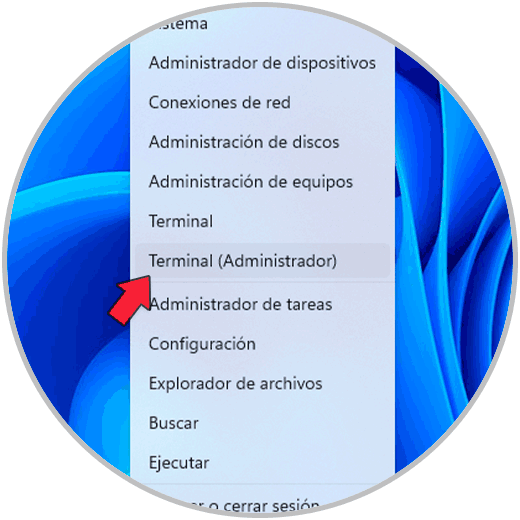
To be able to use this method we are going to open the terminal as administrator from Start:
Step 2
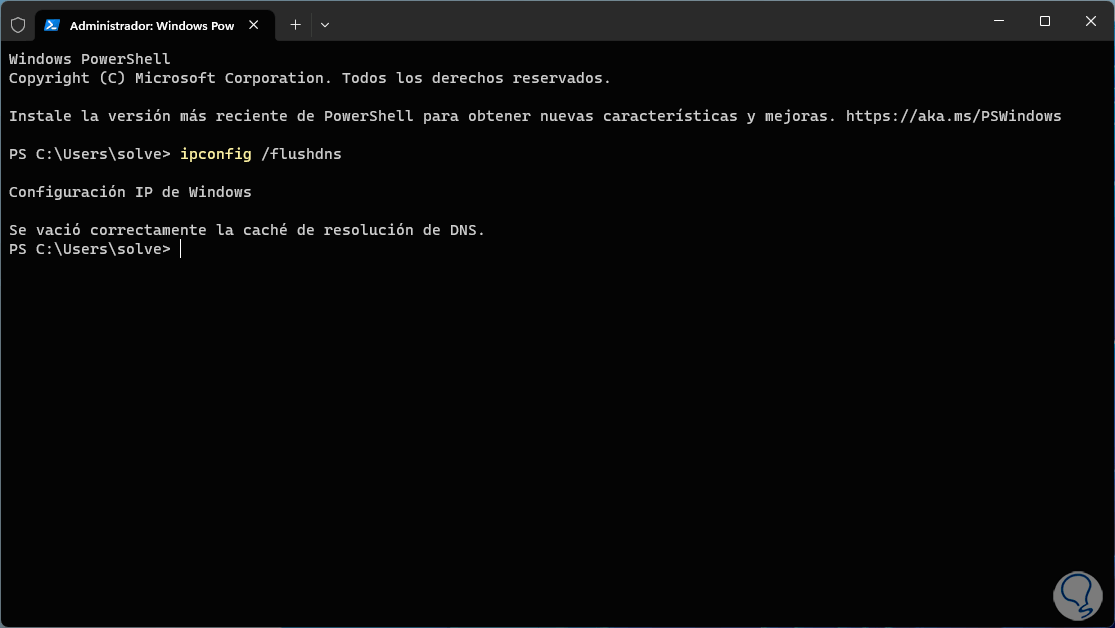
First of all we are going to empty the DNS cache of the system which accumulates as we navigate the network, for this we execute the command:
ipconfig /flushdns
Step 3
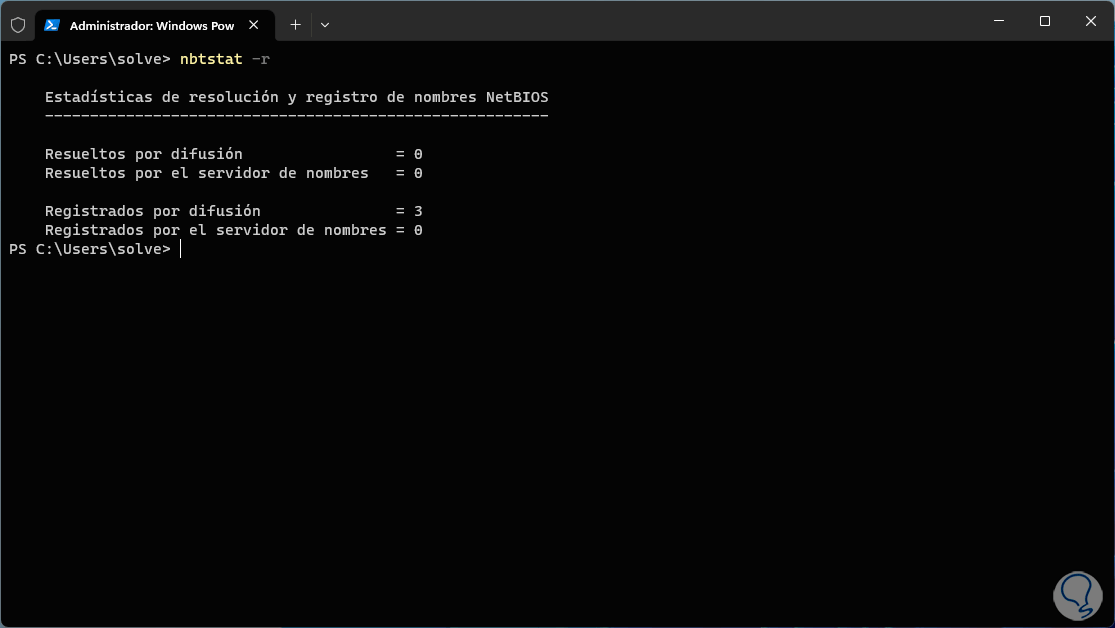
Now we will use the nbtstat command, this command has been created to display and manage all the information associated with NetBIOS (Network Basic Input/Output System), remember that NetBIOS is a network protocol that offers communication services for devices on a local network , in this case we execute the following. The -r parameter allows you to clear and reset the NetBIOS name cache.
nbtstat -r
Step 4
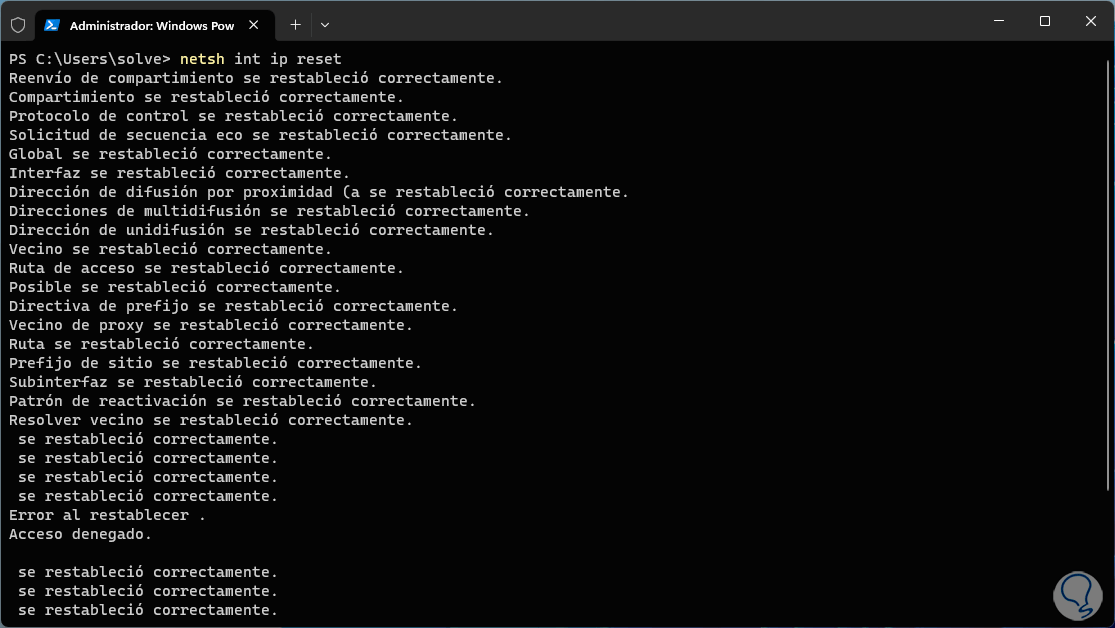
Now we are going to reset the network configuration with the following command:
netsh int ip reset
step 5
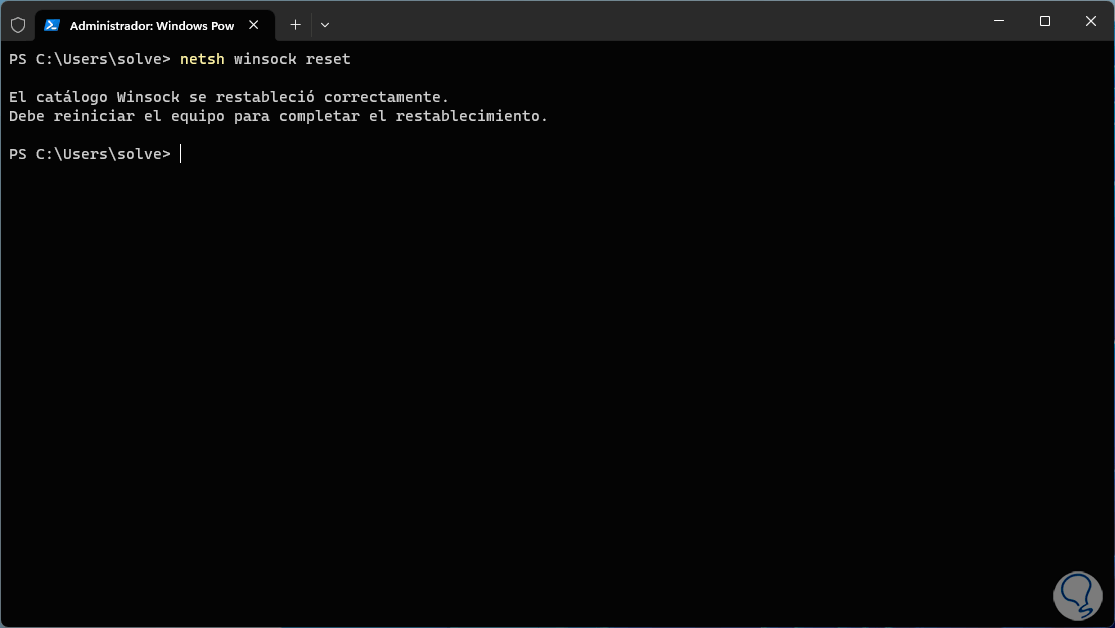
Finally we are going to restore the Winsock catalog, this winsock catalog (Windows Sockets) allows network applications to communicate in TCP/IP networks (Transmission Control Protocol/Internet Protocol) and other associated protocols, to restore it we are going to execute the following :
netsh winsock reset
step 6
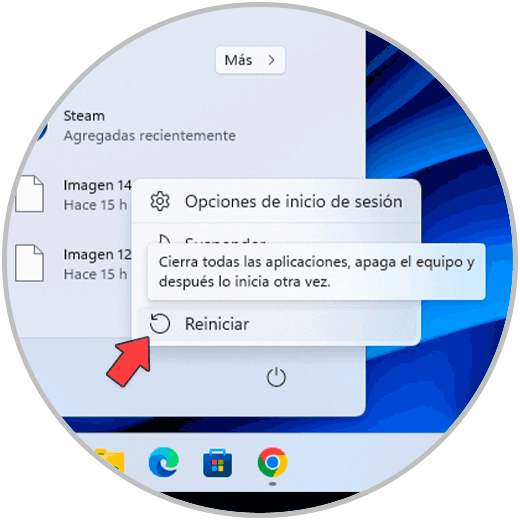
Now we are going to restart Windows to apply the changes:
step 7
We wait for Windows to be restarted:

step 8
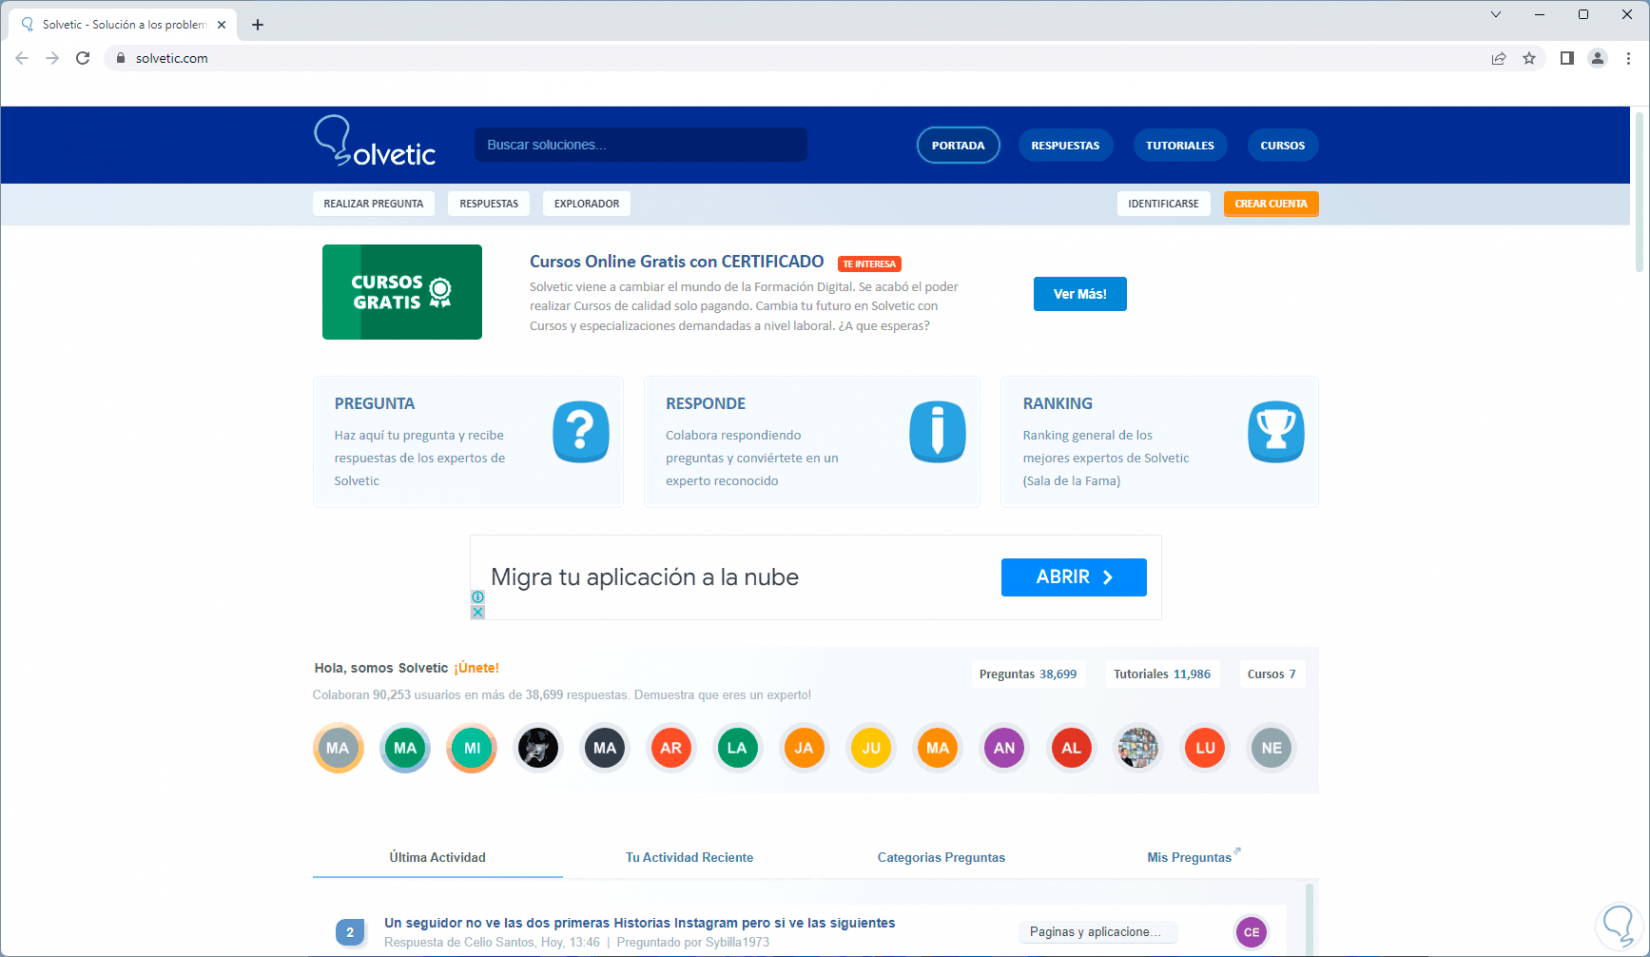
We open Chrome to see if the site loads normally:
2 Fix Chrome changed DNS
The DNS (Domain Name System - Domain Name System) is responsible for translating and converting IP addresses into domain names and vice versa, by default this service is integrated into our provider but it can become collapsed, in this case we can change it and make use of public DNS servers.
Step 1
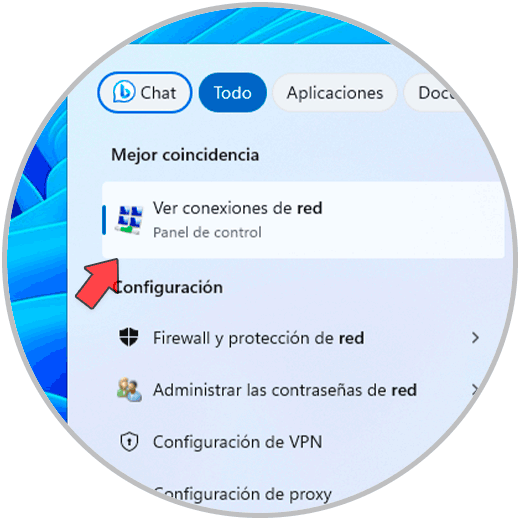
To do this in the search engine we are going to enter the word "network" and click on "See network connections" in the displayed results:
Step 2
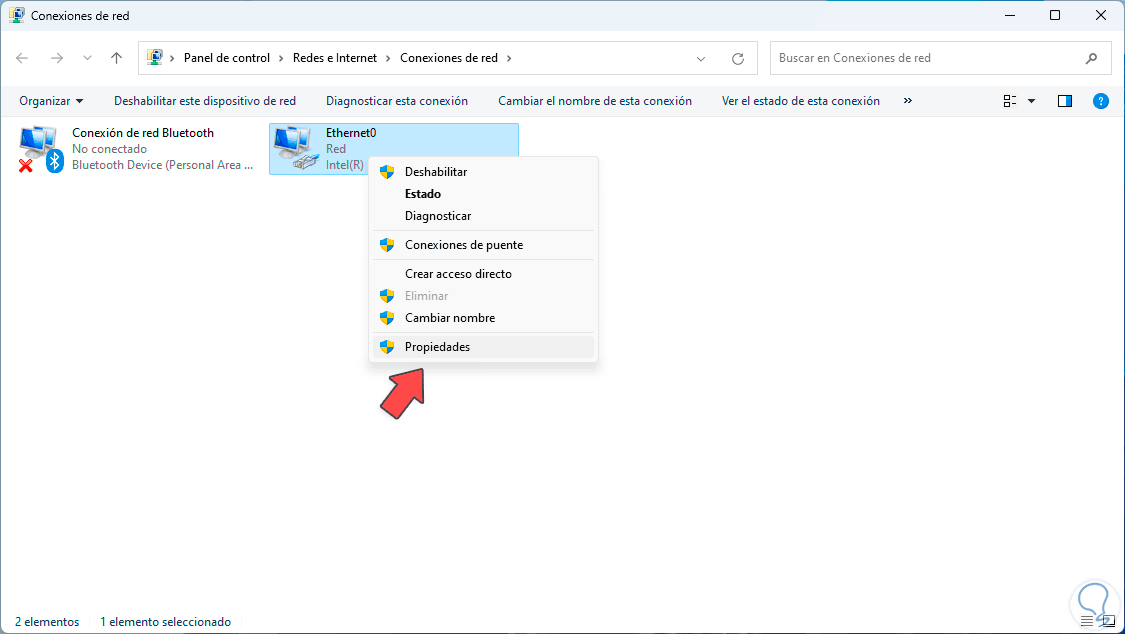
We will right click on the network adapter and then click on "Properties":
Step 3
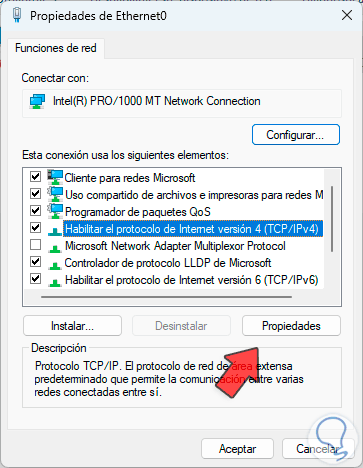
In the pop-up window we are going to select the line "Enable Internet protocol version 4":
Step 4
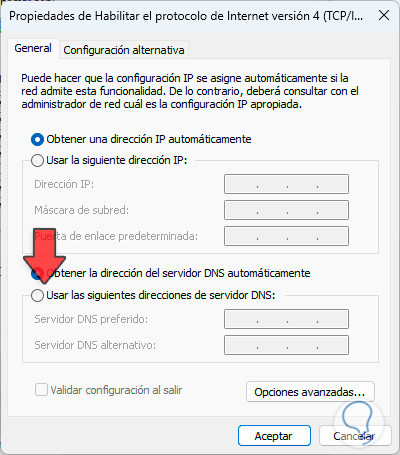
We click on "Properties" to see the following:
step 5
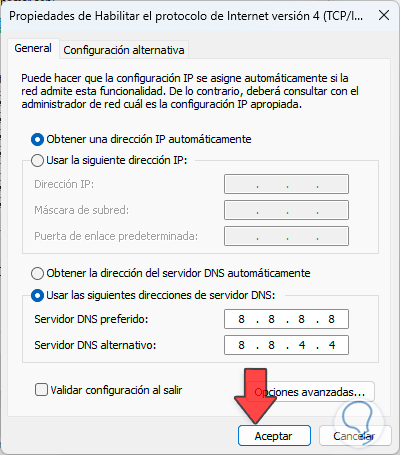
Now we activate the "Use the following DNS server addresses" box and enter the addresses of the desired server:
step 6
We apply the changes and then we check that the site loads normally in Chrome:

3 Fix Chrome configuring proxy
In many cases, a proxy server is used, which serves as a means of access between computers, offering greater security, but this can affect the use of the network, giving rise to the error ERR_NETWORK_CHANGED, to disable it or see its status.
Step 1
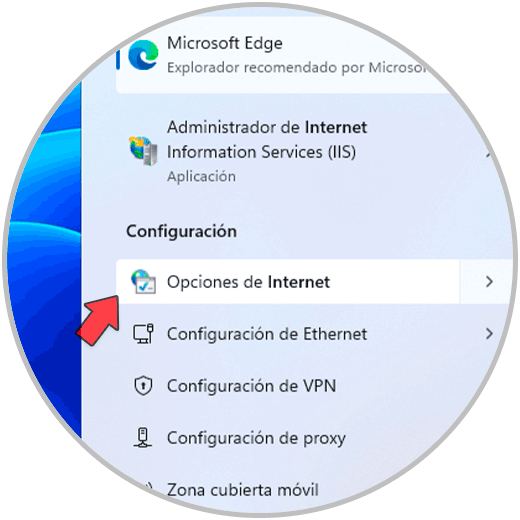
In the search engine we enter the word "internet" and there we will click on "Internet Options":
Step 2
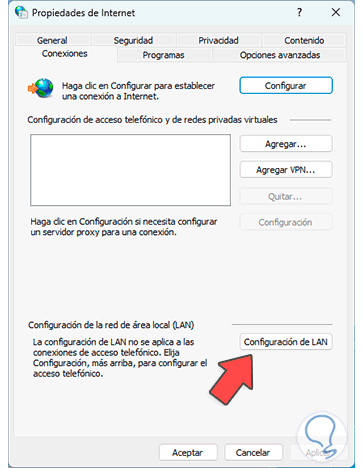
We are going to go to the "Connections" tab in the displayed window. We click on "LAN Configuration":
Step 3
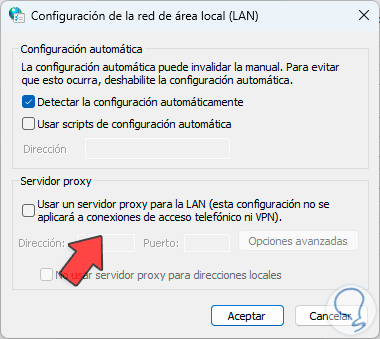
and then we validate that the proxy server box is not active. We apply the changes if necessary.
Step 4
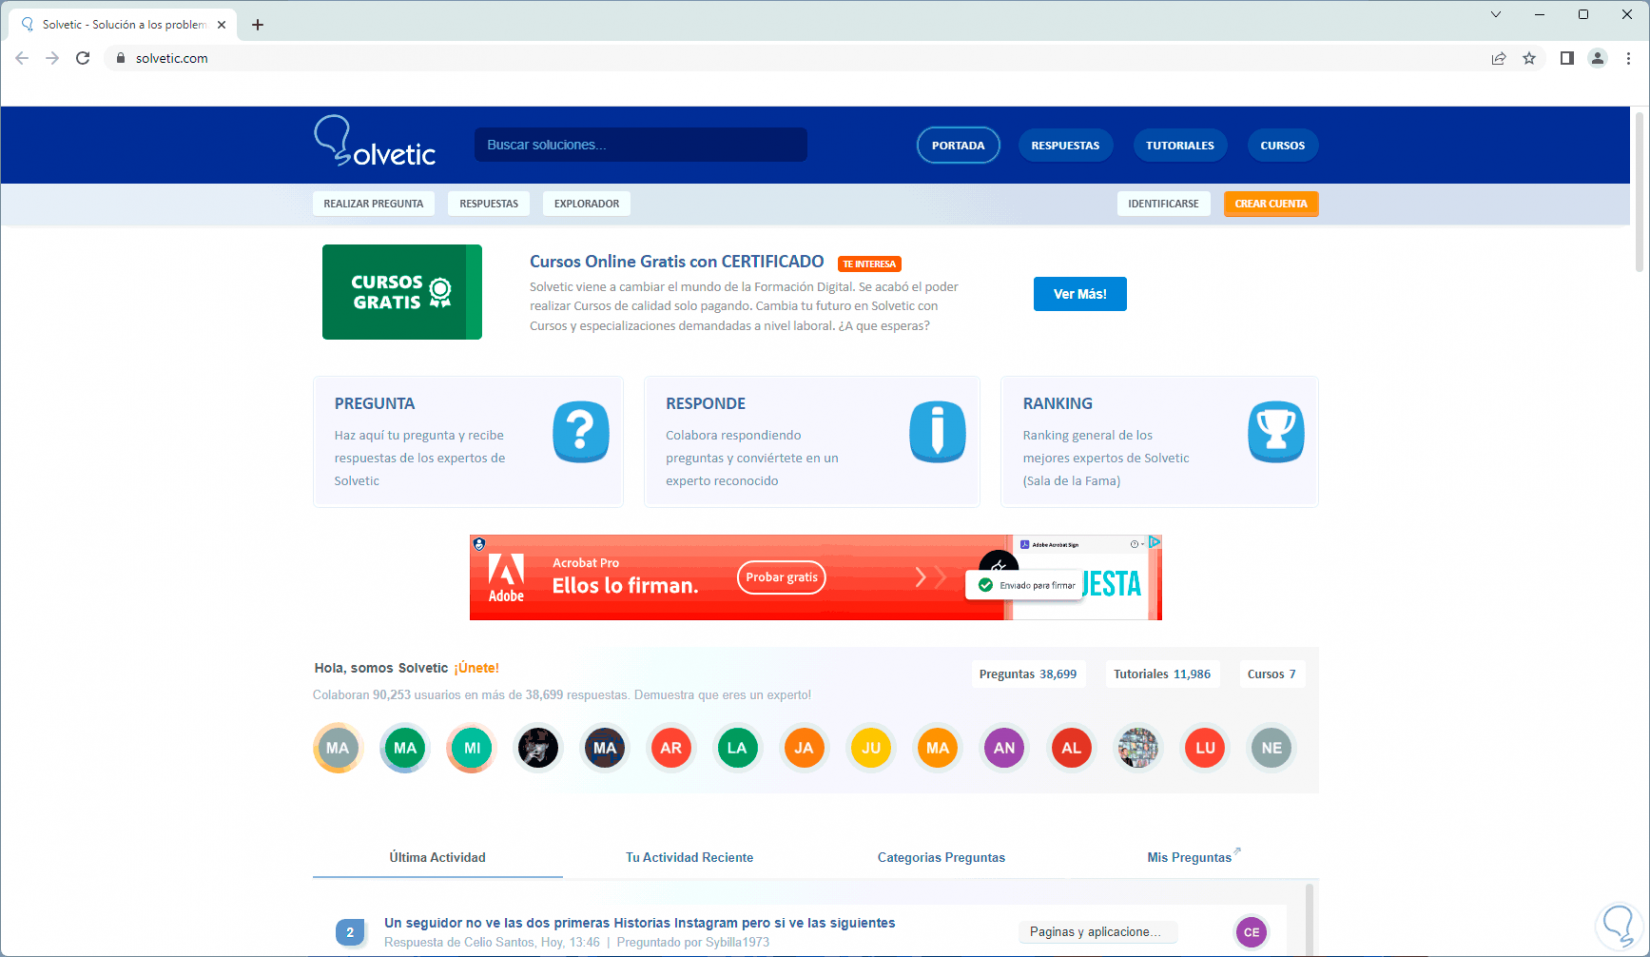
Refresh the page to see that it loads correctly:
4 Fix Chrome by clearing cache
When browsing in Chrome, the browser's own local cache is hosted. Over time, this can affect access and operation, so it is ideal to delete it.
Step 1
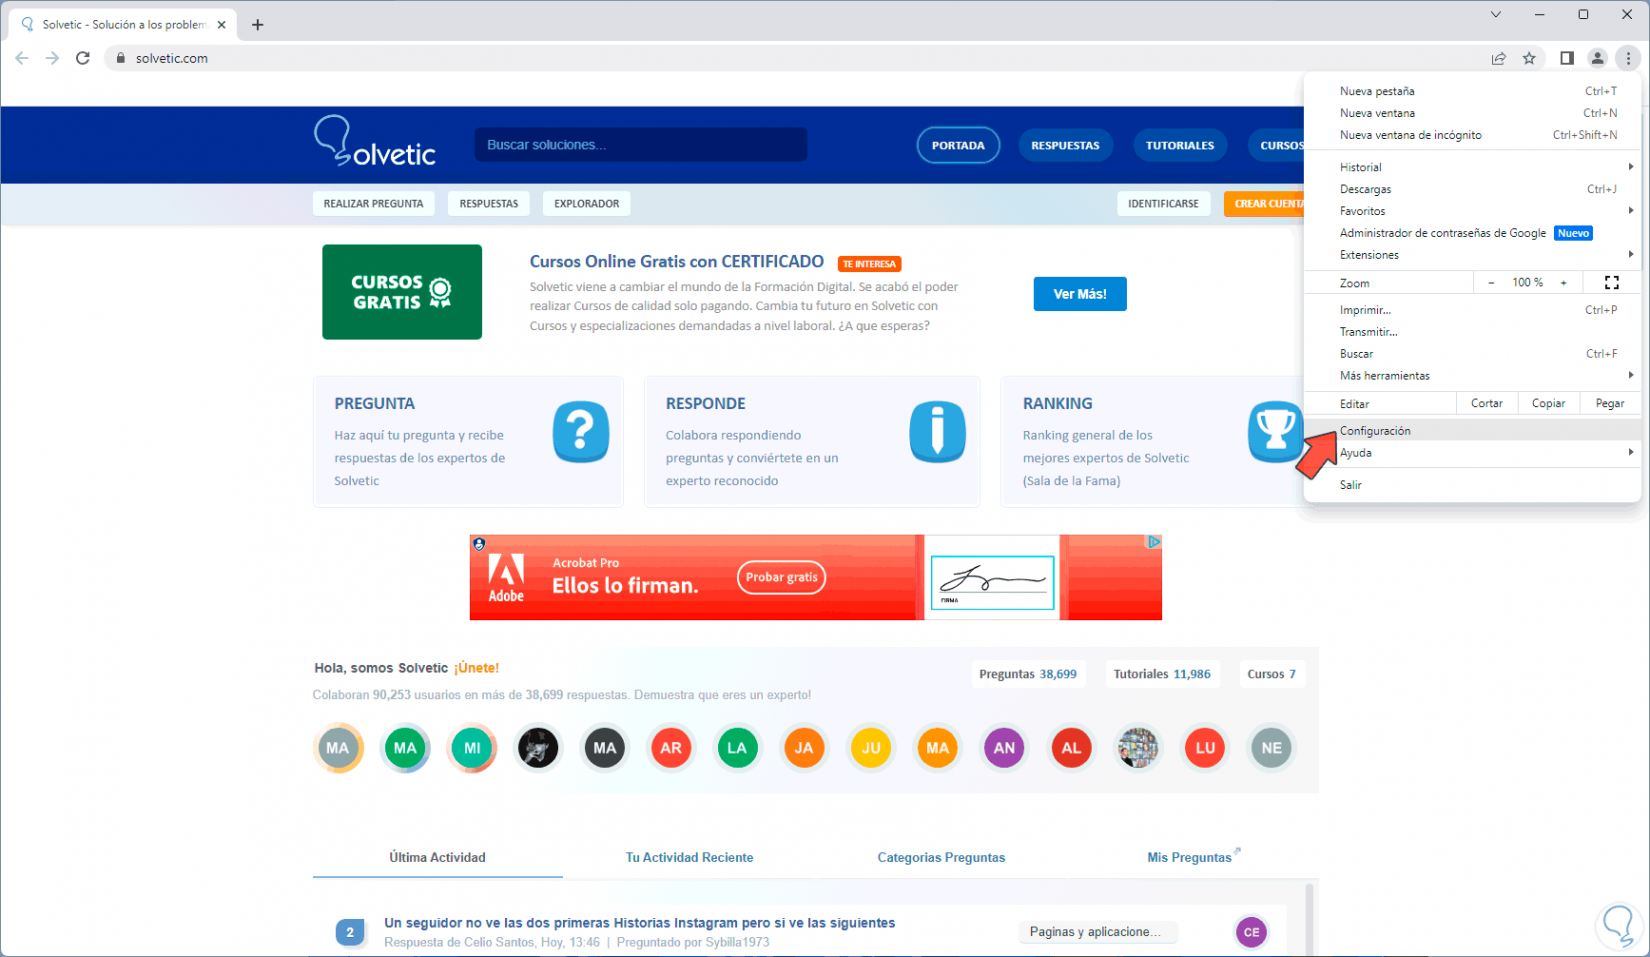
To achieve this we are going to open the Chrome browser and then click on "Customize and control Google Chrome" and then click on "Settings":
Step 2
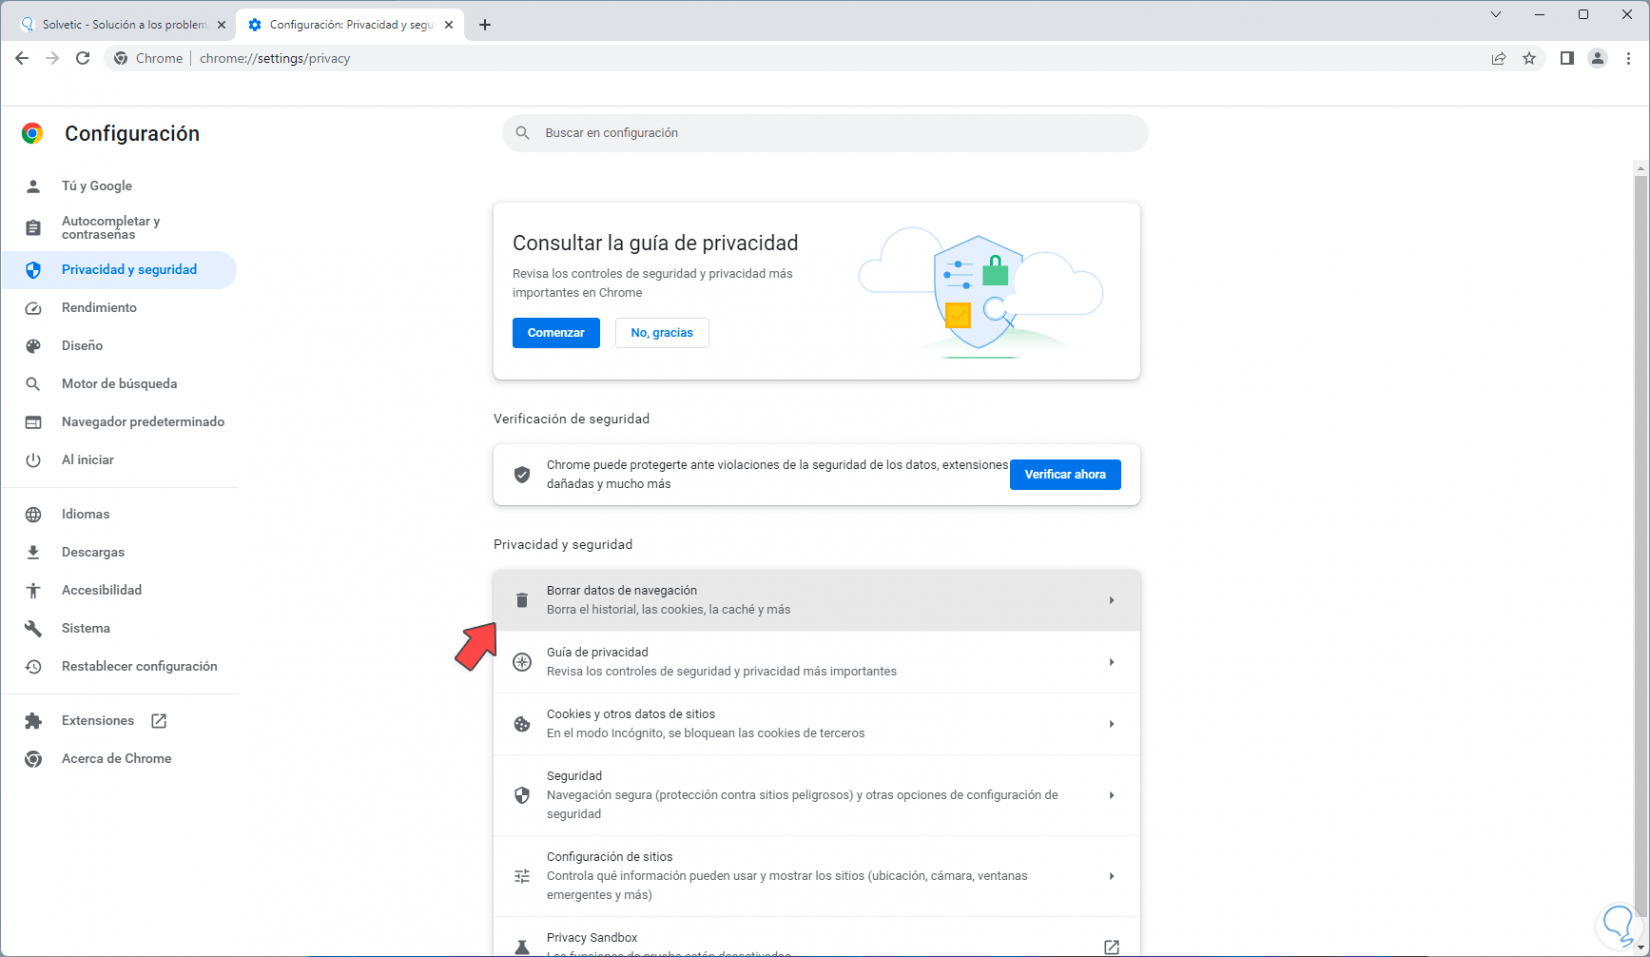
In the displayed window we will go to the "Privacy and security" section and there we click on "Clear browsing data":
Step 3
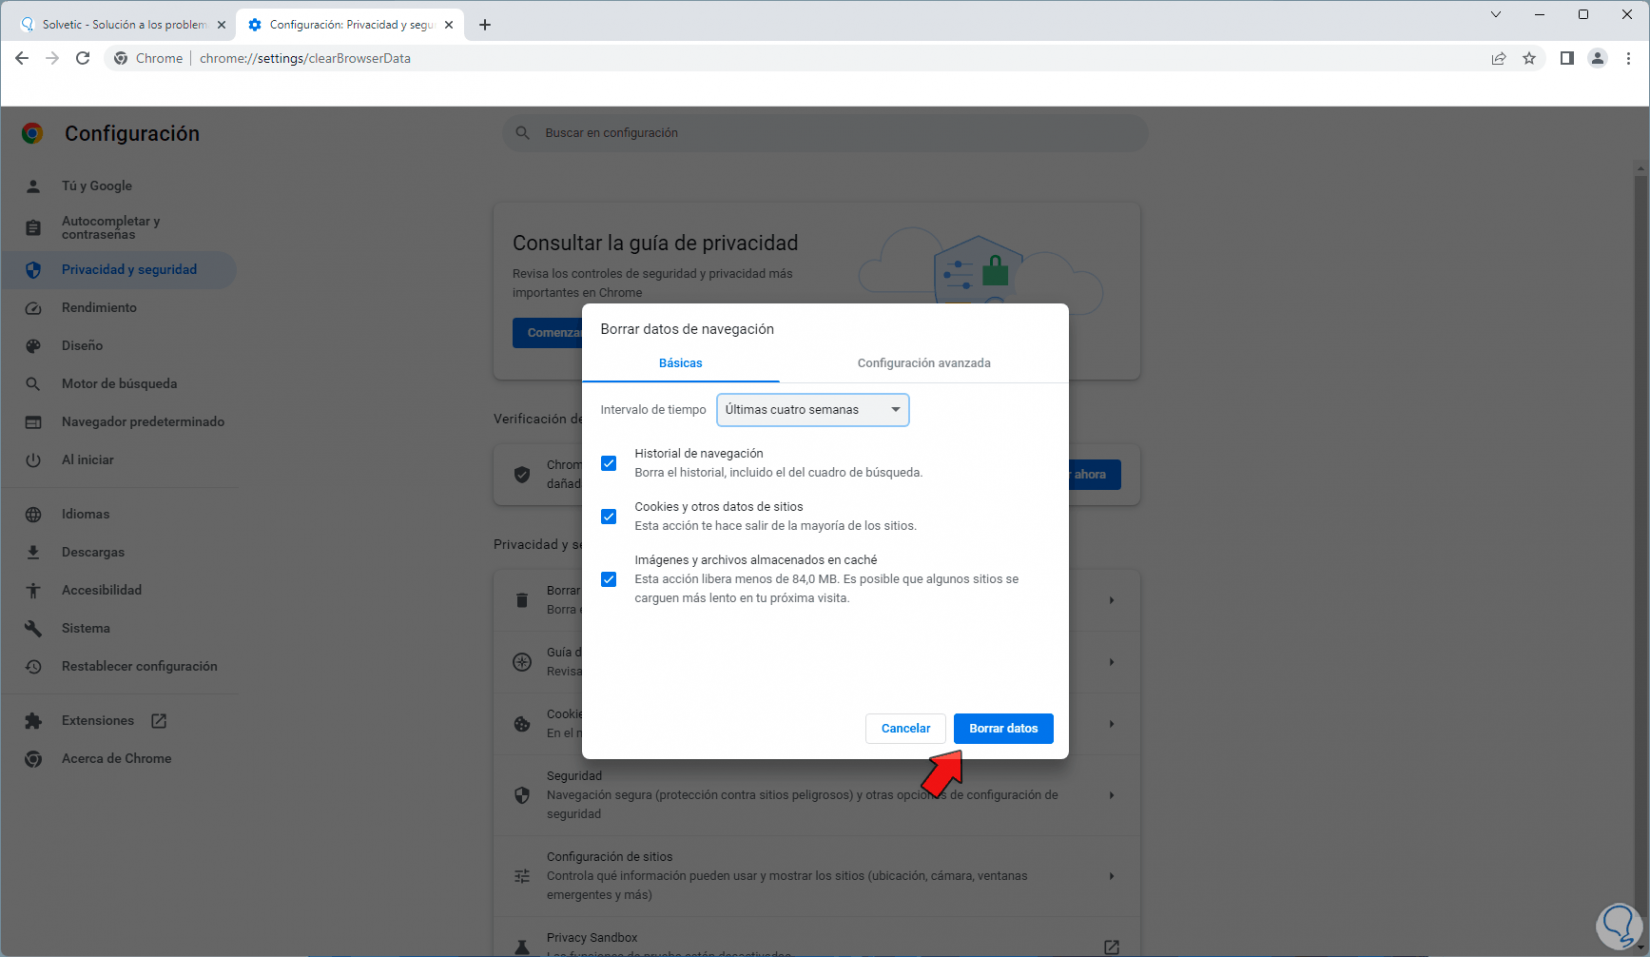
In the pop-up window we will select the desired time range. We click on "Clear data" to proceed with the action
Step 4
and then we refresh the website to see that it opens correctly:

5 Repair Chrome by resetting adapter
Finally it is possible to reset the network adapter to its initial values.
Step 1
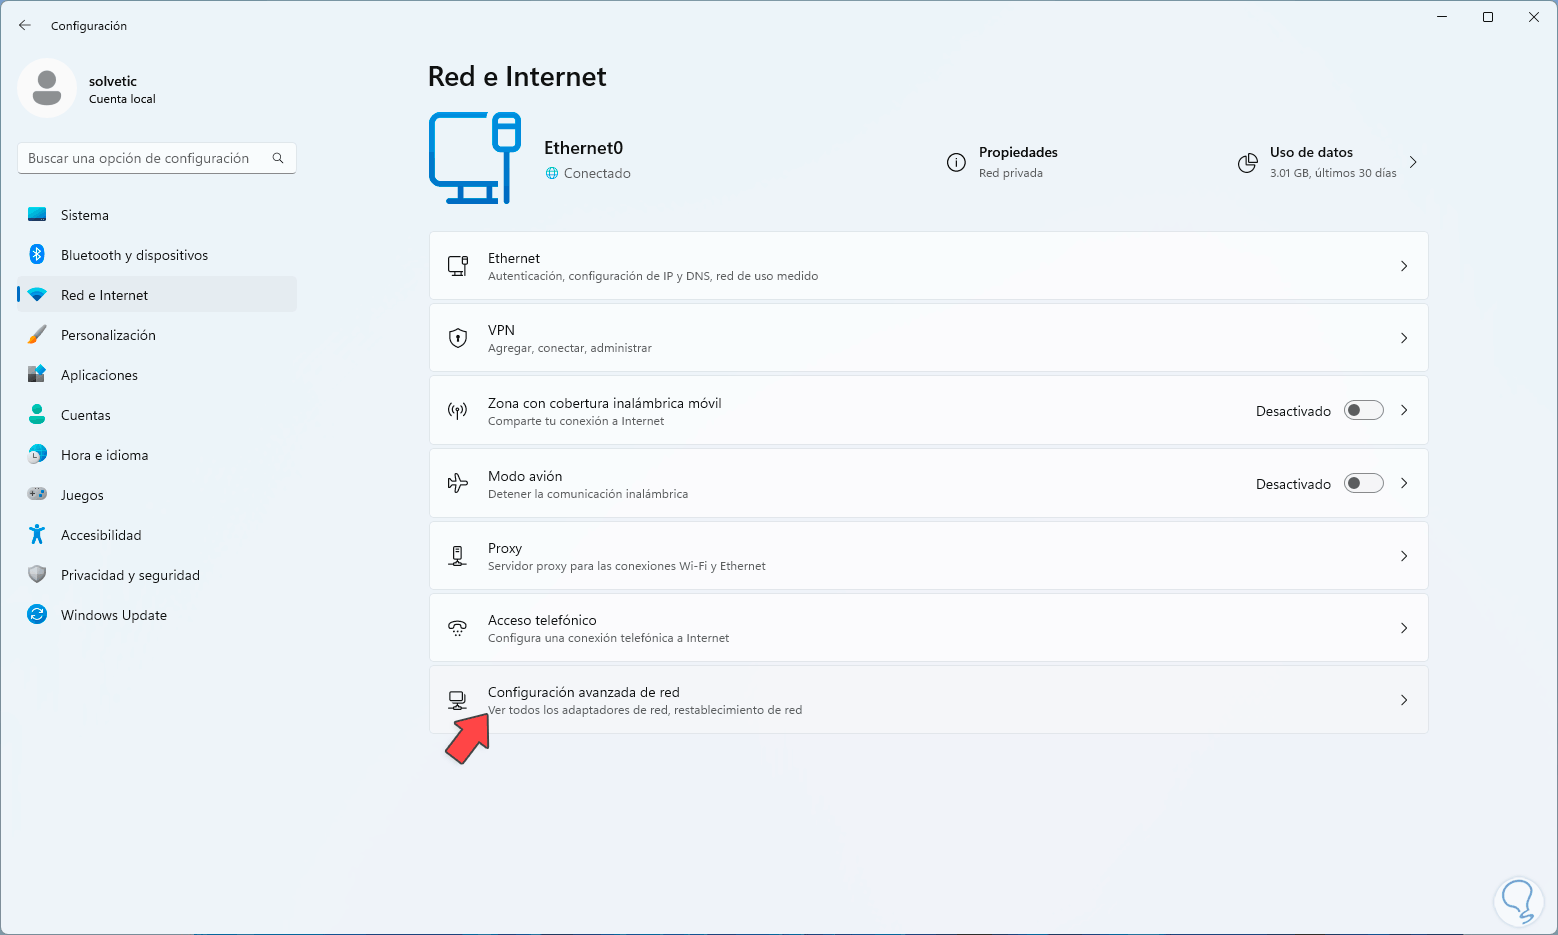
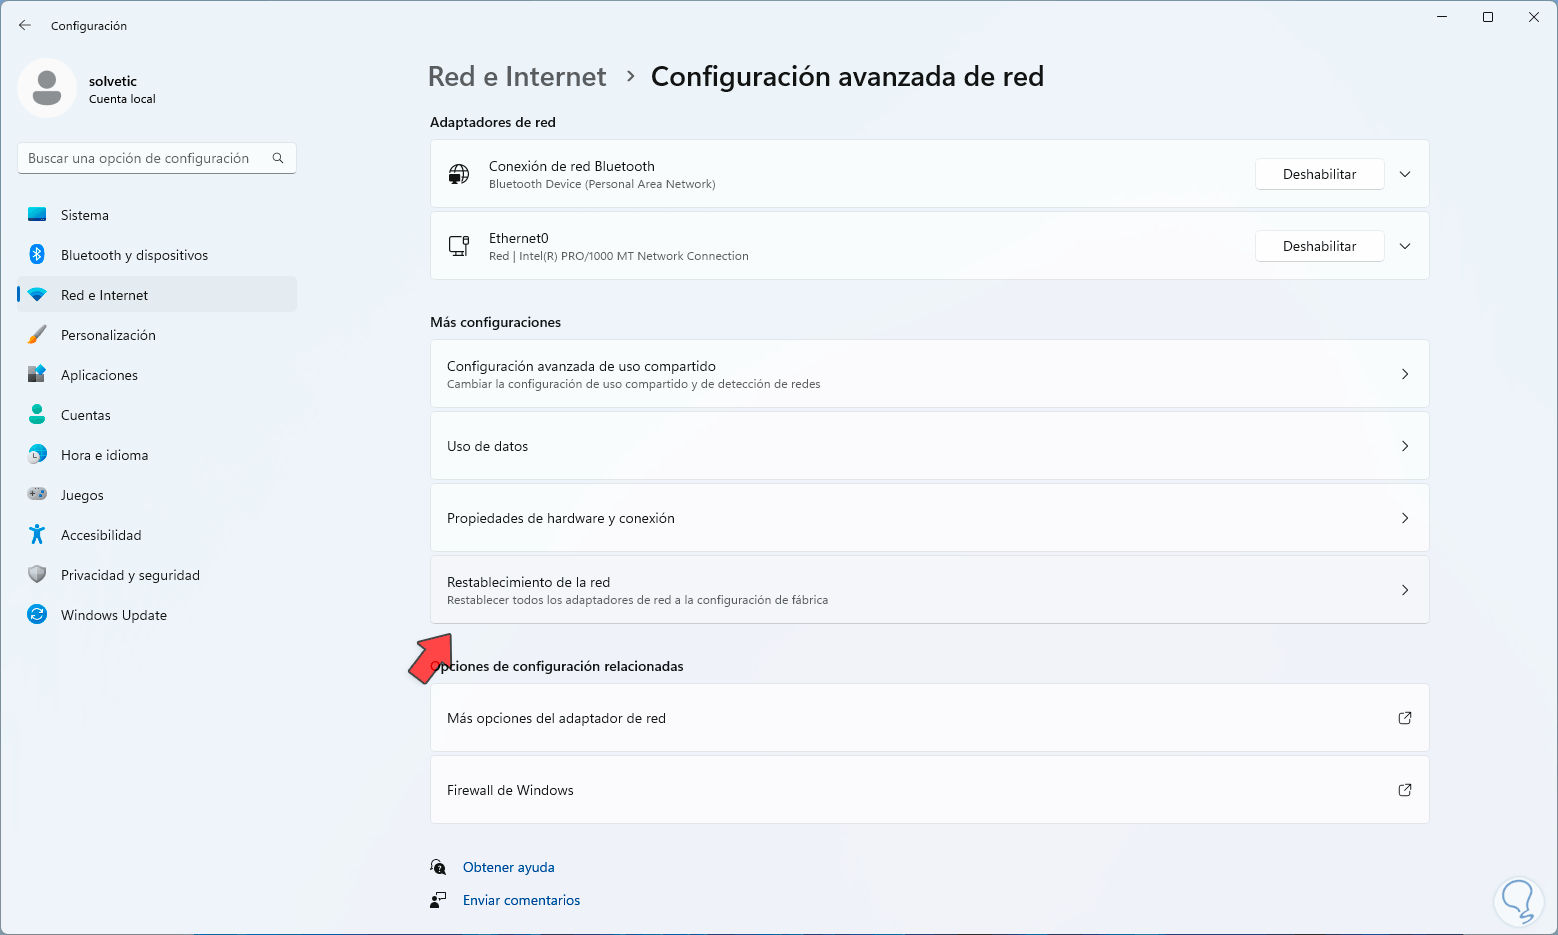
For this we go to "Start - Settings - Network and internet - Advanced network settings":
Step 2
We click there and then click on "Network reset":
Step 3
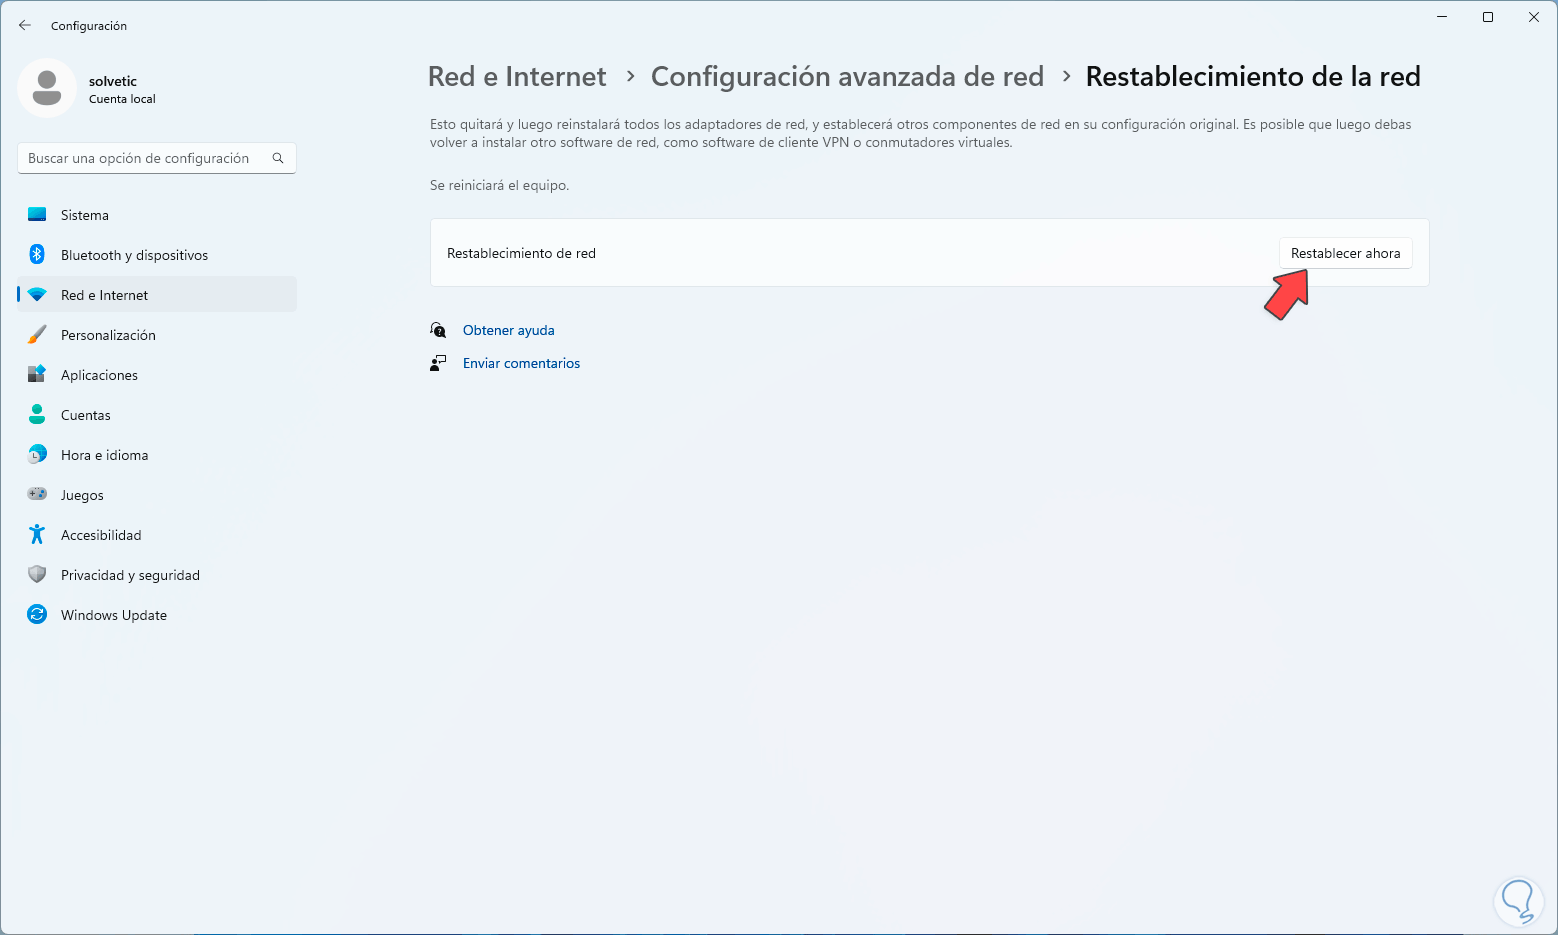
We will see this. We click on "Reset now"
Step 4
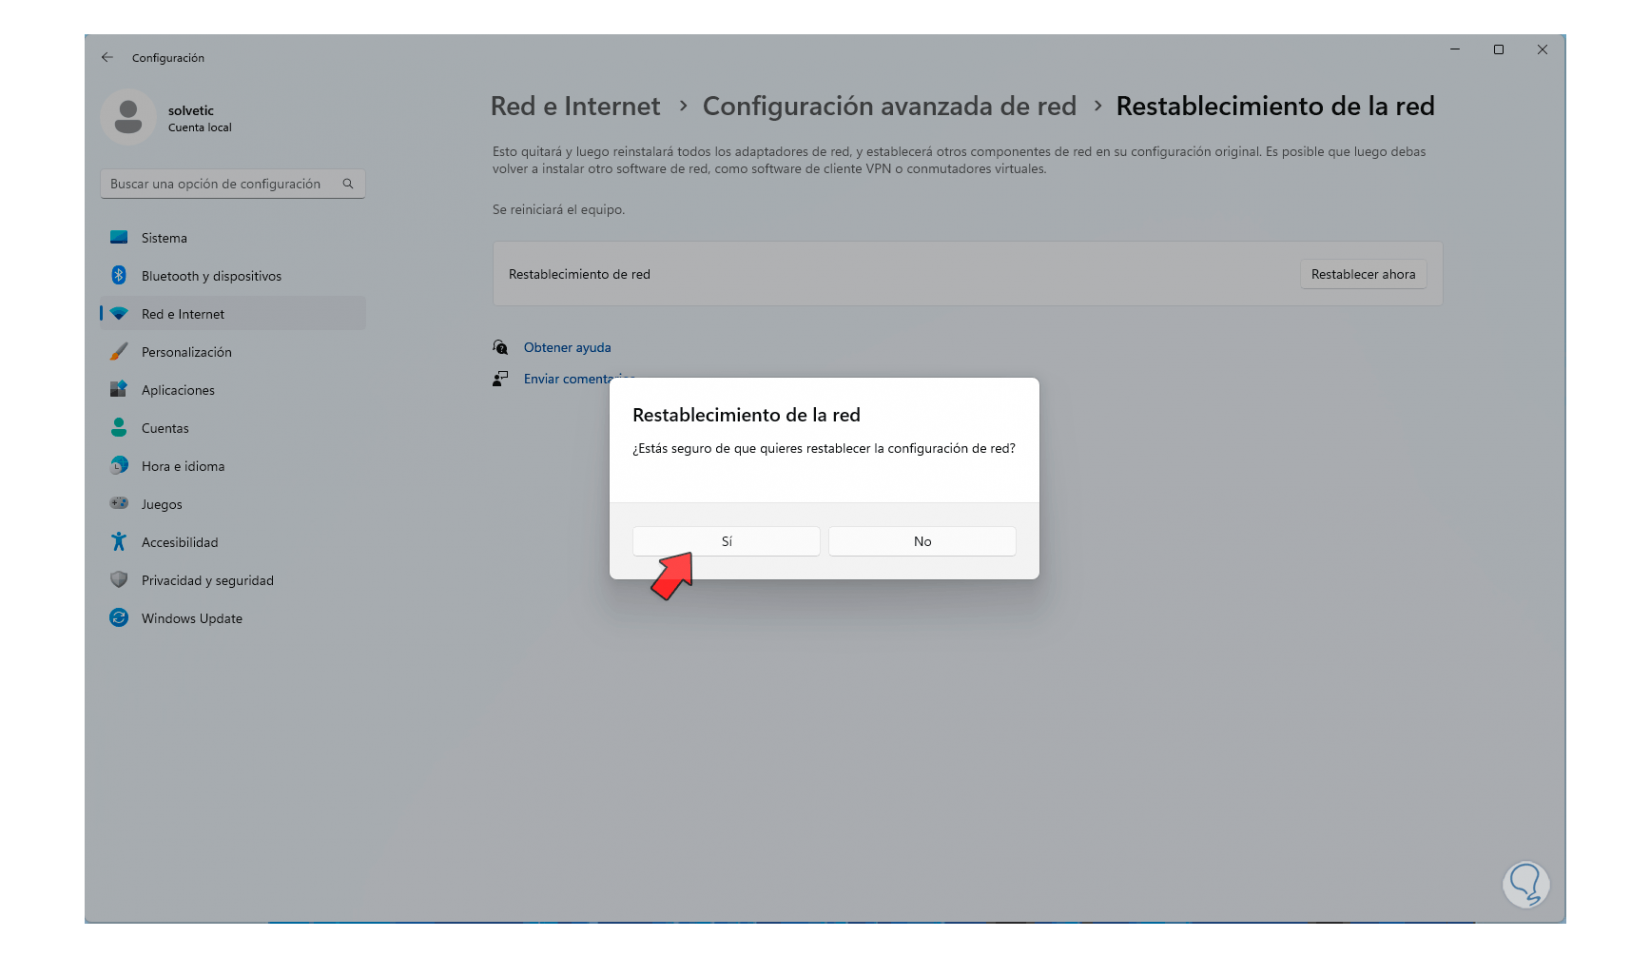
and we must confirm the process:
step 5
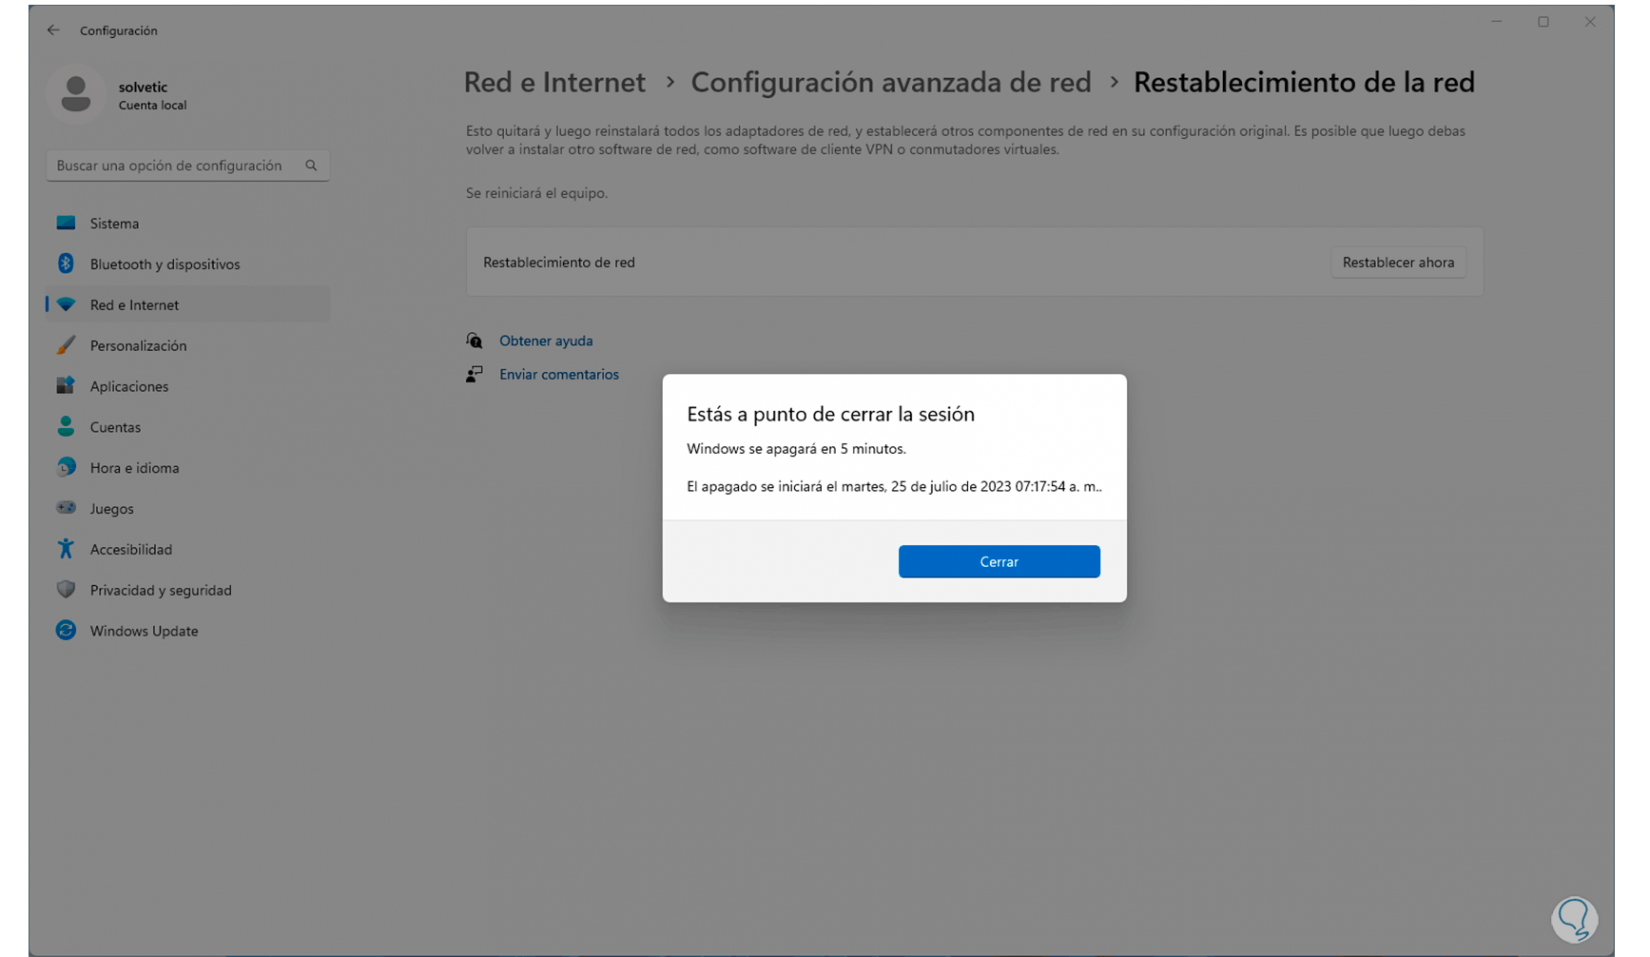
When it has been confirmed we will see a message indicating how long the session will be closed:
step 6
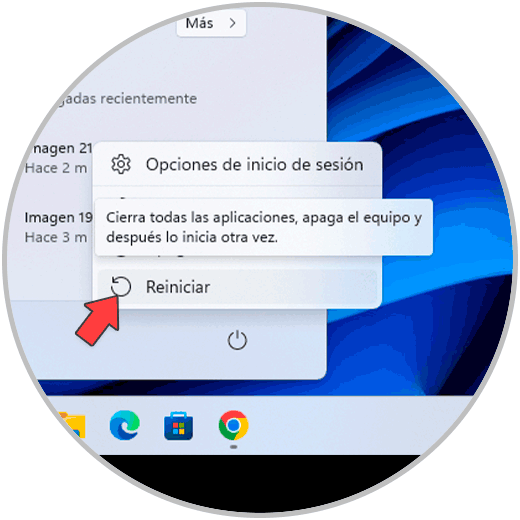
Now we restart Windows to complete the process or we can wait for the indicated time:
step 7
The system will reboot:

step 8
When you log in you can access Google Chrome to check that it opens without problem:

We see how each of these options helps us to correct the network change error and be able to enjoy web browsing without errors and with total fluidity in one of the most used browsers in the world such as Google Chrome..