In some specific situations, especially at the security level , we may want to digitally sign a file so that it is delivered to the right person or that she is certain that the information registered there comes from a secure and reliable recipient..
We can achieve this thanks to certain utilities and it is important to clarify that a digital signature certifies a document and adds a timestamp to make it unique.
This is possible thanks to GPG (GNU Privacy Guard), which was designed to encrypt and digitally sign a document thus increasing its privacy and security..
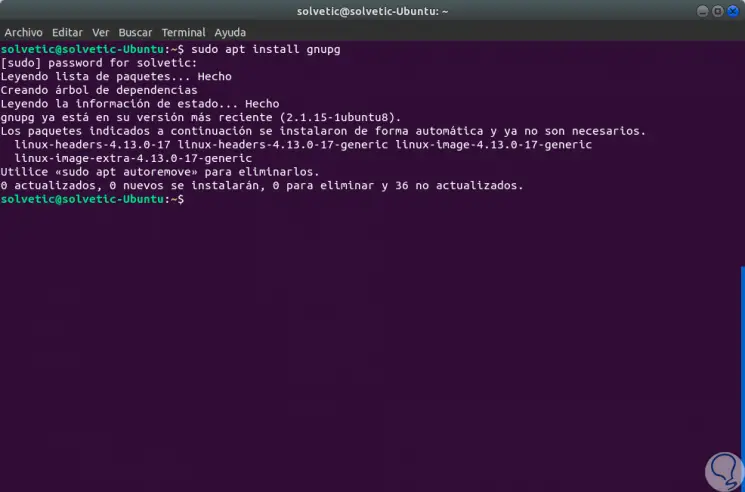
1. Install GPG on Linux
To install GPG, in this case Ubuntu 17, we must run the following line:
sudo apt install gnupg
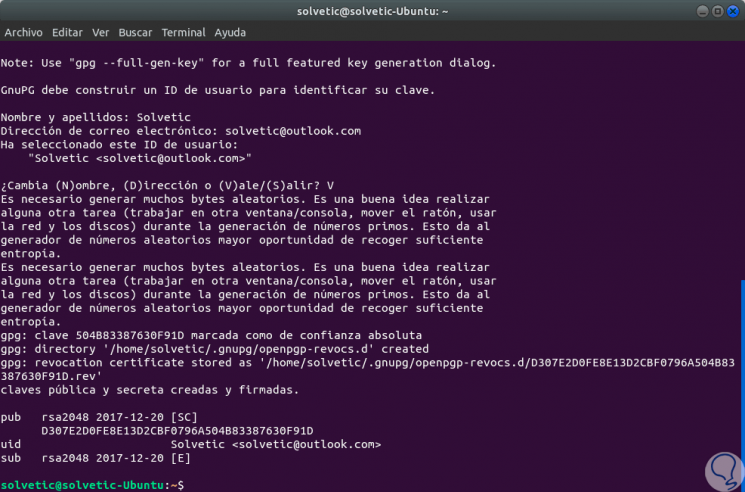
2. Generate GPG keys
Step 1
Next, we will generate a gpg key that will be used for signing the files, in this case the process must be executed by the user who has to sign the documents, we will execute the following:
gpg –gen-key
Step 2
There we must enter the name and email address, then enter the letter V to confirm and we will see the following pop-up window where we must enter and confirm the password:
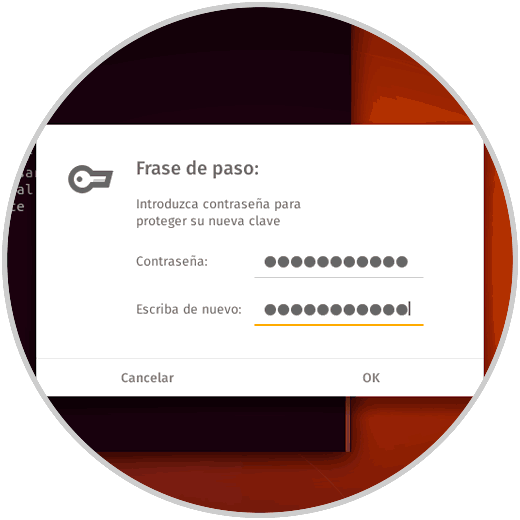
Step 3
Click on Ok and this will be the final result:
Step 4
In some cases the following will be requested:
- The type of key you want (Press Enter to accept the default RSA).
- The desired key size (We select the maximum key size, which is 4096).
- The time that the key must be valid.
3. Sign files with GPG on Linux
Step 1
For this process we will go to the directory where the file to be signed is located, in our case it is the desktop so we enter the following:
cd desktop
Step 2
There we execute the following line to sign the file:
gpg –sign TechnoWikis.docx
Step 3
The following pop-up window will automatically be displayed where we will enter the password:
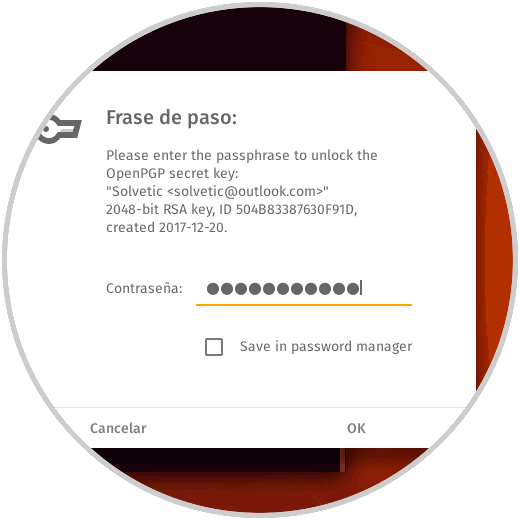
Step 4
This password will be the one that we indicate in the process of creating the keys, in case of having several GPG keys in the system we can indicate to which email is associated with the following syntax:
gpg --sign --default-key mail @ domain TechnoWikis.docx
Step 5
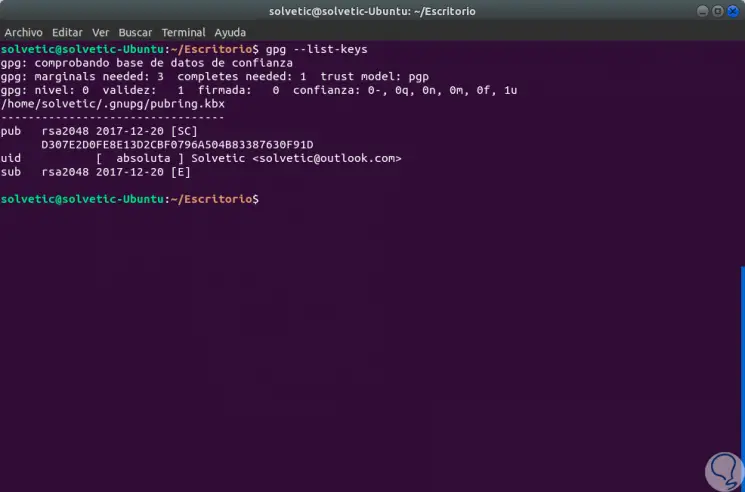
In case of not knowing in detail what keys we have, we can execute the following command:
gpg --list-keys
Step 6
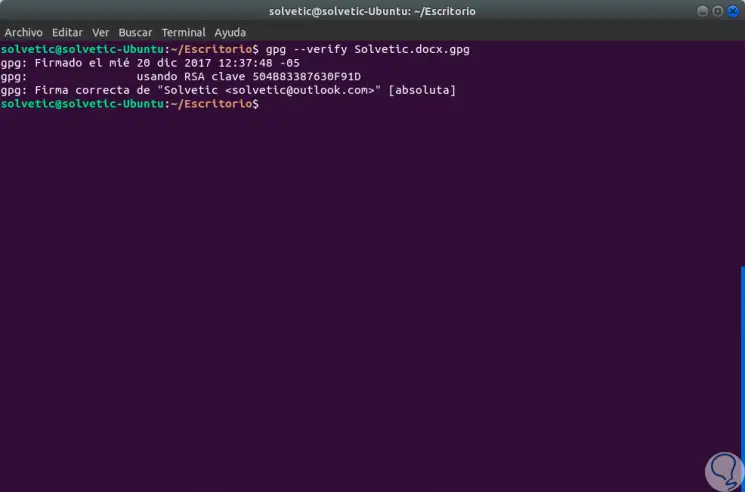
Once the passphrase for the indicated password has been entered, the file will be signed and a new file will be generated with the extension .gpg, in this case TechnoWikis.docx.gpg. With that signed file, it will be possible to verify the signature with the following command:
gpg --verify TechnoWikis.docx.gpg
Step 7
We can see that the signature assigned to the file is correct. Finally, the recipient can decrypt the file by executing the following command:
gpg --output TechnoWikis.docx --decrypt TechnoWikis.docx.gpg
We can check how simple it is to add one more level of protection to the files that are sent in Linux.