The formats of the images have evolved to such an extent that we can now find extensions of the devices that capture the image. We speak for example of the HEIF format (High Efficiency Image Format) which is typical of Apple devices and whose extension is .heic. Although it is Apple's own it will also be present in Google's Android P., HEIF is basically a replacement for JPEG ..
To understand this a bit, we will say that the HEIF format creates images with a much smaller file size, but with a higher image quality than the JPEG standard. This will put HEIF over JPEG in a short time and this action is achieved since HEIF makes use of more advanced compression methods and is based on the high efficiency video compression format or HEVC or H.265.
To our knowledge, Apple integrates it into their devices (since iOS 11) but the original HEIF developer has been Moving Picture Experts Group (MPEG) and to give you an idea of ​​this improvement, it has been said that HEIF images can be Half the size of a JPEG file, but retaining its image quality or even better, this will mean more storage space..
In addition to this, HEIF also adds functions such as transparency and 16-bit color or even add editing values ​​such as rotation, cropping, titles and overlays. Well, when you take a picture with your Apple device, it will save the image with the .heic extension, HEIC is a container format thanks to which it will be possible to host and integrate sounds and images encoded with the HEVC format.
So far everything is fine but the problem (almost eternal) when using HEIF (or .heic) is the compatibility either to integrate it and files, multimedia or more, so in TechnoWikis we will explain how to convert HEIC to JPG in macOS of a simple way and thus enjoy the traditional format of images..
To keep up, remember to subscribe to our YouTube channel! SUBSCRIBE
1. How to convert a .heic image to .jpg in macOS using preview
macOS gives us the opportunity to visualize the image with the preview, but we can go further and convert it to JPG
Step 1
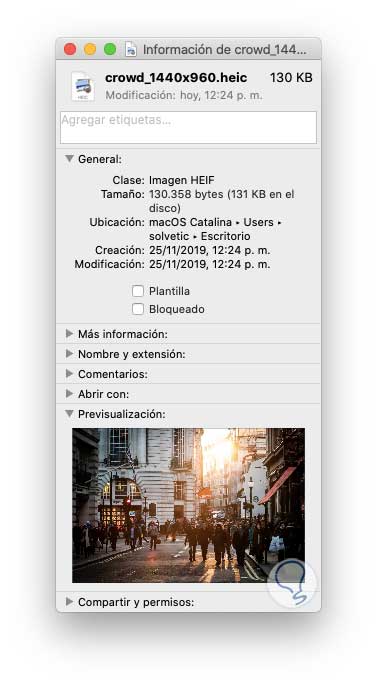
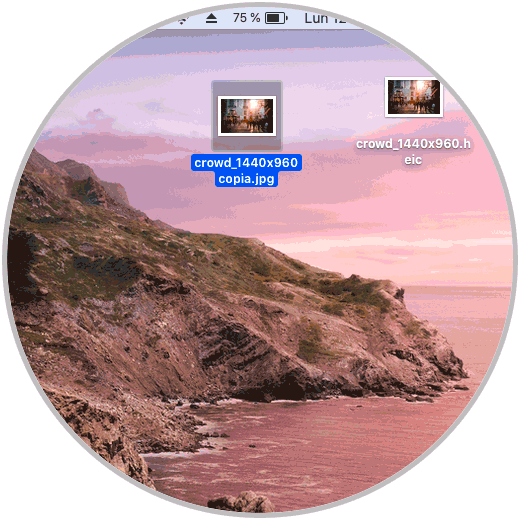
For this we verify that the image to be used is HEIC or HEIF:
Step 2
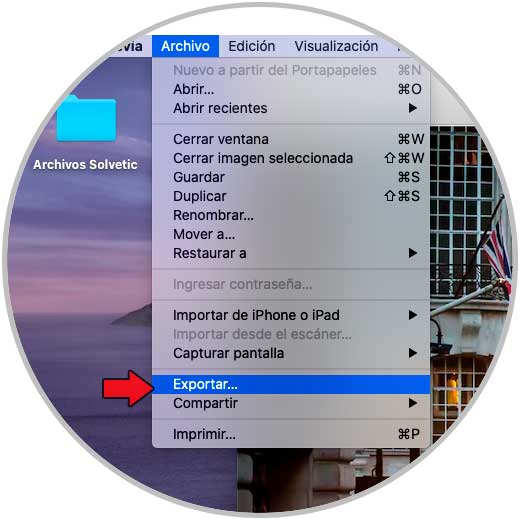
Now, for conversion, we open the image with Preview and from the File menu select the Export option:
Step 3
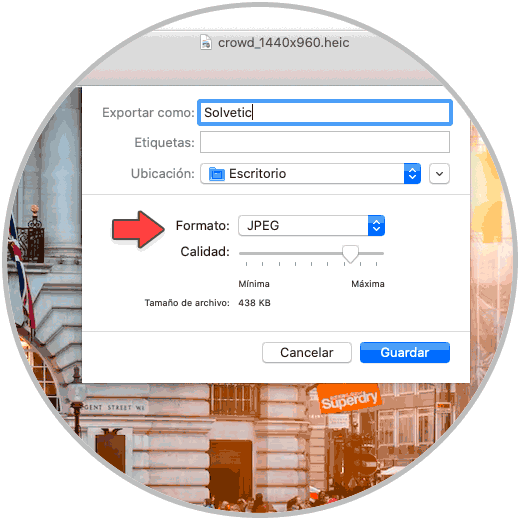
In the window that will be displayed we define the following:
- Location where we want it to be exported
- In the Format field we select JPEG
Step 4
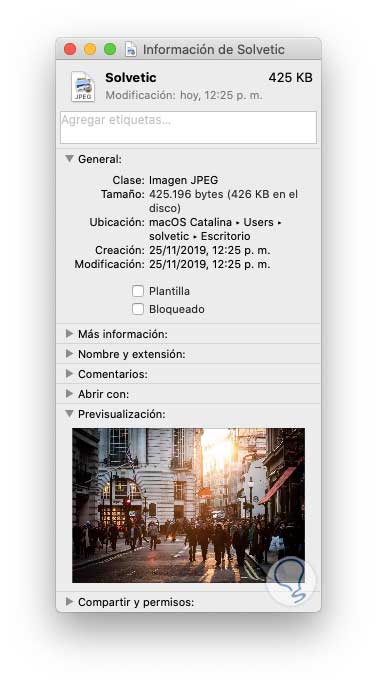
In addition to this we can establish the image quality, finally click on “Save†to apply the changes and when accessing the image properties we validate that it is JPEG:
It's that simple to use macOS Preview to convert HEIC to JPG.
2. How to convert a .heic image to .jpg in macOS using Automator
Automator is the macOS automation manager thanks to which we can create tasks and allow them to be executed automatically according to established order criteria, it sounds strange, but it is simple.
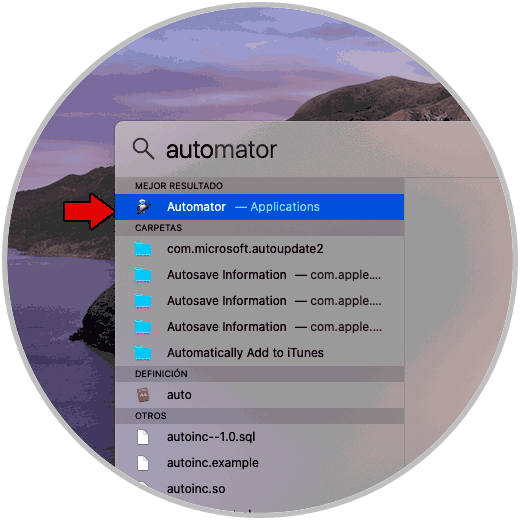
Step 1
For this we look for Automator in Spotlight:
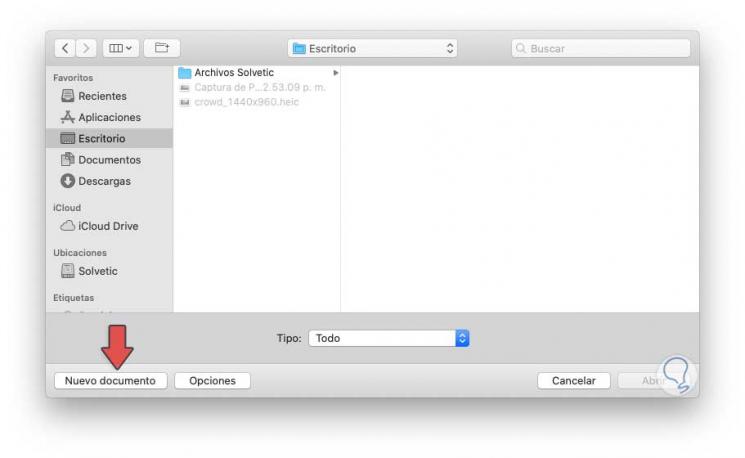
Step 2
We double-click on the app and in the pop-up window select “New documentâ€:
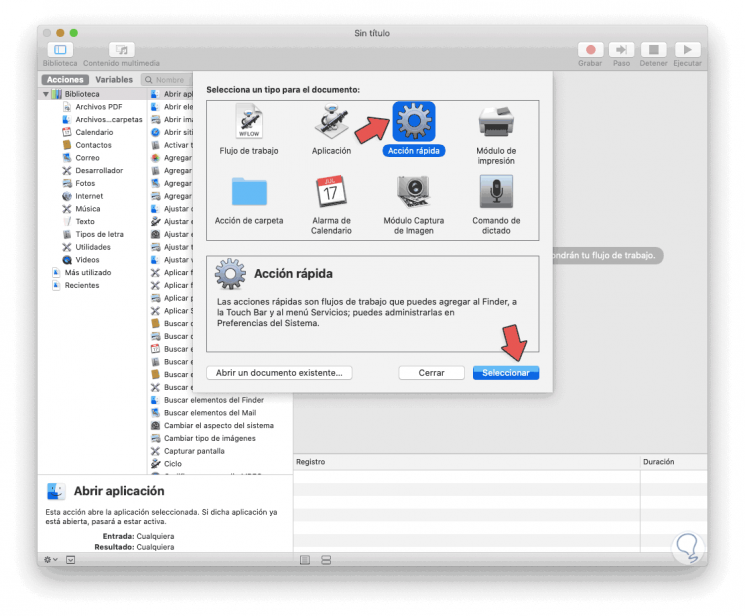
Step 3
In the next window we select the “Quick action†option and click on the “Select†button at the bottom:
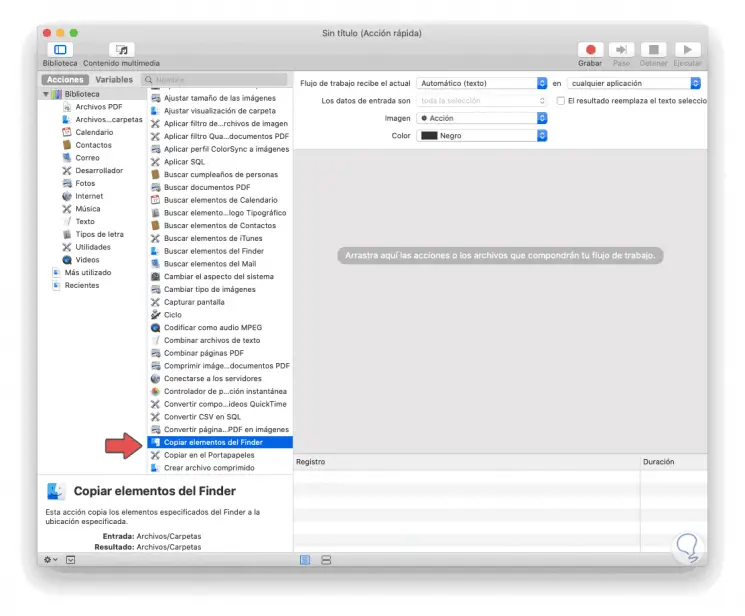
Step 4
The following window will be displayed and in the left side panel we select the line “Copy Finder Itemsâ€:
Step 5
We double click on it to add it and in the central panel we select the location where the objects will be copied, in this case the Desktop:
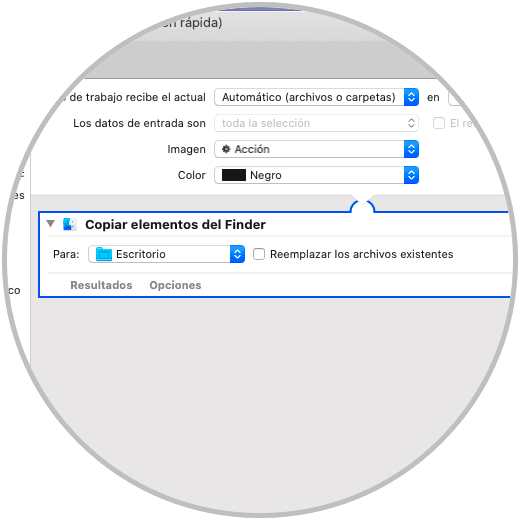
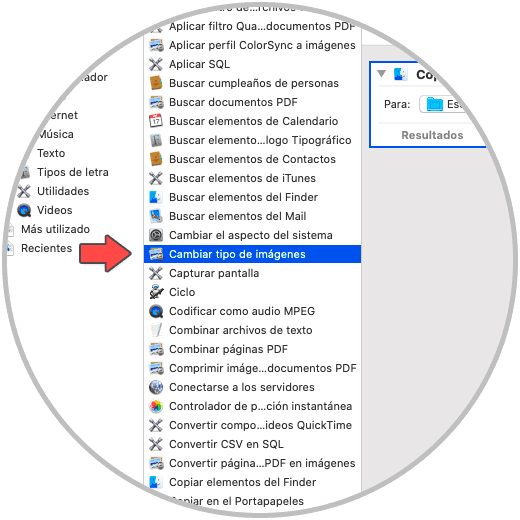
Step 6
Now we locate the line called "Change type of images":
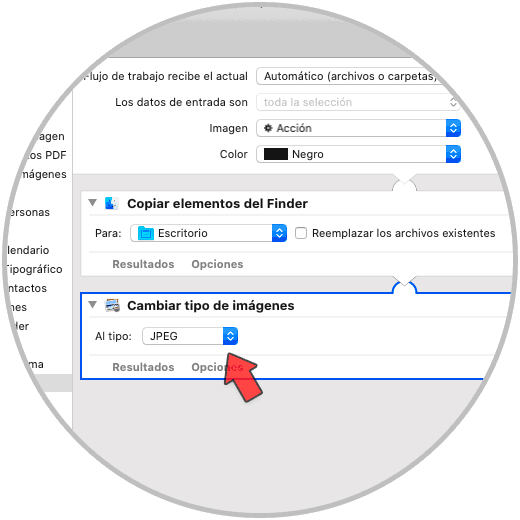
Step 7
Again we double click on it and this time in the "To type" field we select JPEG:
Step 8
We go to the File / Save menu and assign a name for this quick action (this is the name visible in the context menu):

Step 9
Once saved, we can right click on the HEIF or HEIC image and select the task we have created:
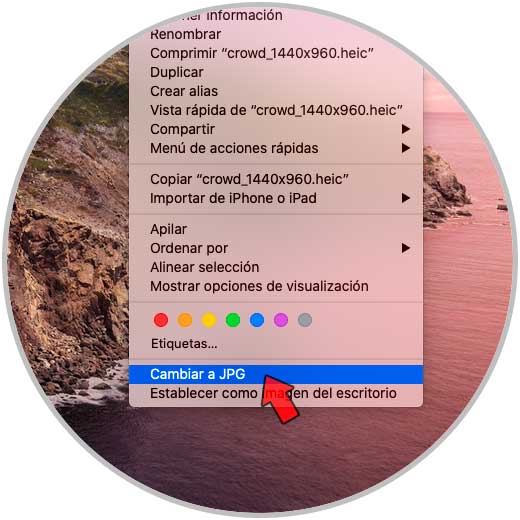
Step 10
This will create a copy of that image, but in the form .jpg:
With the method you select it will be possible to convert this new format to JPG in a simple and fully functional way.