VLC is one of the most commonly used applications to reproduce audio and video objects in various formats such as MPEG-2, MPEG-4, H.264, MKV, WebM, WMV, MP3 and one of its advantages is that it can be used in operating systems such as Windows, macOS, Linux and more..
In view of this versatility of VLC, it is normal that from there we reproduce our favorite videos or audio but, what would you do if your movie or song is not heard ?, obviously the first thing we do is validate that our speakers are at the correct volume and that the integrated VLC audio is correct. But if all this is fine, and still not listening to our multimedia element, we can simply be faced with a VLC error. You should not worry since TechnoWikis has the right solutions for you to correct this completely.
1. How to check VLC Media Player audio
As we have mentioned, the audio is generated both from the external media of the equipment and with the audio of the VLC player itself, so if it is silenced it will be impossible for us to hear something of what is playing or watching.
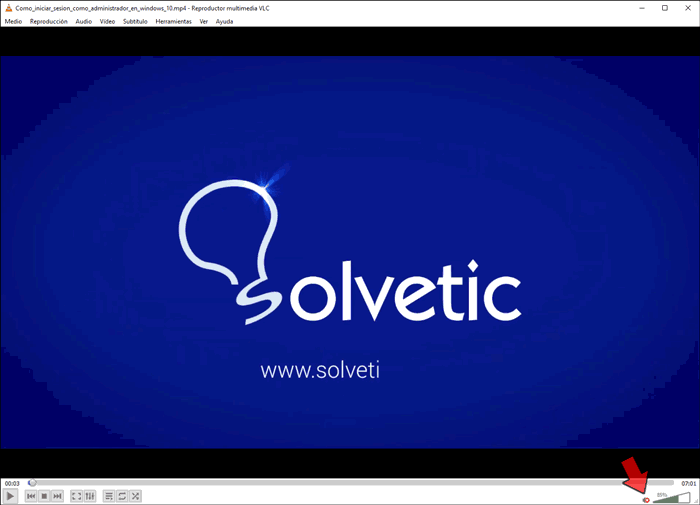
To validate this we place the horn icon at the bottom next to the volume level and if there we see an X it means that it is silenced. Just click on this icon to activate the audio again..
2 . How to adjust the VLC audio settings
An incorrect audio configuration certainly has a negative impact on the way the audio will be played in VLC.
Step 1
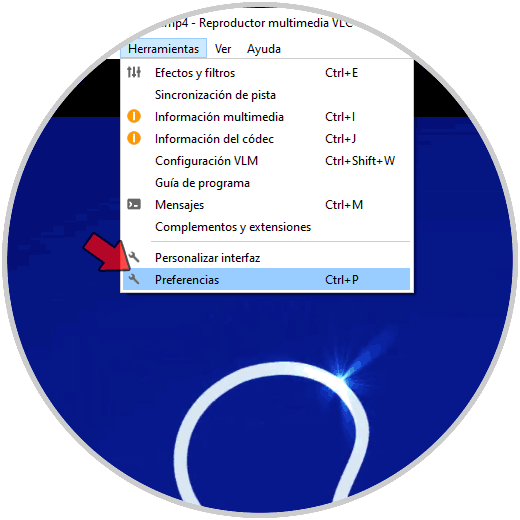
To display these settings, go to the Tools / Preferences menu or use the Ctrl + P keys:
Step 2
In the window that will be displayed we go to the “Audio†tab and there we will do the following:
- Check the box “Enable audioâ€
- In the "Output module" field we set the value "DirectX audio output"
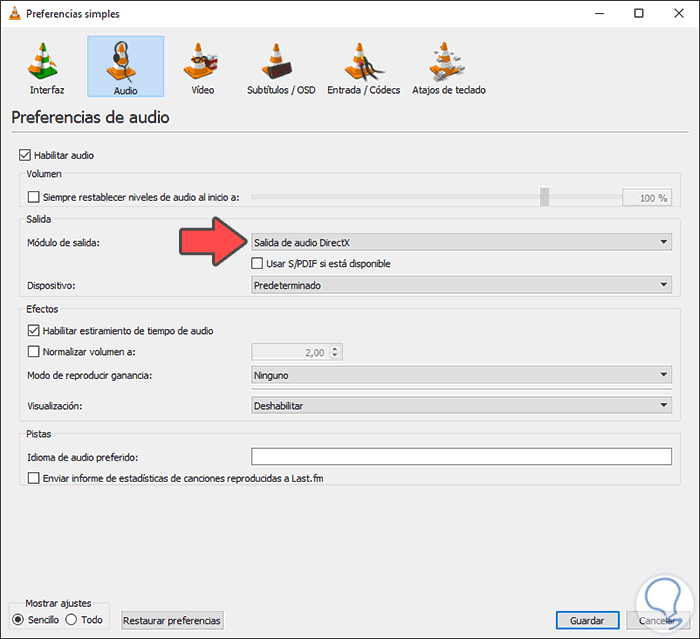
We click on "Save" to confirm the changes.
3. How to reset VLC Media Player audio preferences to factory settings
Sometimes simply resetting the player settings will be enough for the audio to play naturally and as it should be
Step 1
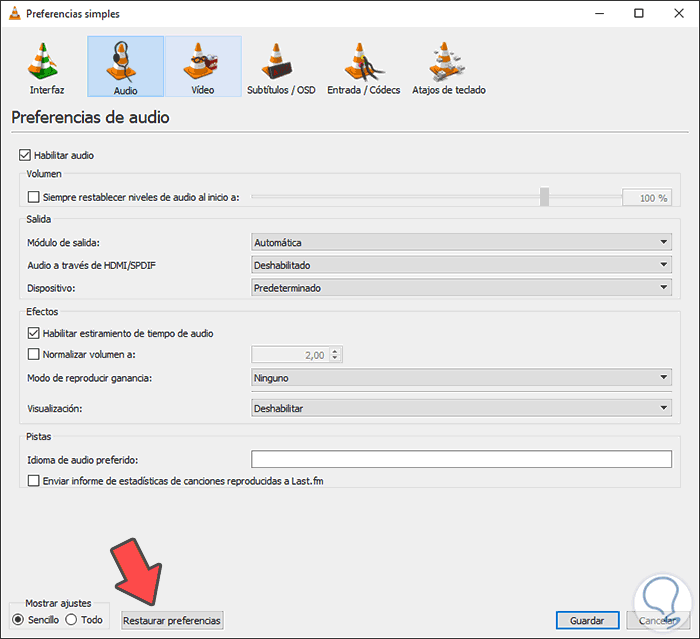
To reset these settings we go back to the menu
- At the bottom we will click on the “Restore preferences†button
Step 2
The following window will be displayed. We confirm the action by clicking on the Yes button.

4. How to disable all improvements in the VLC system
This is a functionality that aims to offer the best experience of using VLC, but this can cause a side effect in that process.
Step 1
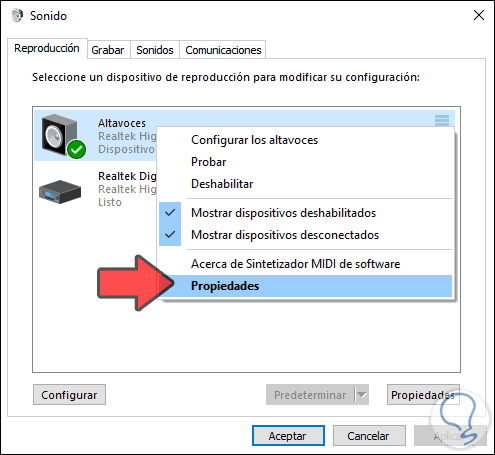
To disable this function we go to the sound control panel integrated in Windows 10 and go to the "Playback" tab and there we right click on the current device and select "Properties":
Step 2
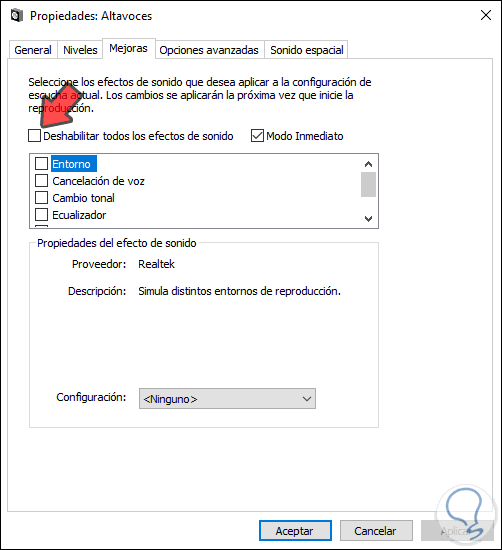
In the new window that appears, we will go to the “Improvements†tab and there we uncheck the box “Disable all sound effects†We click Apply and Accept to save the changes.
5. How to convert video or audio to another VLC format
Many times it may happen that the audio format used does not have sufficient levels of compatibility with the system affecting either its audio or video. In this case TechnoWikis advises you to convert the video to a different format.
Step 1
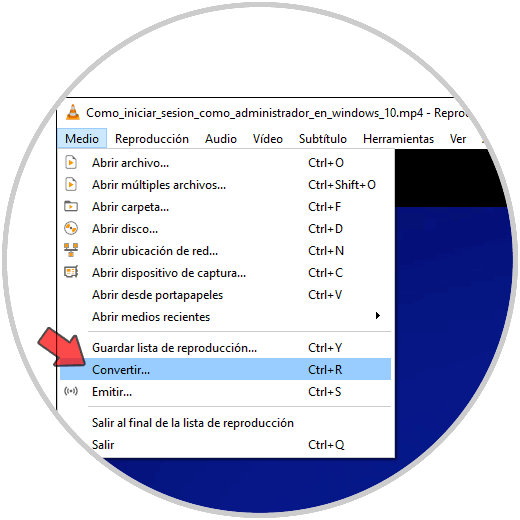
This process can be done with the VLC itself or with a different application, if we use VLC we must go to the Media menu and select Convert:
Step 2
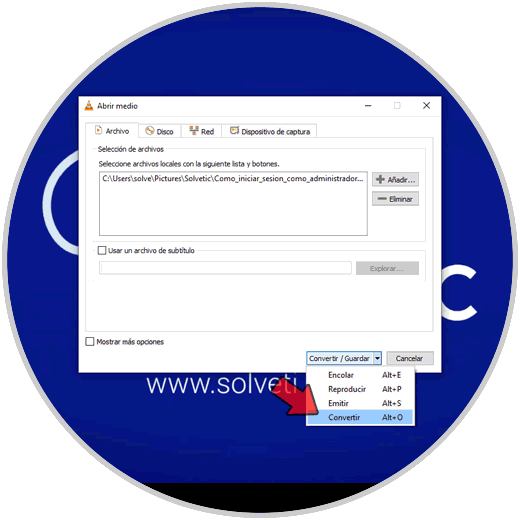
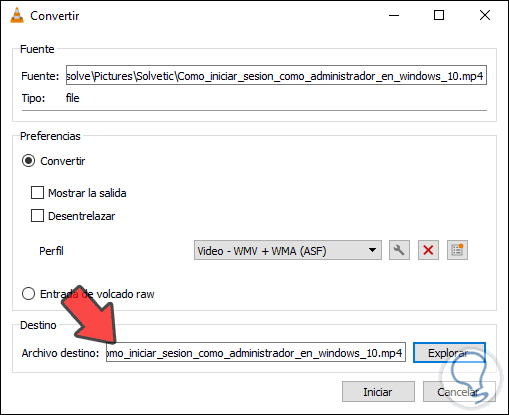
In the next window we select the video or audio to convert and in the lower part we select “Convertâ€:
Step 3
Finally, we select the type of format in which it will be converted and specify the directory where said conversion will be saved. We click on Start to execute the process.
6. How to check the sounds of the VLC system
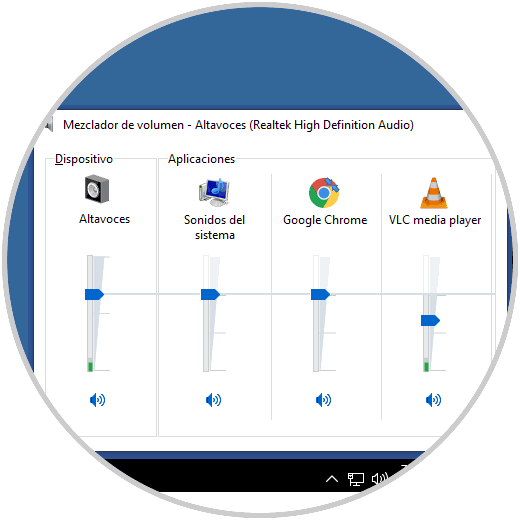
Windows 10 has integrated a functionality with which we can independently manage the audio for currently open applications. There it can be that VLC is without volume, for this we right click on the audio icon in the taskbar and select the option “Open sound settingsâ€, in the different options we validate the VLC status:
7. How to set the current default device in VLC
It is possible that for some reason VLC does not detect the audio device as the default preventing the sound from coming out naturally, this can be corrected in a very simple way from the Tools / Preferences menu and there we go to the “Audio†tab and configure the next:
- In the "Output module" field we set the value "Windows multimedia device output"
- In the field “Audio via HDMI / SPDIF†we leave the default value
- In the "Device" field we select the external player that we use
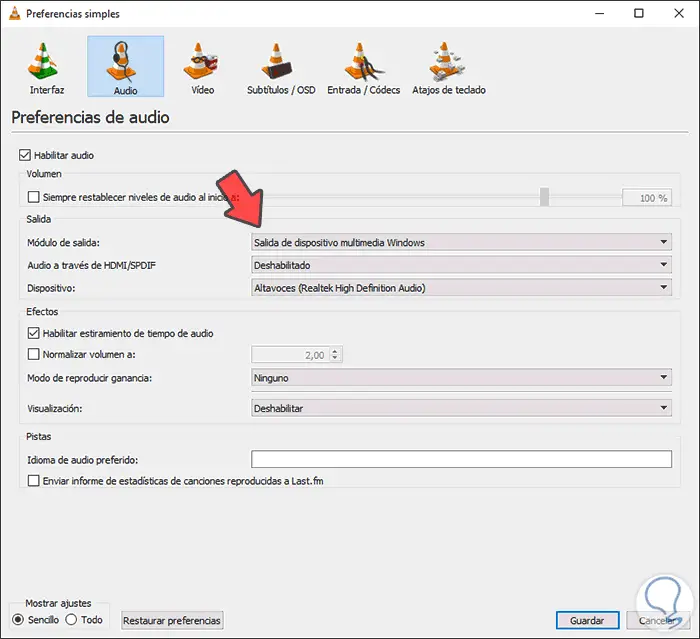
We click on Save to apply the changes..
8. How to update VLC
Undoubtedly, when we update an application or program this can help correct numerous errors of these, so updating VLC to the latest version (if available) may be the correction to the audio problem.
Step 1
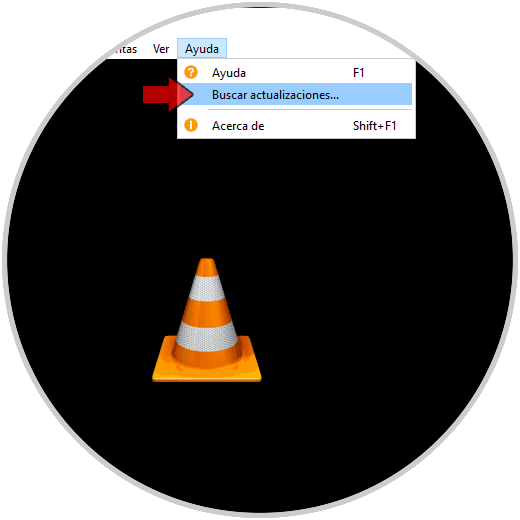
To validate new updates in VLC we must access the application and go to the Help menu / Check for updates:
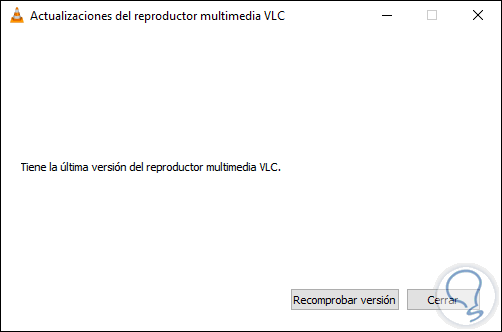
Step 2
As a result we can download a new version or verify that we have the most recent version of VLC:
Some of the solutions that we have given you will be of great help so that the audio returns in VLC.