Managing Windows Server 2019 is a task that implies responsibility since any change we make in the domain will have an impact on the entire domain and the objects that are linked to it, edit or delete a shared folder, edit the IP address or change the name The server or domain will simply affect the access of all users unless it is done by a purely administrative task and with prior authorization..
One of the most delicate changes is to rename Windows Server 2019 since this includes creating new zones and making each object in the domain assume the new change in order to have the necessary accesses. Changing the domain name Windows server 2019 is not a frequent task in Windows Server 2019 but it can occur for specific reasons such as:
Reasons to change domain name Windows Server 2019
- Change in the name of the organization
TechnoWikis will explain how to change domain name in Windows Server 2019 with a computer whose domain is solvetic.com.
Read before changing domain name
Before proceeding with the change we must take into account some key aspects such as:
- DNS zones: for this process it will be necessary to create the new zone files before renaming the domain so that the name resolution is correct.
- Hosting the domain: at this point we must be clear about where the domain is to be stored.
- Forest functional level: this functional level is required to be equal to or higher than Windows Server 2012 R2.
- Computer name: it is ideal to rename the server name for the configuration of the applications after editing the domain name.
- Authority Certificates (CA: If authority certificates are to be managed in Windows Server 2019, they must be guided by the Microsoft indications available at the following URL: CA Certificates
To rename Windows Server 2019 we must be in the “Domain Administrators†group for permission issues..
To keep up, remember to subscribe to our YouTube channel! SUBSCRIBE
1. Install RSAT Windows Server 2019
The first step to take will be to prepare the operating system for the update, for this we must install RSAT (Remote Server Administration Tool) which is a set of utilities in Windows Server that includes the Server Administrator, the Microsoft Management Console (MMC) add-ons ), Windows PowerShell consoles, cmdlets and providers, and command-line tools to manage roles and features to be executed in the system.
Step 1
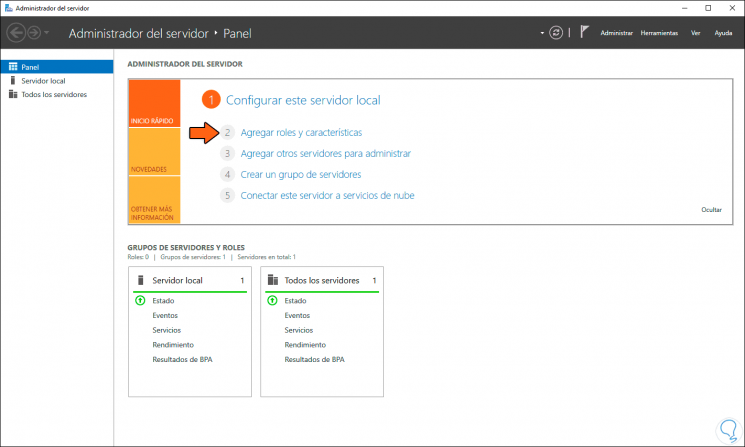
To install RSAT on Windows Server 2019 we go to the Server Manager and there we select “Add roles and featuresâ€:
Step 2
The following wizard will be displayed:

Step 3
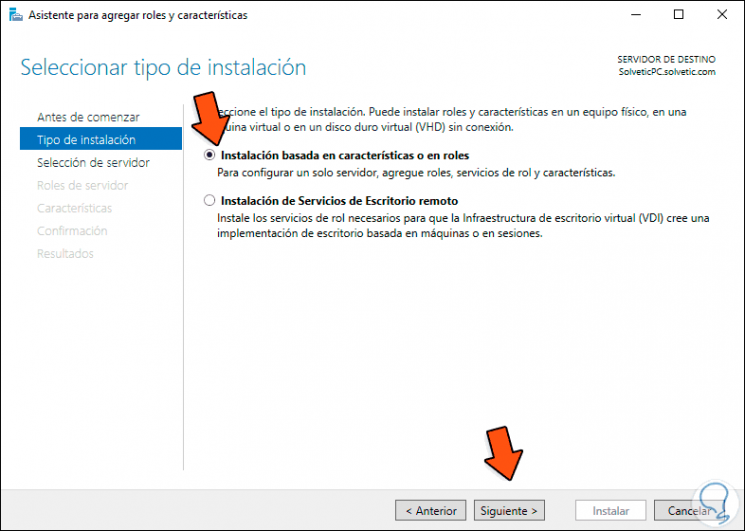
We click on Next and in the next window we activate the box “Installation based on roles and characteristicsâ€:
Step 4
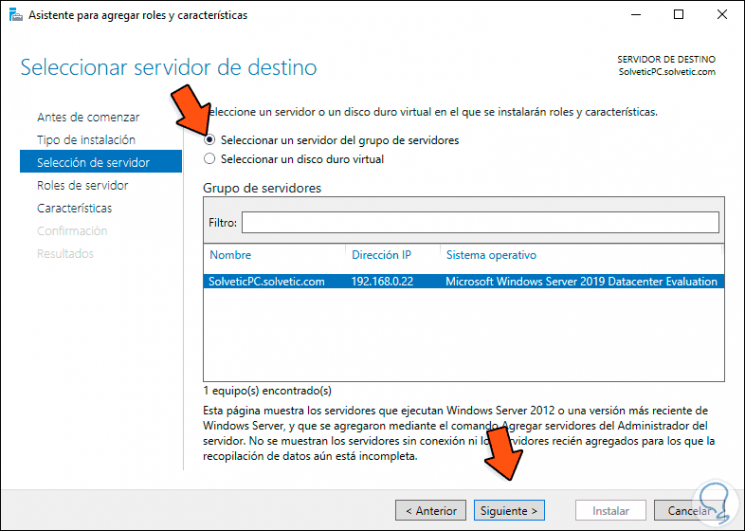
Then we select the server where RSAT is to be installed:
Step 5
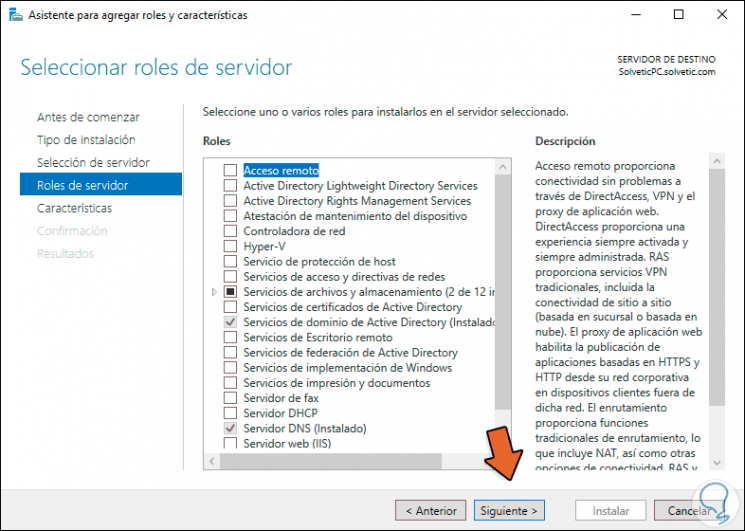
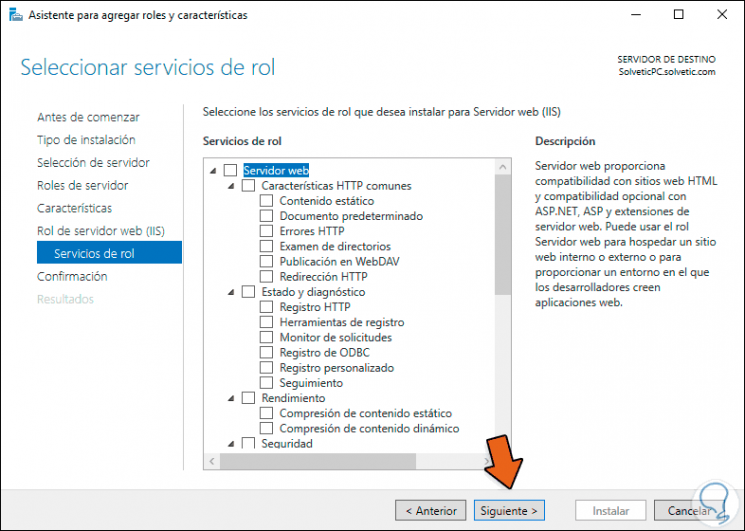
In the following window we find the roles of the system:
Step 6
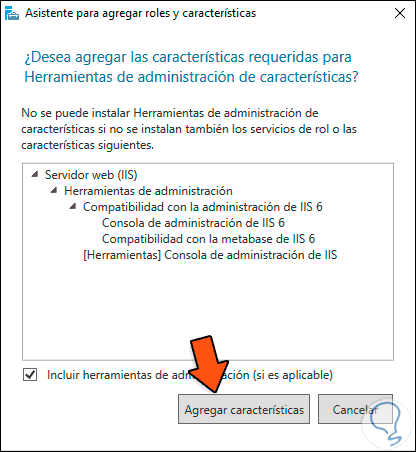
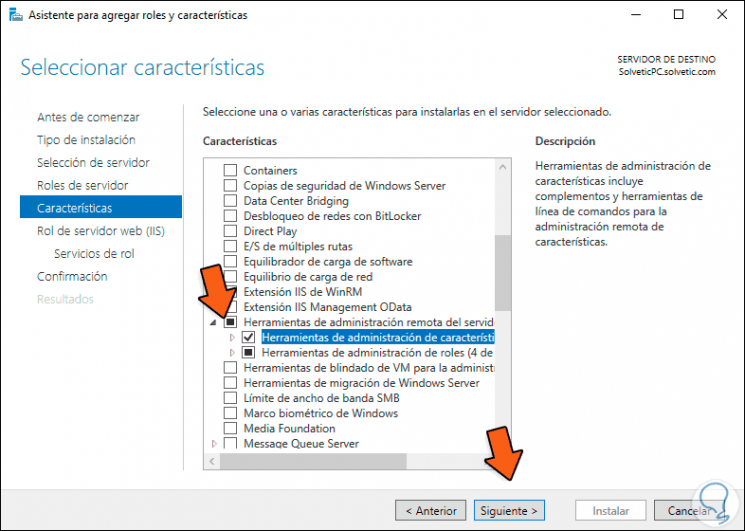
In this case we will not add any role, click Next to access the features of Windows Server 2019 and in the following window we activate the “Remote server administration tools†box to add them and the following will be displayed:
Step 7
We click on “Add features†and validate that the box is active:
Step 8
We click Next and we can configure some role parameters:
Step 9
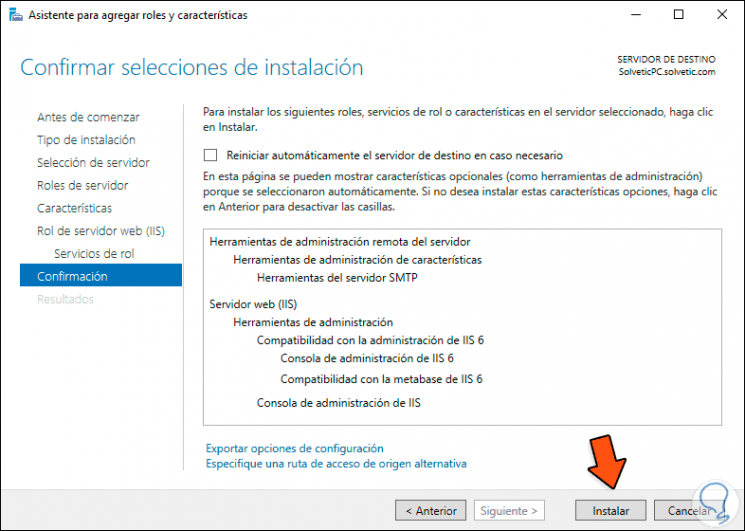
After this we will see the following:
Step 10
We click on the "Install" button to start the RSAT installation process on Windows Server 2019:
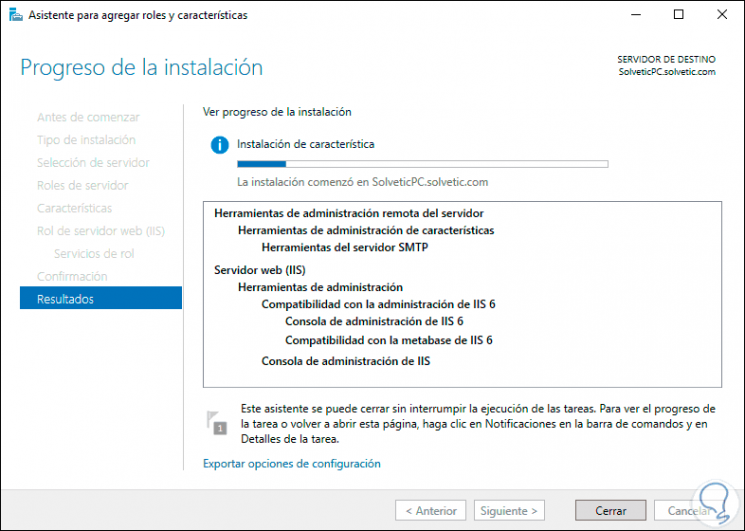
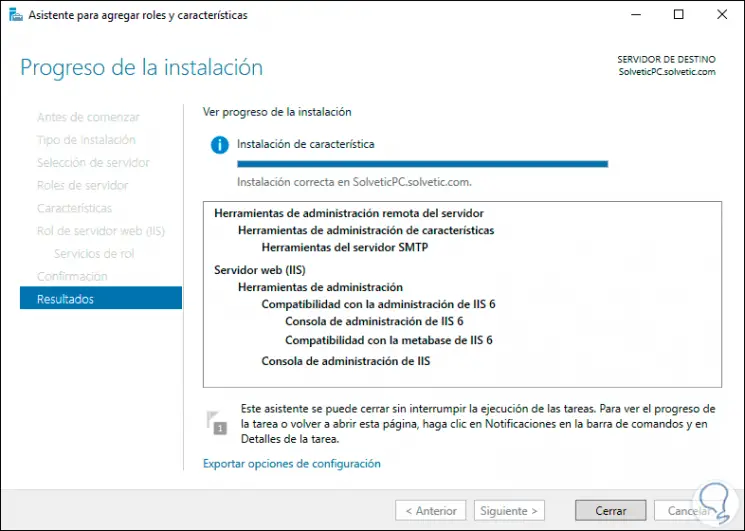
Step 11
When this process ends we will see the following. We click on "Close" to exit the wizard.
2. Create DNS zone Windows Server 2019
As we mentioned at the beginning, it is required to create a new zone to redirect services.
Step 1
To do this we go to the Server Administrator and there we will go to Tools / DNS:
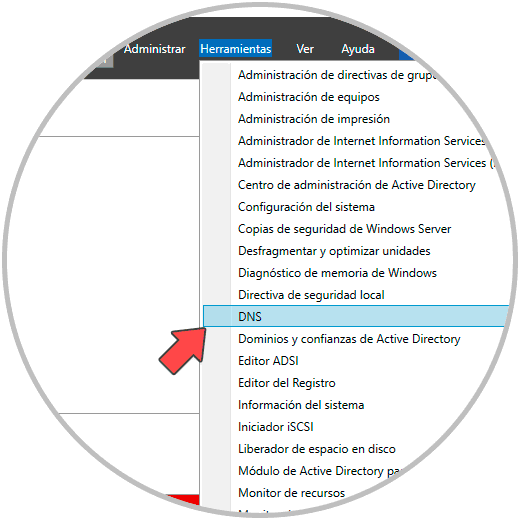
Step 2
In the displayed window we select the server and there we right click on “Direct search areas†to choose the “New zone†option:
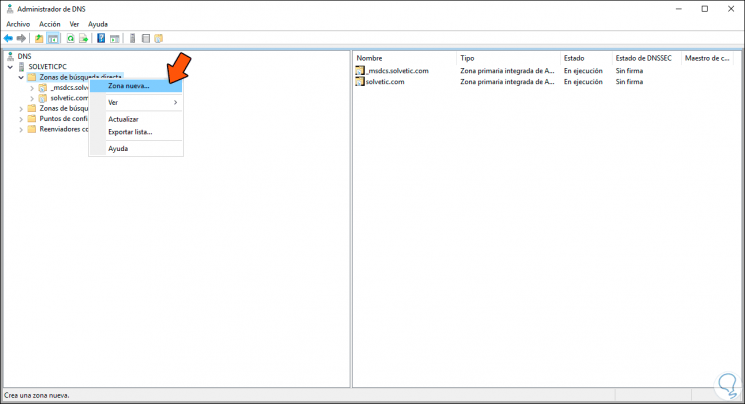
Step 3
The following wizard will be displayed:
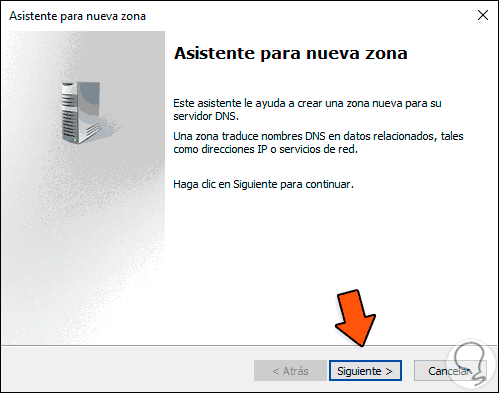
Step 4
We click on Next and in the next window we activate the “Main zone†box:

Step 5
We click Next and now check the box "For all domain controllers that run on domain controllers in this domain":
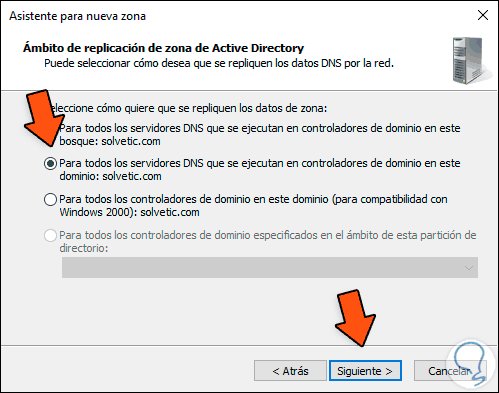
Step 6
In the following window we assign the name of the zone:
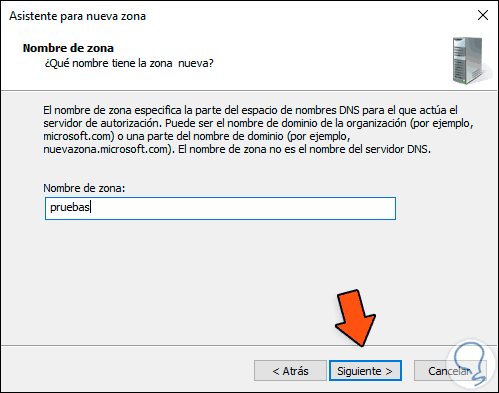
Step 7
We click Next and now we define how to apply the dynamic updates:
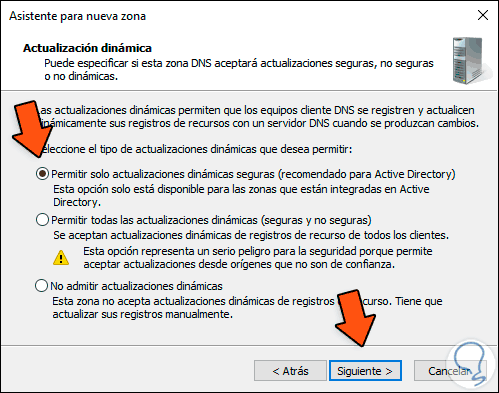
Step 8
In the next window we find a summary of the task to be performed:
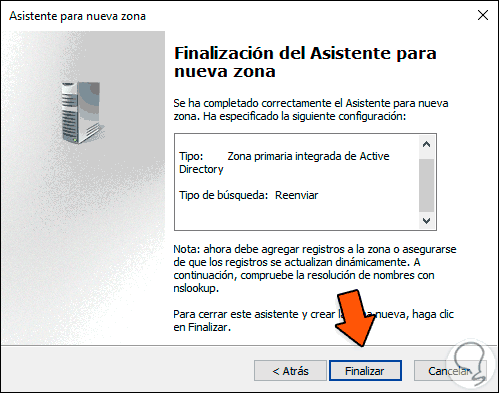
Step 9
We click on "Finish" to complete the process:
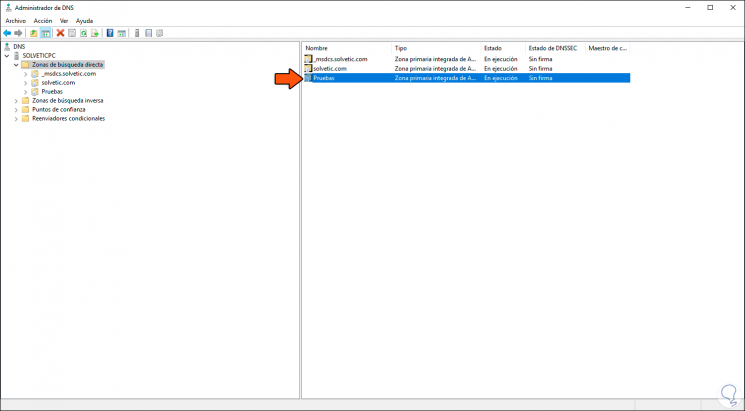
Step 10
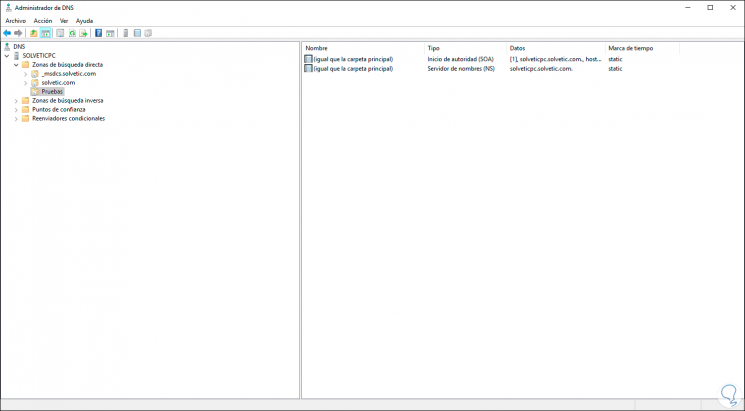
We can access the content of the area to visualize its properties:
3. Create Windows Server Forest 2019
Step 1
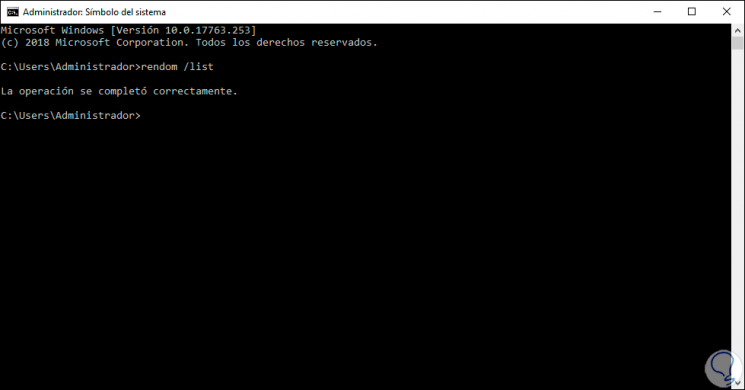
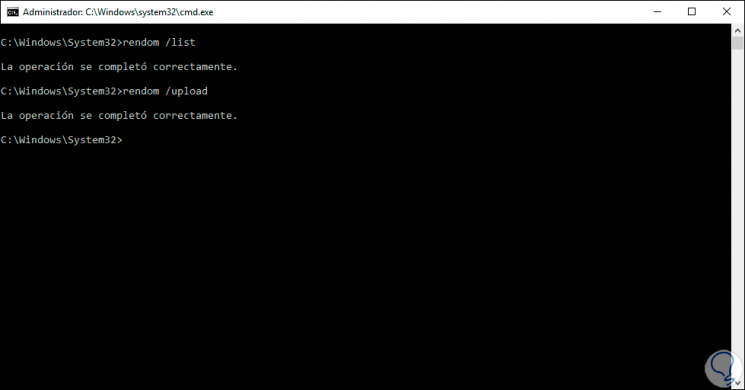
The next step will be to validate the forest in which the domain name will be updated, for this we access the command prompt and there we execute the following line:
rendom / list
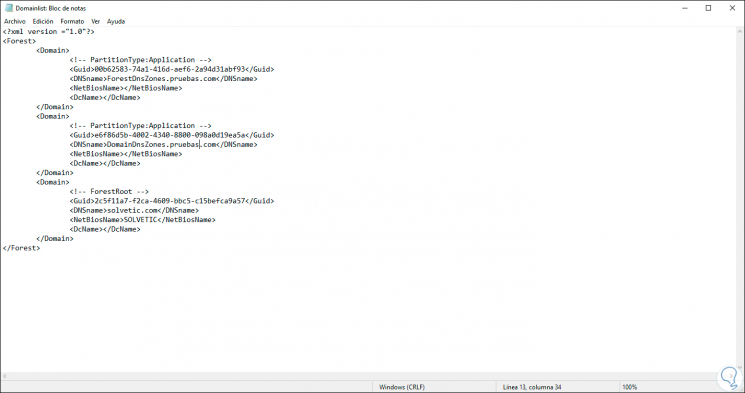
Step 2
This will create a DomainList file in the System32 path (C: \ Windows \ System32 \ DomainList.xml), we go to this file and open it with a text editor and see the following:

Step 3
There we must change the name of the current domain to the new name. We save the changes.
Step 4
We will go back to the command prompt console and update the changes with the command:
rendom / upload
4. Change domain name Windows Server 2019
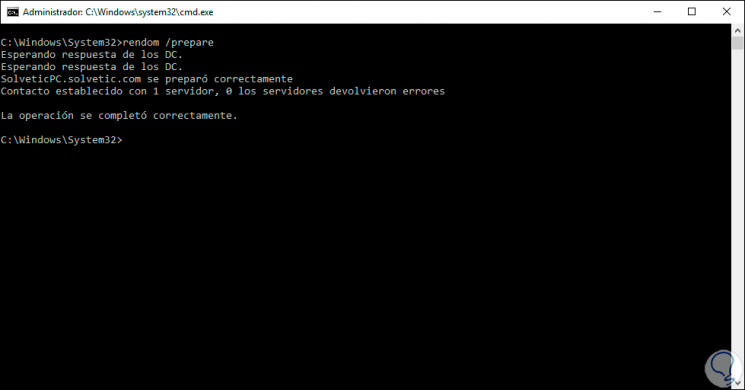
Step 1
We are ready to prepare the domain in order to make the change, for this we execute the following command in the console:
rendom / prepare
Step 2
We apply the changes in the domain by executing:
rendom / execute
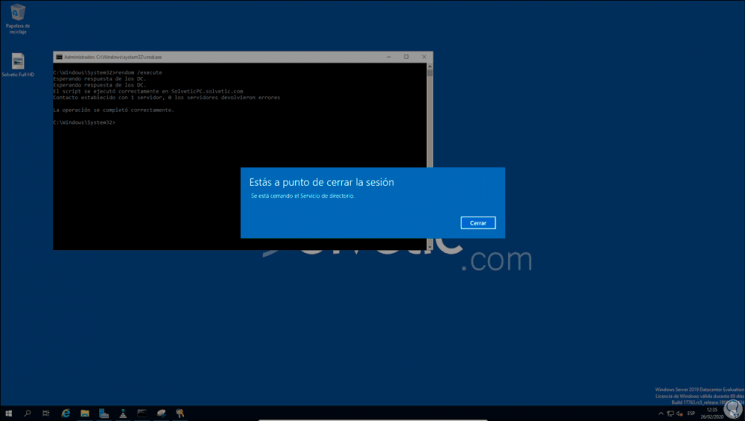
Step 3
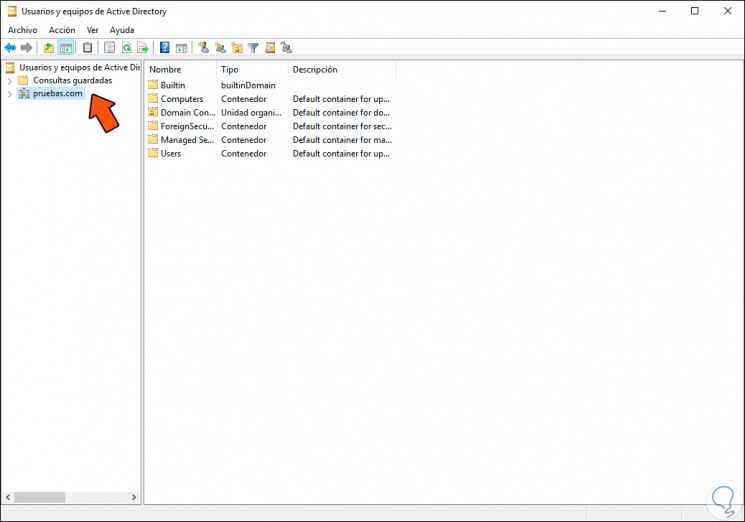
As we can see, when this is completed, the session must be closed, when we access it again we go to Active Directory Users and Computers and there we verify that the domain name has been changed:
Step 4
Finally, we must execute the following syntax on the domain computers so that they are integrated into the new domain:
netdom computername computer_name.domain / add: computer_name.domain netdom computername computer_name.domain / makeprimary: computer_name.domain
Step 5
Finally, on client computers we update the policies with the following order:
gpfixup /olddns: old-domain.com / newdns: new-domain
With these steps we will be able to modify the domain name in Windows Server 2019 according to the need of the organization.