Windows Server 2019 is the new bet that Microsoft has launched for small, medium and large companies thanks to all the innovations and improvements that are integrated into it. But before we talk a bit about these developments, it is vital that we understand the needs of a Windows Server 2019 server . This implies constant maintenance, avoiding shutdowns or unforeseen restarts (this is because there are used many roles and services to which the users and client teams of the organization are linked, using the most special dedicated hardware and many other actions..
Windows Server 2019 is available for official download at the following Microsoft link:
Windows Server 2019
Benefits Windows Server 2019
To understand a bit all the benefits of using Windows Server 2019 in our organizations we find:
- Improvements in the migration tasks of clusters between domains.
- Greater security using the function of software defined networks (SDN) which has been created to optimize the execution of workloads in the different environments where Server 2019 is used.
- System Insights has been integrated as a new feature of the server thanks to which it has a greater capacity of local predictive analysis natively for the Windows Server 2019 operating system.
- Compatibility of the Server Core application on demand.
- Improvements in the performance history.
- HTTP / 2 integration in order to access faster and more secure web browsing on the server (although this is not a good security practice)
- News in the advanced protection against threats of Windows Defender (ATP) (Windows Defender Advanced Threat Protection) which will avoid attacks at the kernel and memory level preventing malicious files from being executed.
- Windows Admin Center support and many more functions.
Even with all the novelties of networks, security, protocols, interfaces, etc, there will be simple but essential tasks in the server so that everything works as it should be and this is with the use of users and groups, it is logical, if you do not have a user How do you access the server or the domain on a client computer), and if we are not in a group, how do we have the necessary permissions ?, hence the importance of both users and groups .
Importance Windows Server domain
Because these objects are important in a domain in Windows Server 2019, there are fundamental reasons such as:
In this way, a specific area, for example IT, can have a specific group and users that have special permissions on the server, permissions or accesses that others will not have. This prevents us from granting permits to users who do not require them but who do put at risk the security of the system and its structure..
We clarify that we can create a user as the type of dedicated service accounts to be used in unique applications on the server.
In Windows Server 2019, after creating the domain, by default several integrated accounts and security groups are created and preconfigured with the respective rights and permissions as the case may be, to see these user accounts and groups we must go to the following route:
- Active Directory Users and Computers
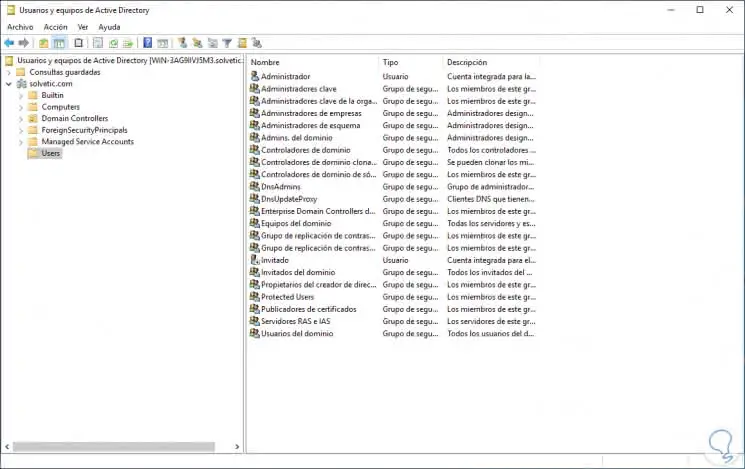
We can see the different types of users and groups with a short description about what role or role meets..
Windows Server Management
In the Windows Server 2019 domain we find two types of management that are:
- Service administrators who are responsible for maintaining and managing the Active Directory Domain Services (AD DS), also counting the management of domain controllers and the configuration of AD DS.
- Data administrators which manage the data stored in AD DS, in the servers and in the client computers of the domain.
We can not reach and create a group or user just because, we must know what function that user will do and what type of group will be created, for this Windows Server offers the following types of users:
Windows Server user types
- Standard accounts which fulfills the role of access to server functions to which the respective permission has been assigned.
- Administrator accounts which have total control in the domain and this is in the Administrators group
Now, at the group level we find the following options in Windows Server 2019:
- Distribution groups which we can implement to create email distribution lists.
- Security groups, which are special, since they assign the permissions to the shared resources in the domain
Apart from this we must keep in mind that Windows Server 2019 manages the groups at the next level:
Now, with this small introduction we will learn to create a user and a group in Windows Server 2019 to better manage all these parameters and control each action of these.
To stay up to date, remember to subscribe to our YouTube channel! SUBSCRIBE
1. How to create a user in Windows Server 2019
In Windows Server 2019 we can create new OUs (Organizational Units) to manage the work in areas, that is, we can create an OU called HR for human resources, an OU called IT for the technology area etc, then add the users in each of these OUs as the case may be.
Step 1
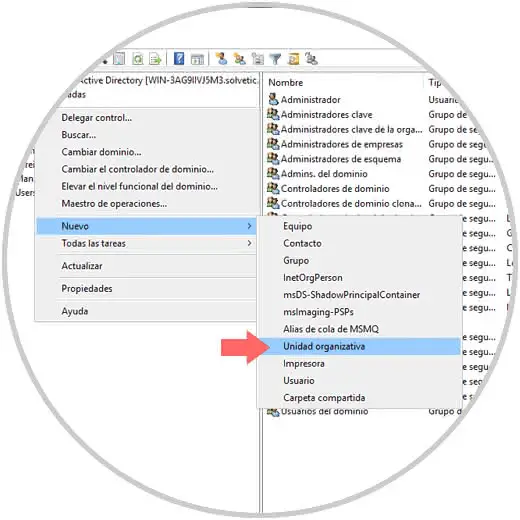
If we want to create an OU, we go to Active Directory Users and Computers and there we must right click on the domain and select the option "New / Organizational Unit"
Step 2
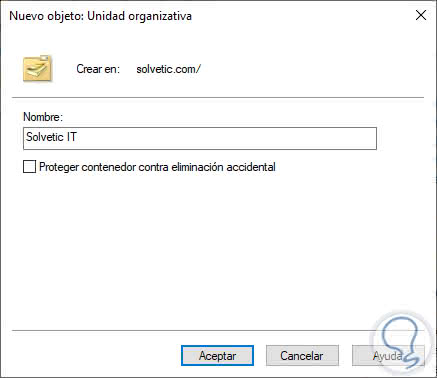
We assign the desired name of the OU. Click OK to create it in the server structure.
Step 3
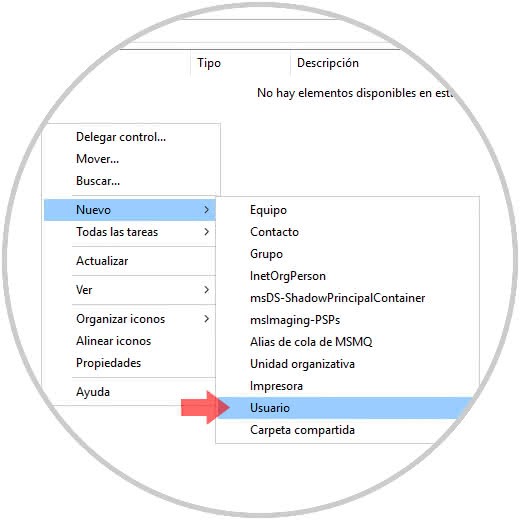
Once created, we will create the user in said organizational unit and for that we access it, we right click in some free place and select the option "New / User"
Note
Another option for this task is to go to the Action / New / User menu.
Step 4
The following wizard will be displayed where we register the following:
- Names and surnames of the user
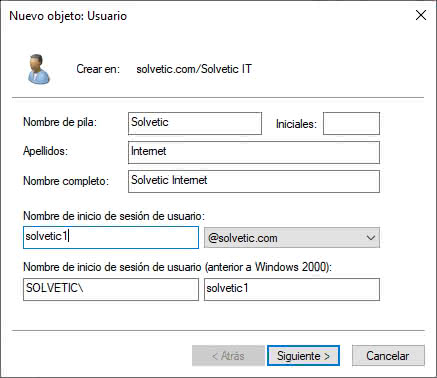
Step 5
Click on Next and then define:
- Permissions on the account such as not changing the password, preventing the password from expiring, forcing the change of the same, etc.
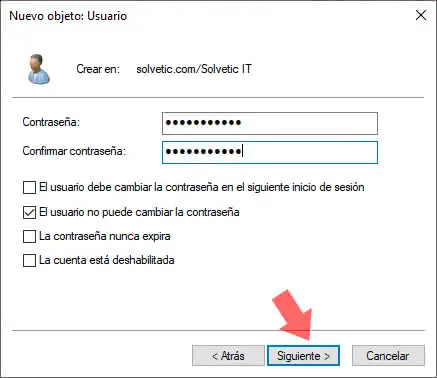
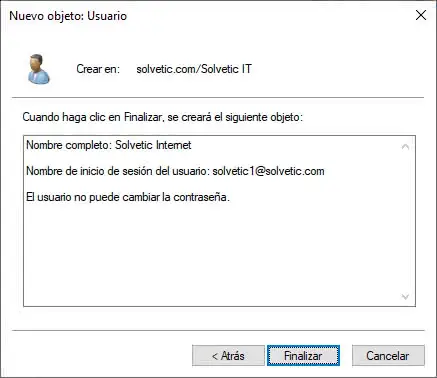
Step 6
We will see a summary of the user to create as details and OU where it will be hosted. Click on Finish
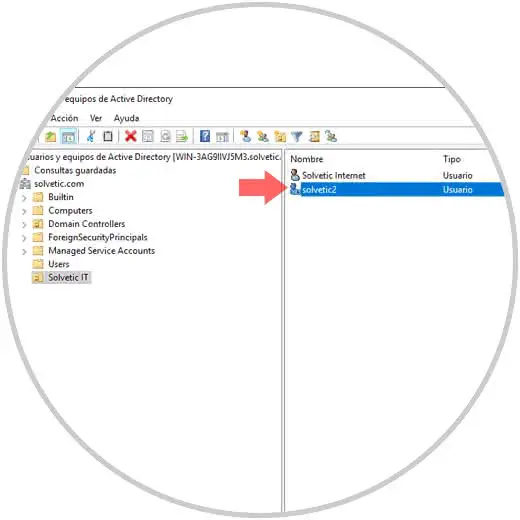
Step 7
Now we will see that user in the unit that we have selected:

Step 8
This is the basic process of creating a user in Windows Server 2019, but as we know you are a professional and you like to go further, we will show you how to create a user using Windows PowerShell which is the server administration console. For this we must use a very simple syntax, in this case we are going to create the user solvetic2 in the TechnoWikis IT OU, so that we execute the following:
dsadd user "CN = solvetic2, OU = TechnoWikis IT, DC = TechnoWikis, DC = com"
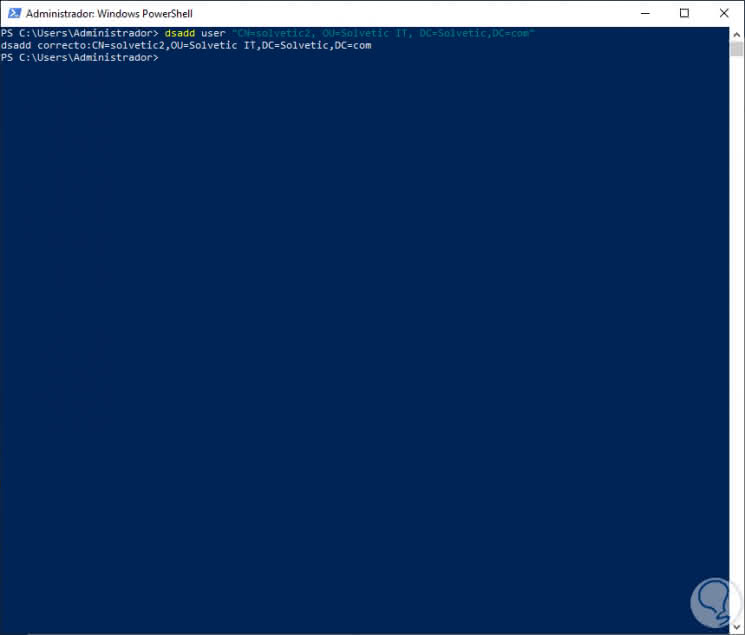
Step 9
This will create this default account disabled. There we can access the account and activate it by assigning a password.
Step 10
We know very well that the profile of the user is his identity in the domain, so when double clicking on it we will see the following:
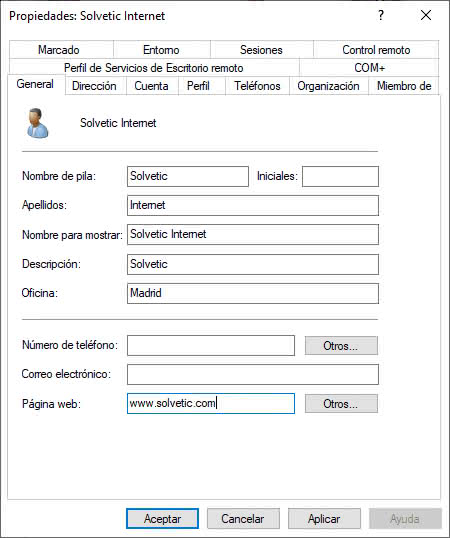
We can see a series of tabs where it is possible to assign specific data of this user as website, location, address, fax or telephone number, groups to which it belongs, range of activity hours and more, each of these fields we can assign in PowerShell also using the following syntax and completing the correct values:
dsadd user <UserDN> [-samid <SAMName>] [-upn <UPN>] [-fn <FirstName>] [-mi <Initial>] [-ln <LastName>] [-display <DisplayName>] [-empid <EmployeeID>] [-pwd {<Password> | *}] [-desc <Description>] [-memberof <Group> ...] [-office <Office>] [-tel <PhoneNumber>] [-email <Email>] [-hometel <HomePhoneNumber>] [- pager <PagerNumber>] [-mobile <CellPhoneNumber>] [-fax <FaxNumber>] [-iptel <IPPhoneNumber>] [-webpg <WebPage>] [-title <Title>] [-dept <Department>] [-company <Company>] [-mgr <Manager>] [-hmdir <HomeDirectory>] [-hmdrv <DriveLetter>:] [- profile <ProfilePath>] [-loscr <ScriptPath>] [-mustchpwd {yes | no}] [-canchpwd {yes | no}] [-reversiblepwd {yes | no}] [-pwdneverexpires {yes | no}] [-acctexpires <NumberOfDays>] [-disabled {yes | no}] [{-s <Server> | -d <Domain>}] [-u <UserName>] [-p {<Password> | *}] [-q] [{-uc | -uco | -uci}]
2. How to manage users in Windows Server 2019
Step 1
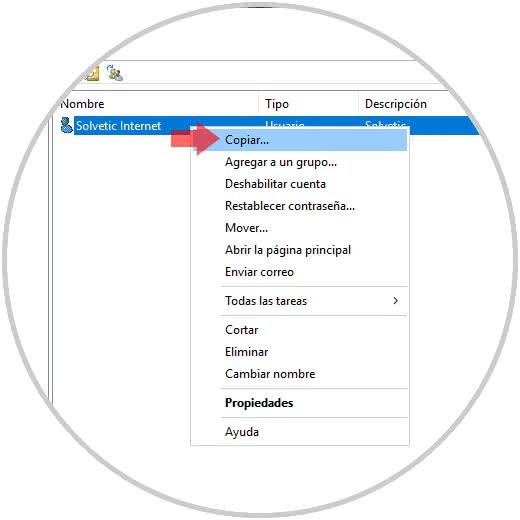
Windows Server 2019 saves us time in creating and editing a user, for example, in case of editing a user's profile, it is normal for another new user to have the same profile, so instead of adding the data manually we can copy the user, this is simple, we can use any of the following options:
- Right click on the user and select the option Copy
- Go to the Action menu and there select Copy
Step 2
When selecting this option the following window will be displayed where we will enter the data of the new user:
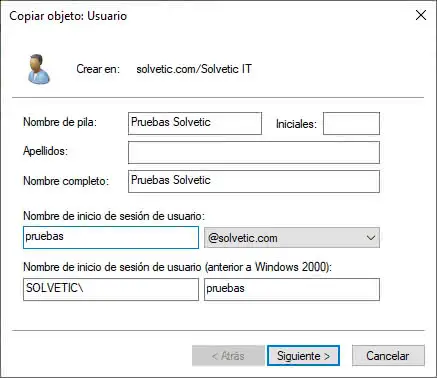
Step 3
In the next window we assign the desired password and in this way all the parameters of the original user will be copied to the new user.
Additional options
By right clicking on the user we find additional options such as:
- Add the user to a new group
- Disable this user's account
So far we have seen how to create a user in Windows Server 201, now we will learn to create a group and then add this user to this new group.
3. How to create a group in Windows Server 2019
As we mentioned at the beginning, the groups are essential to grant permissions to the different applications or general configuration of the Windows Server 2019 server.
Step 1
To create our group, we will do it in the OU TechnoWikis IT, we will right click on it and select New / Group:

Step 2
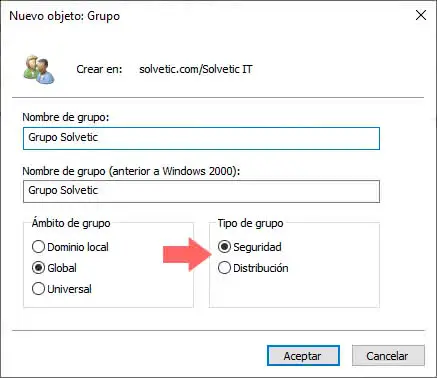
The following wizard will be displayed where we will enter the name of the group and define the following:
- Type of group, if it is for mailing lists, we will select Distribution and if it is to grant permits, we select Security
Step 3
The possible areas are:
Local domain
This applies only to the local server with Windows Server 2019
Global
Applies to all computers and servers in the domain
Universal
Applies for both local and external connections
Step 4
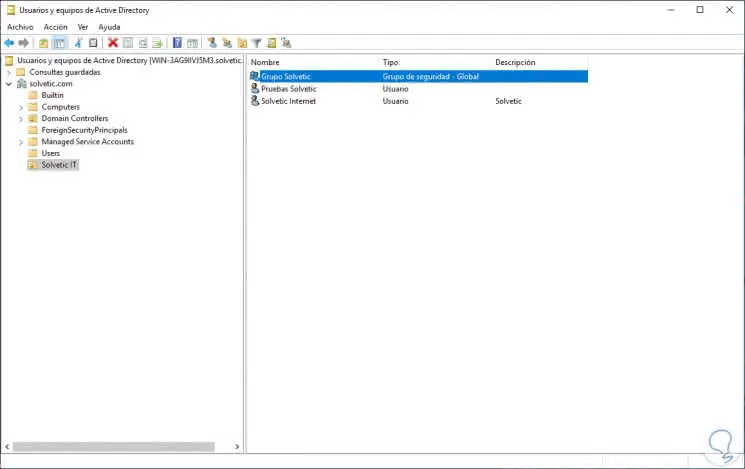
In this case we leave this option and click on OK to apply the changes and we will see our created group:
Step 5
If we want to add a user to this group, we can do it in one of the following ways:
Method 1
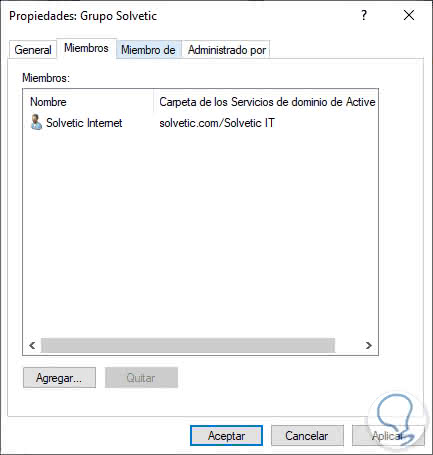
The first is to double click on the group and go to the Members tab:
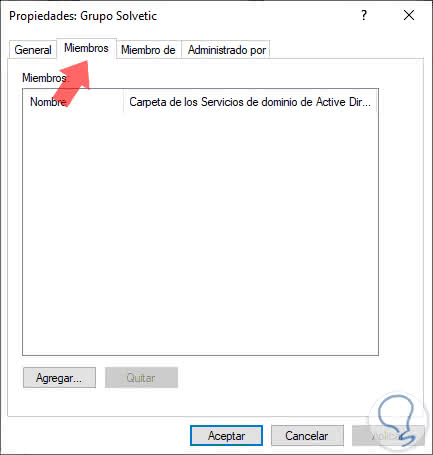
There we click on the Add button and in the pop-up window we enter the name of the desired user and click on the button Check names to validate the existence of that user:
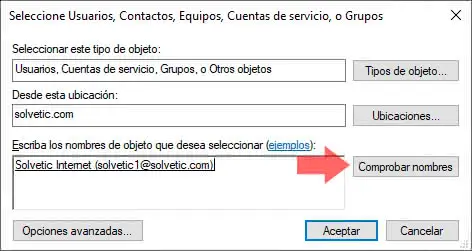
Click OK and we will see that this user has been added to the selected group. Click on Apply and Accept to save the changes.
Method 2
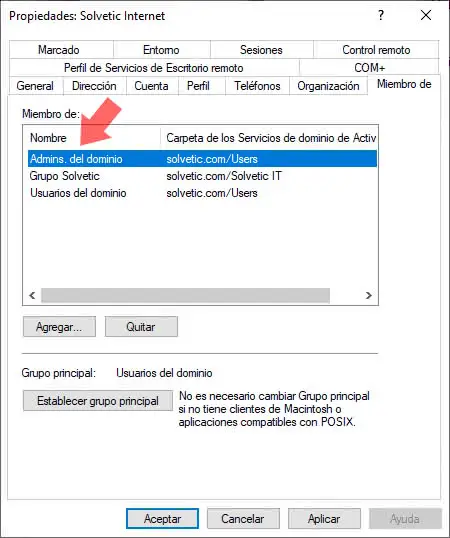
The next method is to double-click on the user and go to the Member tab and there we check the groups in which you are currently:
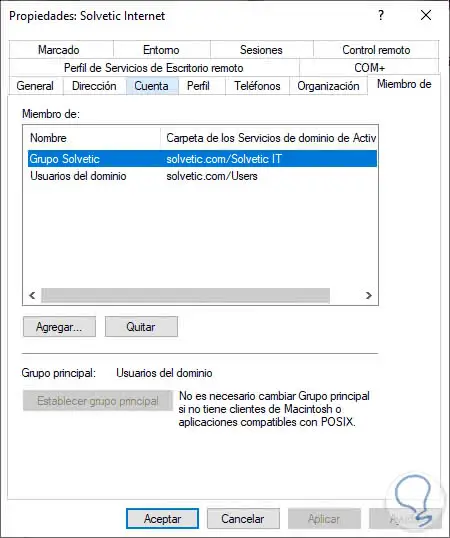
As we see is the group that we have created previously, to add it to a new group we click on the Add button and in the pop-up window we enter the name or initials of this to display the results:
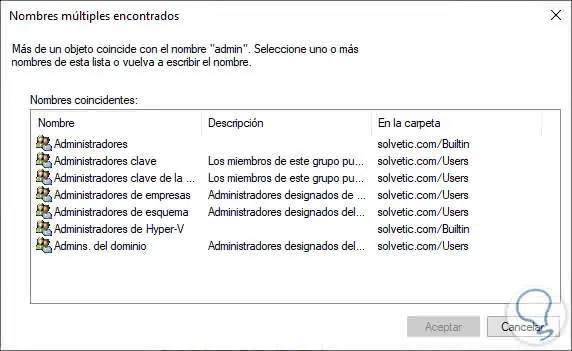
Select the desired group and click on OK to integrate it:
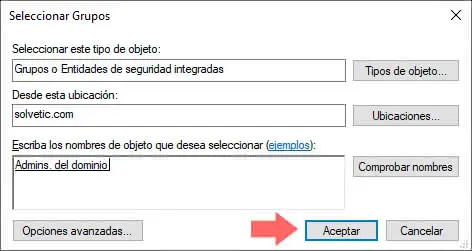
Click OK and now we will see this new group in the selected user profile. Click on Apply and Accept to save the changes.
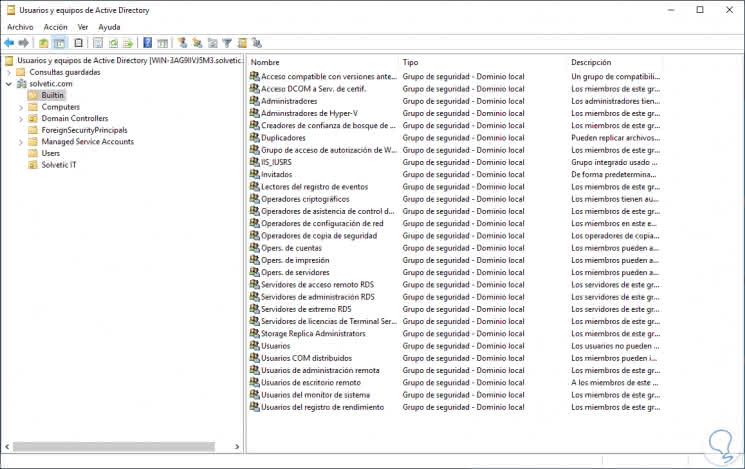
Step 6
If we want to see all the groups that are installed by default in Windows Server 2019 we must go to the Active Directory Users and Computers option and there go to the Builtin folder, this will display all the groups currently available:
Step 7
As with the users, it will be possible to create a group in Windows Server 2019 using Windows PowerShell, in this case we are going to create a group called IT using the following line:
dsadd group "CN = IT, OU = TechnoWikis IT, DC = TechnoWikis, DC = com"
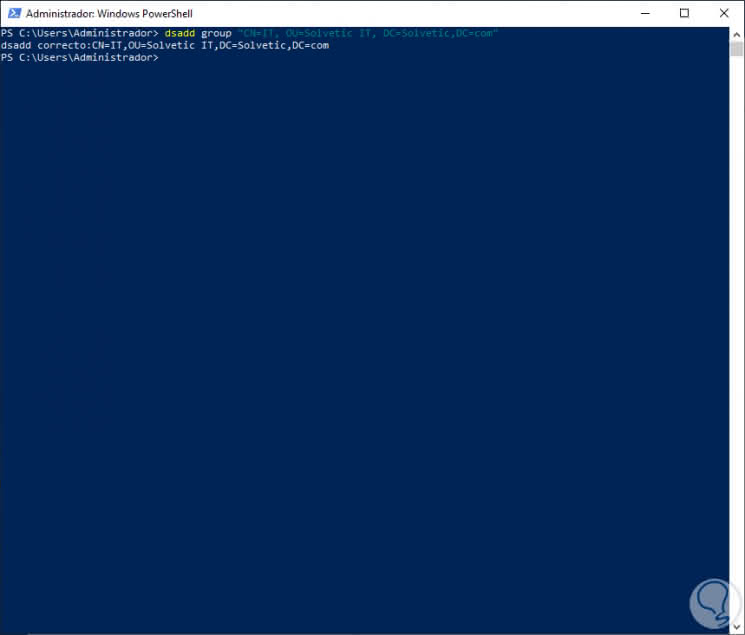
Step 8
Now we can see that said group is available to be used at the desired time. By default this will be created as a Global Security group.

Step 9
For this command the global syntax is the following:
dsadd group <GroupDN> [-secgrp {yes | no}] [-scope {l | g | u}] [-samid <SAMName>] [-desc <Description>] [-memberof <Group> ...] [-members <Member> ...] [{-s Server> | -d <Domain>}] [-u <UserName>] [-p {<Password> | *}] [-q] [{-uc | -uco | -uci}] There we can set on the line -secgrp {yes | no} if the group is security or not (yes it is security and not that it will be distribution). On the line -scope {l | g | u} we define the scope of the group (it is local, g is global or is universal).
We see how both users and groups play a fundamental role in Windows Server 2019 and its use and administration is a task of responsibility and care.