Windows Server is the preferred system for millions of companies to manage everything related to the internal processes of the company at the level of users, computers and objects . The most centralized way to do this is thanks to the domain controller that we can implement on the server so that all client computers have access to what is hosted on the server..
Windows Server 2022
Windows Server is available now in its future version 2022 which gives us some features such as:
- Compatible with AES-256-GCM and AES-256-CCM cryptographic suites
- Option to copy files to SMB with compression using the Robocopy, compress and Xcopy / compress commands
- SMB Direct protocol over RMDA networks supports AES-256 encryption
- Native management with Windows Admin Center and more
Windows Server as controller
But without a doubt that one of the main points in Windows Server is its operation as a domain controller and as a DNS server, let's remember some of the main tasks of a server:
- Work as a DNS server (Domain Name System, Domain Name System) to resolve network names, that is, translate IP addresses into domain names and vice versa.
- Serve as a domain controller for multiple users and computers on the local network to connect to it.
- Manage all user and computer policies.
- Manage third-party software and applications.
- Centralize user access to the system.
TechnoWikis will explain to you how to create your domain in Windows Server 2022 and with this make the most of it.
To stay up to date, remember to subscribe to our YouTube channel! SUBSCRIBE
How to create a domain and configure Active Directory in Windows Server 2022
One of the essential keys is to have a static IP since as it is a central server many processes depend on this, when changing the IP the connection will be lost. Later we will explain why you should do this.
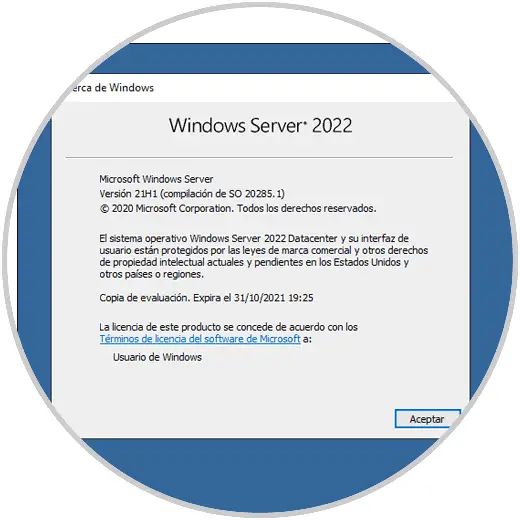
Step 1
First we check with winver that we use Windows Server 2022:
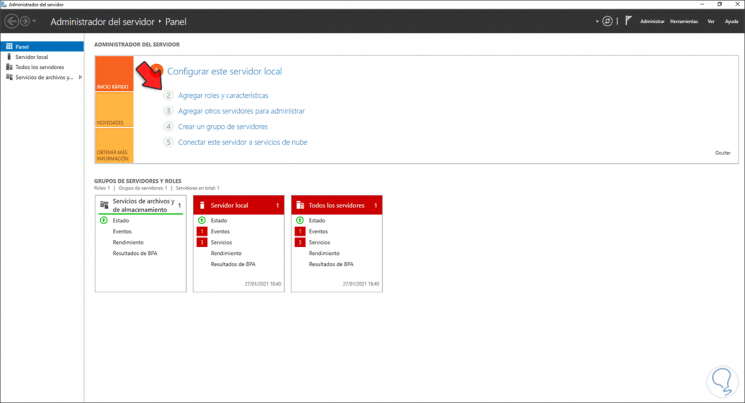
Step 2
Now open the Server Manager, we will see the following:
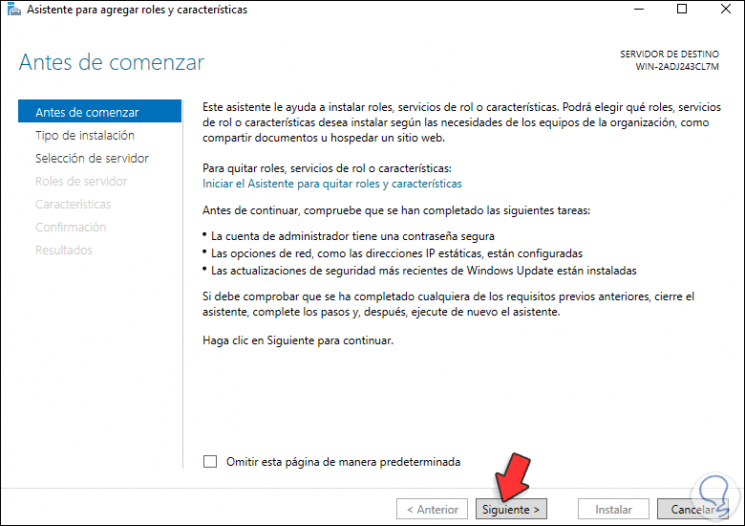
Step 3
Select "Add roles and characteristics" and the following wizard will be launched:
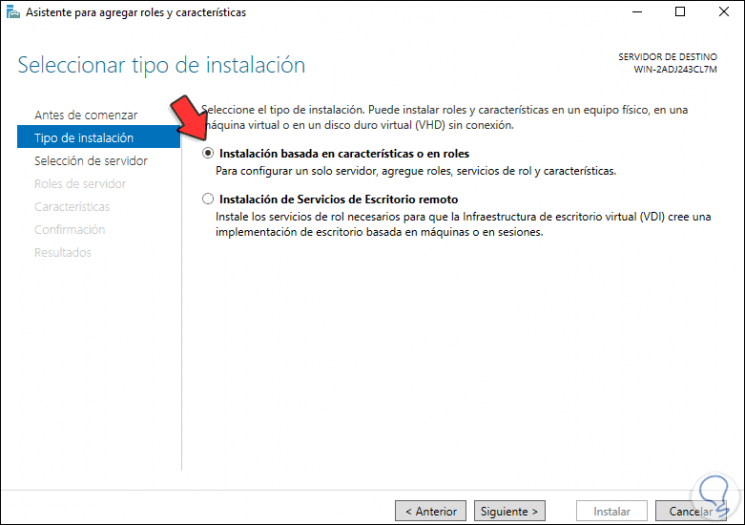
Step 4
We click Next and select "Role-based or feature-based installation":
Step 5
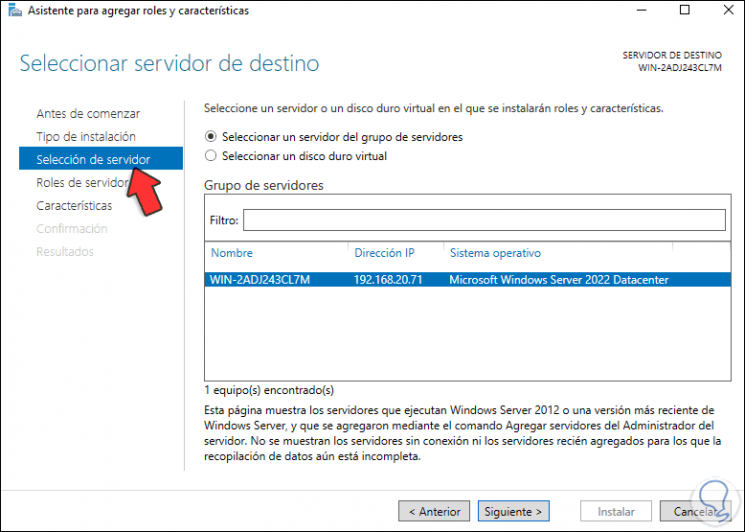
Click Next and choose the server:
Step 6
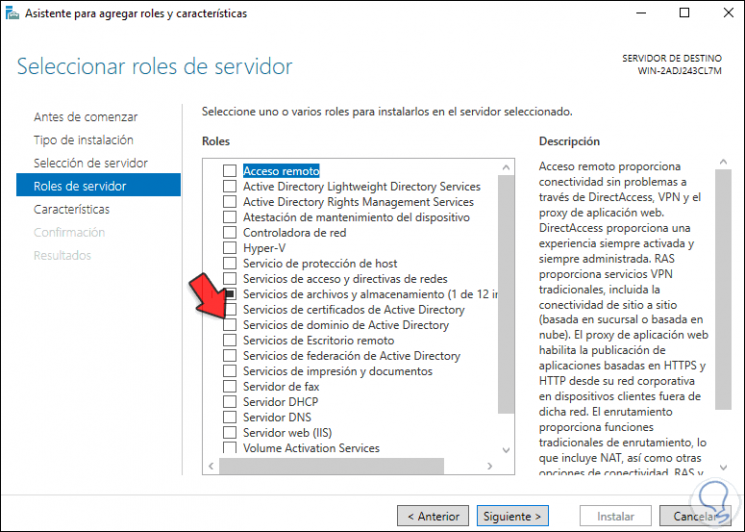
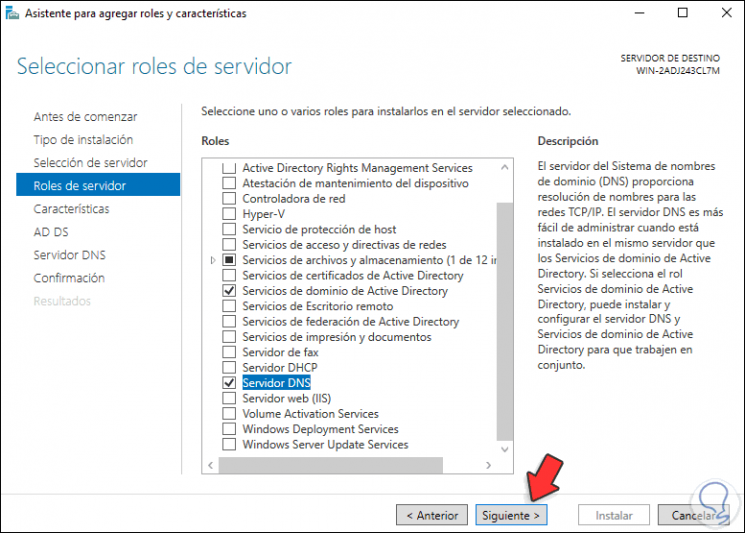
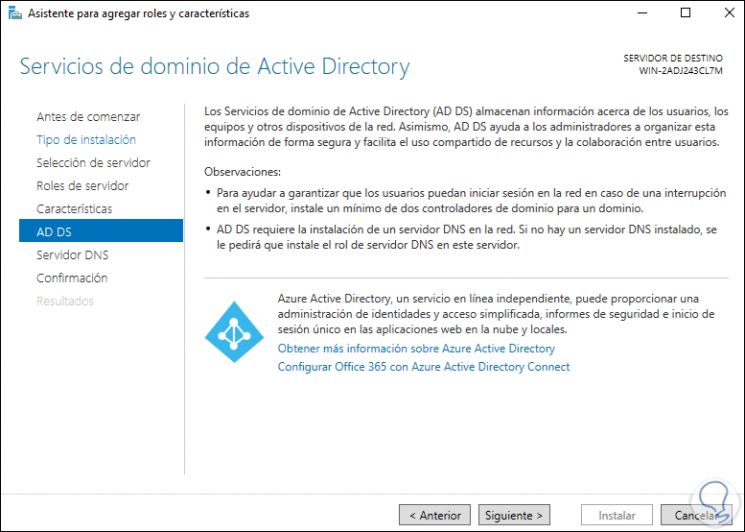
In the next window we select "Active Directory Domain Services":
Step 7
This will display the following window:
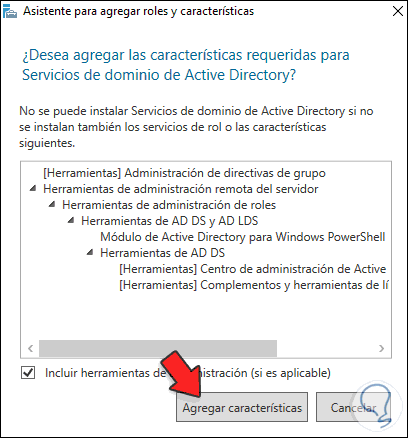
Step 8
Click Add Features to add the role:
Step 9
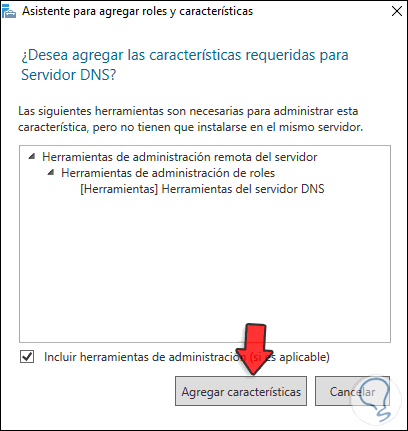
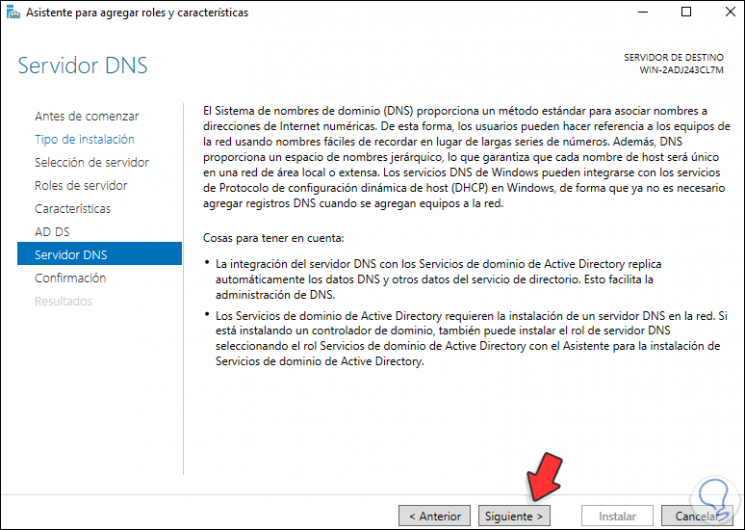
We select "DNS Server" and the following will be opened:
Step 10
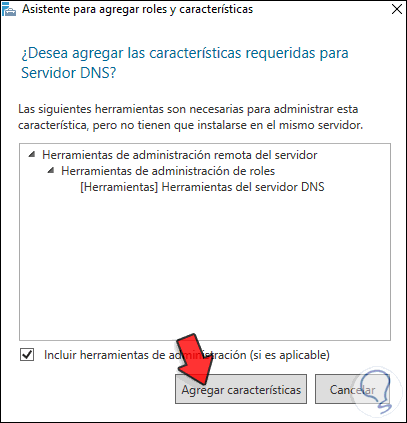
When we click on Add features we will see the following message:
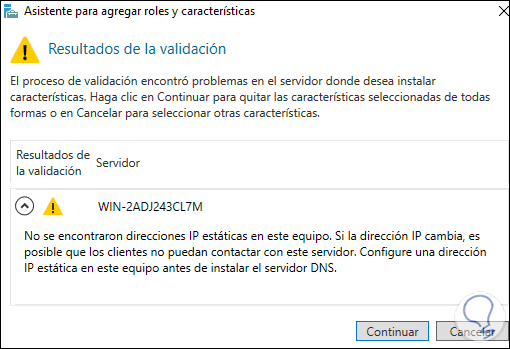
Step 11
As we mentioned, the IP address is essential for the operation of Windows Server 2022 when delivering services, to achieve this we go to the network properties:
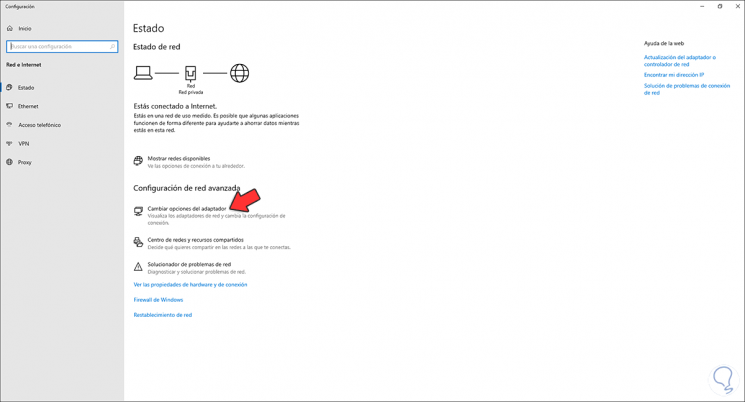
Step 12
Click on "Change adapter options" and then right click on the adapter and select "Properties":

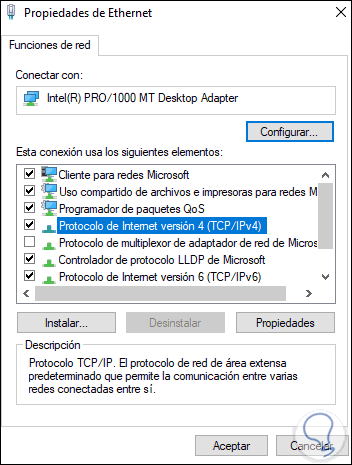
Step 13
Select Internet Protocol version IPv4 and click on properties:
Step 14
We establish the static IP based on the available range:
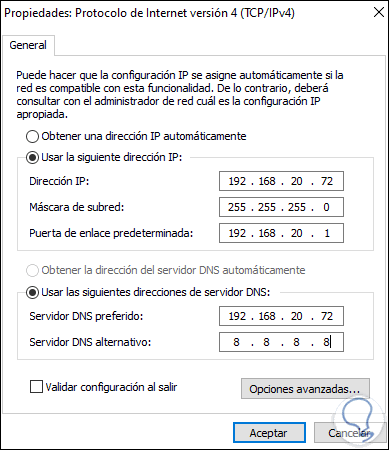
Note
The IP address of the "Preferred DNS server" field is the same IP of the equipment as it will act as DNS server.
We apply the changes..
Step 15
Now we can add the DNS role again:
Step 16
We will see that this time it allows it:
Step 17
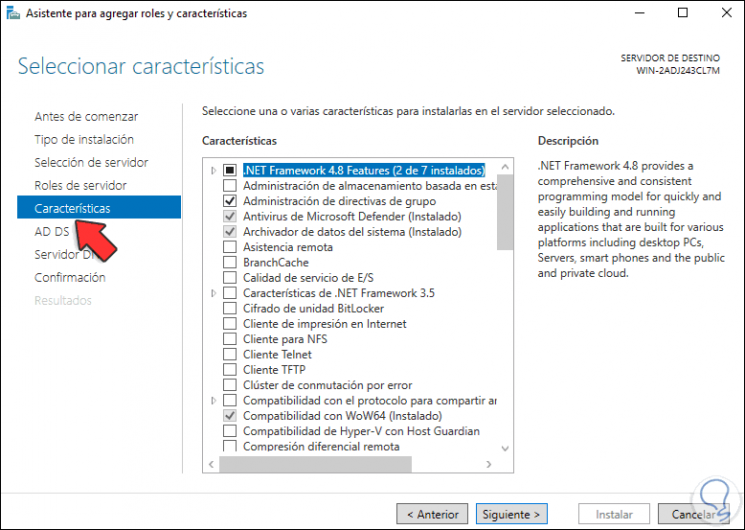
Click Next and we will go to the Features section:
Step 18
There we do not make any changes, then we will see a brief summary of the role:
Step 19
Click Next and we access information about the DNS server of Windows Server 2022:
Step 20
Click Next and we find a summary of the task to be carried out:
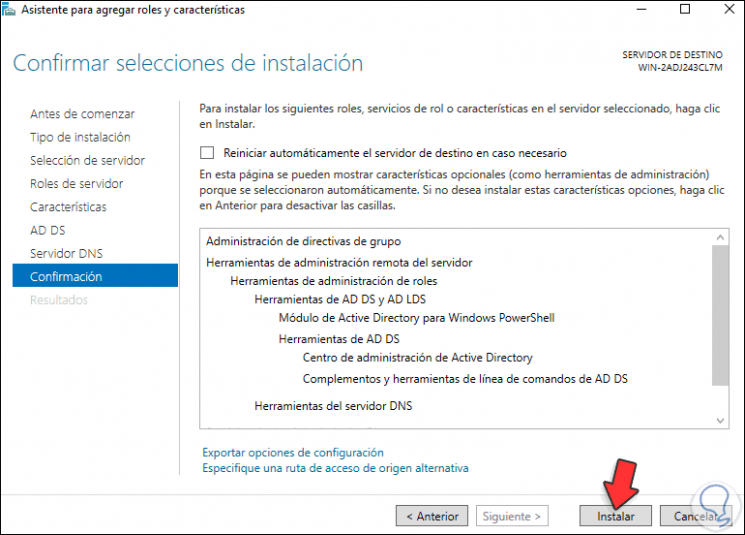
Step 21
We click on "Install" to start the Active Directory installation process on the server:
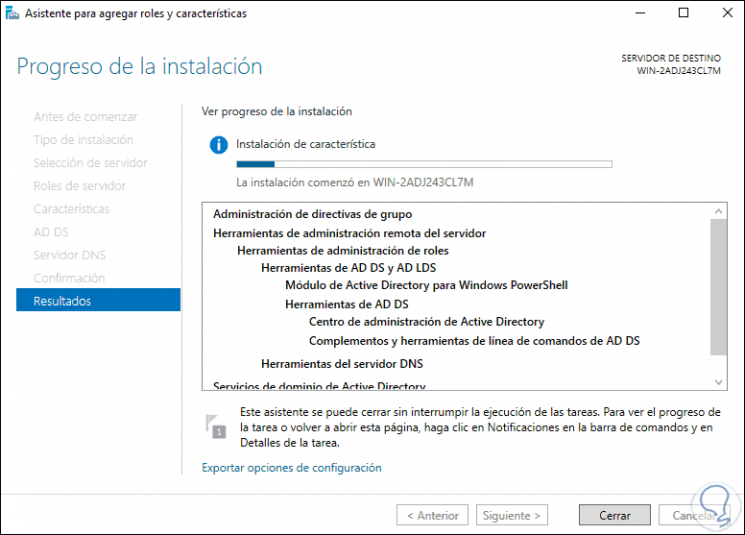
Step 22
When this process comes to an end we will see the following:
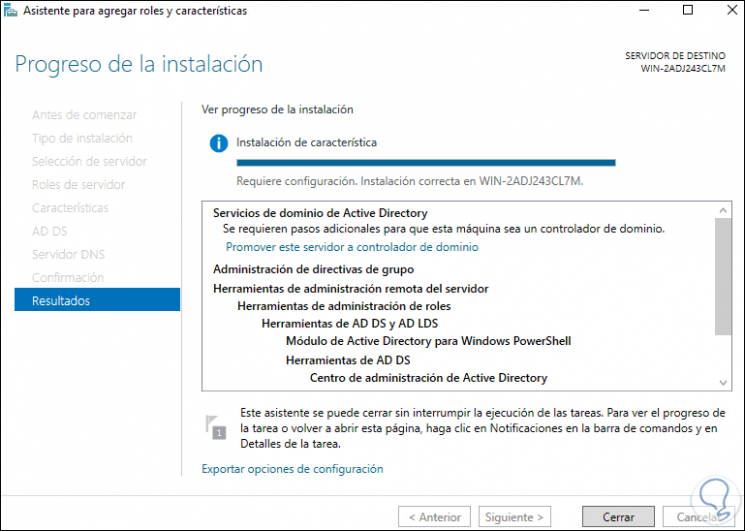
Step 23
We click on Close and at the top we click on "Promote this server to a domain controller":
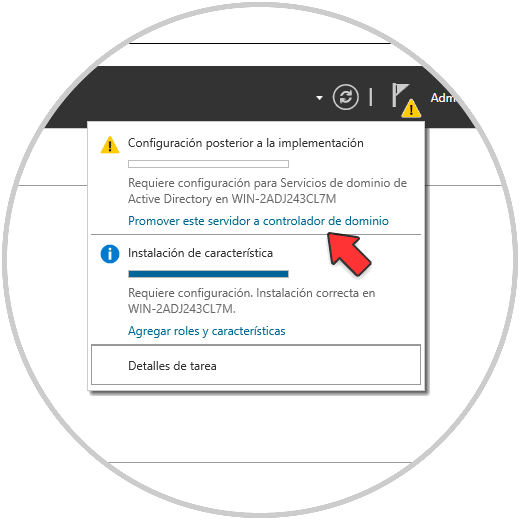
Step 24
We click there and in the wizard displayed we activate the "Add a new forest" box and register the domain name to use in Server 2022:

Step 25
Click on next to see the functional levels of the forest and enter the password for recovery:
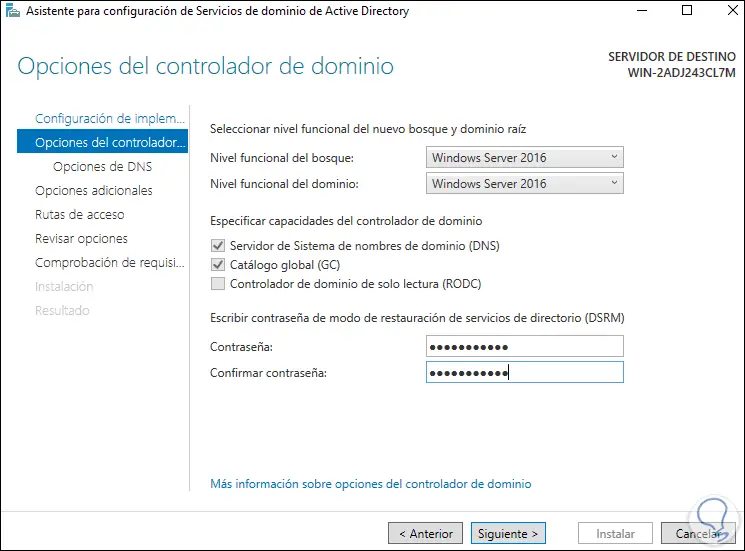
Step 26
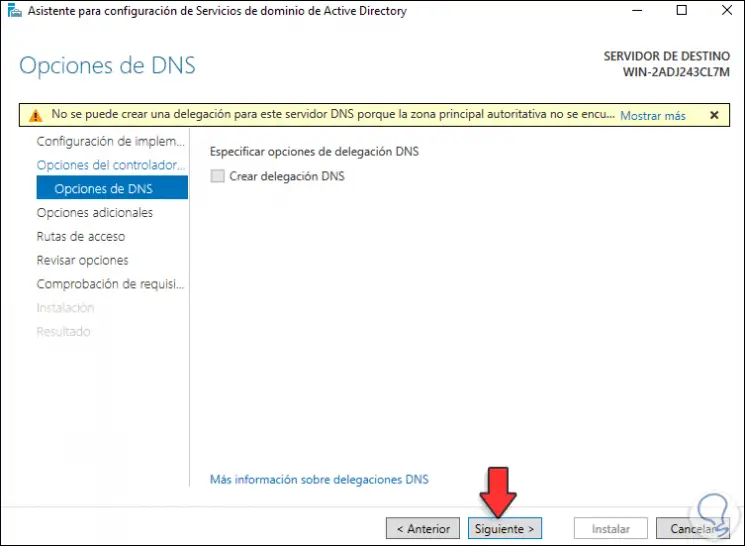
Click Next and we will see the DNS delegation section:
Step 27
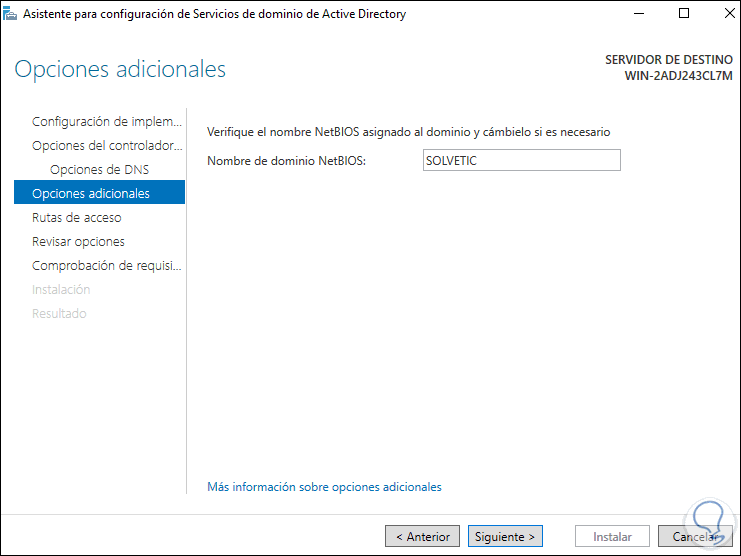
In the next window we find the NETBIOS name which is automatically assigned by the system:
Step 28
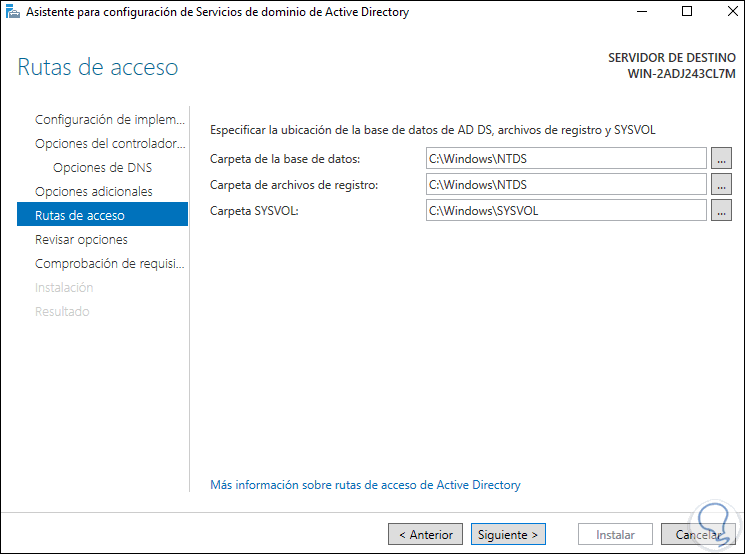
After this we see the default values of the databases, it is advisable not to alter these values:
Step 29
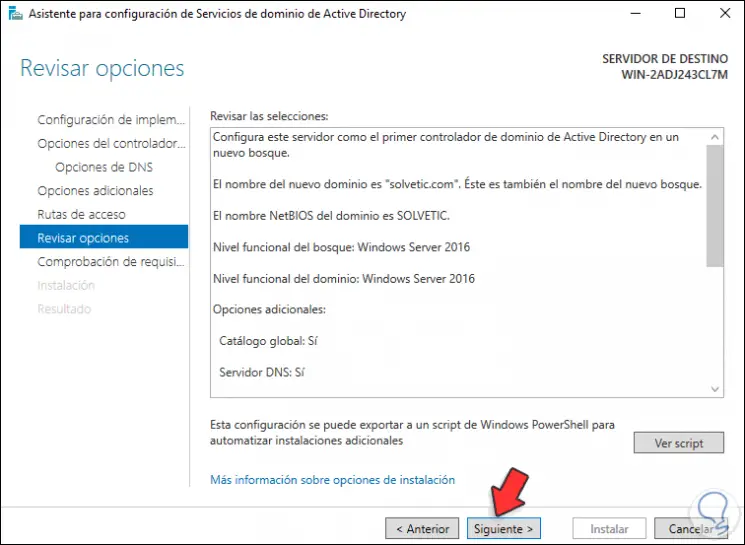
Click Next and we find a summary of the activity to be executed:
Step 30
We click Next to perform the prerequisite validation:
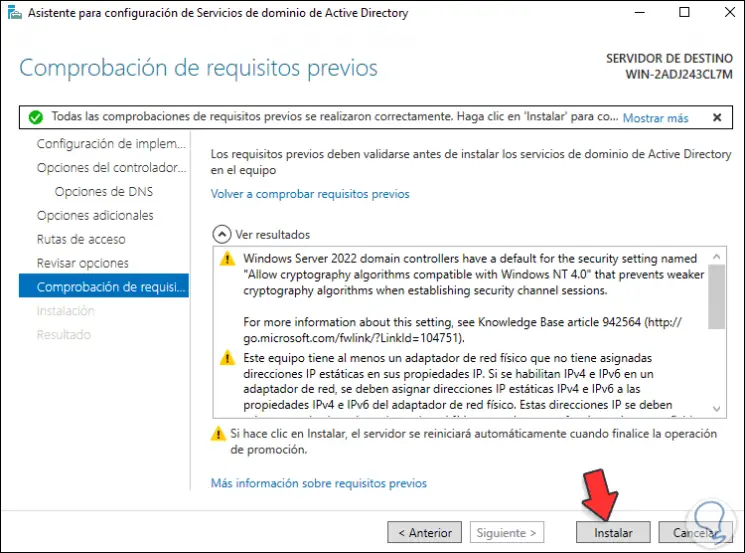
Step 31
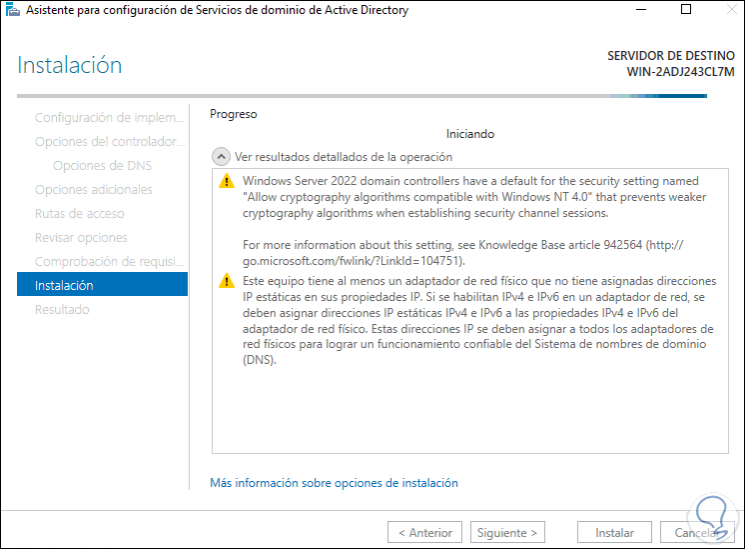
If everything is correct, click on "Install" to start the promotion process to domain controller in Windows Server 2022:
Step 32
At the end we will see the following:
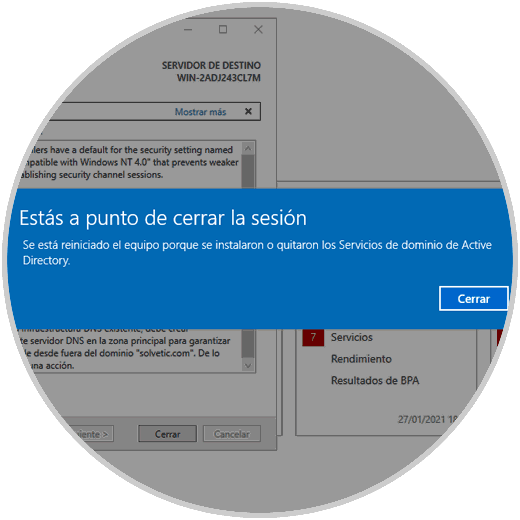
Step 33
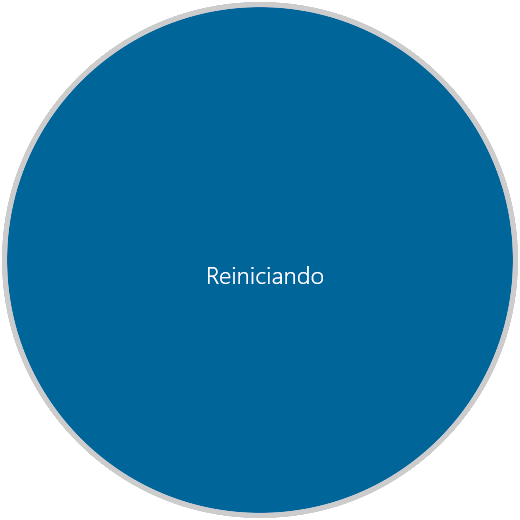
The system must be rebooted to complete the process:
Step 34
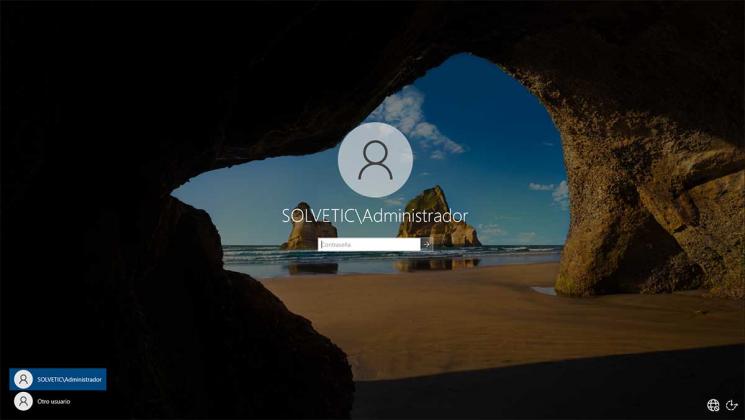
We can see in the login screen that the domain has already been established:
Step 35
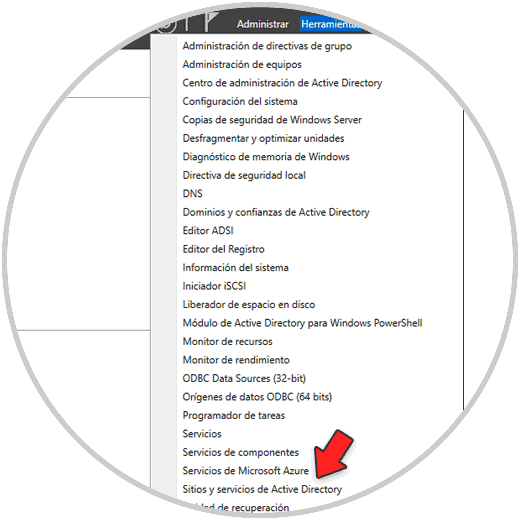
When logging in we open the Server Manager and go to "Tools - Active Directory Users and Computers":
Step 36
We select the domain, right click and choose Properties:
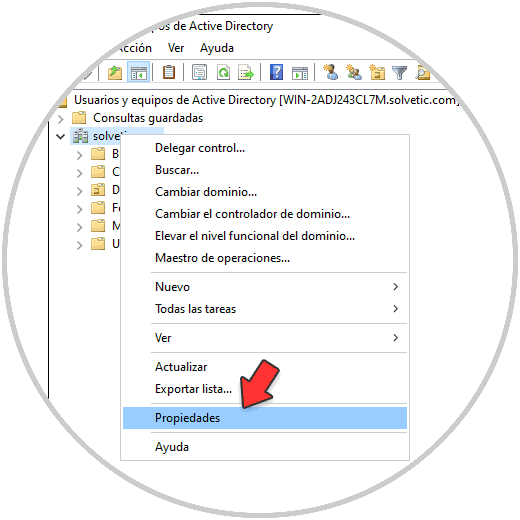
Step 37
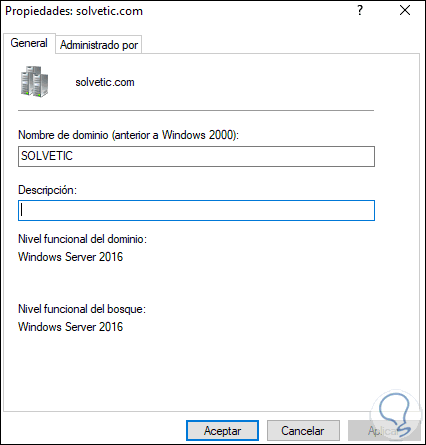
We can see the functional levels that we have defined:
Step 38
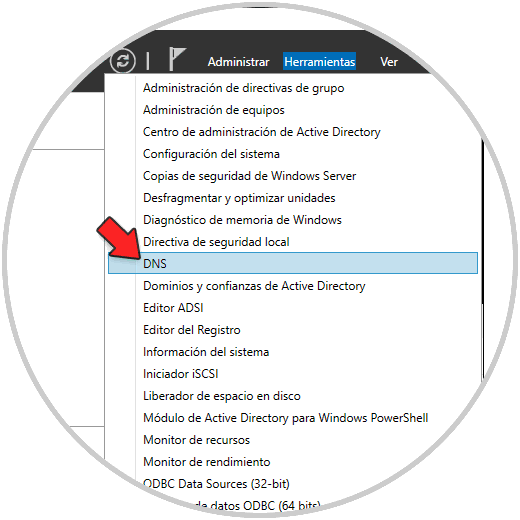
Now we go to "Tools - DNS":
Step 39
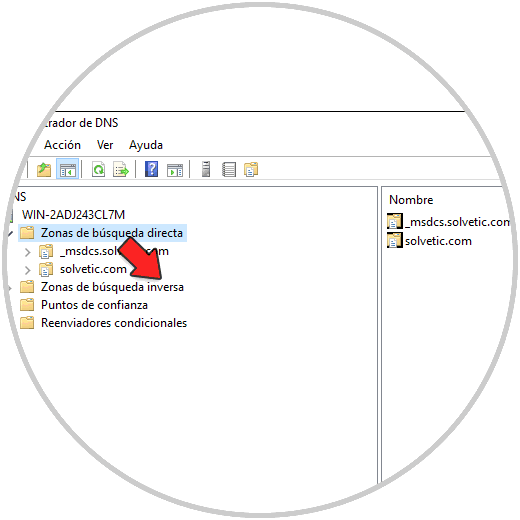
We deploy the DNS server
Step 40
We right click on "Reverse search area" and select "New area":
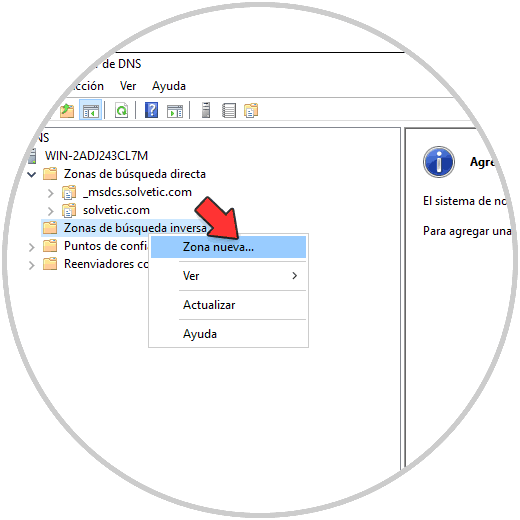
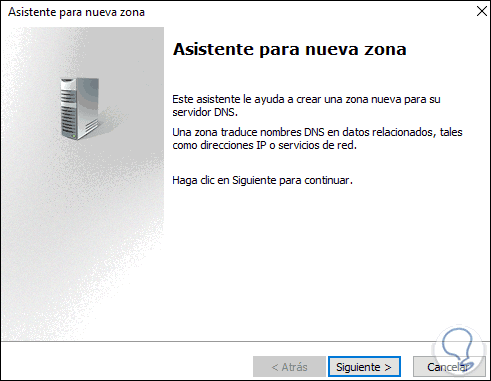
Step 41
The following wizard will be launched:
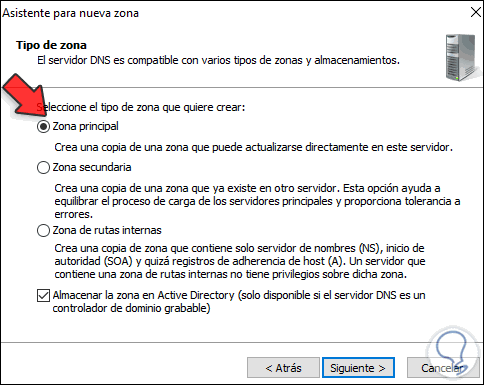
Step 42
Click on next and set the Main zone option:
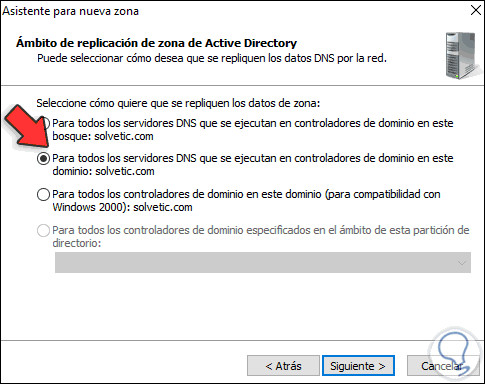
Step 43
In the next window we leave the option "Leave for all DNS servers that run on domain controllers in this domain":
Step 44
Click on Next and we leave the area for IPv4 addressing:
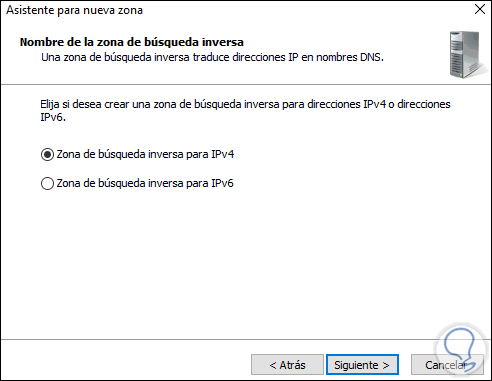
Step 45
In the next window we enter the network identifier:
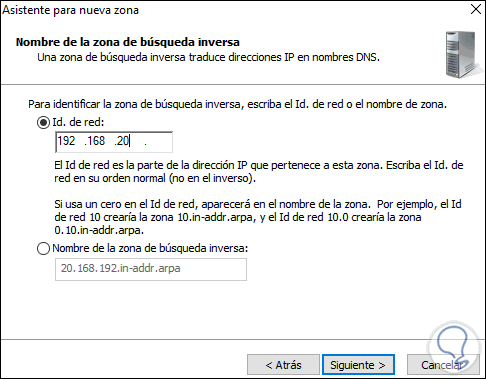
Step 46
Then we define the way the updates will be applied:
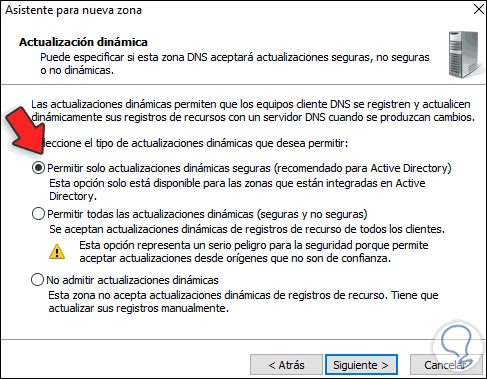
Step 47
Click Next and we will see a summary of the area to create:
Step 48
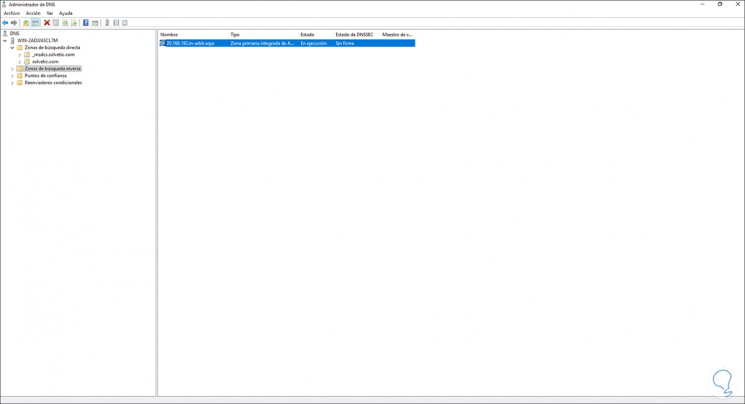
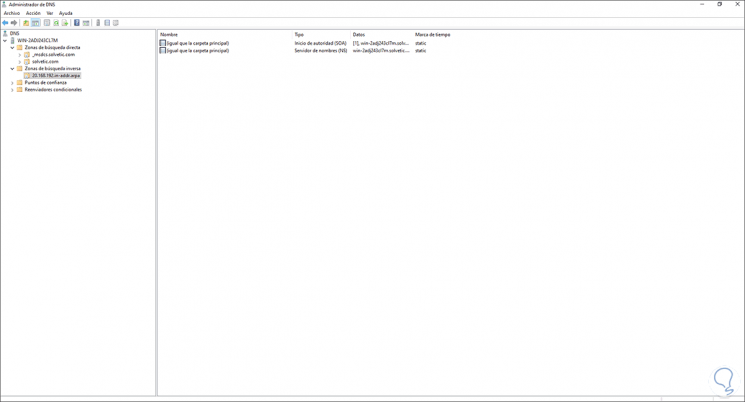
Click on Finish and we check the created zone:
Step 49
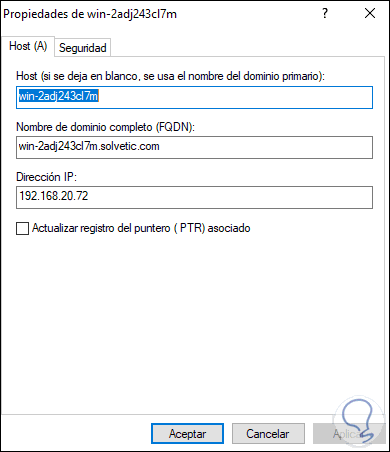
We go to the domain and click on the Host (A) file to validate the IP of Windows Server 2022:
Step 50
We will see the following:
Step 51
Finally we can check the server properties from "Local Server" in the Server Manager:

This is the step by step that TechnoWikis has taught you to create your domain controller in the new version of Windows Server 2022.