Microsoft has released in its Insider program the new version of Windows Server which is the bet for corporate environments offering administrators a wide set of functions so that data management is as complete as possible, Windows Server 2022 is no stranger to these options and that is why the use of roles is key to increase server productivity and one of the fundamental roles for administration tasks is WSUS..
WSUS (Windows Server Update Services - Windows Server Update Services) is a role that basically gives us the opportunity to implement the update options of all the most current Microsoft product portfolio, this covers all types of products for both servers and for client computers.
This WSUS role facilitates administrative tasks since it will be possible to install, manage and distribute updates to all computers in the domain automatically, saving manual tasks for such operation..
WSUS Features
WSUS allows us to:
- Have an update management automation available for Windows and its products
- Have various Windows PowerShell cmdlets to manage administrative tasks in WSUS
- Security improvements since we have the SHA256 hash privacy level
- Function of separation between client and server, so the versions of the Windows Update Agent (WUA) can be delivered independently of WSUS so as not to apply them to all computers in the domain
- Centralized management of updates
WSUS requirements
To implement WSUS on Windows Server 2022, the following minimum requirements will be necessary:
- 1.4 GHz x64 processor, 2 GHz or higher recommended
- 100 Mbps or higher network adapter
- 10 GB available disk space, 40 GB recommended to accommodate downloaded updates
We see how to install this role in Windows Server 2022.
To stay up to date, remember to subscribe to our YouTube channel! SUBSCRIBE
Install WSUS on Windows Server 2022
Step 1
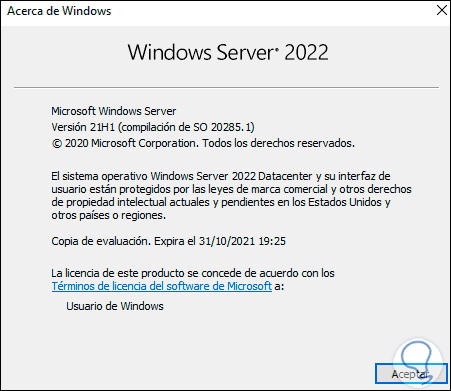
First, we validate the version of Windows Server with "winver":
Step 2
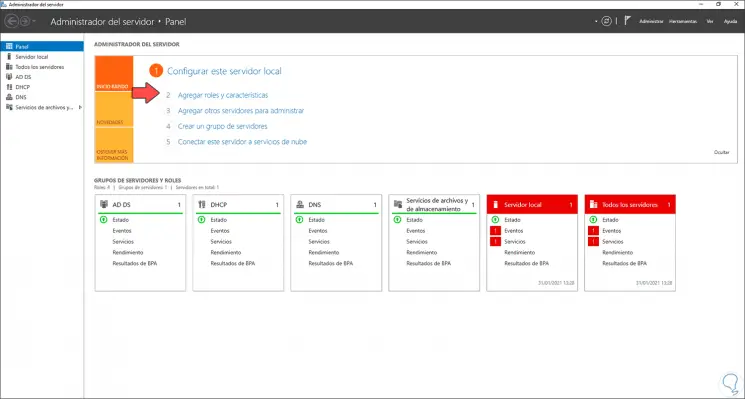
We open the Server Manager and select "Add roles and features":
Step 3
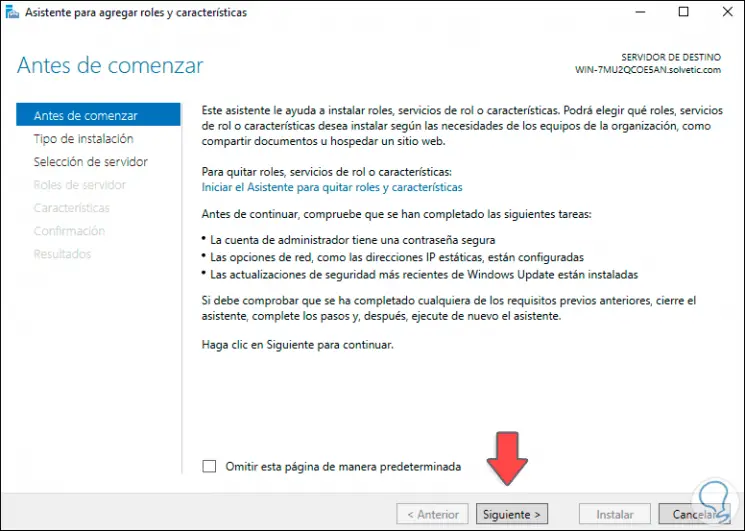
The following wizard will be displayed:
Step 4
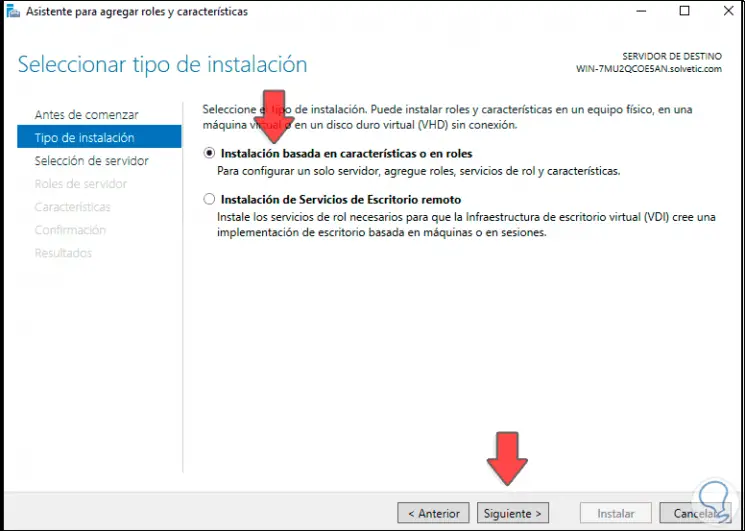
Click Next and select "Role-based or feature-based installation":
Step 5
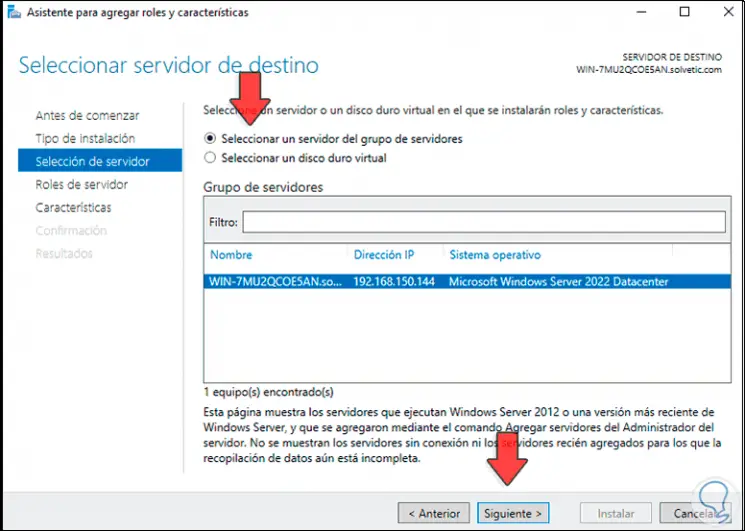
In the next window we choose the server in which the role will be installed:
Step 6
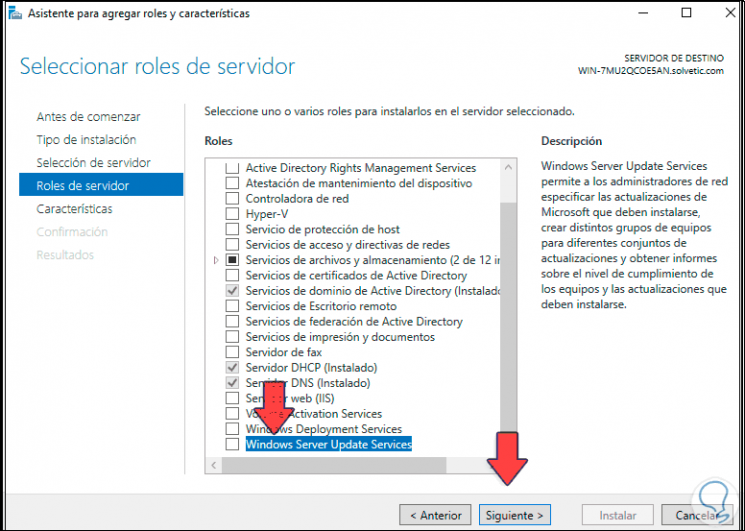
Next, we locate the "Windows Server Update Services" box:
Step 7
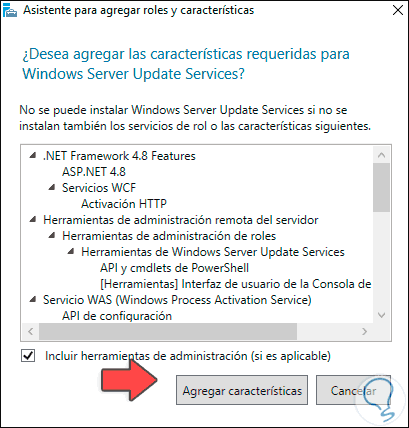
We activate your box and the following will be displayed:
Step 8
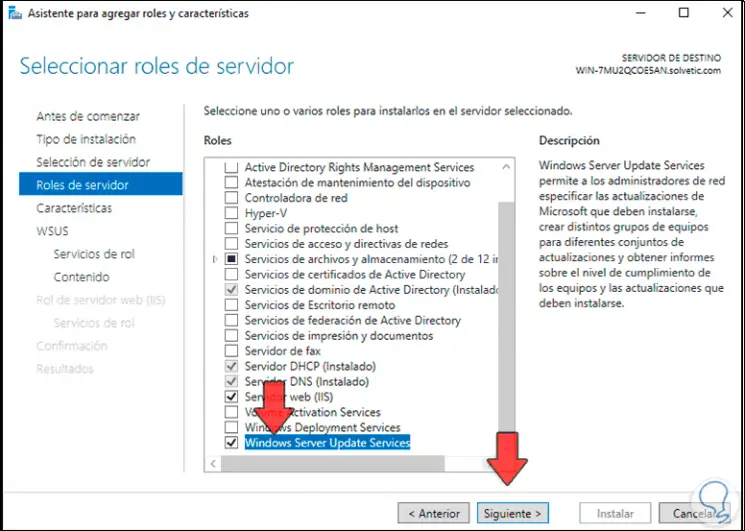
We add the characteristics and we will see the selection of the river:
Step 9
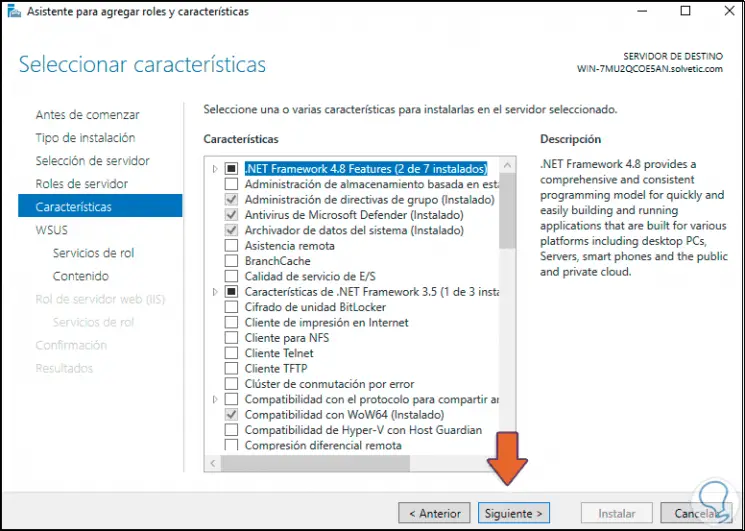
Click Next and in the Features window we do not modify anything:
Step 10
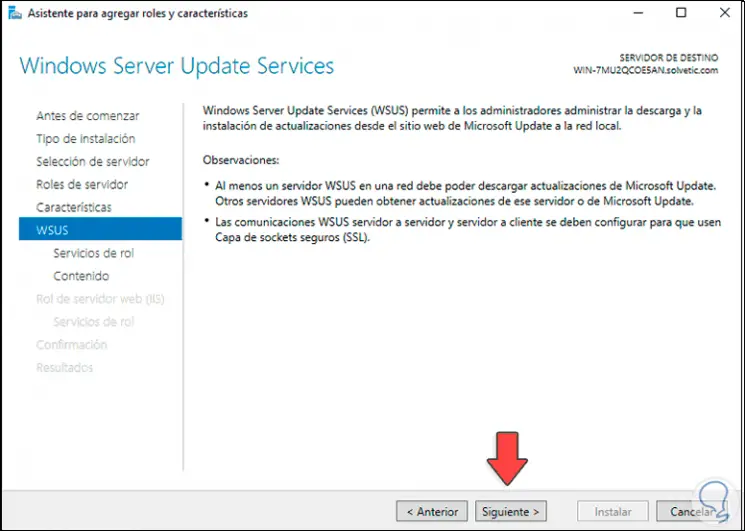
In the next window we will see a summary of the WSUS role:
Step 11
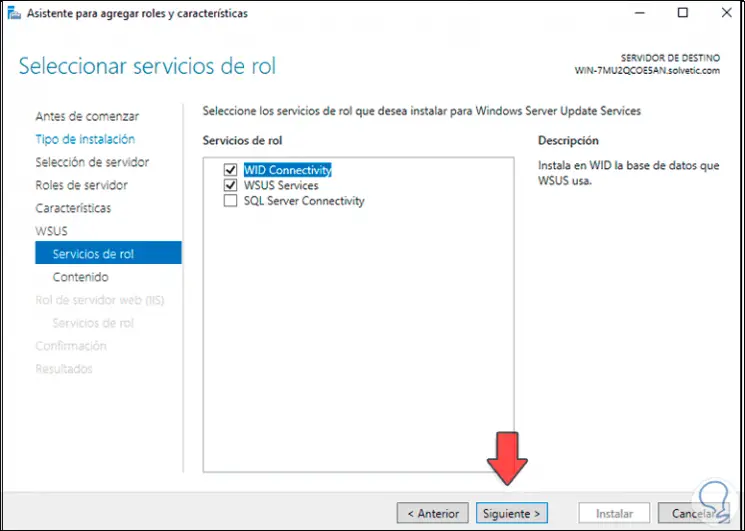
In the next window we select the WSUS roles:
Step 12
These are:
- WID Connectivity: it is a service whose task is to install the WID database
- WID Services: its role is to manage all WSUS services
Step 13
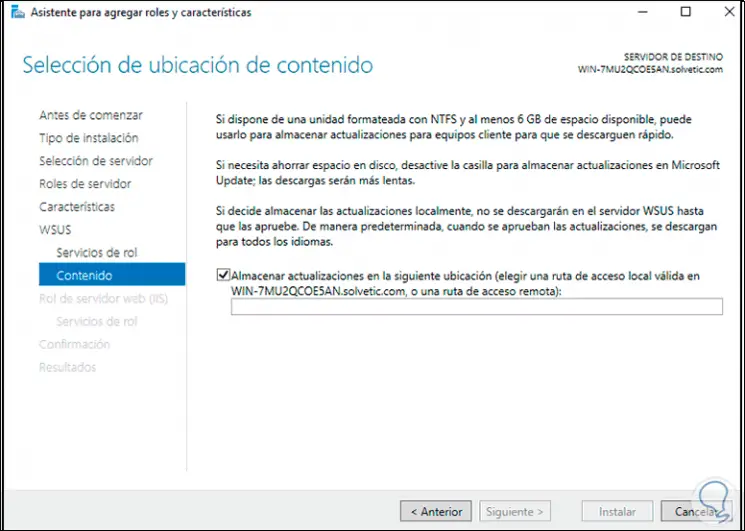
Click Next and we will see this:
Step 14
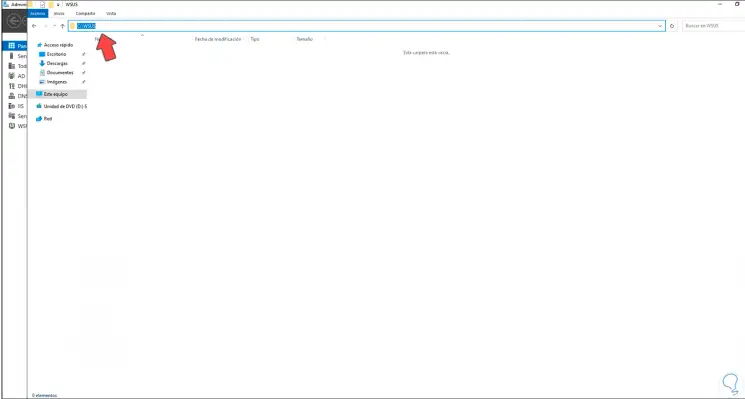
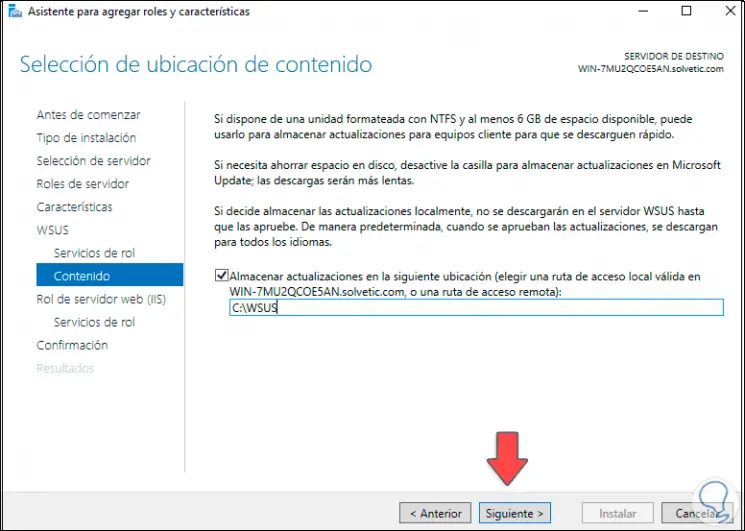
We activate the "Store updates in the following location" box and enter the desired path where the downloads will be hosted, in this case we go to the Explorer and copy that path:
Step 15
We paste it in the respective field:
Step 16
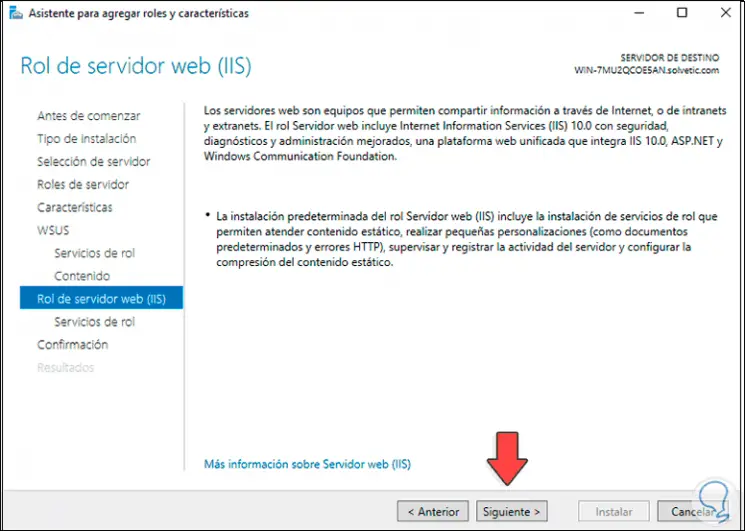
We click on Next and we will see a summary about the roles of the IIS (Internet Information Services) web server:
Step 17
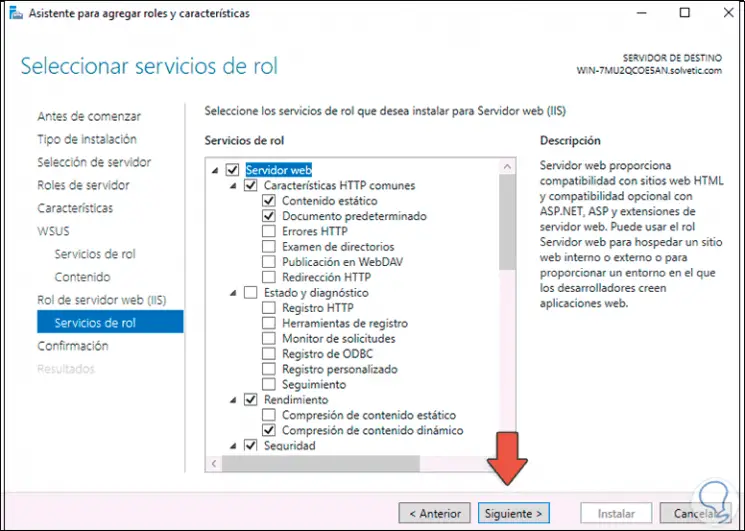
In the following window it is possible to select the desired role services:
Step 18
After this we will see a summary of the role to install in Windows Server 2022:
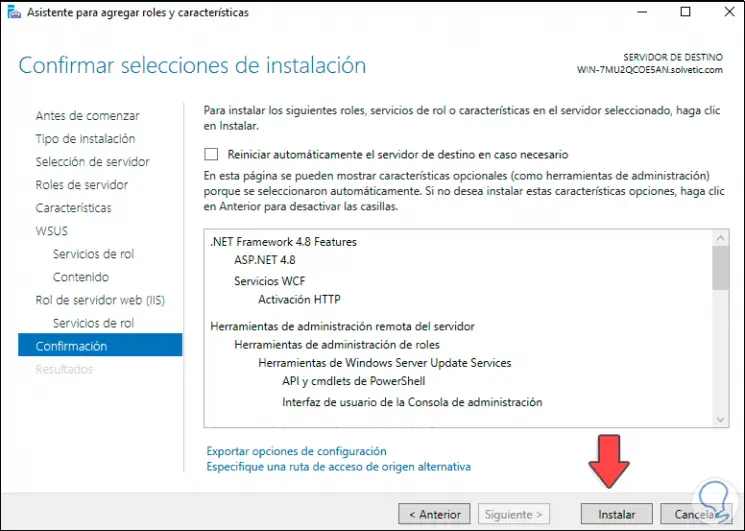
Step 19
Click Install to complete the installation:
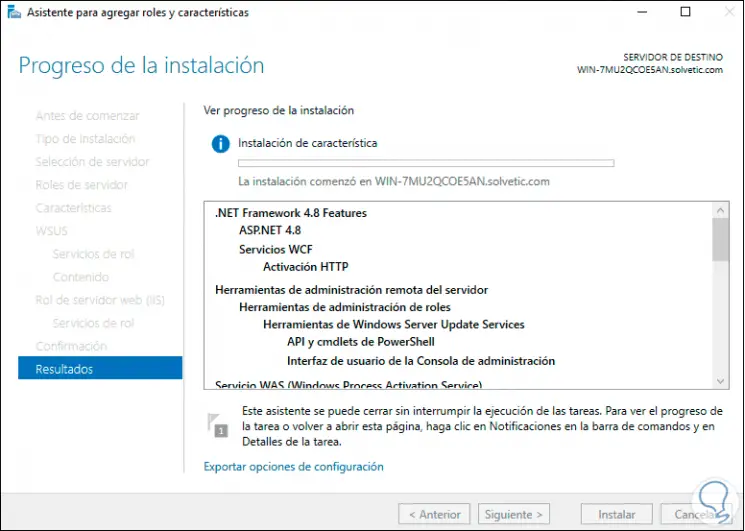
Step 20
At the end we will see the following:
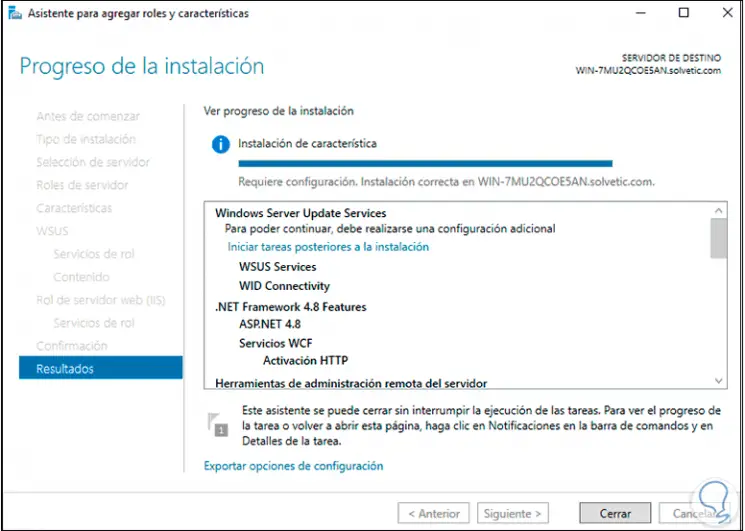
Step 21
We click on "" Start post-installation tasks "to complete the process:
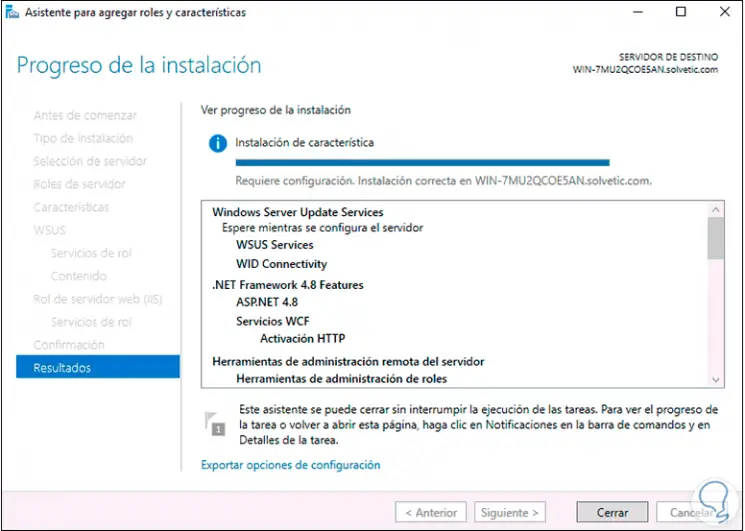
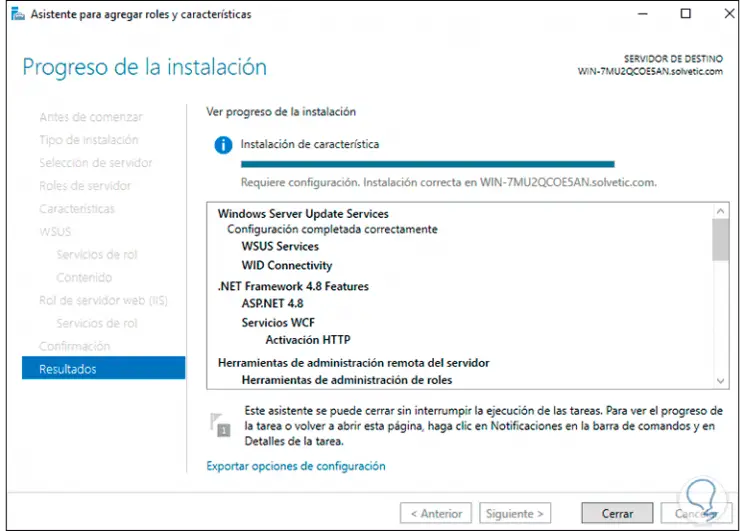
Step 22
At the end of this we will see the following. We click Close to exit the wizard.
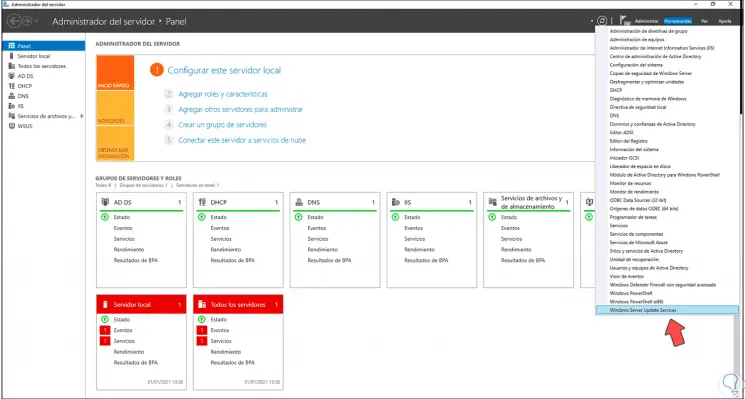
Step 23
Now we go to "Tools - Windows Server Update Services":
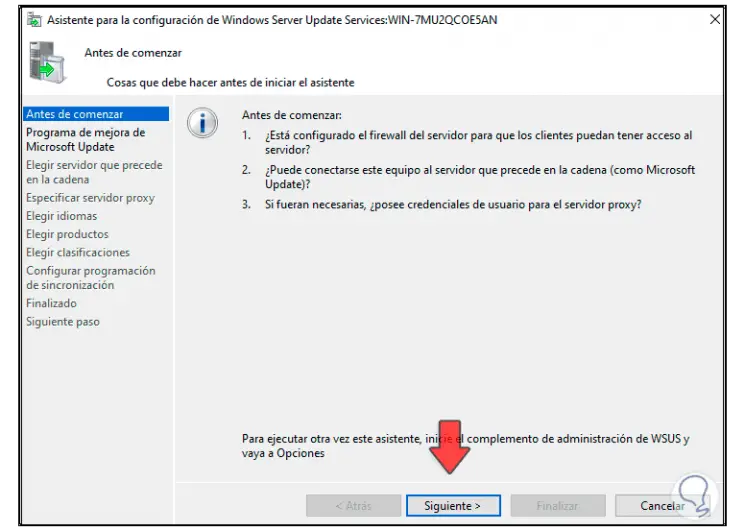
Step 24
The following wizard will be displayed:
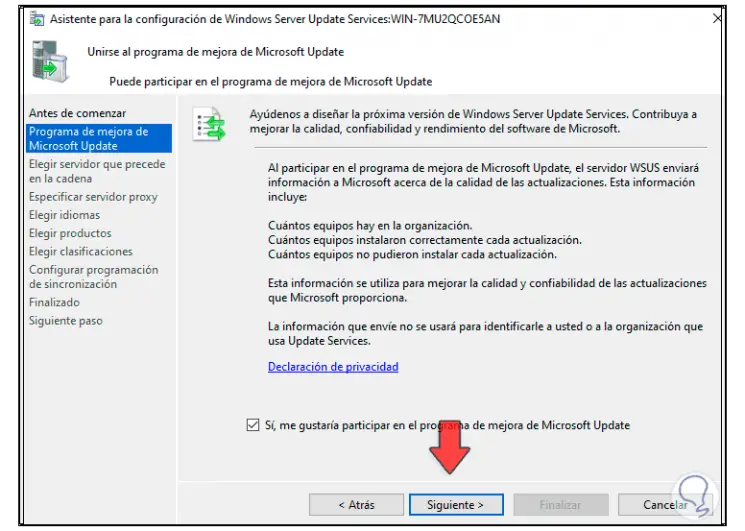
Step 25
Click Next and we can participate or not in the improvement program:
Step 26
In the next window we activate the box "Synchronize from Microsoft Update":
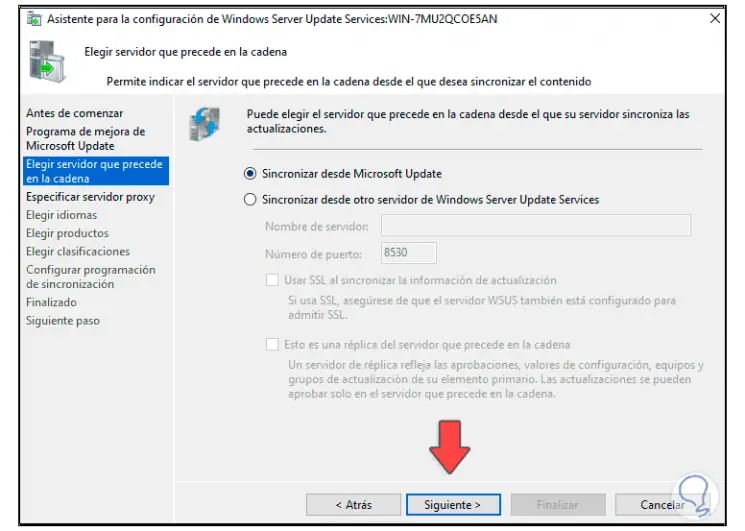
Step 27
We click Next and now we define whether or not we will use a proxy server:
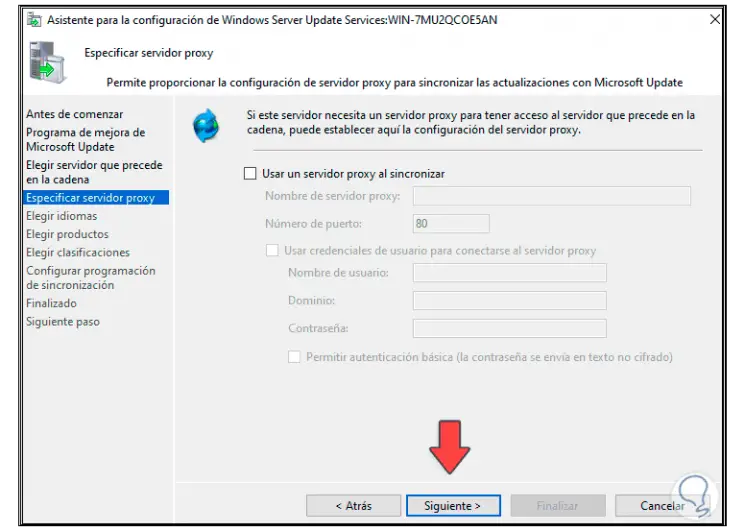
Step 28
Click Next
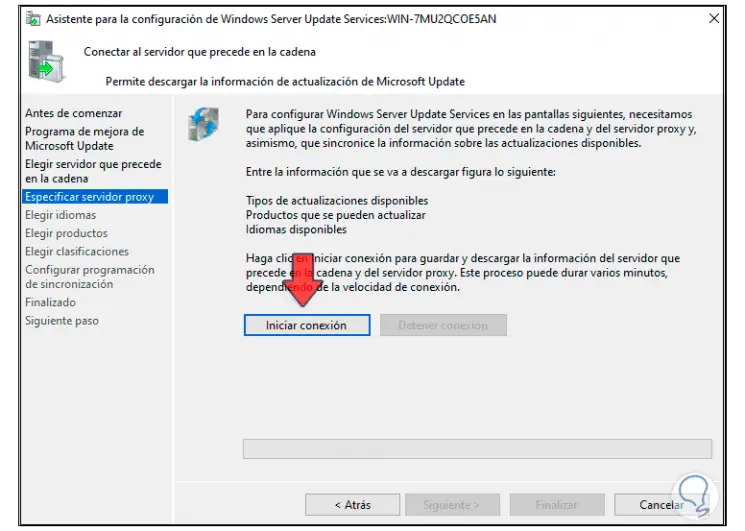
Step 29
Click on "Start Connection" to download Microsoft products:
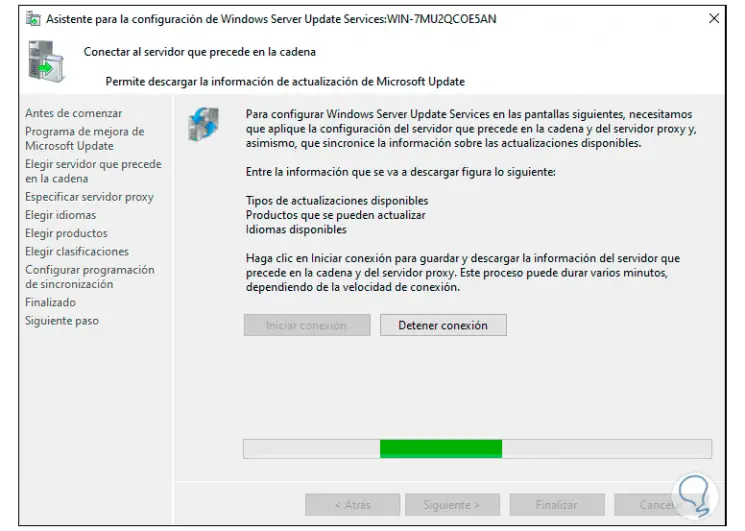
Step 30
Upon completion of this download we will see the following:
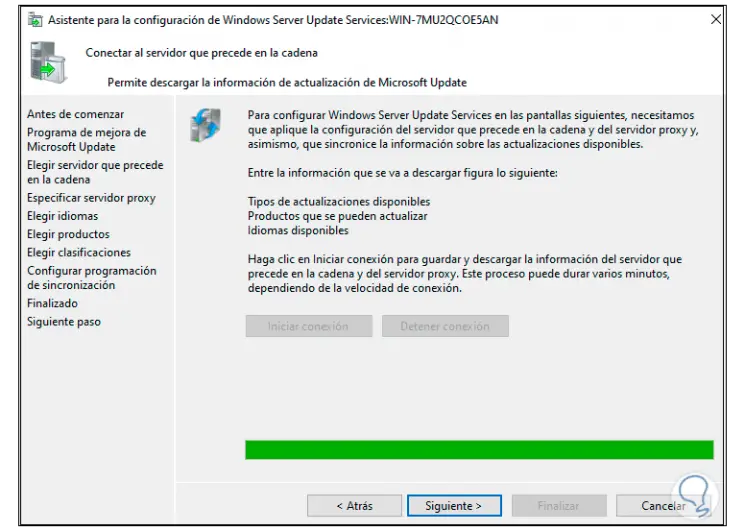
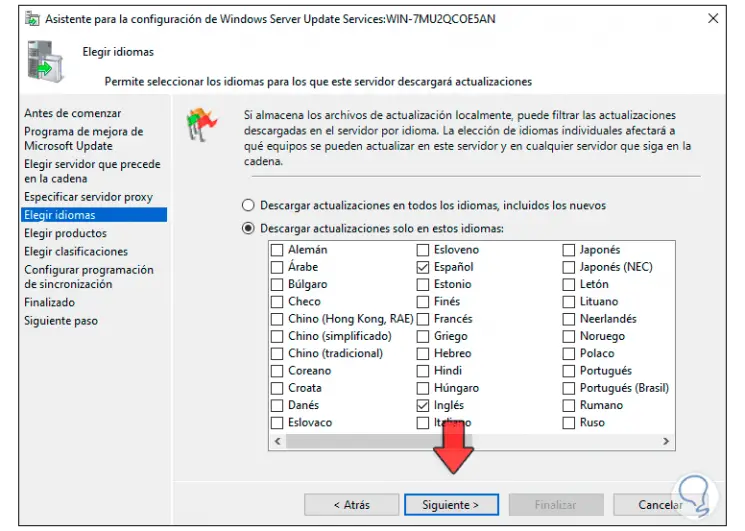
Step 31
Click Next and select the languages available for updates:
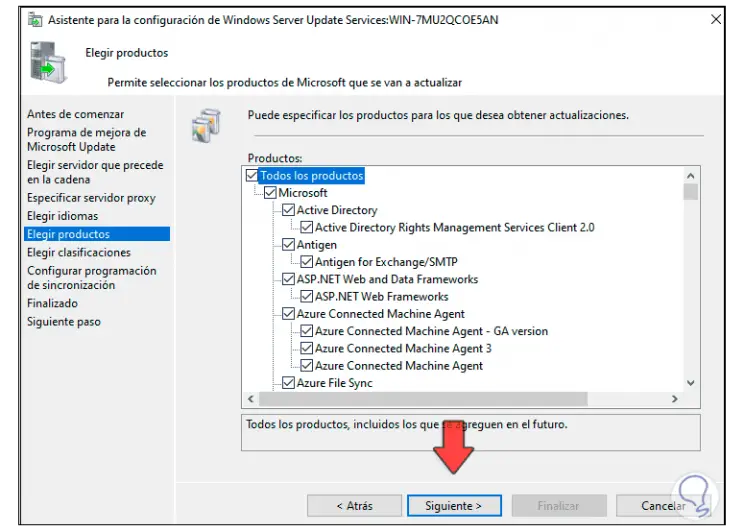
Step 32
Then we choose which products will be available to receive updates through WSUS:
Step 33
In the next window we confirm the type of updates to download:
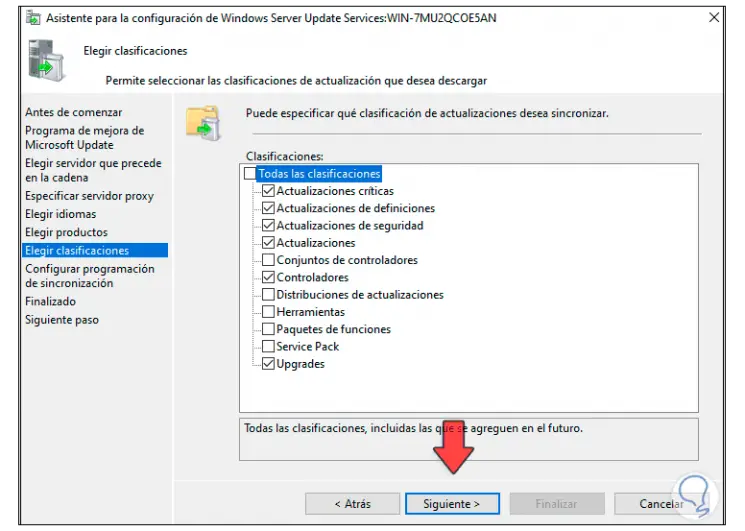
Step 34
There we activate the boxes as necessary and click Next to define the synchronization method to use:
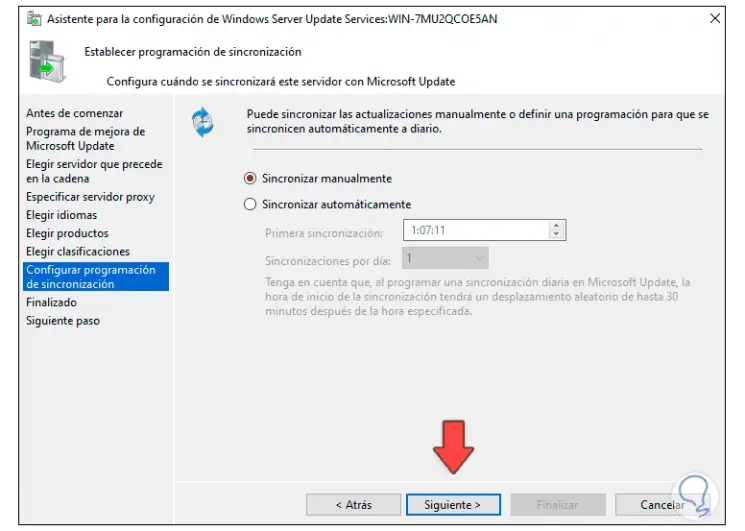
Step 35
Click Next and we will see the following:
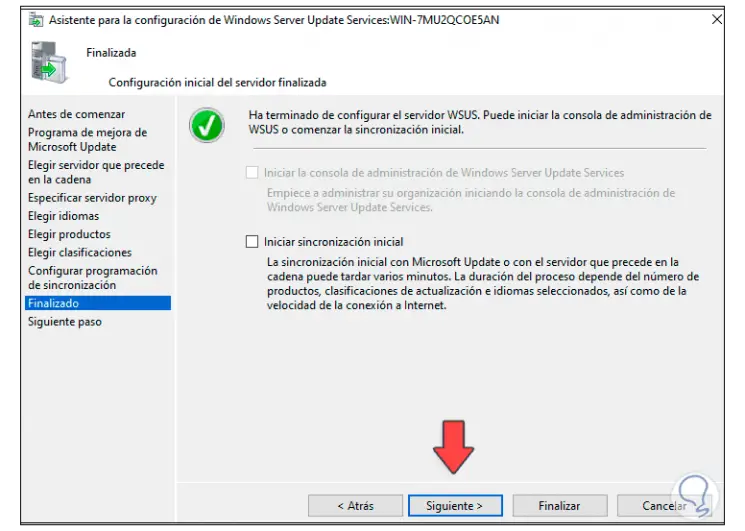
Step 36
Click Next to complete the process:
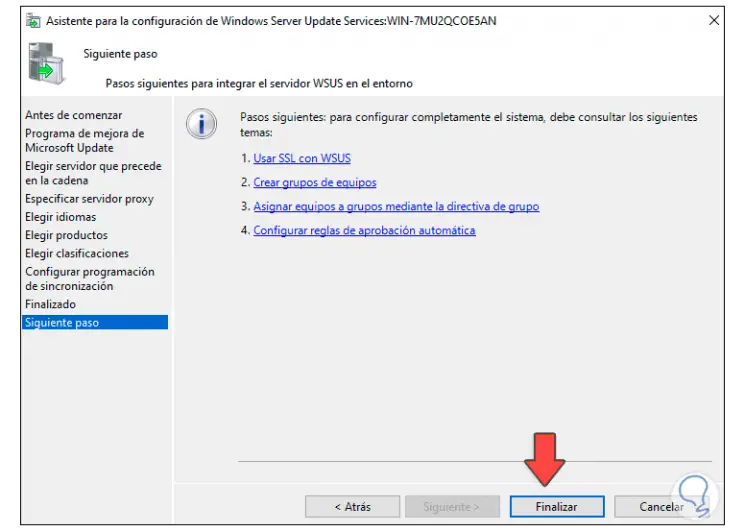
Step 37
Click "Finish" to finish the WSUS configuration on Windows Server 2022.

Step 38
We will be redirected to the WSUS console to see details of the available updates:
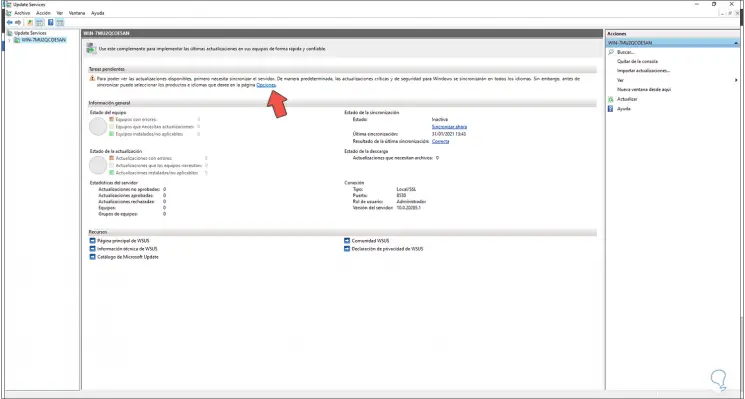
Step 39
In the WSUS console we click on the "Options" category:
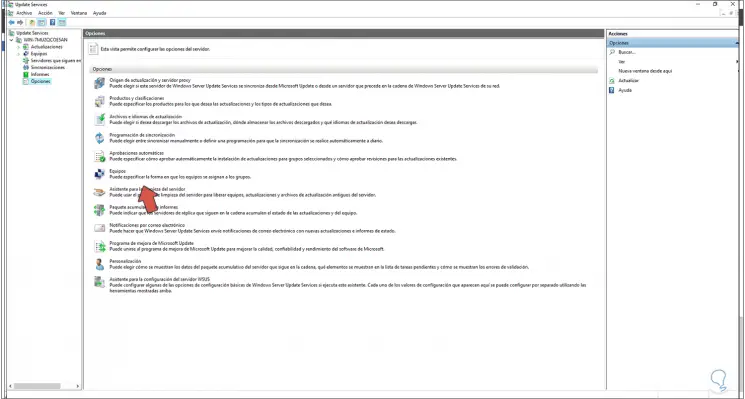
Step 40
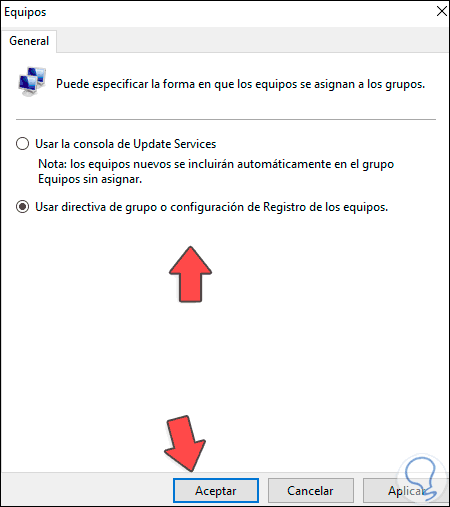
We double click on "Computers" and in the displayed window we activate the "Use group policy or computer registry settings" box. Click Apply and OK to apply the changes.
Step 41
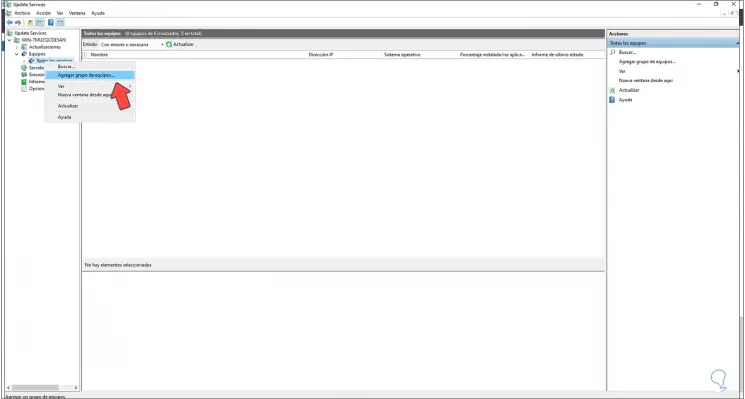
We go to the "Teams" section, right click on the "All teams" line and select "Add group of teams":
Step 42
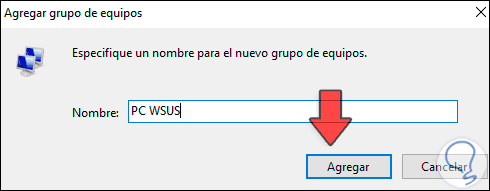
We assign the name to the group:
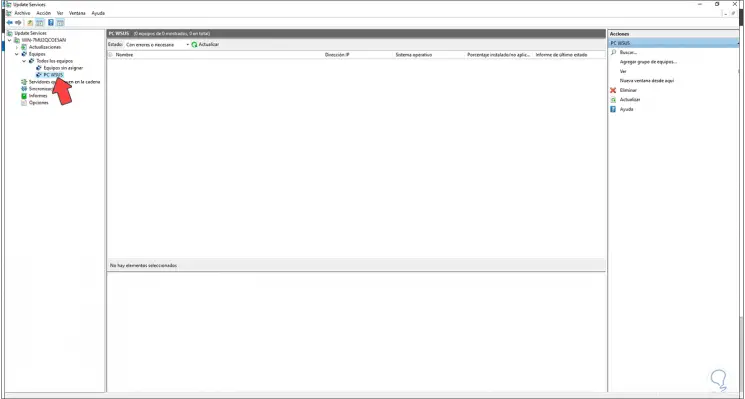
Step 43
Click Add and we see the group created:
Step 44
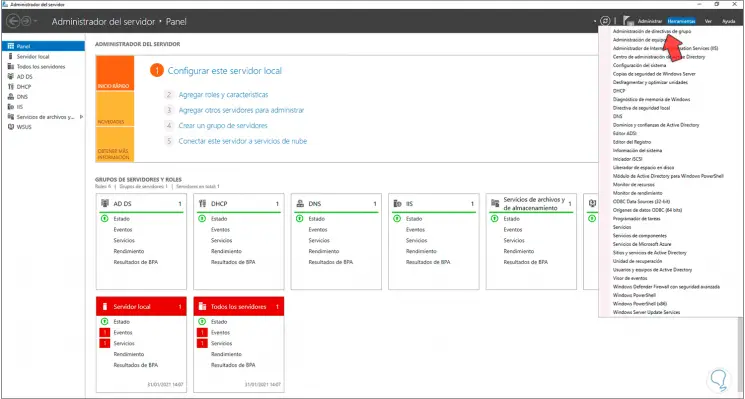
Now we go to the Server Manager and select "Tools / Group Policy Management":
Step 45
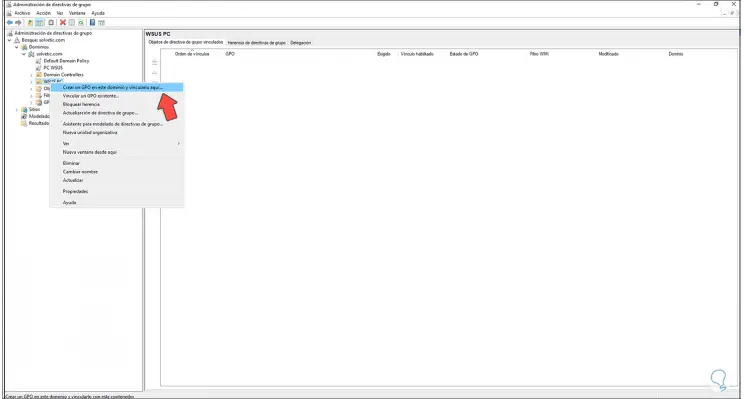
We right click on the Organizational Unit of the teams that will be linked to WSUS and select the option "Create a GPO in this domain and link it here"
Step 46
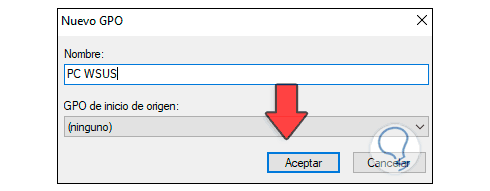
We assign the desired name and apply the changes:
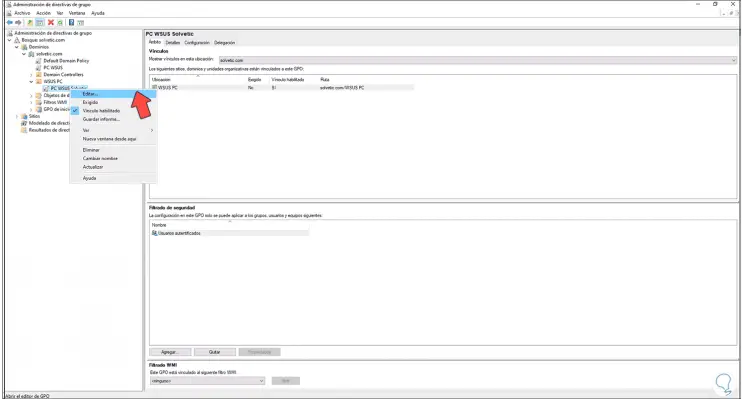
Step 47
We right click on the created GPO and select the Edit option:
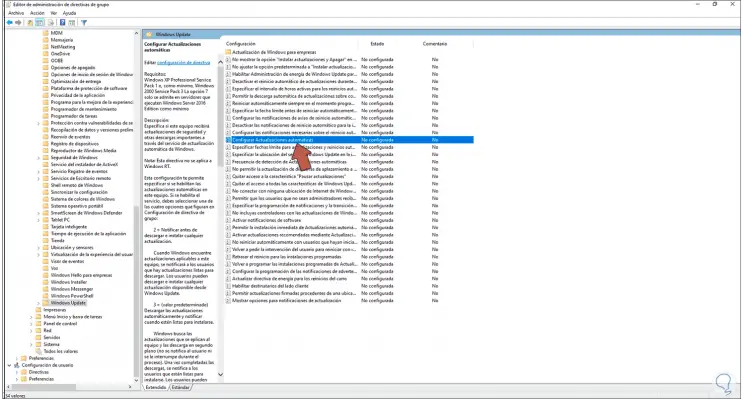
Step 48
In the open window we go to the path "Computer Configuration - Policies - Administrative Templates - Windows Components - Windows Update", first of all we select the policy "Configure Automatic Updates":
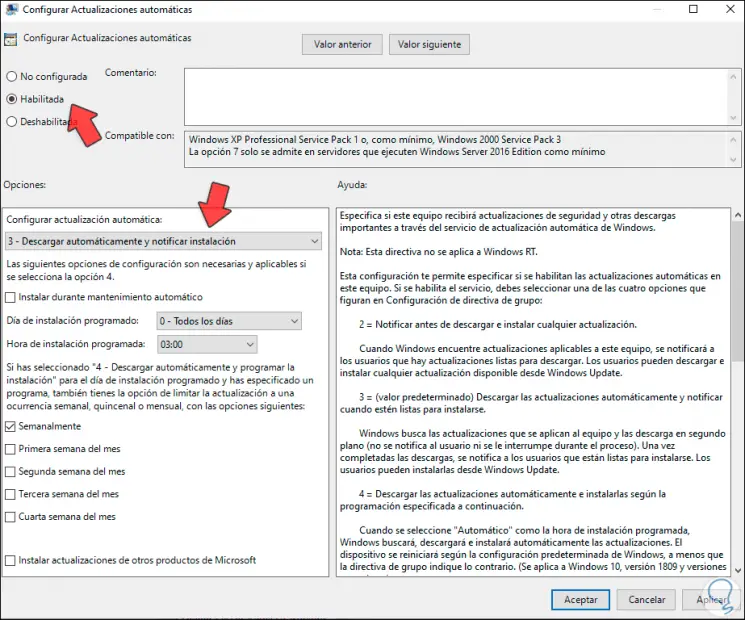
Step 49
We edit the policy and activate the "Enabled" box, then select option 3 - "Automatically download and notify installation" in the Configure automatic update field. Apply the changes by clicking Apply and OK.
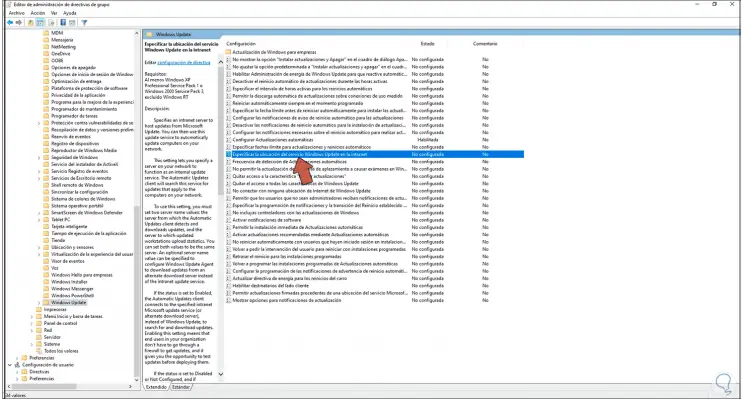
Step 50
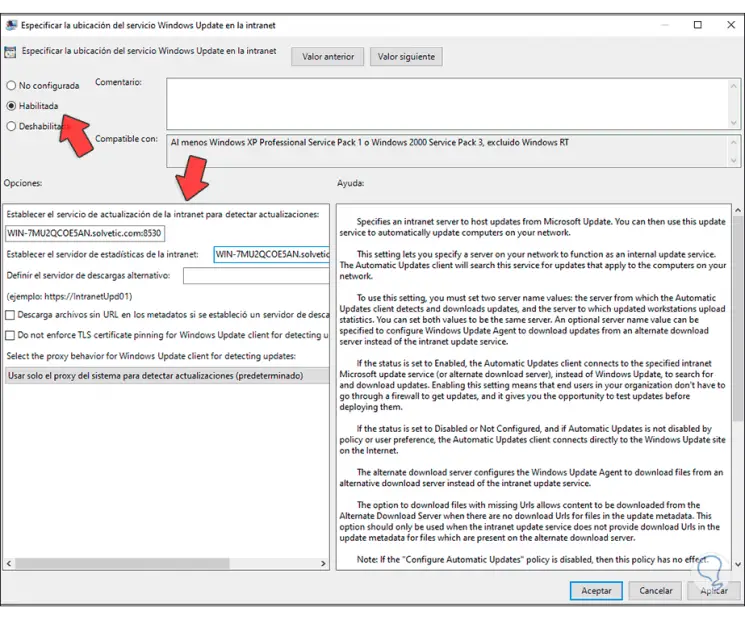
Now we edit the policy "Specify the location of the Windows Update service on the intranet"
Step 51
We edit this policy, enable it and in the field "Establish the intranet update service to detect updates" and "Establish the intranet statistics server" we enter the syntax http: //Equipo.Dominio: 8530 . We apply the changes.
Step 52
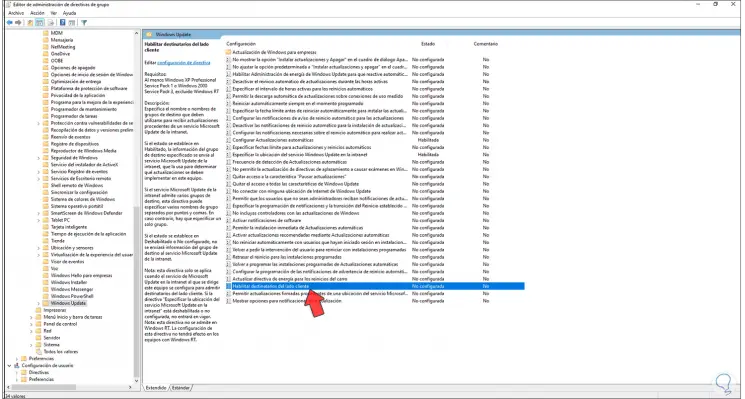
Then we go to the policy "Enable client-side recipients":
Step 53
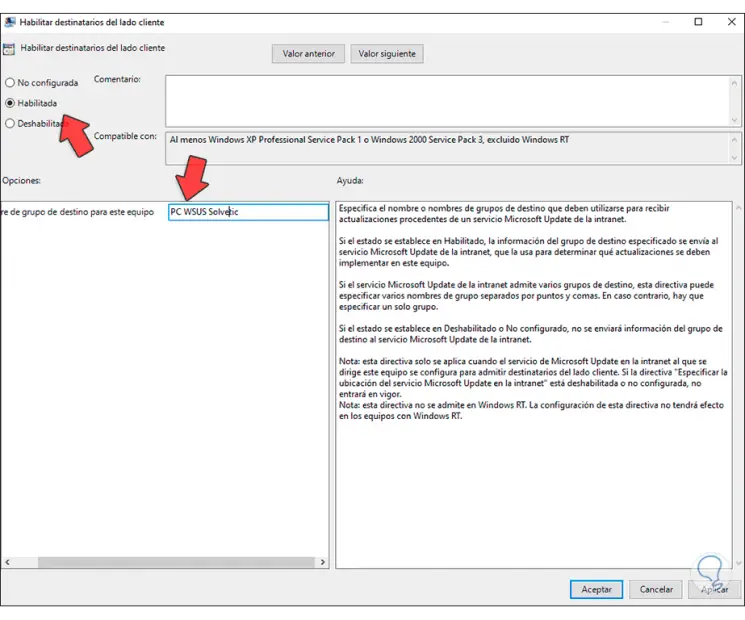
We edit the policy and activate the "Enabled" box, in the "Target group name for this computer" field enter the name of the created group. We apply the changes.
Step 54
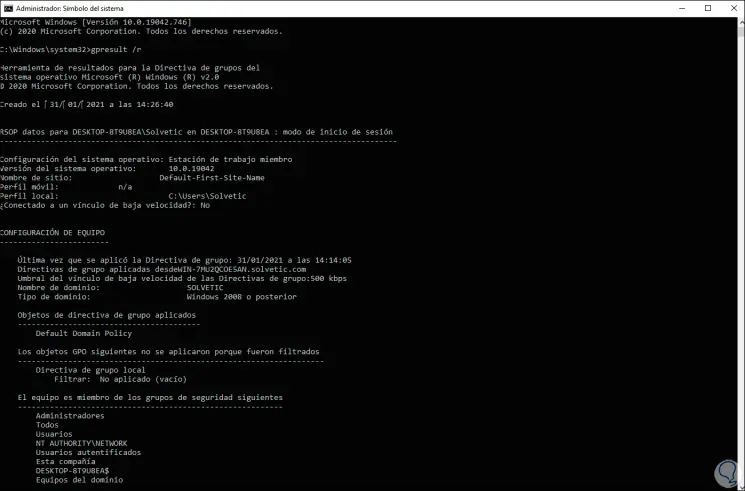
We go to the client computer of the domain, we access the command prompt as administrator and there we execute:
gpresult / r
Step 55
This takes care of updating the domain policies on the computer. Now we initialize Windows Update with the command:
Wuauclt.exe / reportnow / detectnow

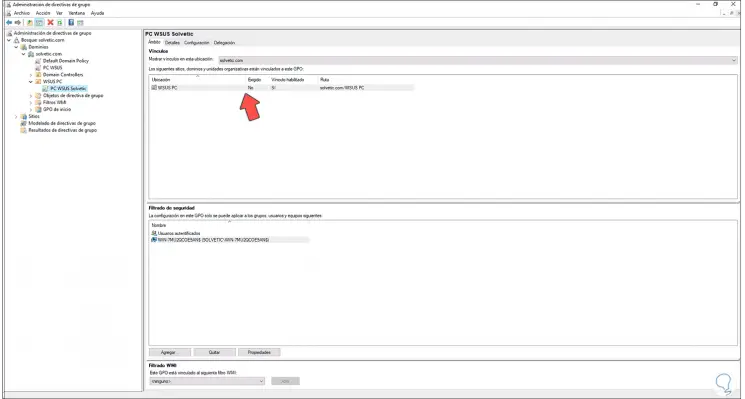
Step 56
Finally we go back to Windows Server 2022, and in the WSUS console and in the policy we can see the computers where the configuration has been applied:
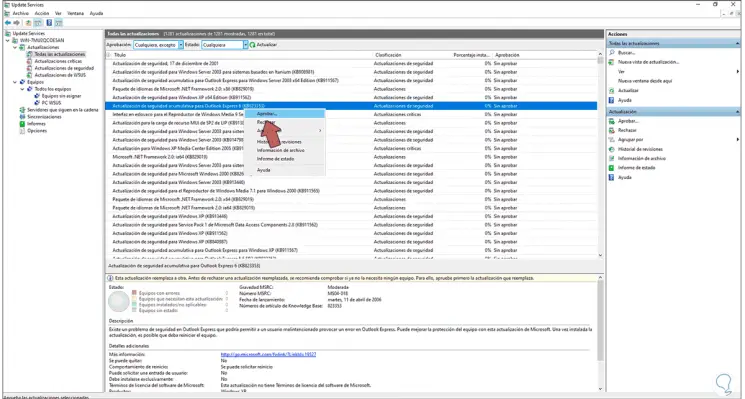
Step 57
Now we will go to "Updates / All updates", we right click on any update and choose "Approve":
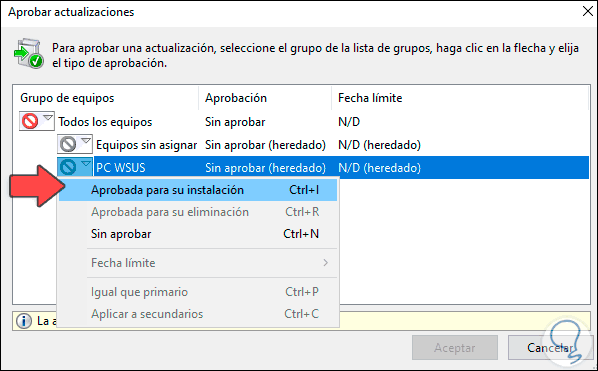
Step 58
Now we select the GPO created and choose "Approved for installation":
Step 59
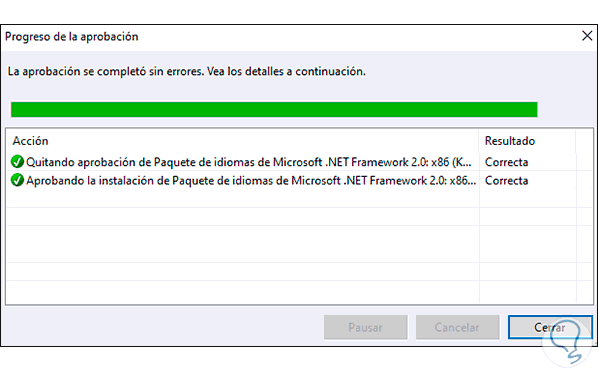
We will see the following:
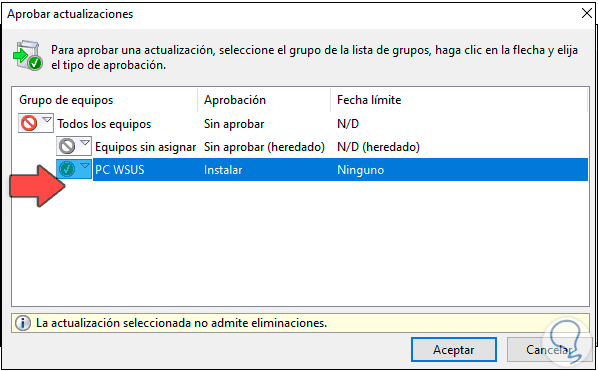
Step 60
Click OK to install said update:
Thanks to WSUS we have the best alternative to manage everything related to updates in Windows Server 2022 and domain computers..