Microsoft through its Insider program gives us the opportunity to know what will come in the next edition of Windows Server and it is its version 2022 ( Windows Server 2022 ) which changes its appearance but maintains the essence of the system in terms of roles, services and performance is concerned..
Windows Server is tasked with being a central point for administrators to offer client computers and users better management options, and one of these roles is the ability for Windows Server 2022 to act as a file server.
When we talk about a file server we mean that the server is able to offer a central location in the local network to store files and share them with domain users, facilitating this type of task, this logically can go with certain permissions in based on the criteria and level of privacy of the information..
In Windows Server we can manage
By acting in this mode, Windows Server 2022 allows us to manage:
- Work folders: these allow users to store and have access to work files, being these managed by the server administrator
- ISCSI Target Server - Allows you to create hardware independent iSCSI disk subsystems which are based on storage area network (SAN) software
- Data deduplication: is a feature that reduces the hard disk space requirements of files by optimizing overall storage space
- Storage spaces: it is a function that allows to have high availability storage
- Windows PowerShell: known to all, this gives us the opportunity to automate the management of file server administration tasks
- Storage Spaces Direct - Creates a new level of scalable and available storage through local storage servers
- Storage Quality of Service - centrally monitors storage performance on the system
- Storage Replica - Synchronously replicate storage across servers and clusters for data availability
TechnoWikis will explain how to install and configure a file server in Windows Server 2022.
To stay up to date, remember to subscribe to our YouTube channel! SUBSCRIBE
How to install and configure a file server in Windows Server 2022
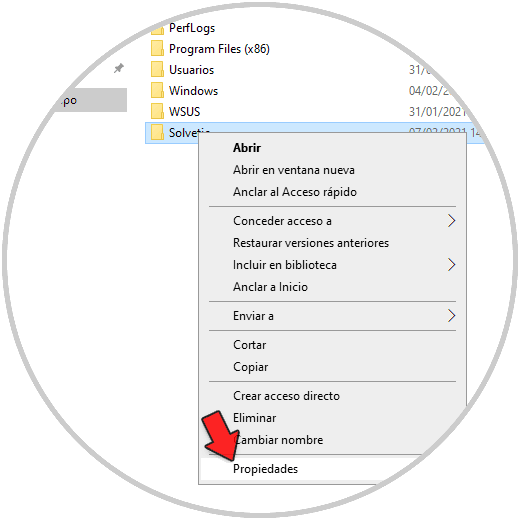
Step 1
We go to the folder that will act as a repository, we right click on it and select "Properties":
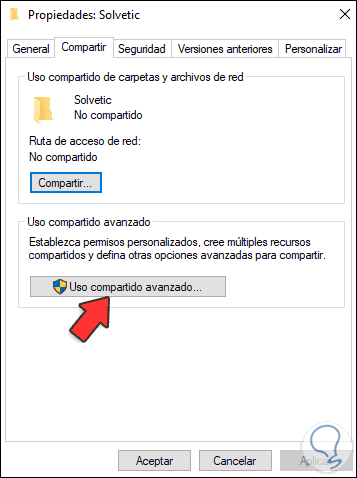
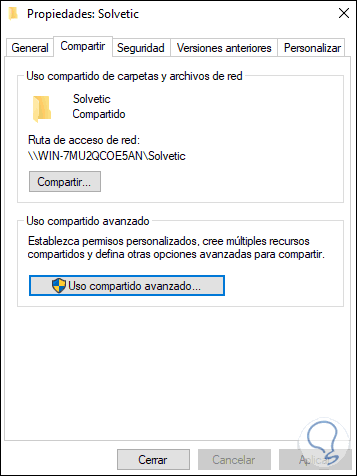
Step 2
In the pop-up tab we go to the "Share" tab. We click on "Advanced sharing":
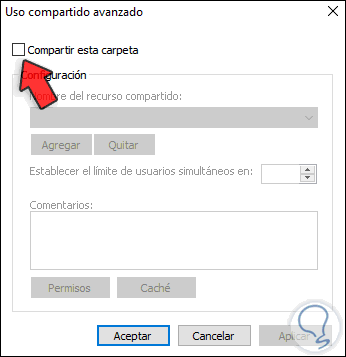
Step 3
We activate the "Share this folder" box and assign the name to the shared resource:
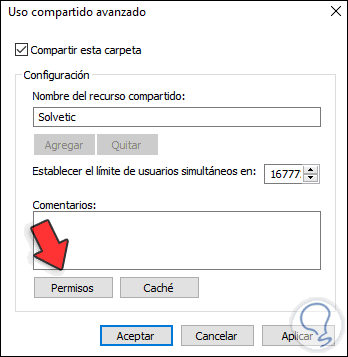
Step 4
Now we click on "Permissions" and we will see the following:
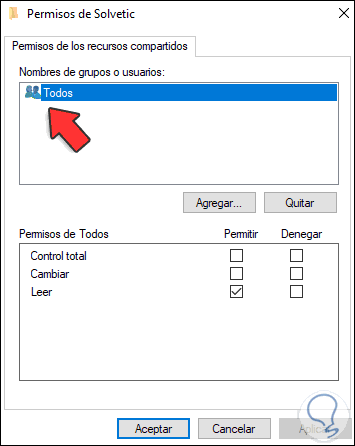
Step 5
Remove "All":
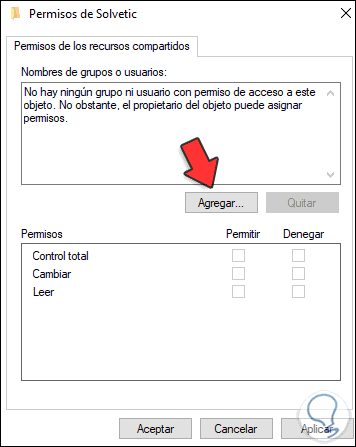
Step 6
Click on "Add"
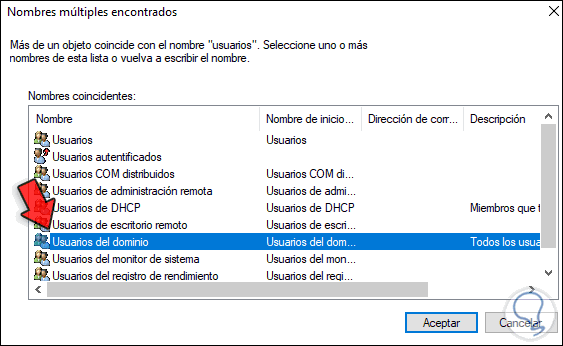
Step 7
We add "Domain users":
Step 8
We see the added group:
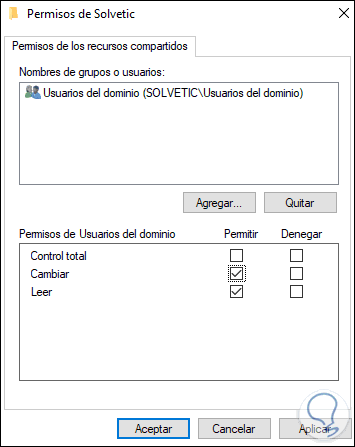
Step 9
We configure the appropriate permissions and apply the changes, we can see the path established with the shared folder:
We close the window..
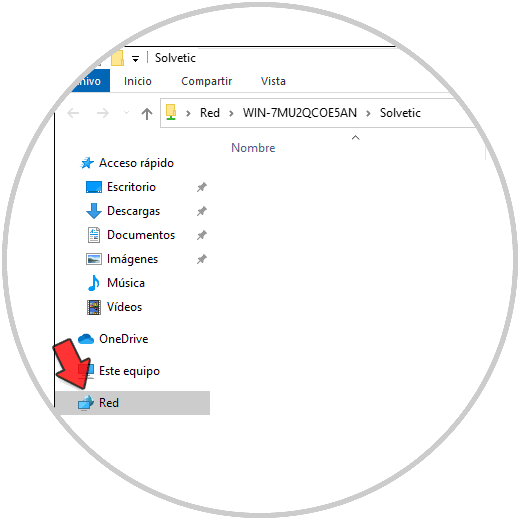
Step 10
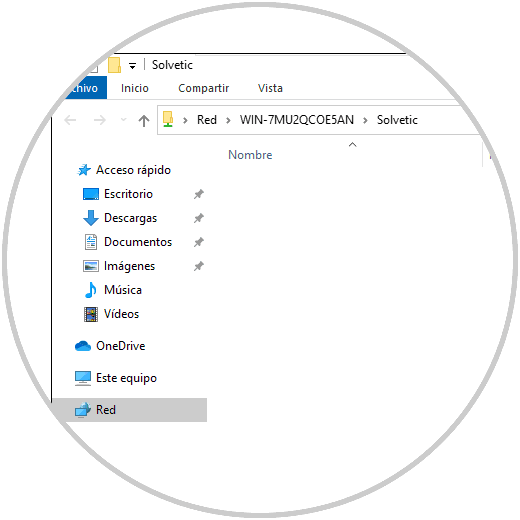
On the client computer from "Network" you can access the shared folder on the server:
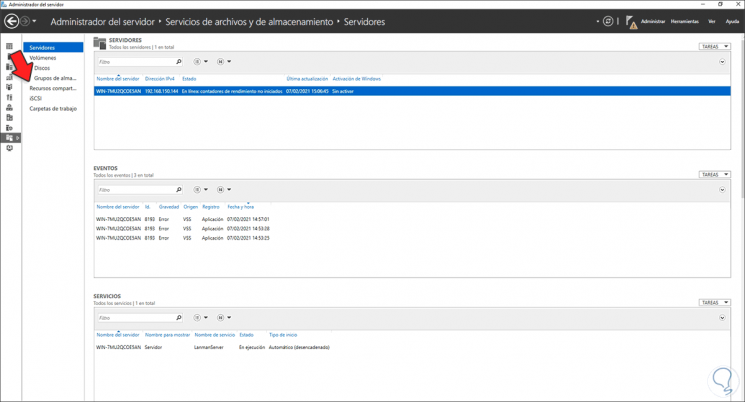
Step 11
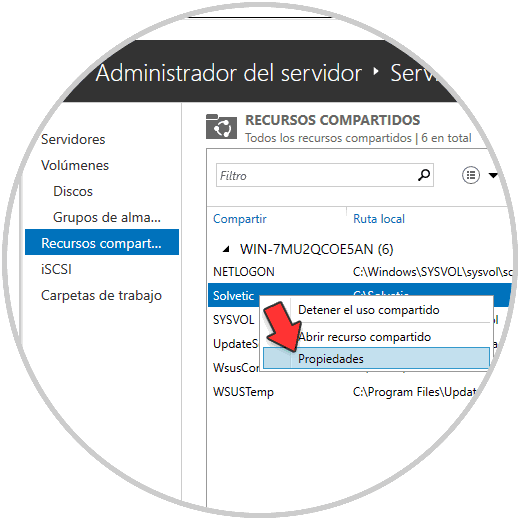
In the "Server Manager" we go to "File Services and Shares":
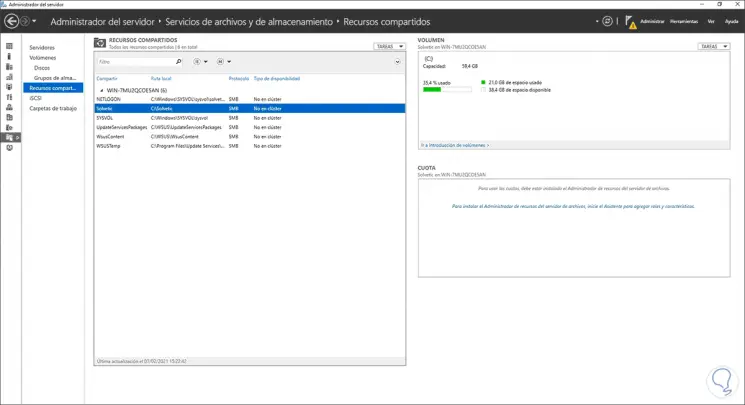
Step 12
In "Shared Resources" we will see the previously shared folder:
Step 13
We right click on the folder and go to "Properties":
Step 14
Then we go to "Configuration" and we will see the following:

Step 15
We activate the "Enable enumeration based on access" box:
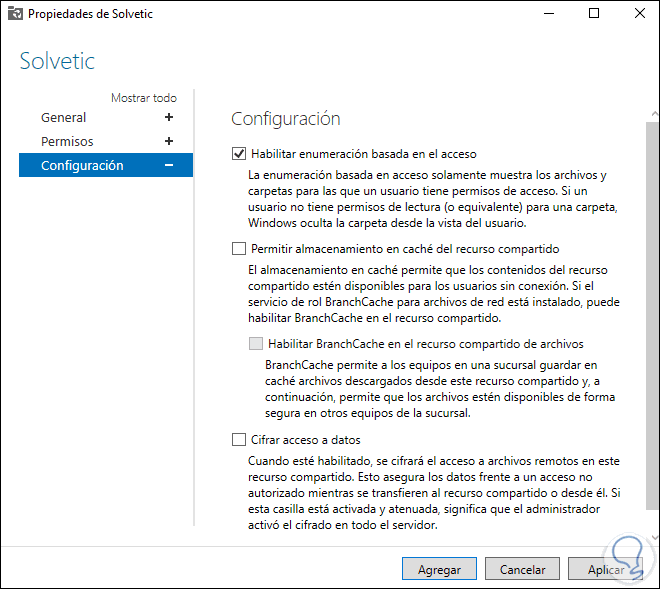
Apply the changes by clicking apply and then Add.
Step 16
Choices
The available options are:
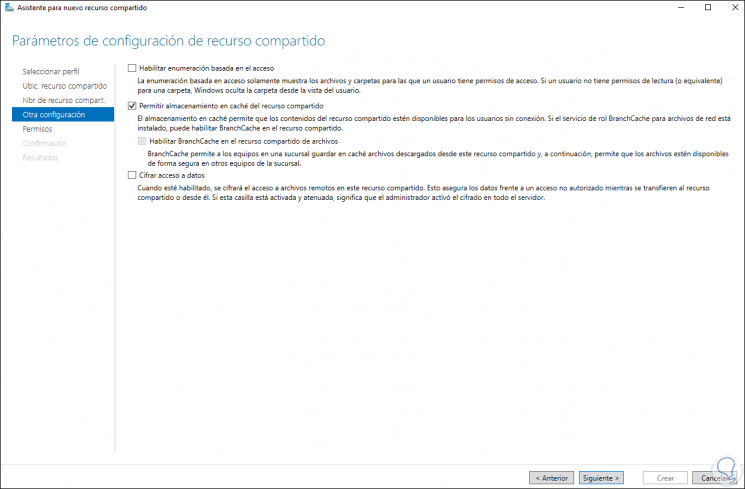
- Enable access-based enumeration: allow users to only view folders with edit permission, those that are read-only will be hidden
- Allow share caching: enable sharing without connection
- Enable BranchCache on file share: This option caches resources for later access
- Encrypt Data Access - Encrypts access to files for added security.
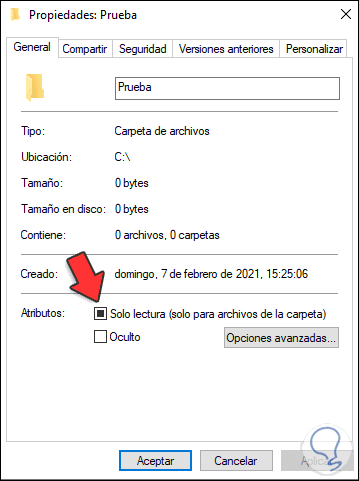
Now we create a folder with read-only permissions:
Step 17
We can verify that this will not be visible from the client computer:
Step 18
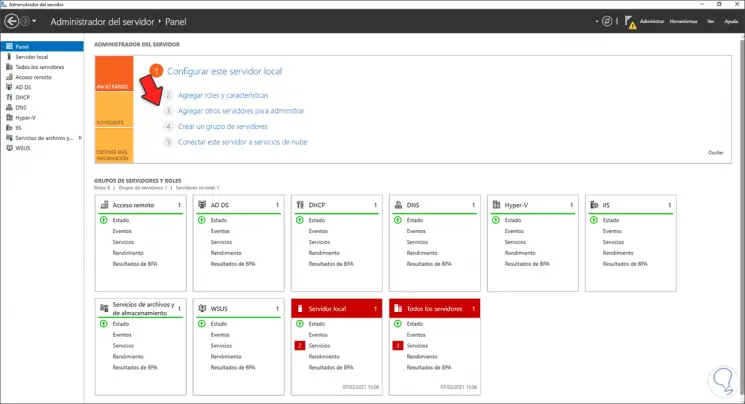
We go to the Server Manager and click on "Add roles and characteristics":
Step 19
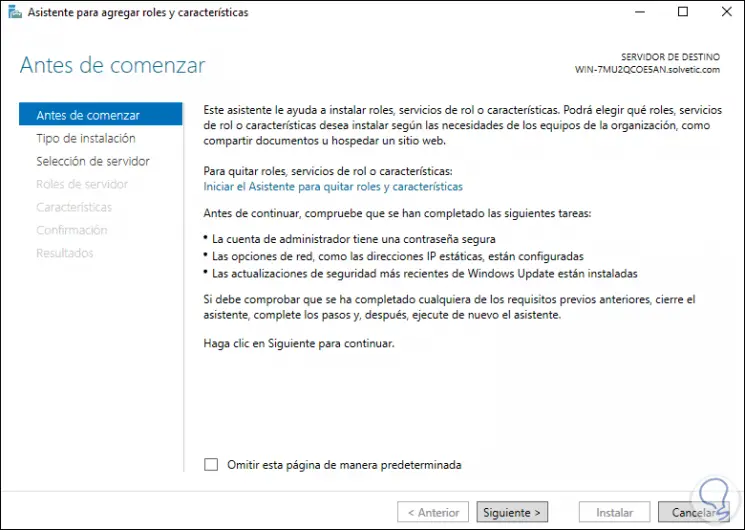
The following wizard will be displayed:
Step 20
We select "Feature-based or role-based installation":

Step 21
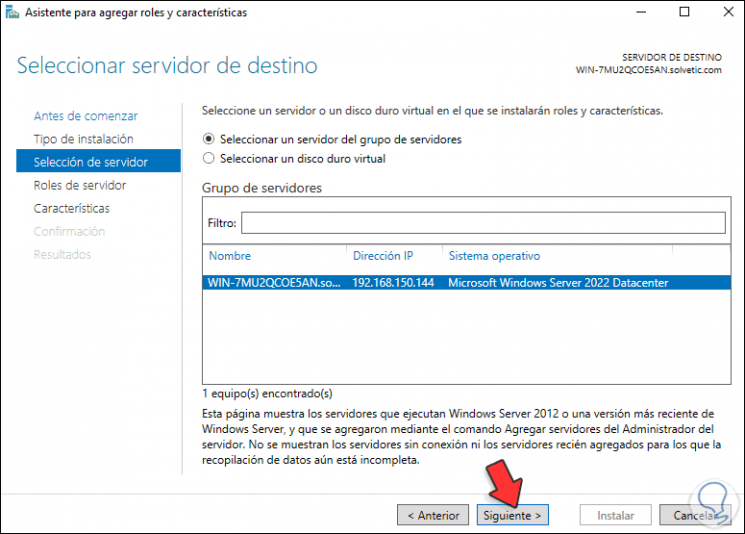
In the next window we select the server:
Step 22
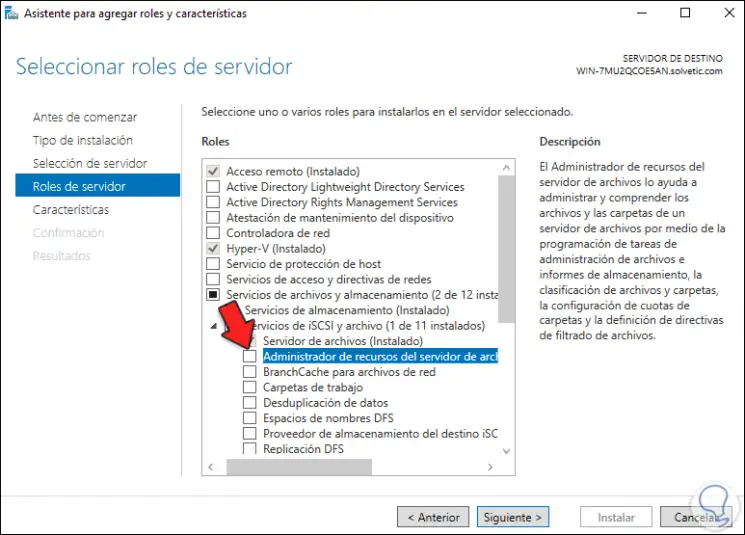
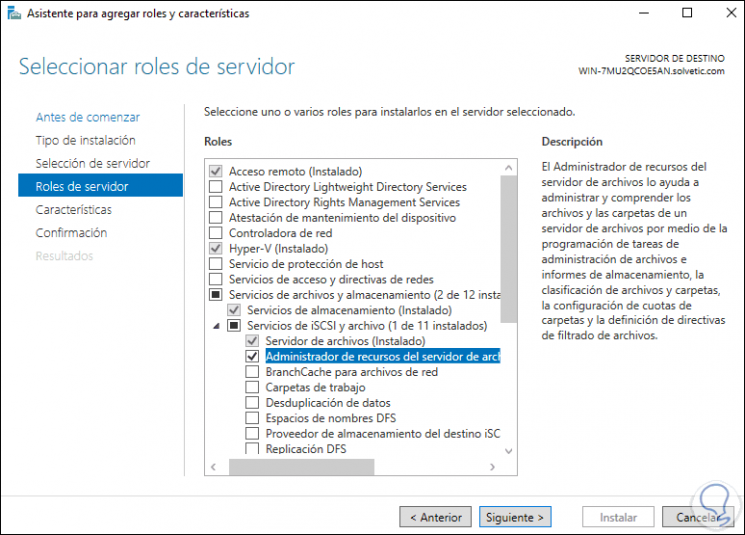
Click Next to go to the roles section, go to "File and storage services", display "iSCI and file services" and locate "File server resource manager":
Step 23
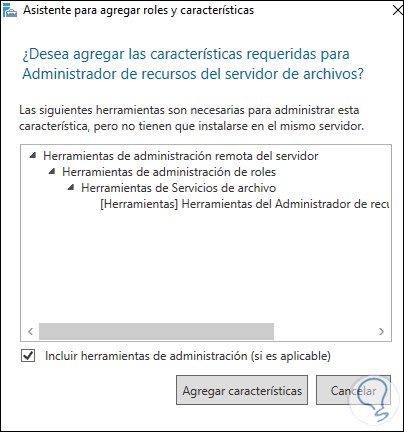
We activate its box and we must add the characteristics:
Step 24
We will see the active role:
Step 25
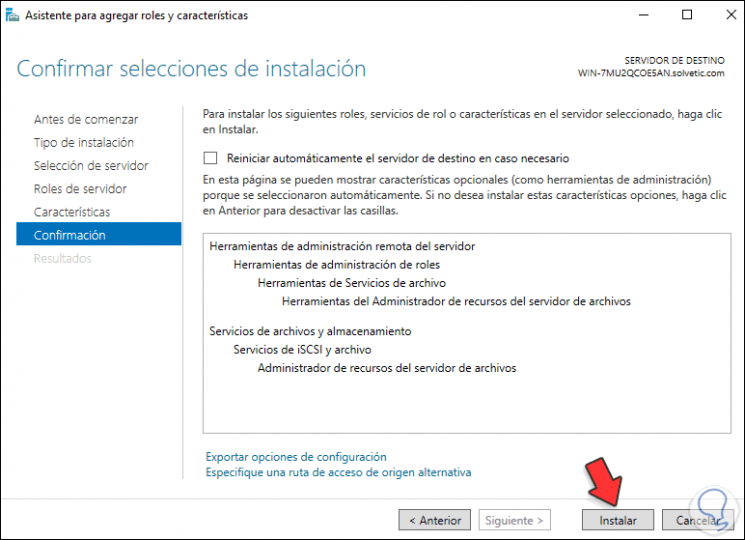
Click Next and skip the “Features” section, we will see a summary of the role to add:
Step 26
Click Install to complete the process:
Step 27
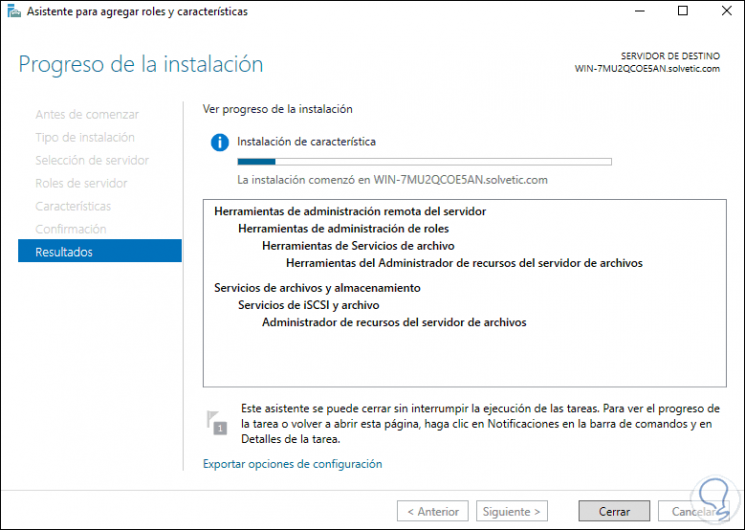
At the end of the action we will see the following:

We left the assistant.
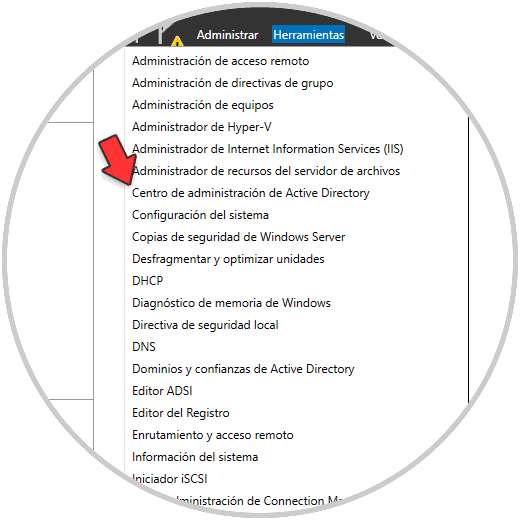
Step 28
Now we go to "Tools - File server resource manager":
Step 29
The following window will be displayed where we can see the various options to use:
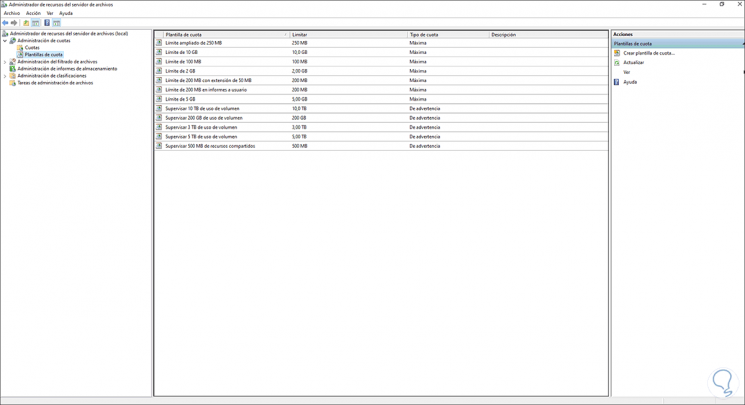
Step 30
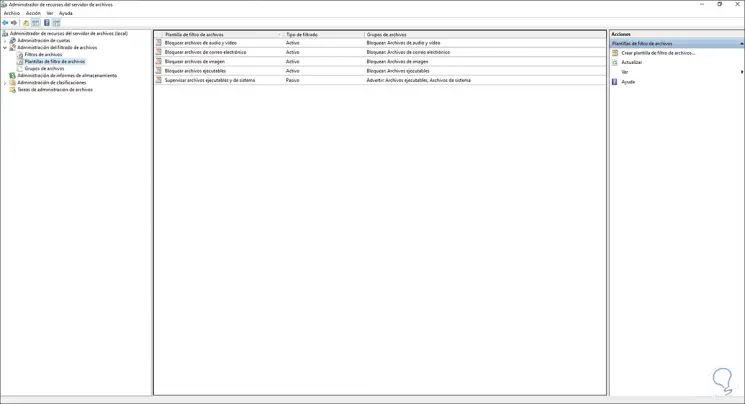
In this section we can apply quotas or limits for storage so that the disk is not occupied with non-essential data. We can filter the types of files to be used on the file server if we want:
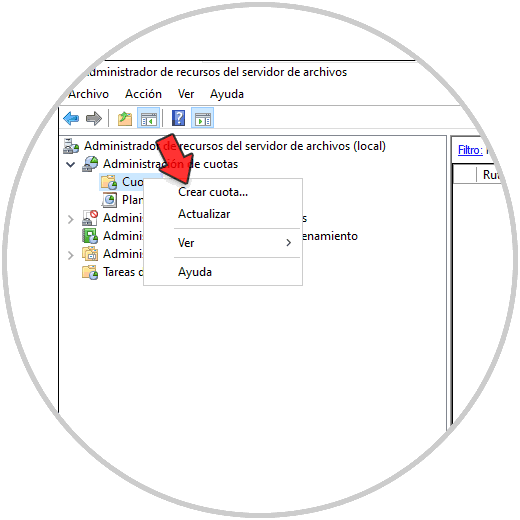
Step 31
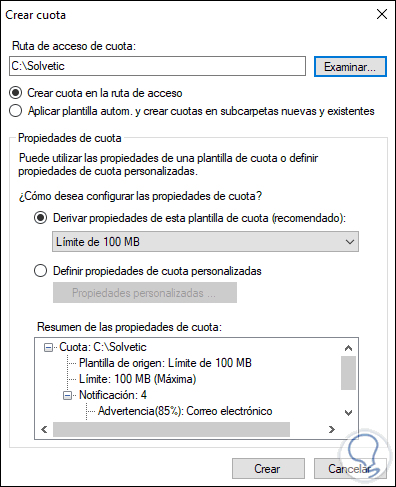
We are going to create a quota to see how it works, right click on "Quotas" and select "Create quota":
Step 32
We set the path and the parameter, apply the changes:
Step 33
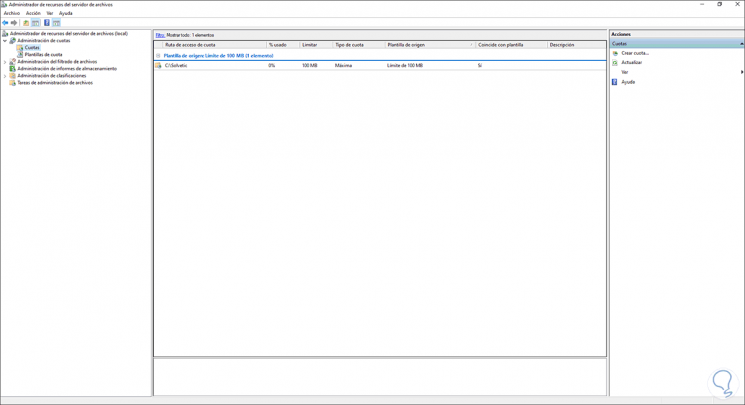
We see the quota created:
Step 34
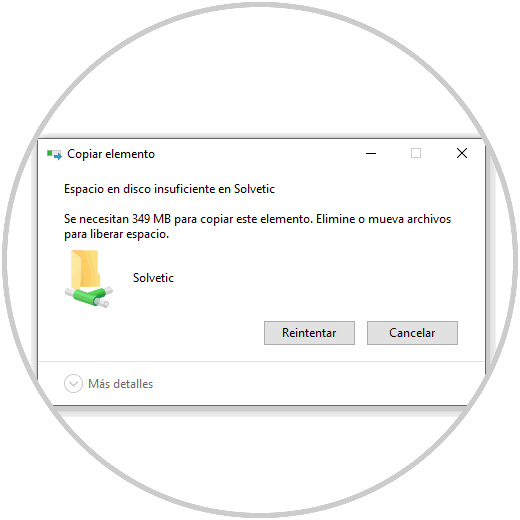
When we try to copy something in the folder that exceeds the quota we will see the following error:
Step 35
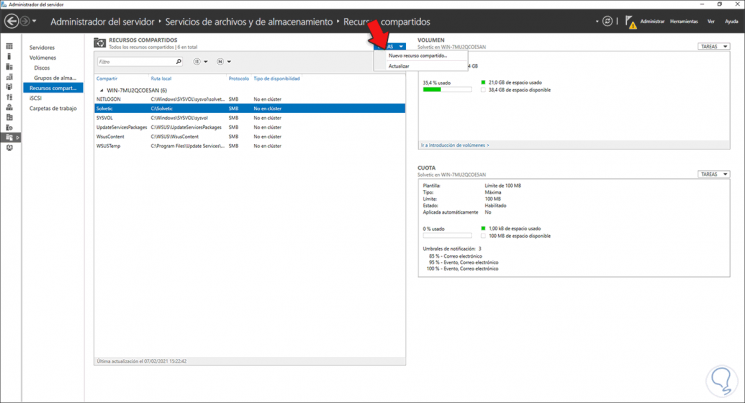
It is possible to create a shared resource from the administrator, for this we go to "File services and shared resources", then we go to Shared Resources and in Tasks select "New share":
Step 36
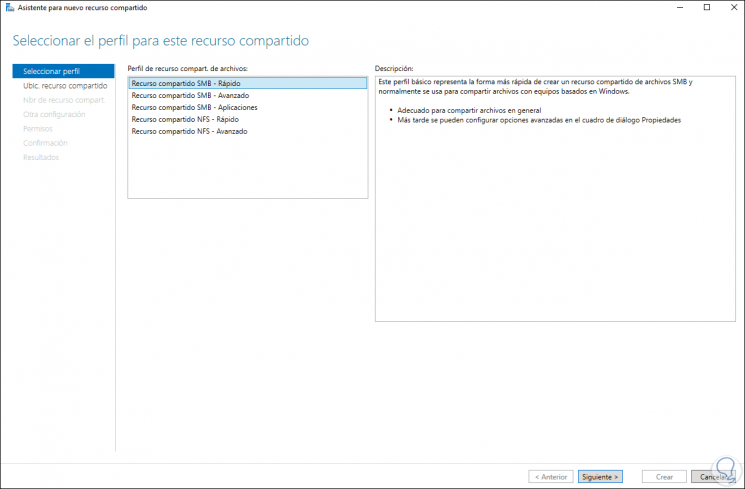
The following window will be displayed where we select the profile to use:
Step 37
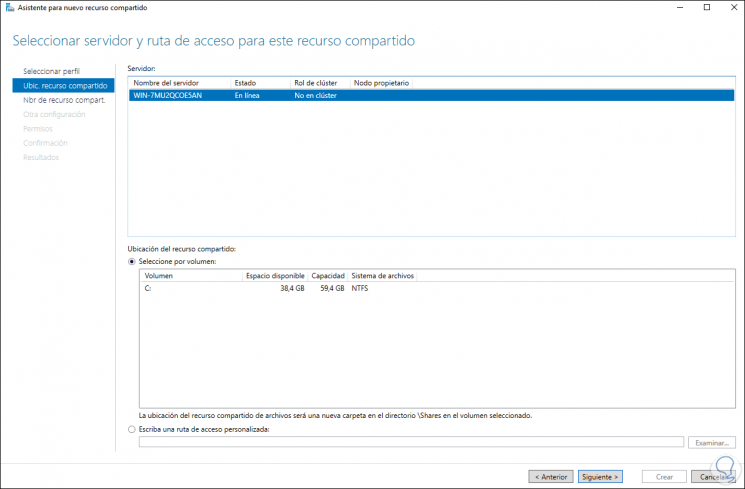
We select the location where the resource will be:
Step 38
Then we set the resource path:

Step 39
Click Next and configure the desired parameters:
Step 40
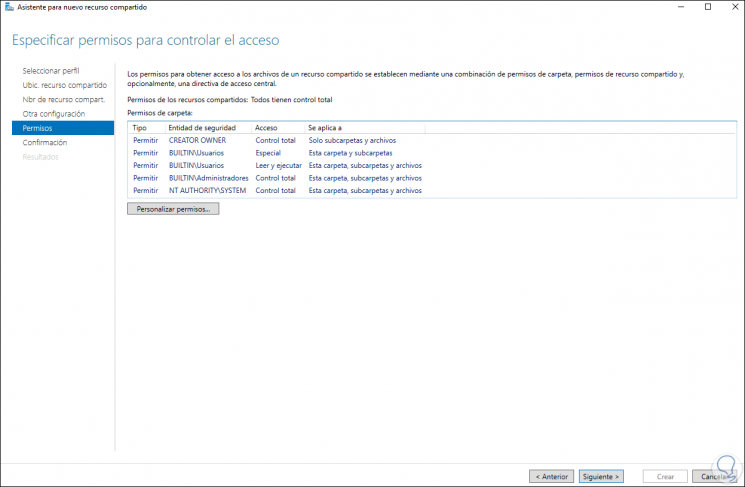
Next we define the permissions:
Step 41
Click Next to see a summary of the resource:
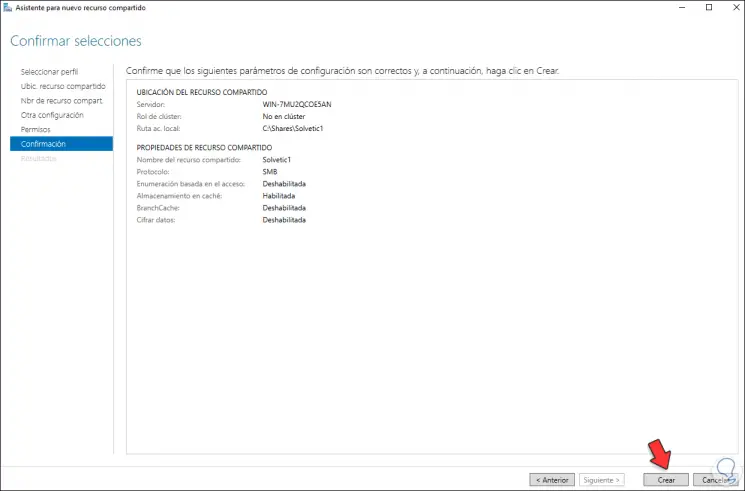
Step 42
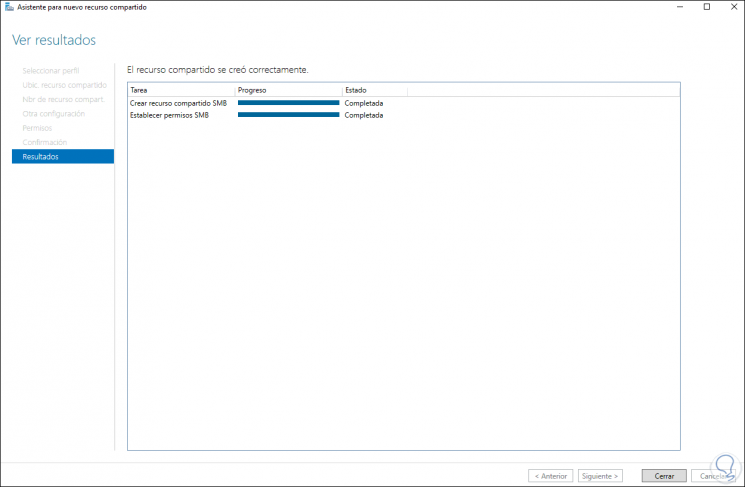
Click on Create to apply the changes:
Step 43
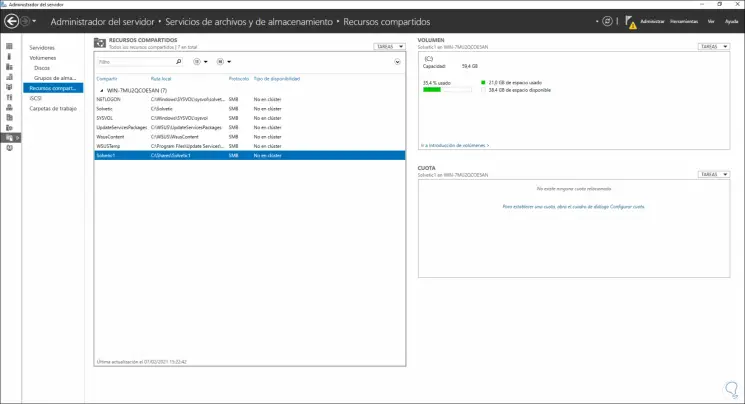
We will see the new share:
Step 44
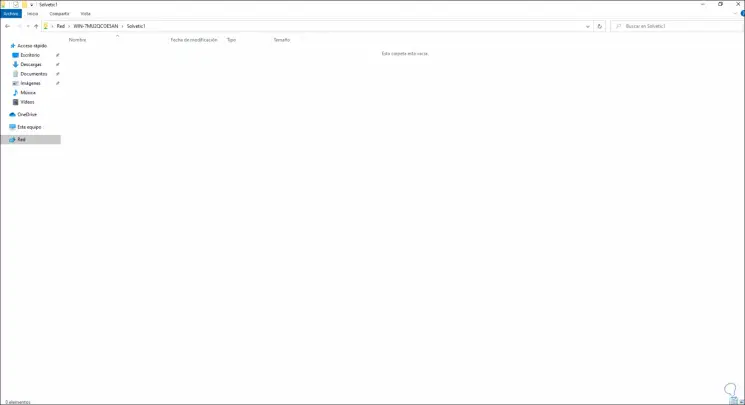
On the client computer we will have access to the new share in Windows Server 2022:
This is the step-by-step process to install and configure a file server on Windows Server 2022.