The file transfer is one of the activities that remain active in any environment and thanks to this we can share different items between users on a network . To help make this process effective there is the FTP protocol..
What is FTP
The FTP protocol (File Transfer Protocol) has been developed with the aim of defining the way in which one or more files must be shared both in the tasks of sending and receiving, as well as their management that involves creating , rename and delete on a TCP / IP network. FTP works in both passive and active modes.
When using FTP, one connection will be used for data transfer and another connection must be destined for the control connection.
FTP
With FTP it is possible to:
- Make use of file sharing effectively
- Transfer data reliably and efficiently
- Implement the use of remote computers
When we implement FTP, two types of connections will be used, which are:
Control connection
This is a connection with which we are able to transfer a command line, the control connection is carried out between the control processes and will be connected during the entire interactive FTP session.
Data connection
This connection is activated between data transfer processes
FTP client
In addition to the FTP configuration on the server, an FTP client is required with which it is possible:
- It gives a user the possibility to connect to a remote host and upload or download the necessary files.
- It implements a file transfer protocol thanks to which we can transfer files between two computers on the network.
- It integrates commands with which it is possible to connect to a host, transfer files or close the connection.
Now we are going to see how to install and configure this FTP protocol in Windows Server 2019..
To stay up to date, remember to subscribe to our YouTube channel! SUBSCRIBE
1. How to install and configure FTP on Windows Server 2019
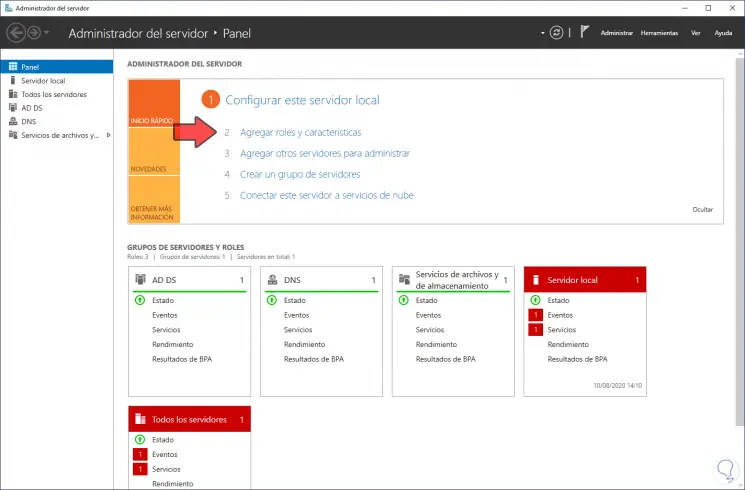
Step 1
FTP is presented as a role in Windows Server 2019 and we must install it from the Server Administrator, for this we will click on "Add roles and characteristics":
Step 2
This will launch the following wizard:
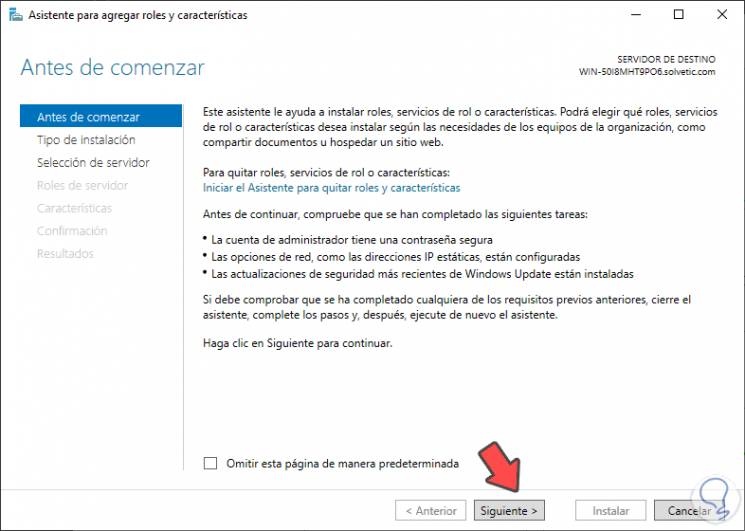
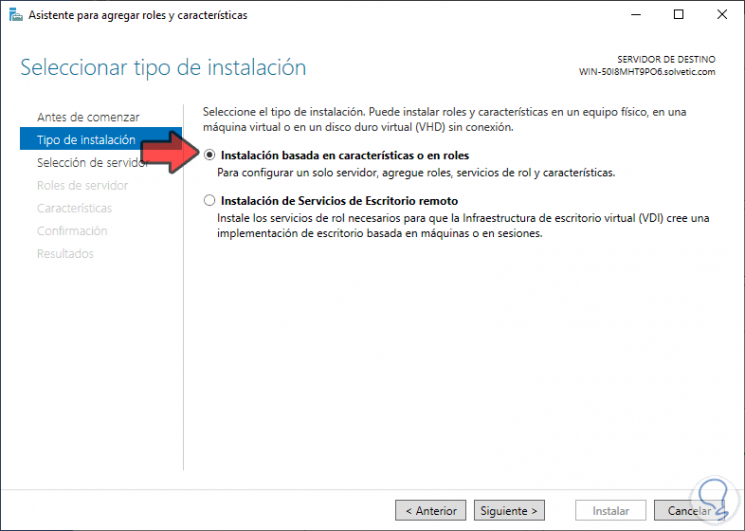
Step 3
We click on Next and in the next window we activate the box "Installation based on characteristics or roles":
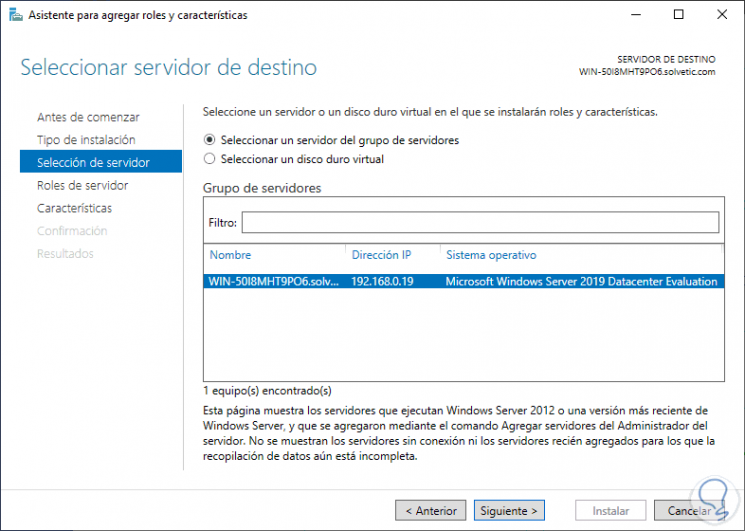
Step 4
We click Next and now we select the server where the FTP role will be installed:
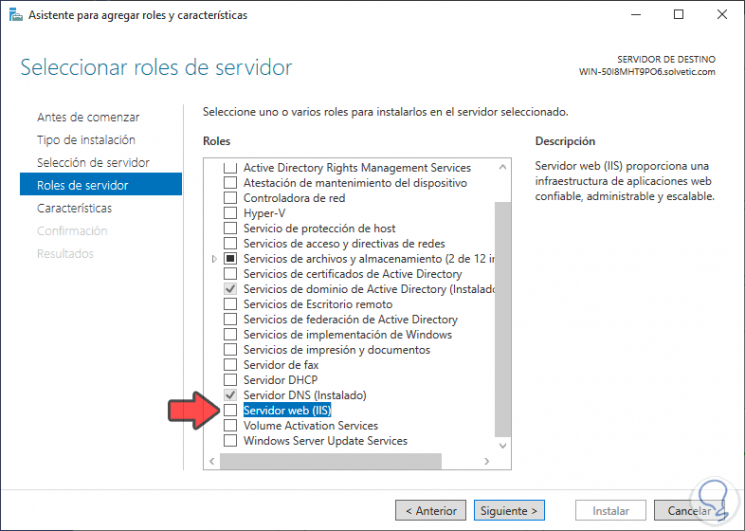
Step 5
In the next window we find the server roles, there we locate the option "Web server (IIS)":
Step 6
When activating its box we will see the following window:
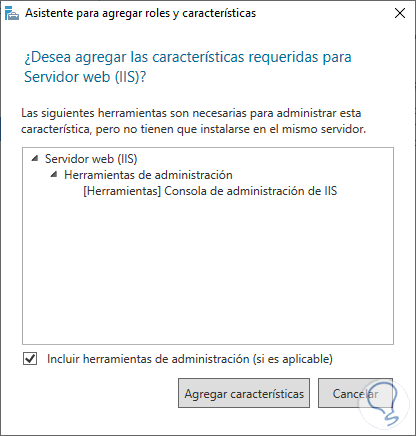
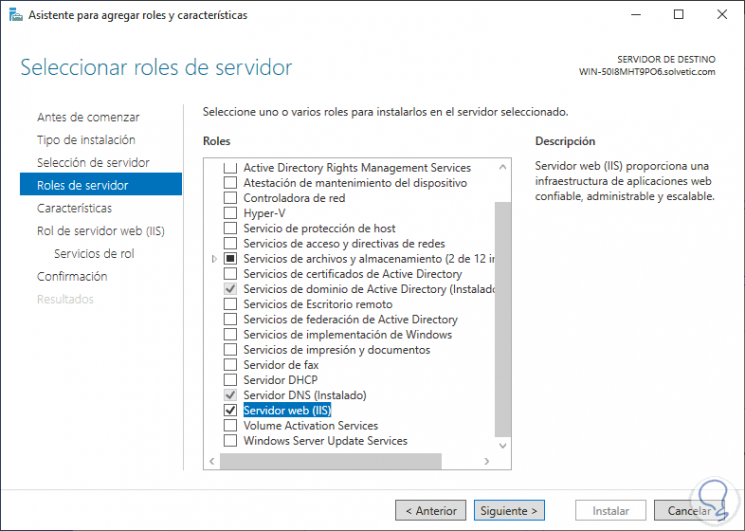
Step 7
We click on "Add features" and this will activate said role option:
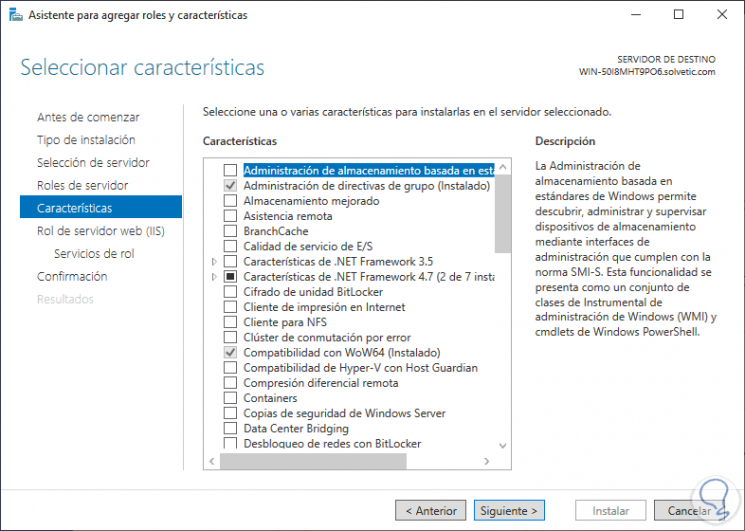
Step 8
We click on "Next" and we will see the characteristics section in which we will not apply any changes:
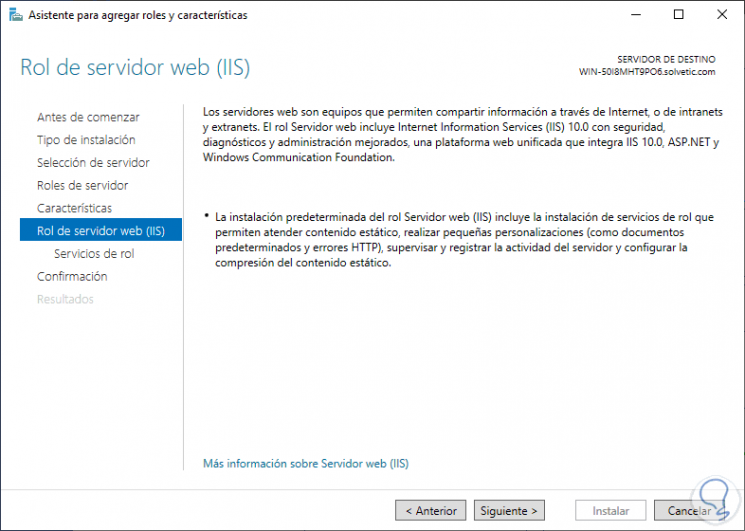
Step 9
Again we click Next and we will see a brief summary about the role that we are going to install in Windows Server 2019:
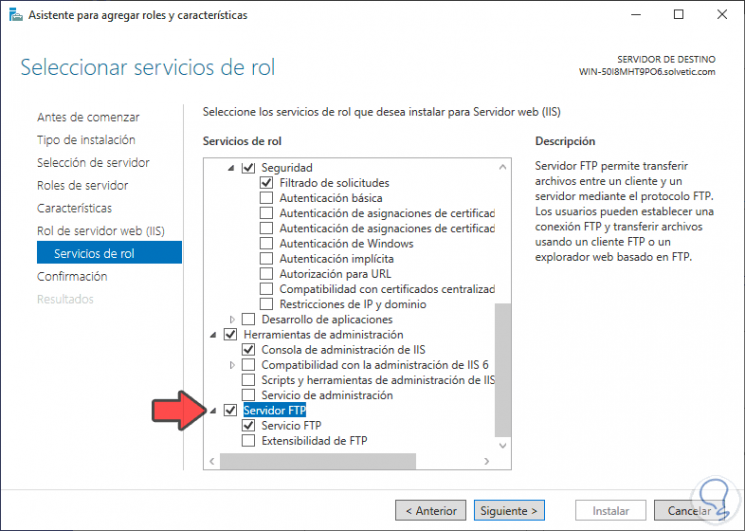
Step 10
Click on Next and in the "Role Services" section we activate the "FTP Server" box:
Step 11
We click Next and we will see a summary of what has to be installed on the server:
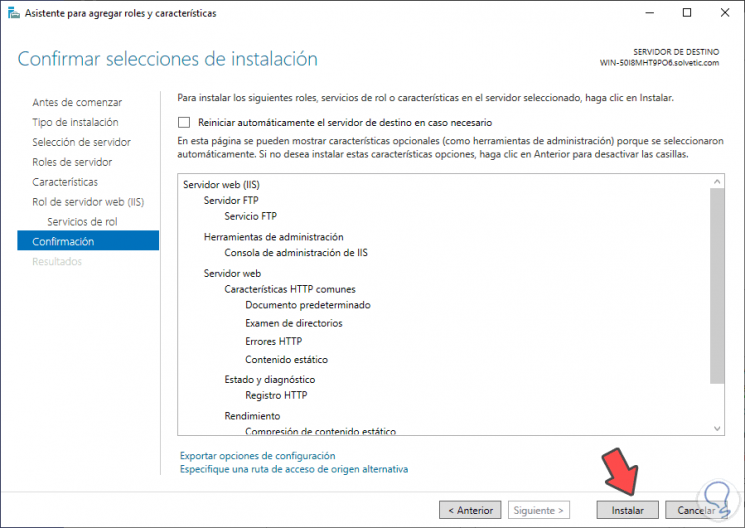
Step 12
Finally, we click on "Install" to start the installation process of the FTP role on the computer:
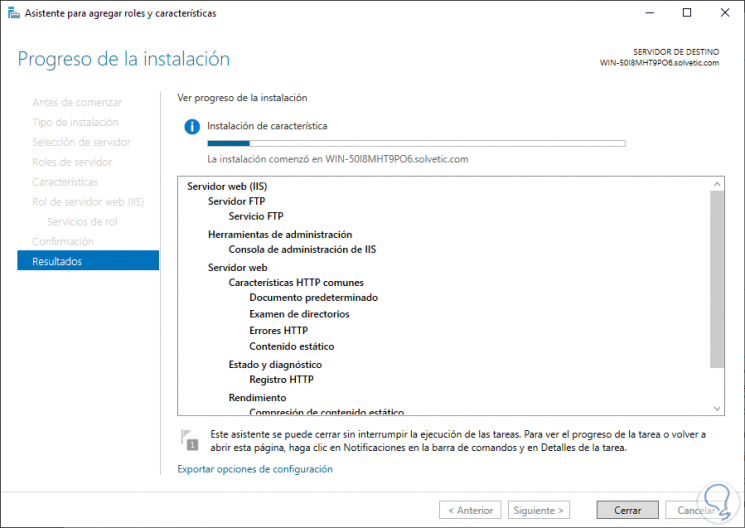
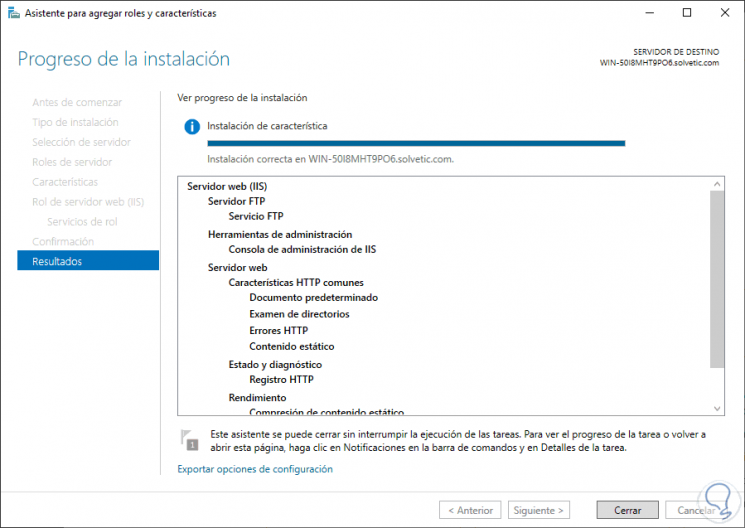
Step 13
When this process comes to an end we will see the following:
Note
In case you want to install the FTP role from PowerShell, you must execute the following command:
Install-WindowsFeature Web-FTP-Server -IncludeManagementTools
2. How to manage IIS console in Windows Server 2019
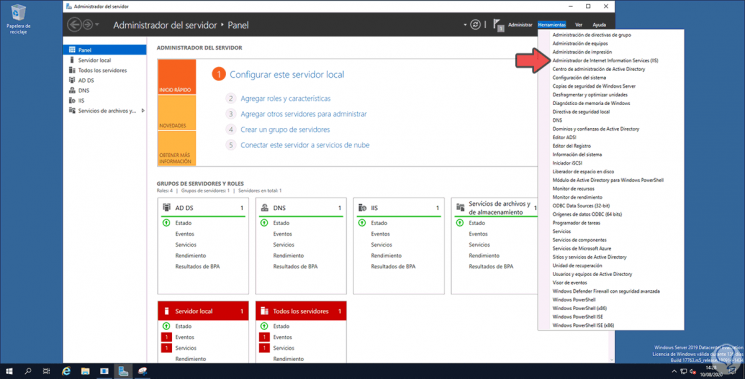
Step 1
When the FTP role has been installed on the server, we will go to Tools / Internet Information Services (IIS) Manager from the Server Manager to access the console where we will manage the FTP:
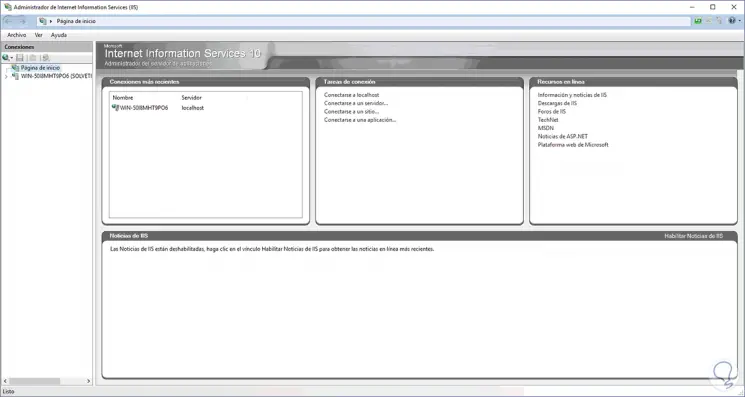
Step 2
When accessing we will see the following:
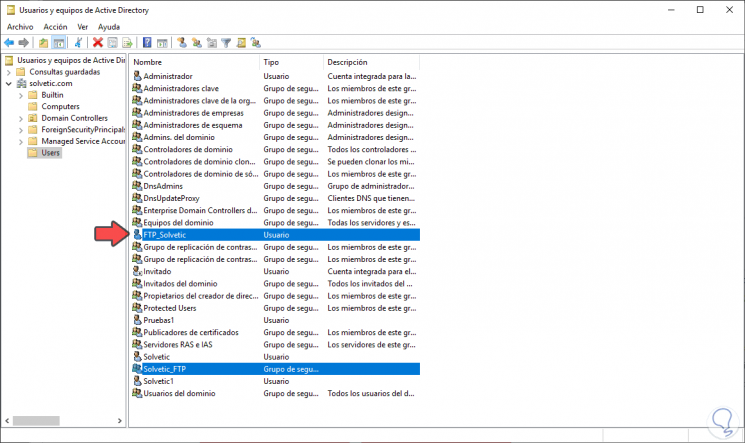
Step 3
In the left column we will display our server, and there we select the option Sites to create access to the FTP site there. Before this we have created a group and a user for FTP access.
For this, from "Active Directory Users and Computers" we create the user in Users, in this case called FTP_TechnoWikis and the group TechnoWikis_FTP:
Step 4
Before creating the site, we must create the repository, which is the place where the FTP information will be available. We create a folder on drive C with the desired name and then we click on it and select Properties and then select the Security tab:

Step 5
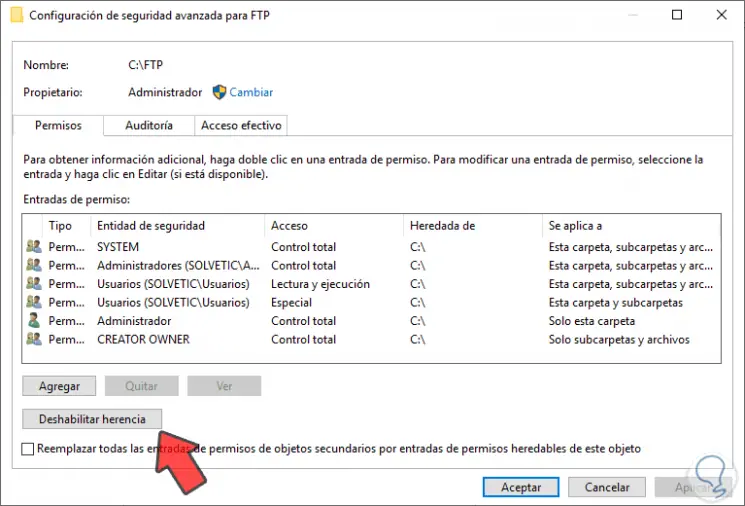
We click on "Advanced Options" and we will see the following:
Step 6
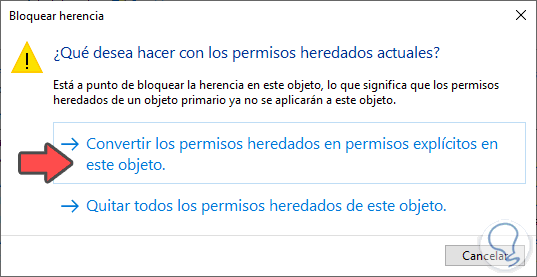
We click on the "Disable inheritance" button and the following message will be displayed. We click on "Convert inherited permissions into explicit permissions on this object", click on Apply and then OK.
Step 7
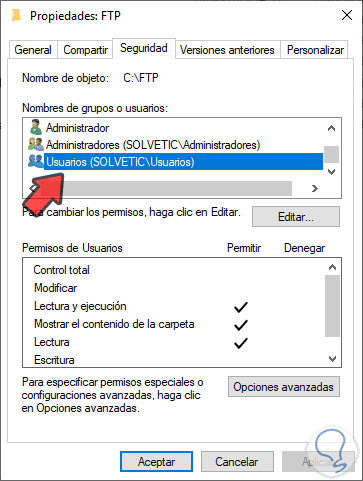
Now we select the Users group in the pop-up window:
Step 8
We click on Edit and again select this group to see the following:
Step 9
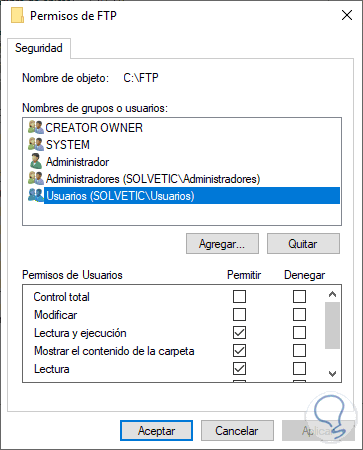
We click on "Remove" and click on "Add" and we will enter the name of the FTP group that has been created:
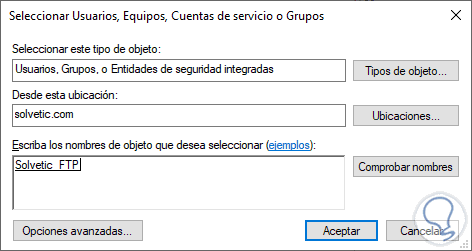
Step 10
We click on Accept and grant the permissions that we consider necessary:

We click on Apply and OK to save the changes.
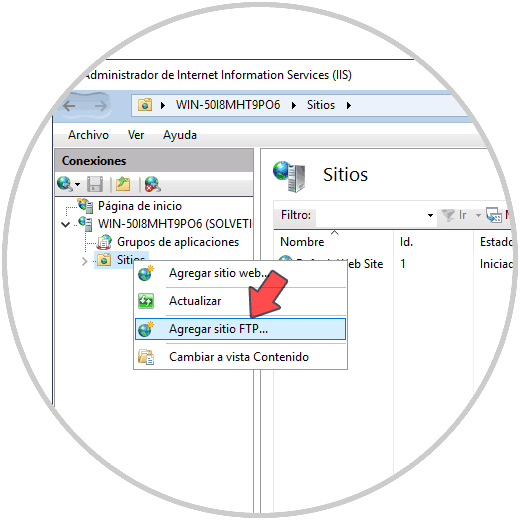
Step 11
Now we are ready to create the FTP site, for this we go back to the FTP console, we extend the name of the server and we right click on "Sites" to select "Add FTP site":
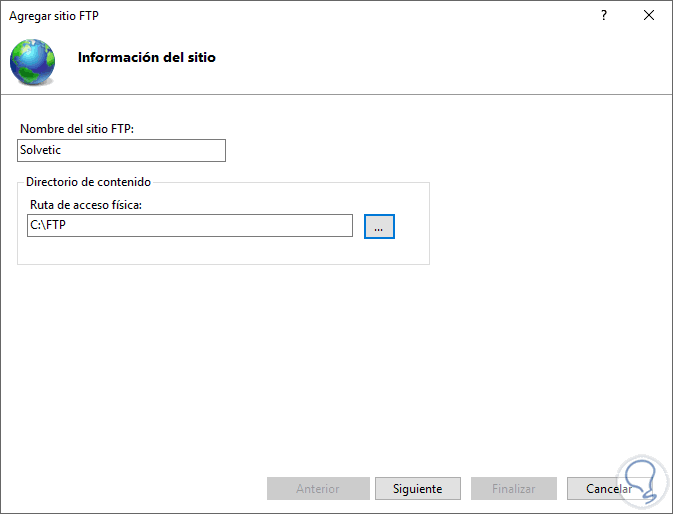
Step 12
By clicking there we will define the name of the FTP site and the physical path, this is the folder that we have created on drive C previously:
Step 13
We click Next and now we select the server's IP, the port we leave the default value 821) and at the bottom it is possible to configure additional security aspects:

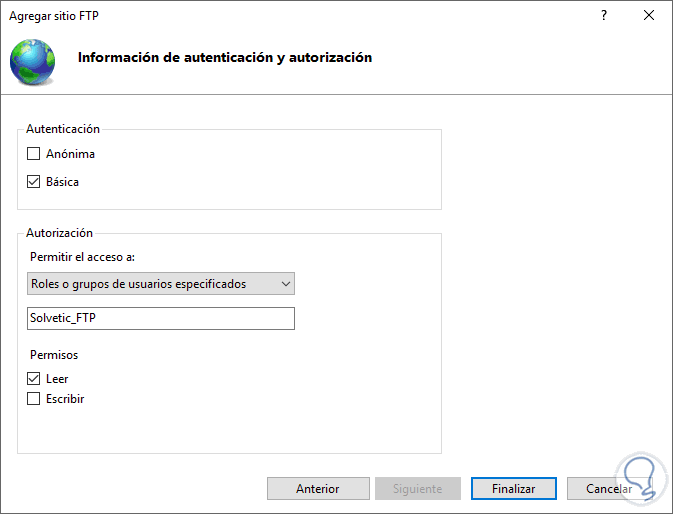
Step 14
We click on Next and now we define the type of authentication which can be:
- Anonymous: this allows access without credentials
- Basic: requires the use of credentials
In the field "Allow access to" we can define:
- Specific roles or groups, etc.
In this case we select a specific group and enter its name, at the bottom we configure the type of permission to use:
Step 15
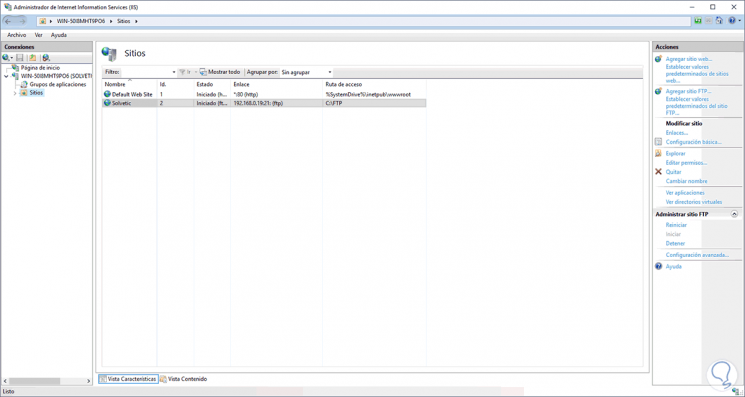
We click Finish and we will see the FTP site created in Windows Server 2019:
3. How to validate FTP in Windows Server 2019
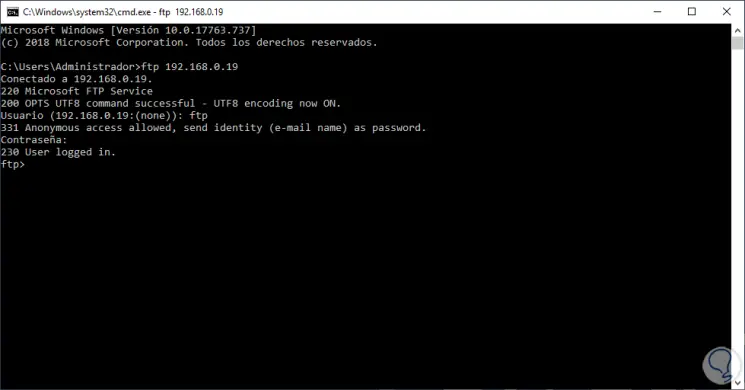
Once this is done we can create more users if we wish, we access the command prompt console in Windows Server 2019 and there we enter the following syntax:
ftp "IP Server"
This will require entering the user name and password to access FTP:
We access from the local browser and we can validate the FTP content:

Accessing FTP in passive mode
The previous steps allow us to access FTP locally either from the console or from the browser, but if we need to access from outside we must activate the passive mode. This mode allows the firewall rules at the client level to be more flexible..
Step 1
To achieve this we access the IIS administrator and there we select our server:
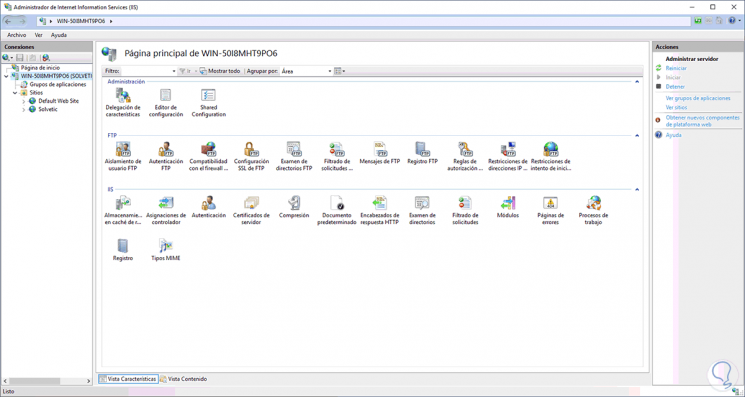
Step 2
We click on the option "Compatibility with the firewall" and in the pop-up window we enter the range of ports to use:
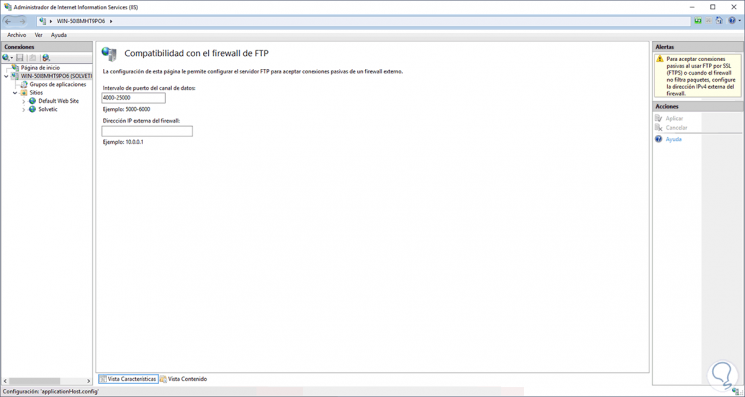
Step 3
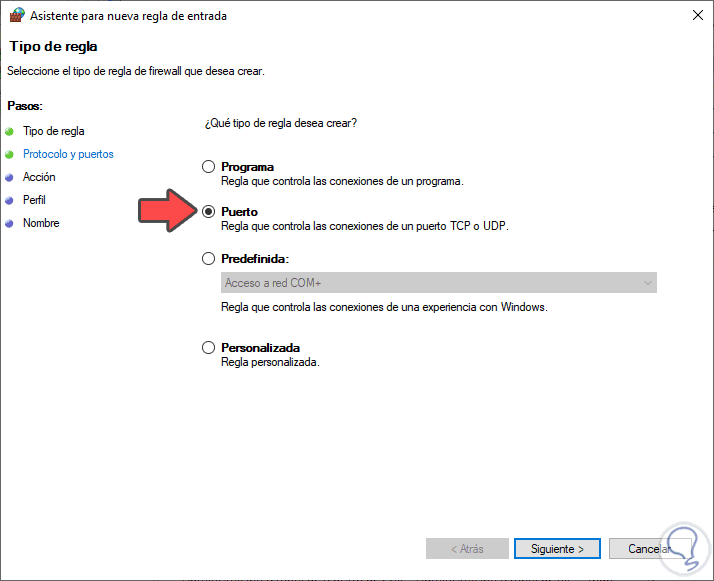
This range allows some of the ports used there to serve for passive mode in FTP, we apply the changes and now we go to the Windows Server 2019 Firewall and create a new rule. Activate the "Ports" box:
Step 4
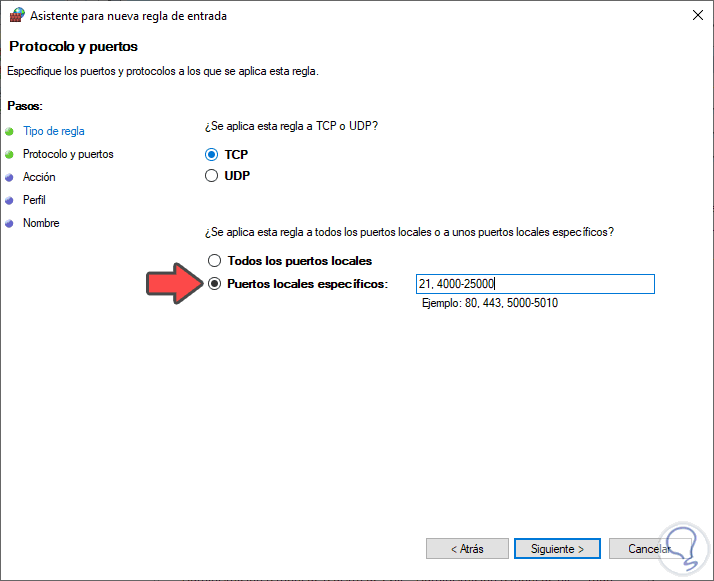
We click Next and then select TCP and enter the desired range or ports:
Step 5
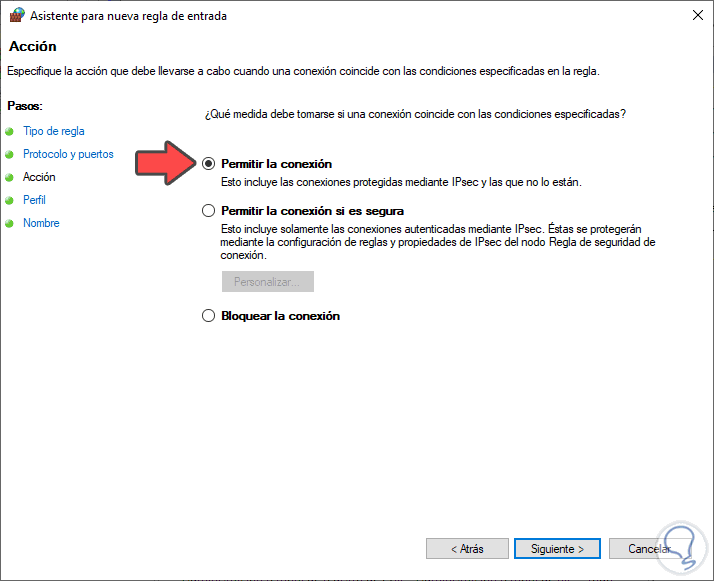
We click Next and allow the connection:
Step 6
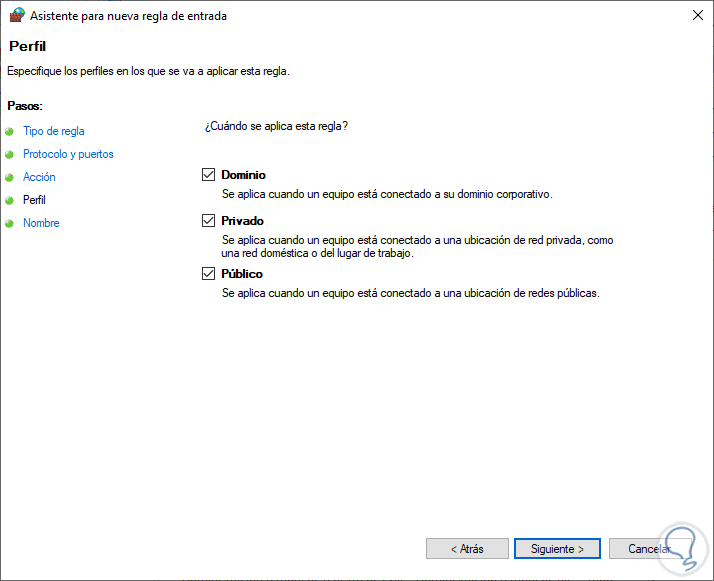
Then we define in which network profiles this rule will apply:
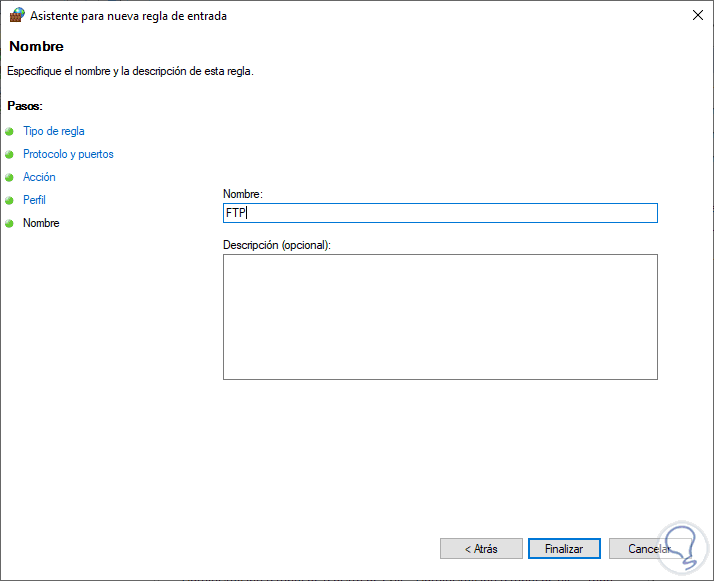
Step 7
Finally we assign a name:
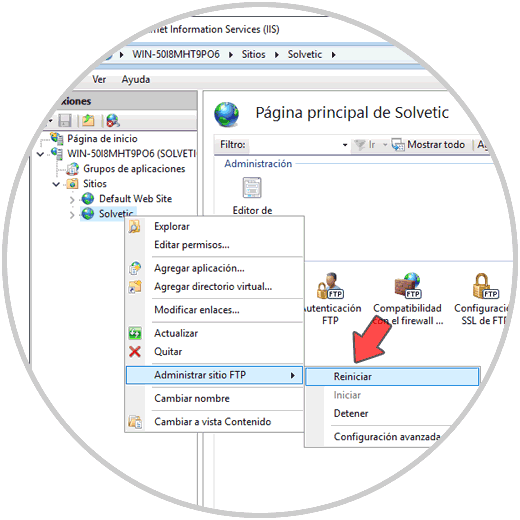
Step 8
After this we right click on the FTP site and select "Manage FTP site - Restart":
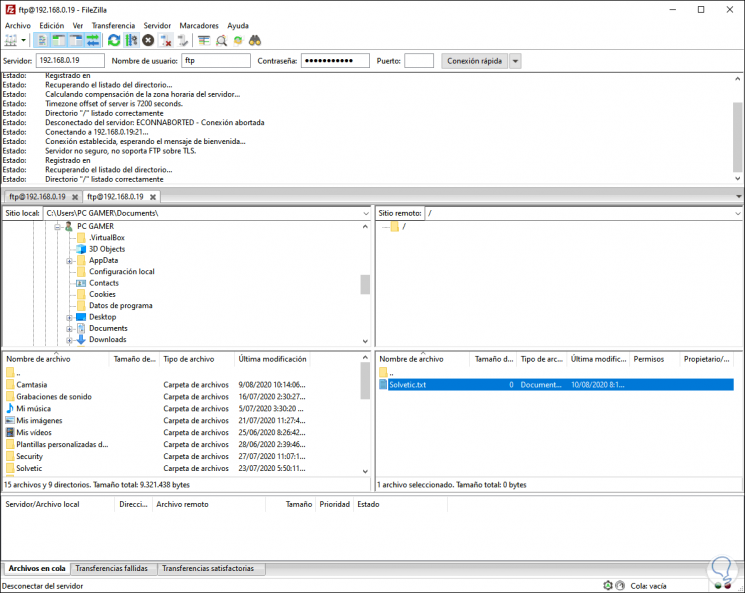
Step 9
With this we can access the FTP content from an external FTP client or from a browser:
With the implementation of FTP in Windows Server 2019, we will have the opportunity to allow access to authorized elements in a comprehensive and secure way.