The range of operating systems for Windows Server servers provides the user with a series of special functions so that everything related to object management is as complete as possible and in the new edition of this range of servers which is Windows Server 2022, they will be delivered many more special features, but certainly something that has been around for years and will continue to be is the DHCP role..
DHCP (Dynamic Host Configuration Protocol) is a role of Windows Server 2022 with which it is possible to establish different ranges of IP addresses destined for the client computers of the domain and allowing a much more direct control over each available IP , this allows redirecting some IP addresses to specific computers.
By implementing this role, when logging in the client computer a process is executed to grant the available IP in the range we define, this helps to automate everything avoiding extra administration tasks..
DHCP role
When using the DHCP role, the following parameters will be integrated:
DHCP Glossary
To know a little more about DHCP there are some words that we must be clear about what they are about, these are:
- Lease: this indicates the time in which a computer will actively have the IP address in the domain
- DHCP scope: indicates the administrative group of users or computers on the subnet.
- DHCP range: as we said, it is a group of IP addresses destined to be delivered to client computers.
- IP address reservation: is a function with which it is possible to separate one or several IP addresses for administrative or support purposes.
TechnoWikis will explain how to install and configure DHCP on Windows server 2022.
To stay up to date, remember to subscribe to our YouTube channel! SUBSCRIBE
Configure DHCP Windows Server 2022
Step 1
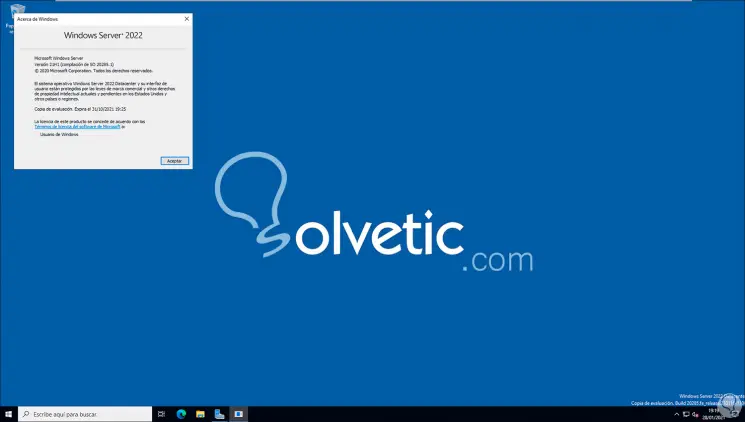
First, we check the version of Windows Server with "winver":
Step 2
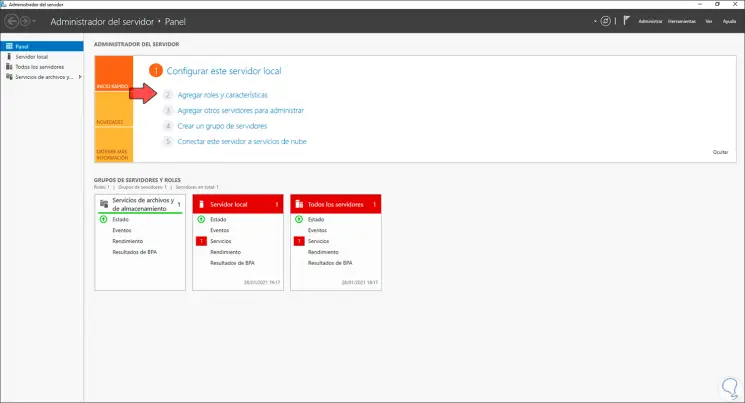
Now we go to the Server Manager and click on "Add roles and characteristics":
Step 3
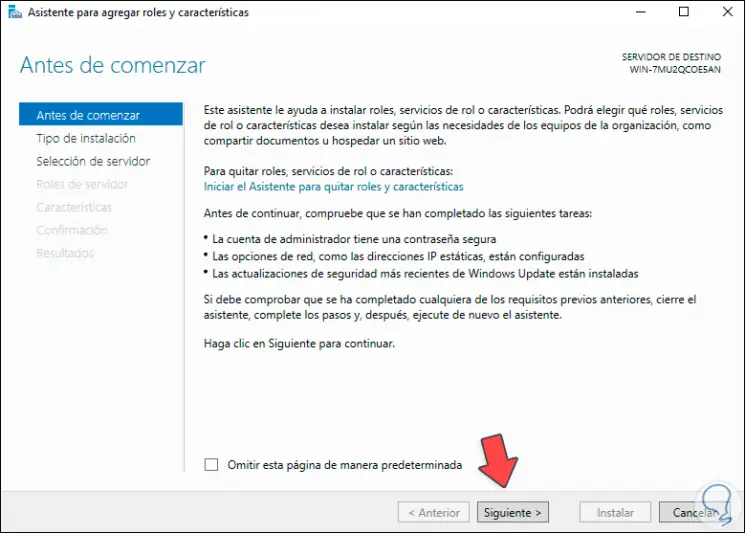
The following wizard will be displayed:
Step 4
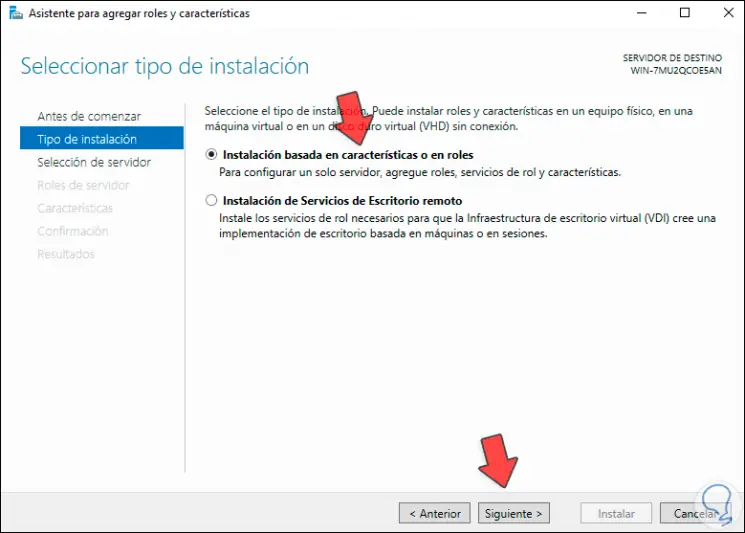
Click Next and select "Role or Feature Based Installation":
Step 5
Now select the server where the role will be installed:
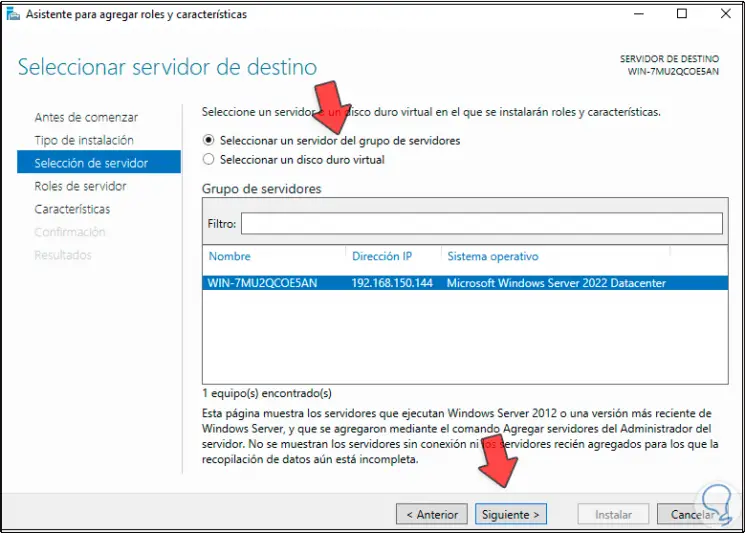
Step 6
Click Next and in the roles window select "DHCP Server":
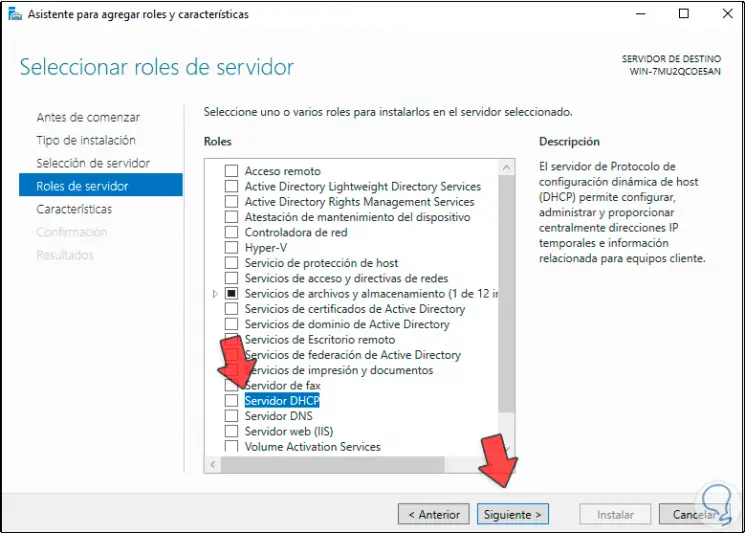
Step 7
Clicking there will open the following window:
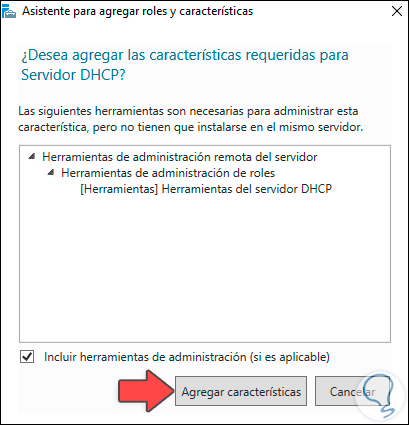
Step 8
Add the characteristics by clicking on "Add characteristics":
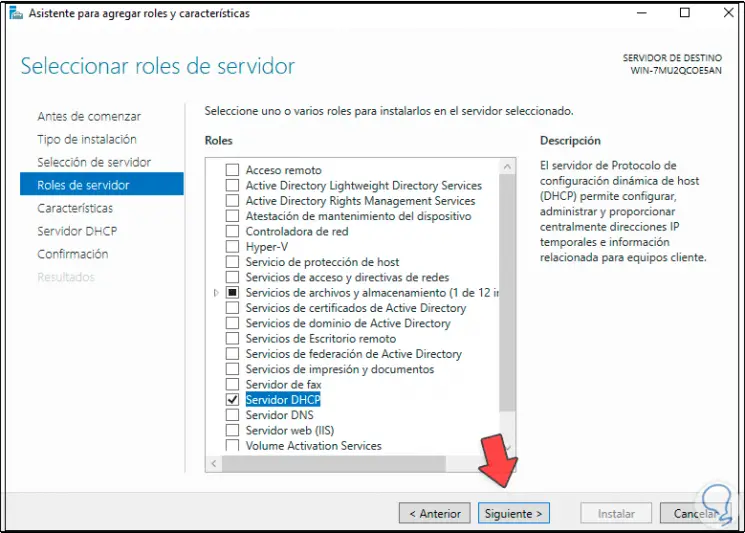
Step 9
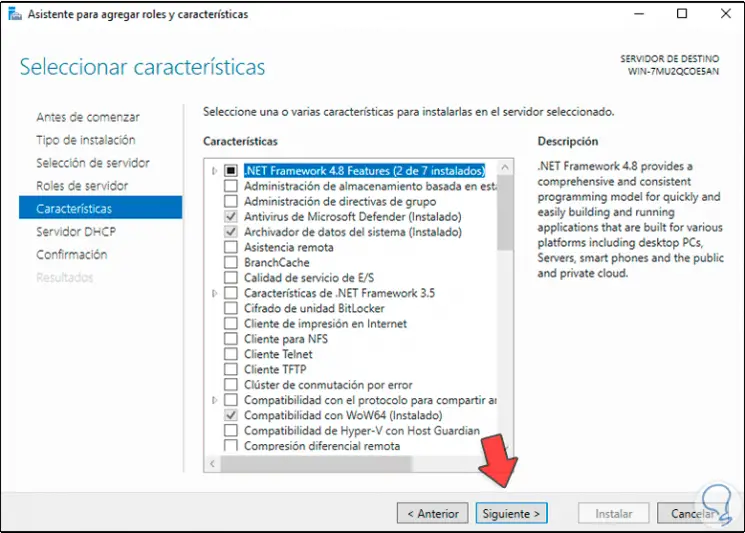
Click Next to access the characteristics section: In this section we will not make changes, then we see a summary about the DHCP role:
Step 10
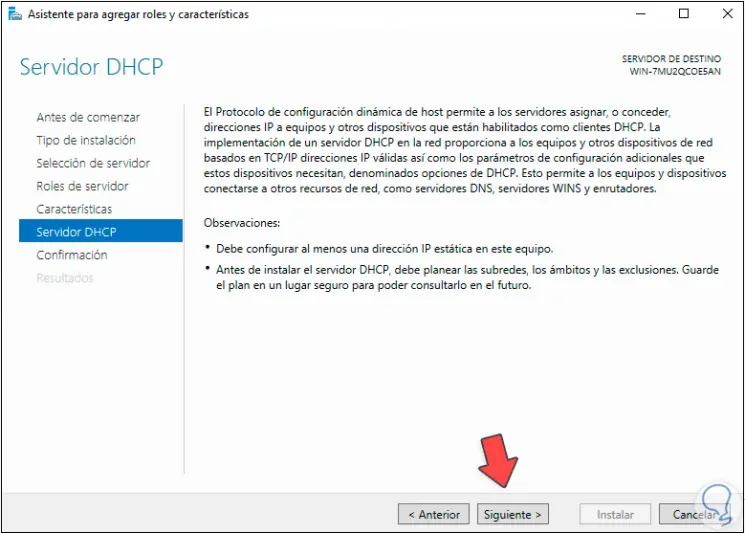
Click Next to see a summary of the role to install on Windows Server 2022:
Step 11
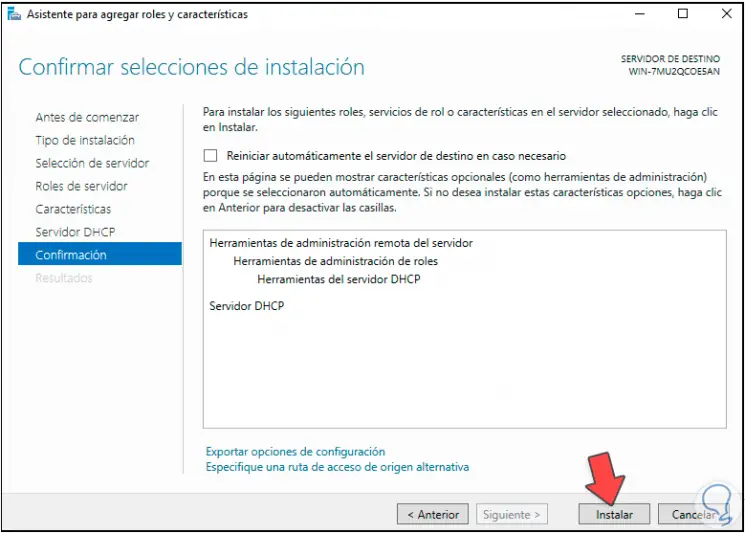
Click Install to proceed with the installation of the DHCP role:
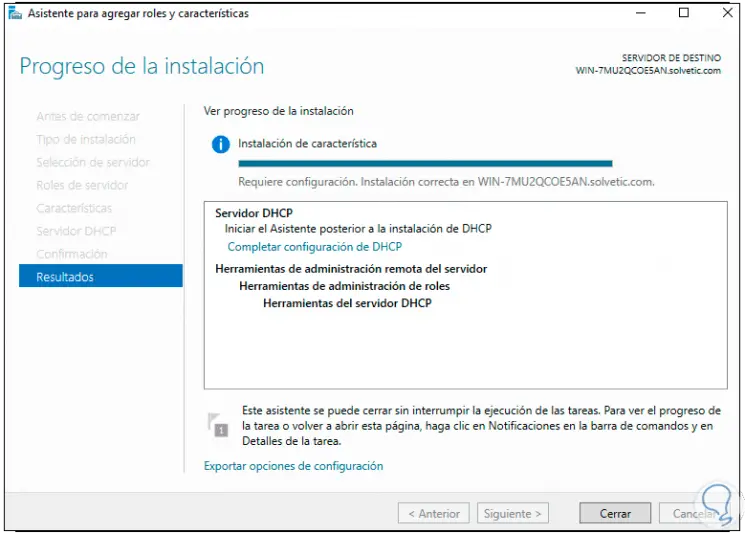
Step 12
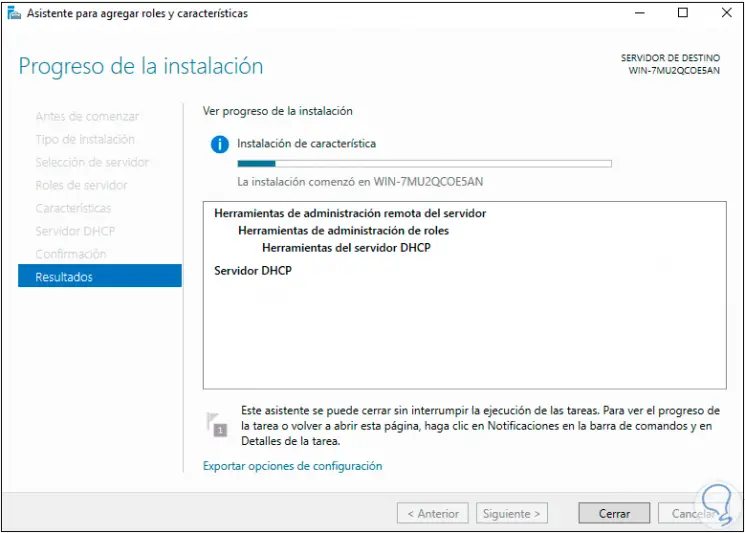
At the end we will see the following. We left the assistant.
Step 13
At the top we will see the message "Complete DHCP configuration":
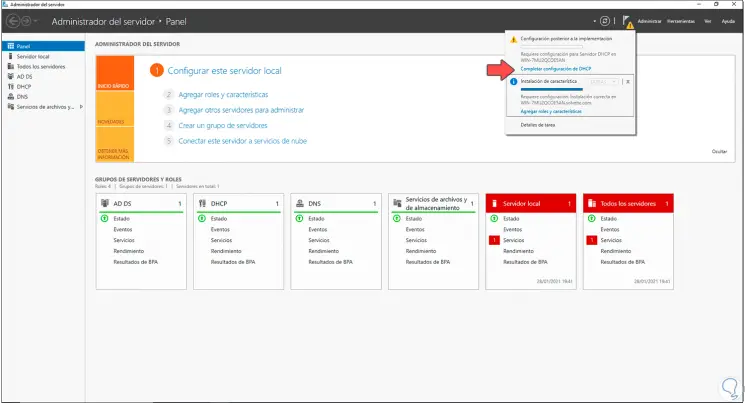
Step 14
We click there and the following wizard will open:
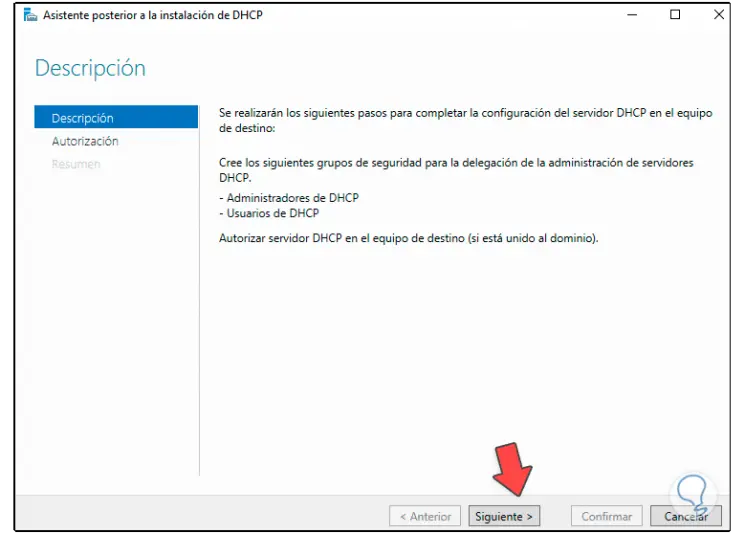
Step 15
Click Next and select the credentials to use:
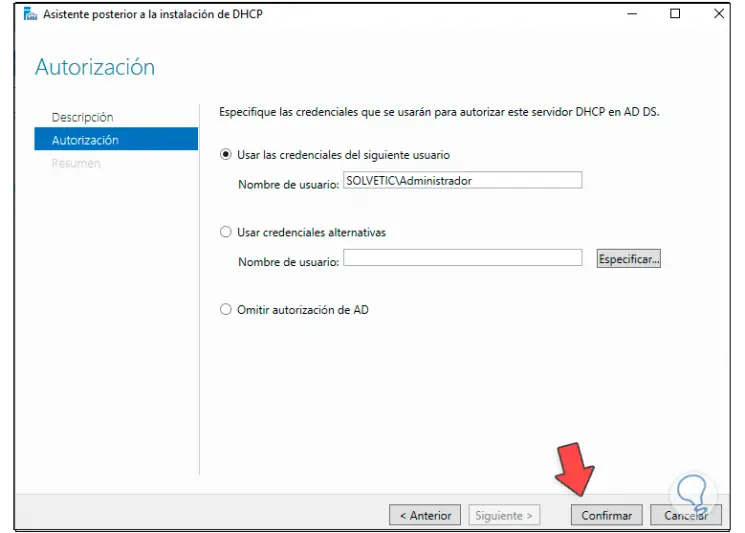
Step 16
We can use the local administrator account or define some others as necessary, click on "Confirm" to apply the changes. Click Close to exit the wizard.
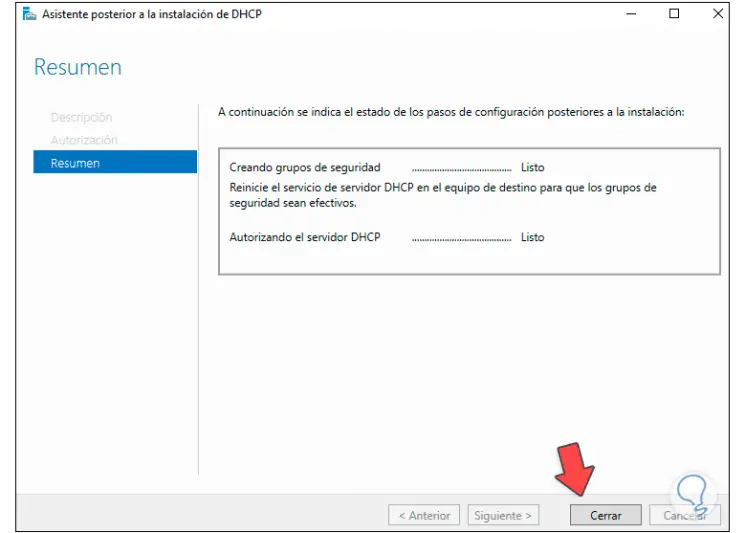
Step 17
We check the DHCP section in the Server Manager:
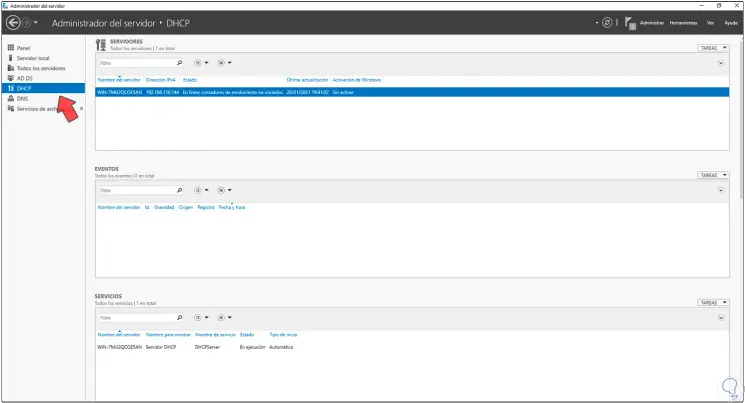
Step 18
Let's go to "Tools - DHCP":
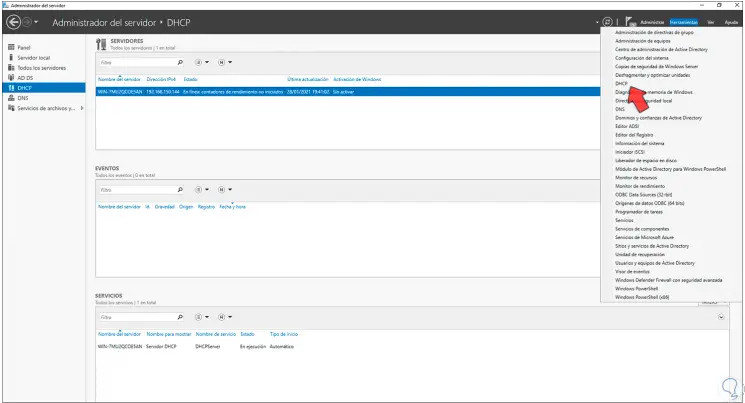
Step 19
In the displayed window we select the server and its details will be available:
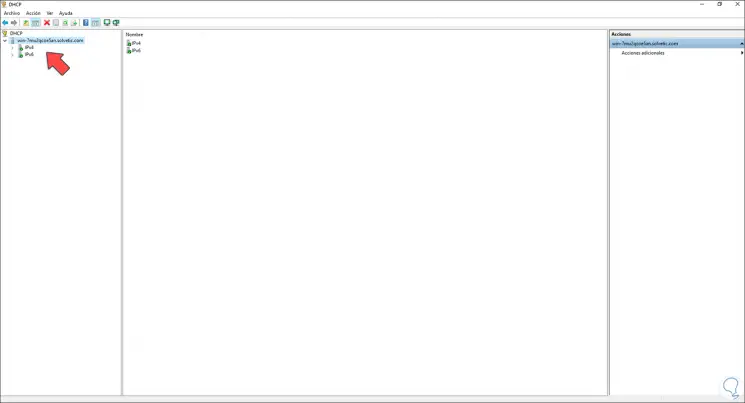
Step 20
We see the details of DHCP:
Step 21
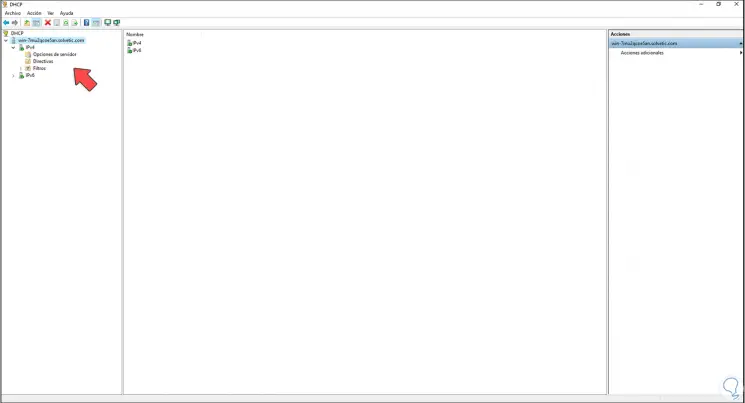
We right click on "IPv4" and select "New scope":
Step 22
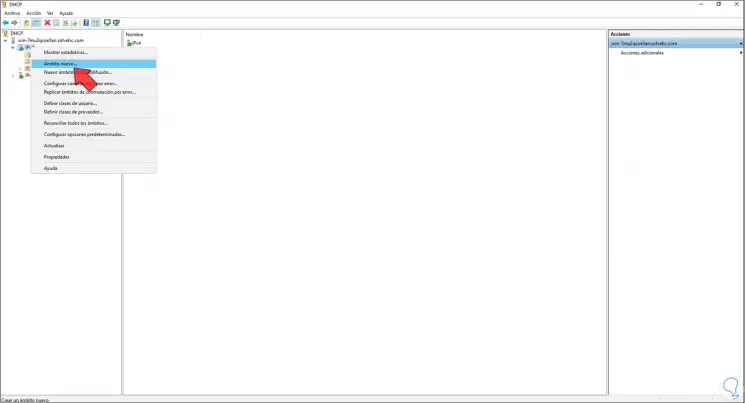
The following wizard will open:
Step 23
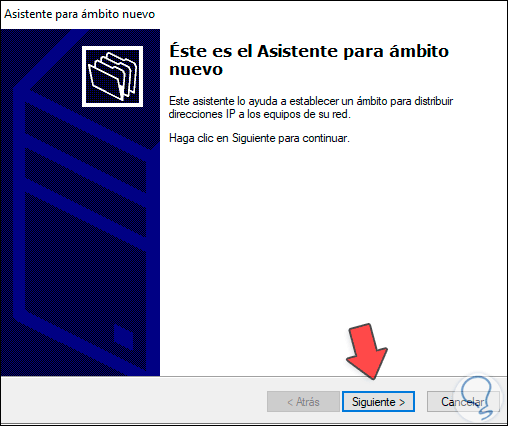
We click Next and assign a name to the scope:
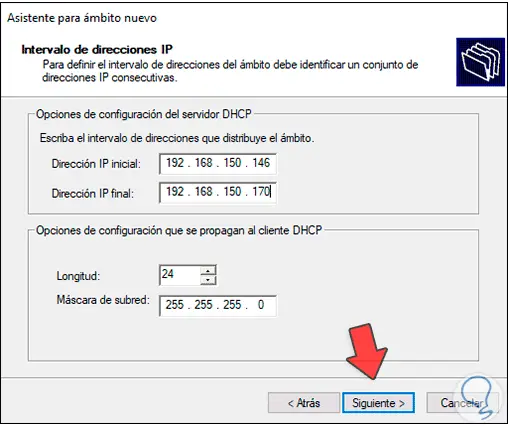
Step 24
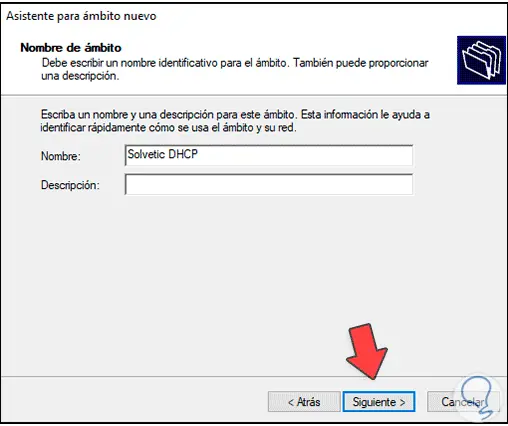
Click Next and we establish the range of IP addresses to deliver to the client computers:
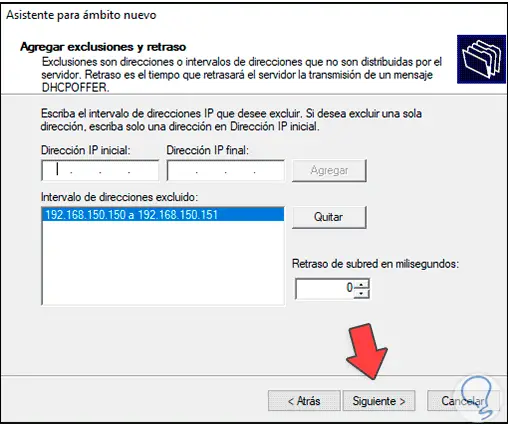
Step 25
In the next window we can exclude addresses for support or administrative tasks:
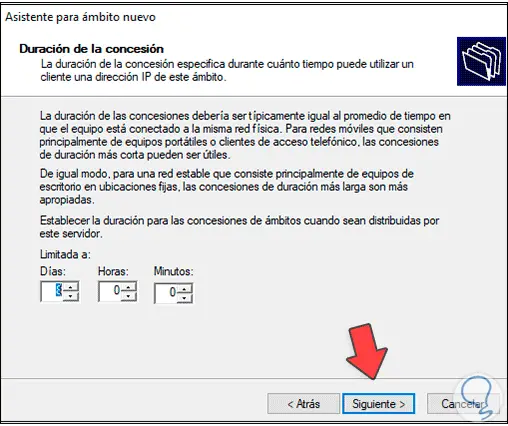
Step 26
In the next window we can establish the expiration of the grants of the addresses delivered:
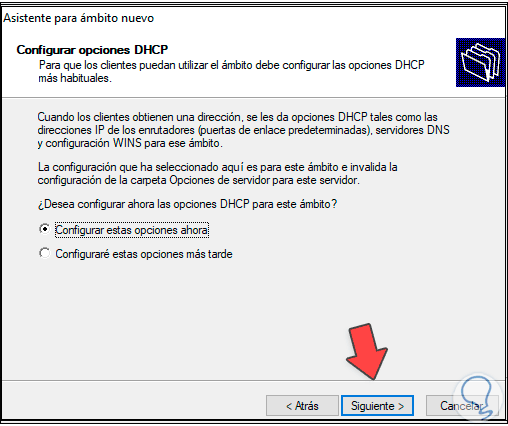
Step 27
Click Next and we will see the following:
Step 28
We leave the box active and click Next:
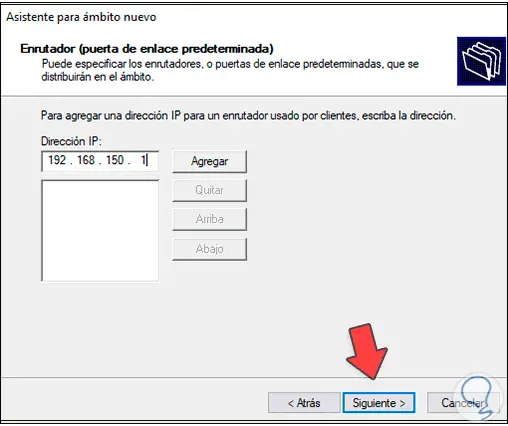
Step 29
In this section we add the IP address for the router:
Step 30
Next, we will see the following:
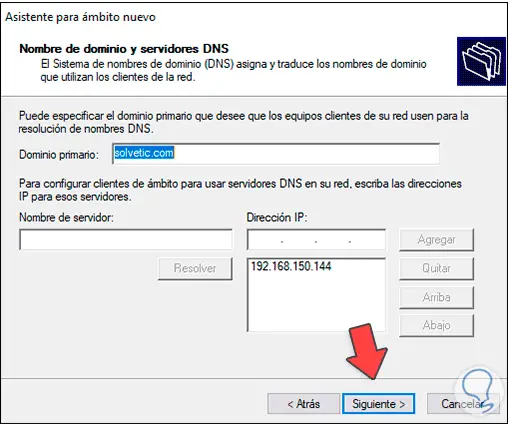
Step 31
There we find the main domain and it is possible to add more servers if we have them, click on next and then it will be possible to set the configuration of the IP addresses for NetBIOS:
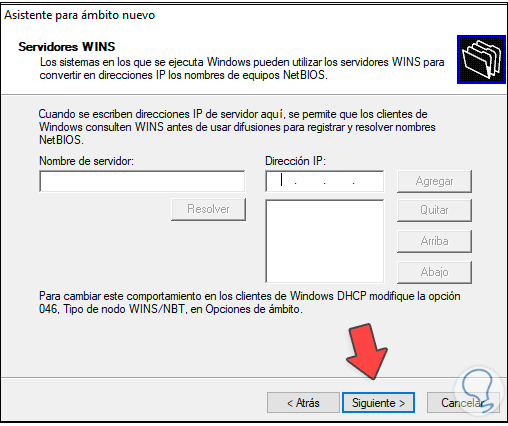
Step 32
Click Next and now it is possible to activate this scope:
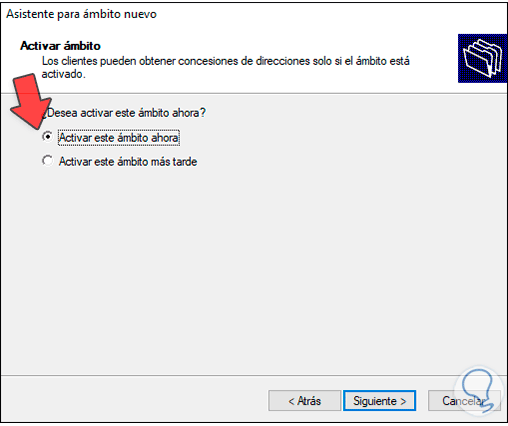
Step 33
Click Next to activate it:
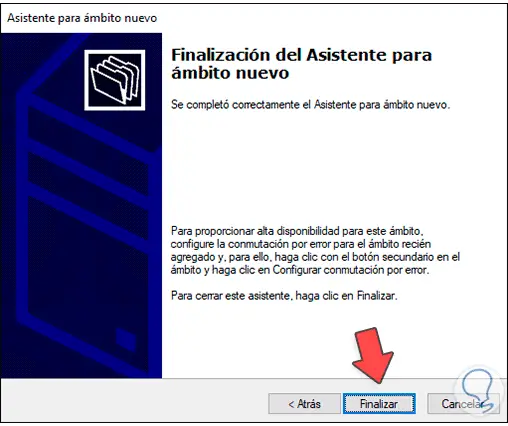
Step 34
Click Finish to complete the process, we validate the created scope:
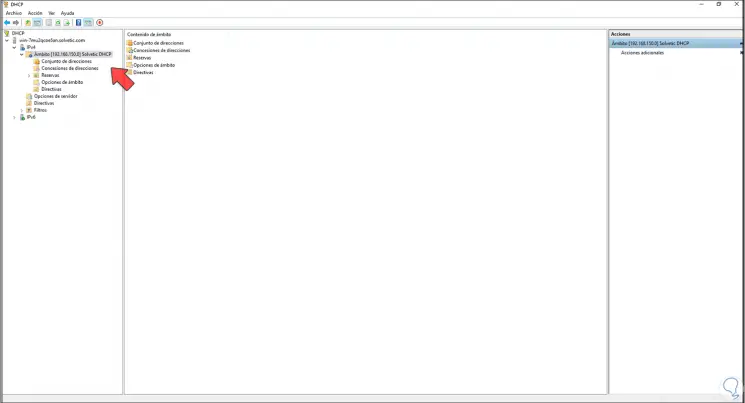
Step 35
We can navigate through the different options in the field:
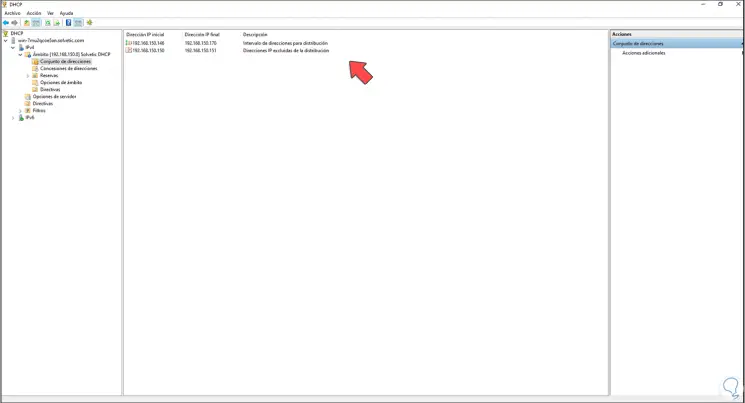
Step 36
In scope options we see the established addresses:
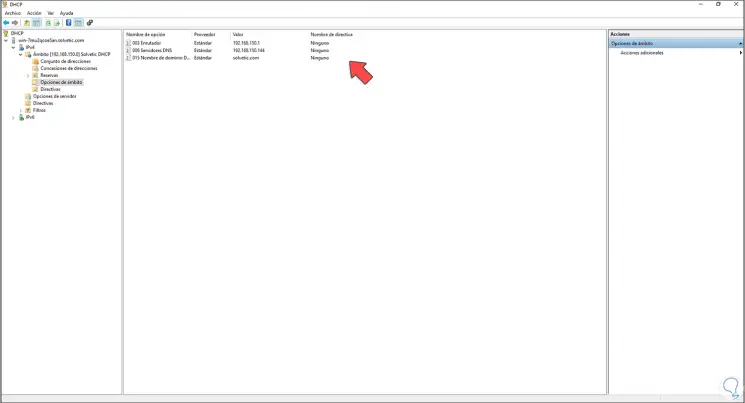
Step 37
To validate this, we go to a client computer and there we validate from the Internet properties that it is in the domain and that it receives the IP addresses by DHCP, for this we go to the Network Center:
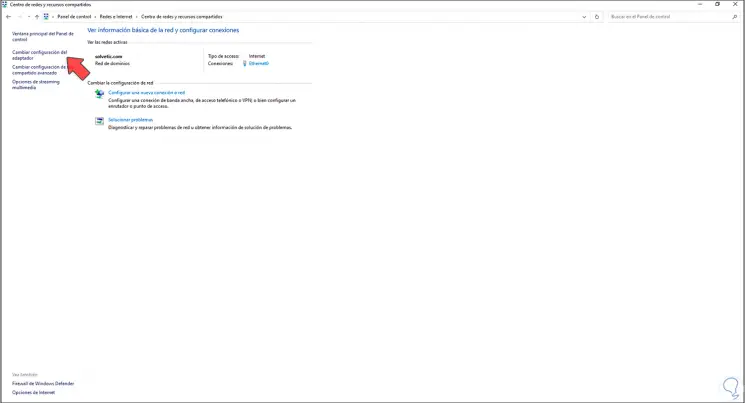
Step 38
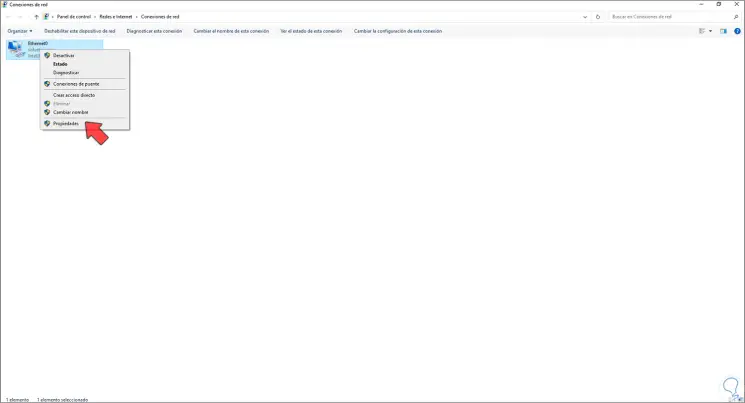
We are going to "Change the adapter settings" and right click on the adapter to select "Properties":
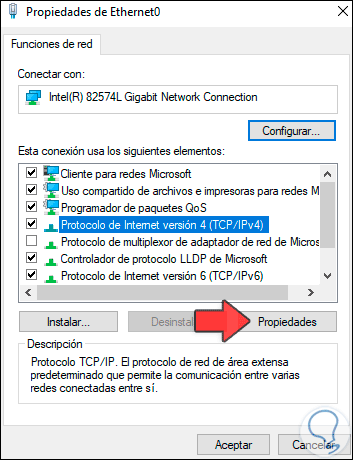
Step 39
Let's go to the IPv4 protocol:
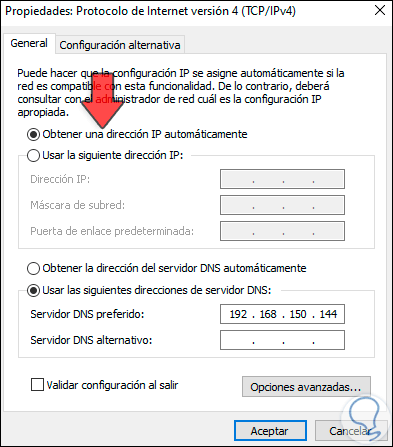
Step 40
Click on Properties and we validate that the IP is by DHCP (automatically):
Step 41
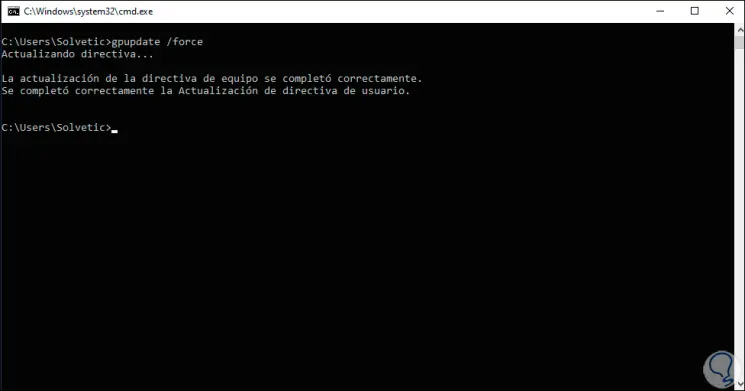
Now we go to the command prompt and update the directives with "gpupdate / force":
Step 42
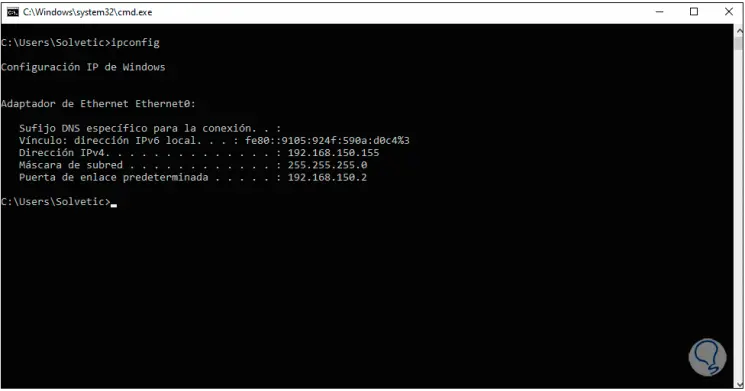
With "ipconfig" check that the address provided is in the defined range:
Thus we have configured the DHCP server in Windows Server 2022..