Microsoft has developed Windows Server with the aim of facilitating the tasks of management, control and administration in a much simpler way, since thanks to their roles and services IT administrators have a versatile, scalable and simple configuration system to expand drastically the objectives of an organization..
With the new edition of operating systems for organizations such as Windows Server 2019 this vision of Microsoft is not lost and therefore we have a secure system, with multiple configuration options and with a design designed for all users who must perform some type of task directed towards users and that is why we must take full advantage of each alternative that Windows Server 2019 gives us and one of them is to implement WSUS and today we will learn the importance of this function and how to configure it correctly in Windows Server 2019 .
What is WSUS?
WSUS (Windows Server Update Services - Update Services for Windows Server), is a function present in various editions of Windows Server with which IT administrators are given the possibility to have a tool for the implementation of product updates Most recent Microsoft, remember that Microsoft developers frequently release various types of updates for both the system and applications.
Thus, WSUS is a Windows Server 2019 server role with which it will be possible to have at an central point the opportunity to install, manage and distribute updates for all computers in the domain and thus allow this to be an automatic and not manual process in each team..
When we carry out the WSUS implementation process, we can configure several servers with that role, but at least one WSUS server in the local network must be connected to Microsoft Update in order to obtain information about available updates and thus ensure that they are always available for installation As administrators we can determine, taking into account the configuration and network security settings, the number of servers that we want to be connected directly to Microsoft Update since this implies a high network use especially when downloading cumulative updates as a new system version operational
features
When using WSUS it will be possible to have:
- A centralized update management
- An update management automation available
- Has the SHA256 hash privacy level for greater security
- You have Windows PowerShell cmdlets to manage the ten most important administrative tasks in WSUS
- It offers a separation between client and server, in this way the versions of the Windows Update Agent (WUA) can be delivered independently from WSUS without having to apply them to all computers
Hardware requirements
To use WSUS effectively we must have the following at the hardware level:
- Have a 1.4 GHz x64 processor, although it is recommended that it be 2 GHz or more
- WSUS requires an additional 2 GB of minimum RAM for Windows Server 2019.
- Available disk space of 10 GB and recommended 40 GB to host downloaded updates
- A network adapter of 100 Mbps or higher
1. Install and use WSUS on Windows Server 2019
Step 1
To start this process, we will install the role using one of the following options:
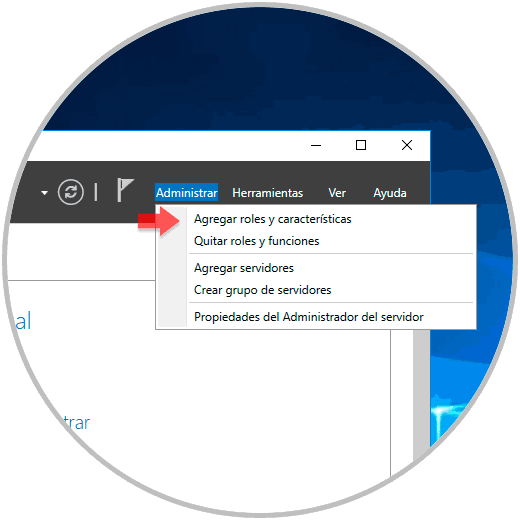
- In the server administrator click on the “Add roles and features†line located in the panel.
- In Server Manager go to the "Manage" menu and there select "Add roles and features".
Step 2
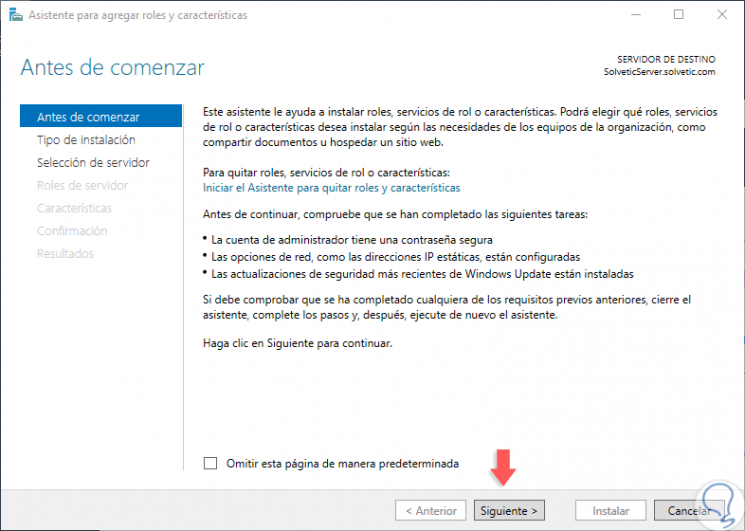
The following wizard will be displayed:
Step 3
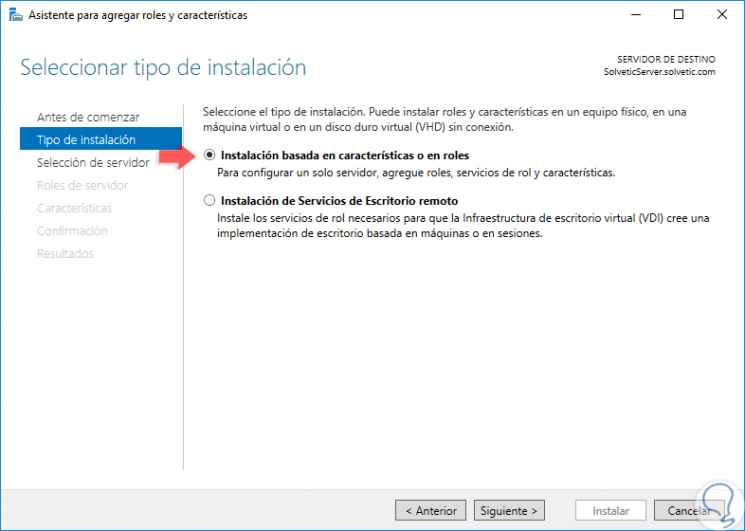
There we have a brief introduction about the actions that we can perform, we click on Next and in the next window we activate the box “Installation based on features or rolesâ€:
Step 4
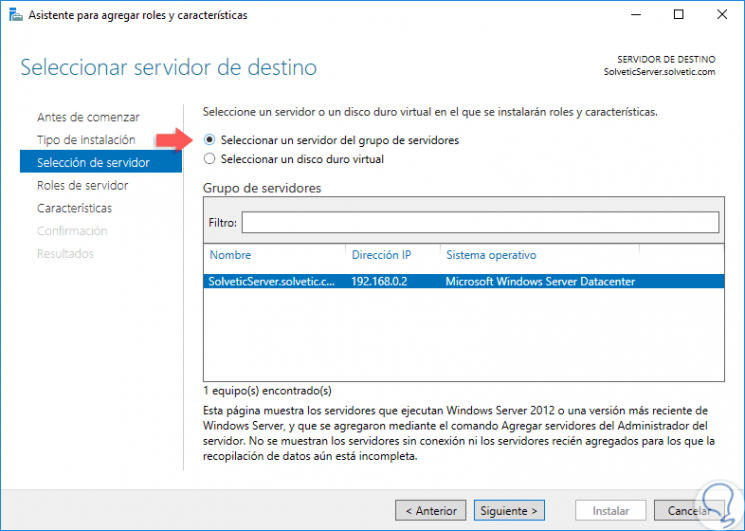
Next, we select the server where the WSUS role is to be installed:
Step 5
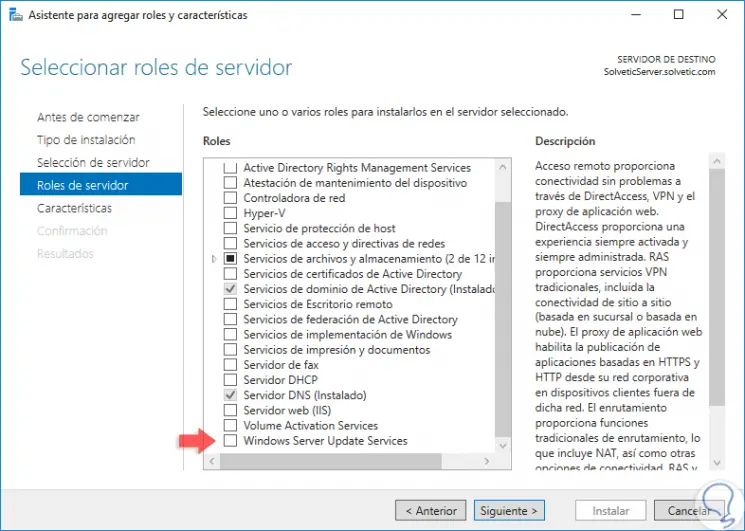
By clicking Next, in the Server Roles window, we locate the line called "Windows Server Update Services":
Step 6
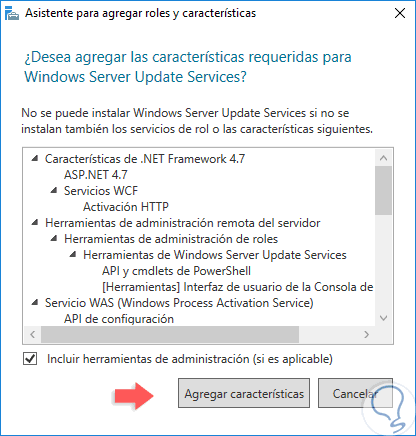
When activating the box, the following pop-up window will be displayed where we click on the “Add features†button:
Step 7
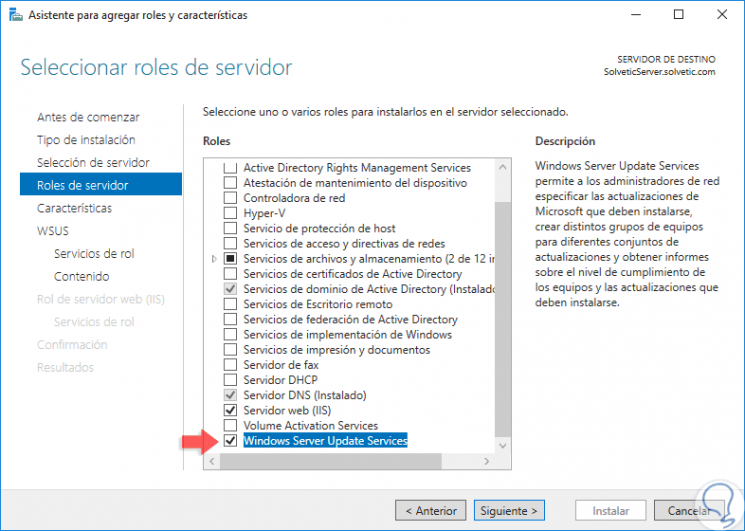
We can see that the WSUS box is activated:
Step 8
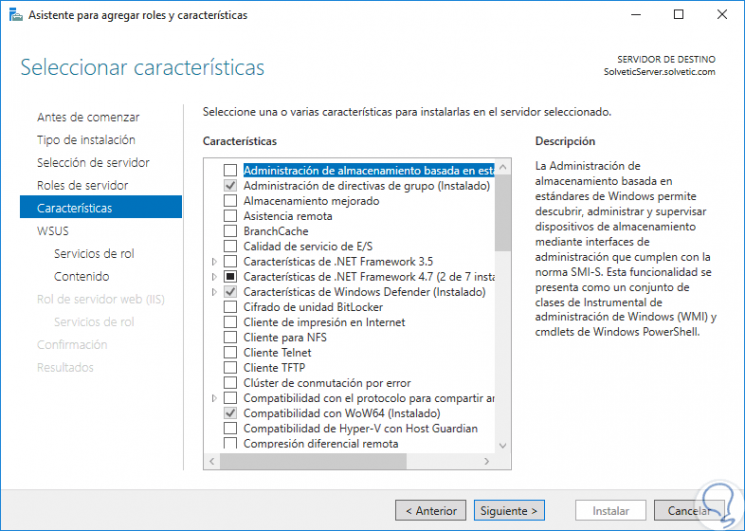
Click on Next and the Features window will be displayed where we can activate, if necessary, some additional features for the server:
Step 9
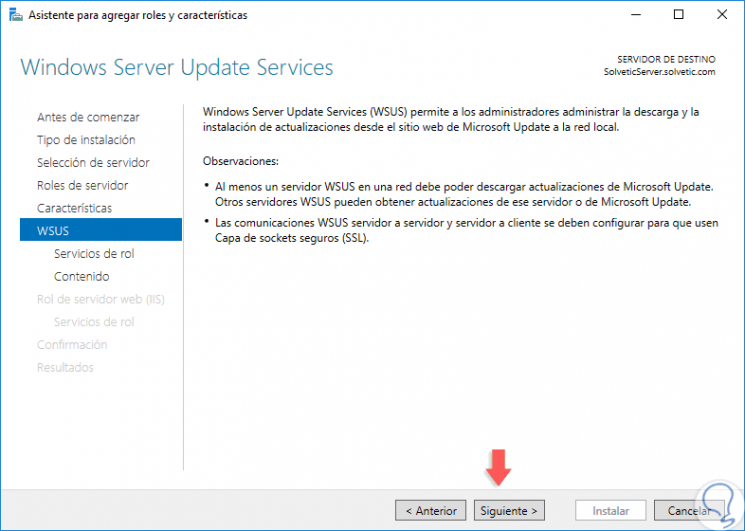
In the case of WSUS, no feature is required, so click on Next and now we will see a summary about the WSUS role:
Step 10
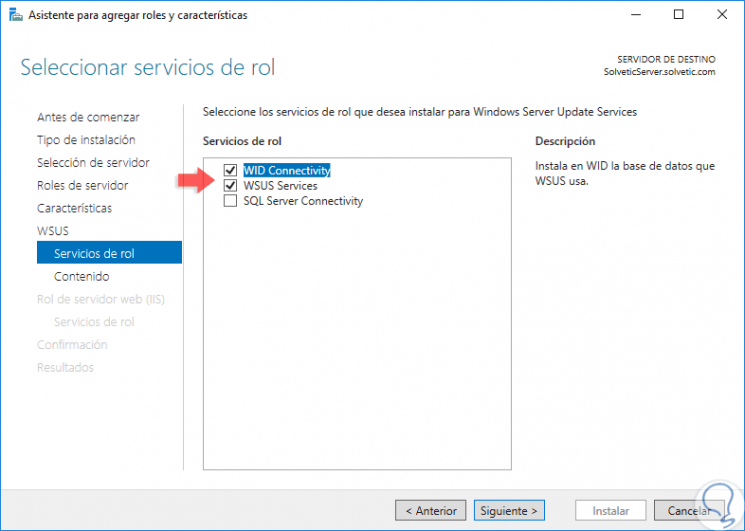
By clicking on Next we will see the window of the services of the role where we will have the following options:
Step 11
Basically you need to activate the following:
- WID Connectivity: is a service that is responsible for installing the WID database.
- WID Services: It is a service that is responsible for managing all WSUS services.
Step 12
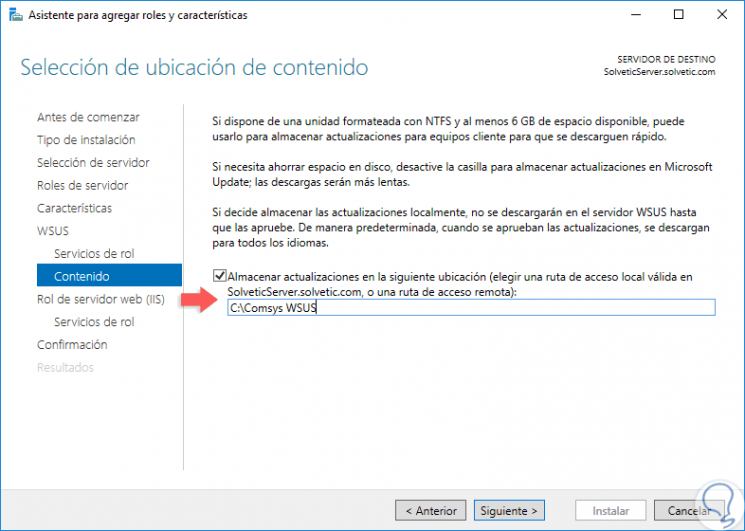
Once we activate these boxes, which are already selected by default, click on Next and we will see the following. There we must activate the “Store updates in the following location†box to determine the route, local or remote, where the downloaded updates have to be hosted for later administration, we can see at the top that it is required that this route be with the NTFS file system and have enough space.
Step 13
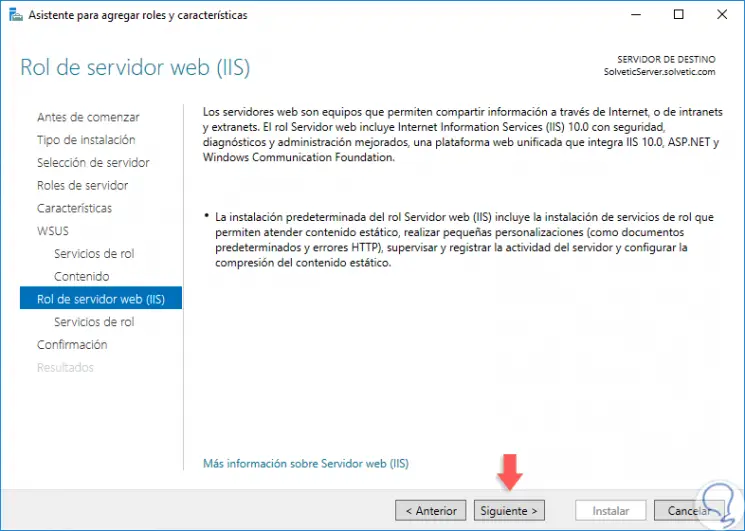
Once the storage path is defined, click on Next we will see the following summary about the roles of the IIS (Internet Information Services) web server:
Step 14
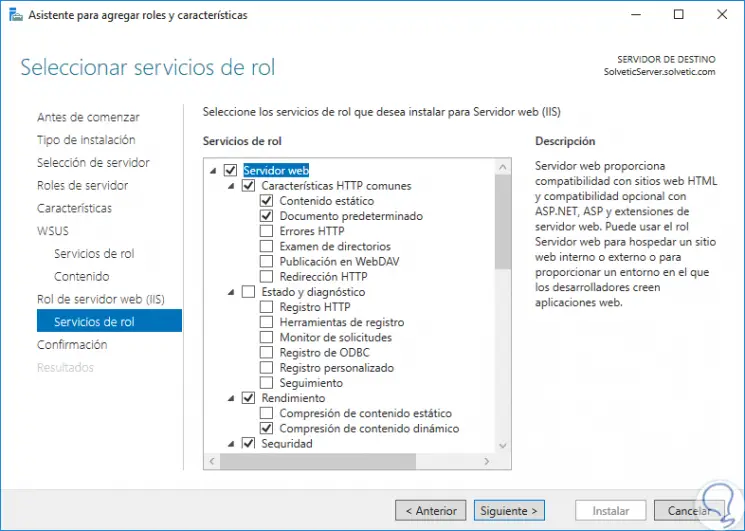
Click on Next and we can activate the boxes with the necessary roles:
Step 15
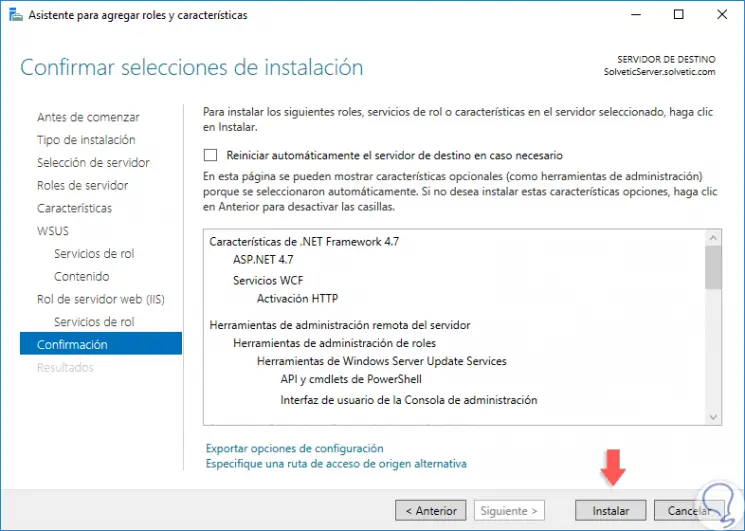
When defining these roles, click Next and we will see a summary of the roles to be installed in Windows Server 2019:
Step 16
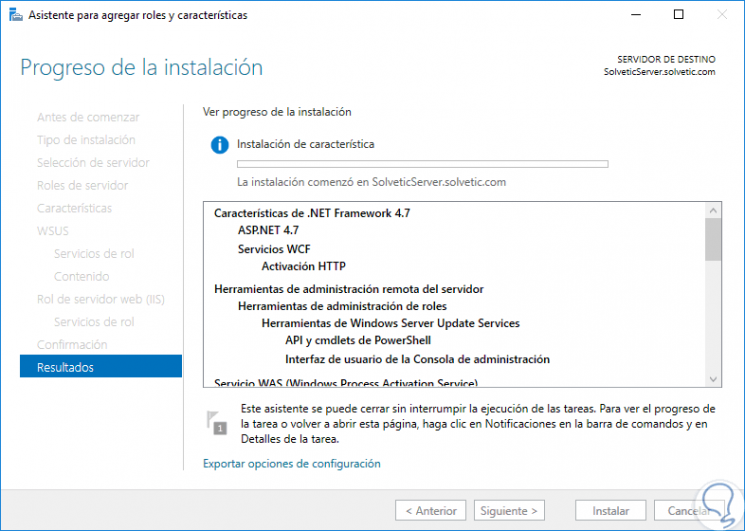
Click on “Install†to start the WSUS installation process on Windows Server 2019:
Step 17
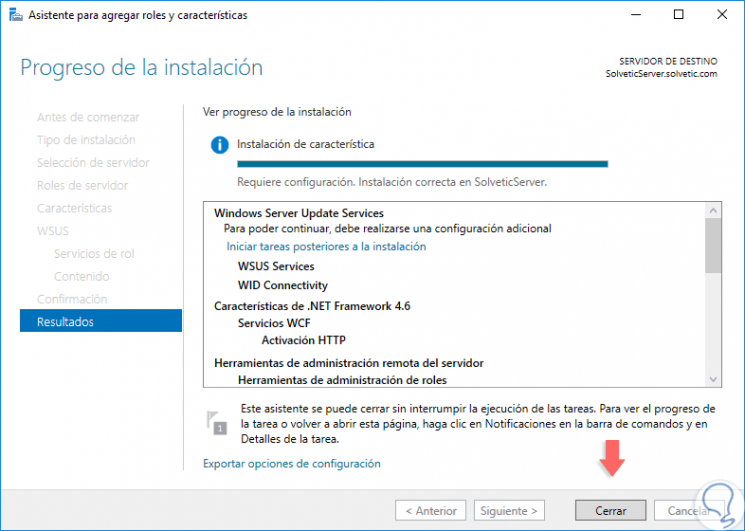
Once the installation is finished we will see the following:

Login Join up!