It is normal that as IT users we use different operating systems to perform our daily tasks. This may be due to the fact that we are users of a special system and another system is used in our work or institute, with which the process of transferring information between both can become somewhat complex due to the file system of these systems..
A file system is responsible for managing the way in which information will be stored in the system, especially in the units designed for it. The problem arises when the file systems are incompatible , for example, if we use Windows operating systems there the default system will be NTFS and if we use a Linux system we will notice that the file system will be EXT3 or EXT4.
Normally, or at least it is the common form, we pass information between a Windows operating system and a Linux one is using some removable media such as external drives or USB memory or through email. But we know the limitations of size, speed of access and especially of security that this implies, that is why TechnoWikis will explain a practical method to carry out this task of transfer in a much simpler way through our LAN network. This network is available in all types of offices and homes and for this we will use Samba..
What is Samba
Samba has been developed as a standard package whose functions allow the interaction of the Windows operating system with other systems such as Linux and Unix.
The Samba package is a free software licensed under the GNU General Public License and is a member of Software Freedom Conservancy, which guarantees its free availability.
Samba offers printing services and secure files, adding stability and security to the transfer process thanks to the SMB / CIFS protocol with which we will know that information will always be protected in both ways and added to that is a resource that allows us to go much further there, since it can act as a domain controller or as a member of a domain..
Samba features
Among its characteristics we find:
- You can authenticate the login in Windows domains.
- Create a service tree between Windows, Linux and UNIX clients.
- It acts in a similar way to a Windows Primary Domain Controller.
- You can act as a member of the group of servers in the Windows Active Directory (AD).
- It helps in the exploration of the network using the NetBIOS function.
Samba is the most practical option for the task of sharing files between different devices and various operating systems such as Windows, Linux or macOS. Keep in mind, computers must be connected in the local network with a generic router so that communication between all is optimal. Now we will learn to create and share folders between these two operating systems.
1. Access Linux shared folder from Windows 10
Step 1
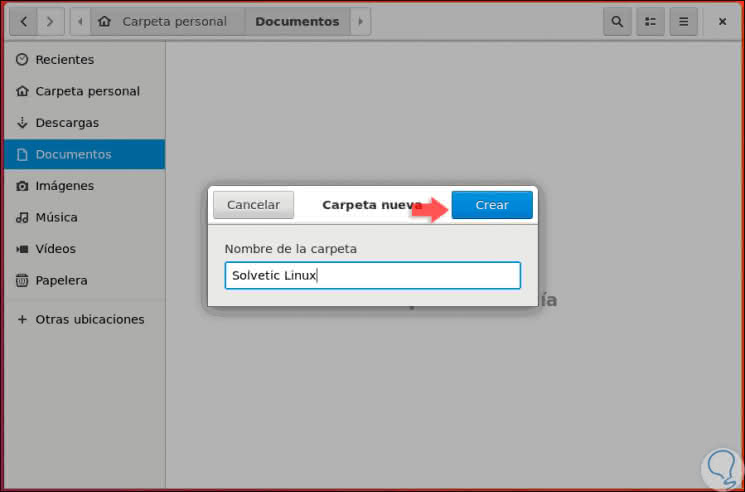
For this case we will use Ubuntu 18.10 and the first step will be to create a folder, this is the one that will be shared with the Windows operating system:
Step 2
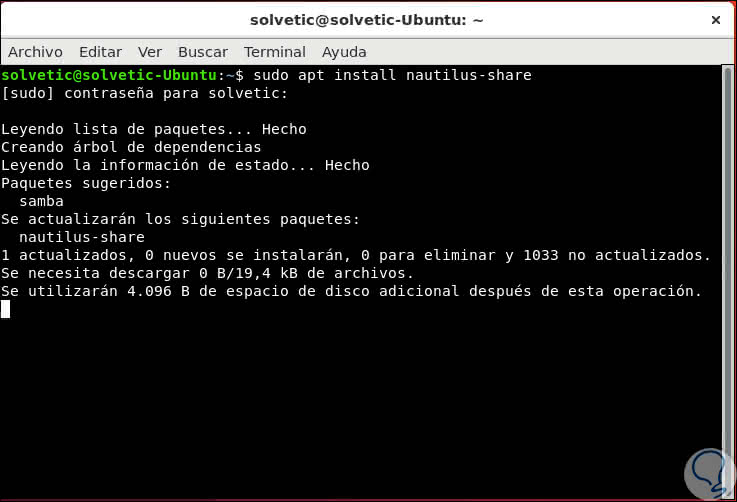
Now it will be necessary to activate the sharing option of this folder by right clicking on it, if this function is not available, we must install it by executing the following command:
sudo apt install nautilus-share
Step 3
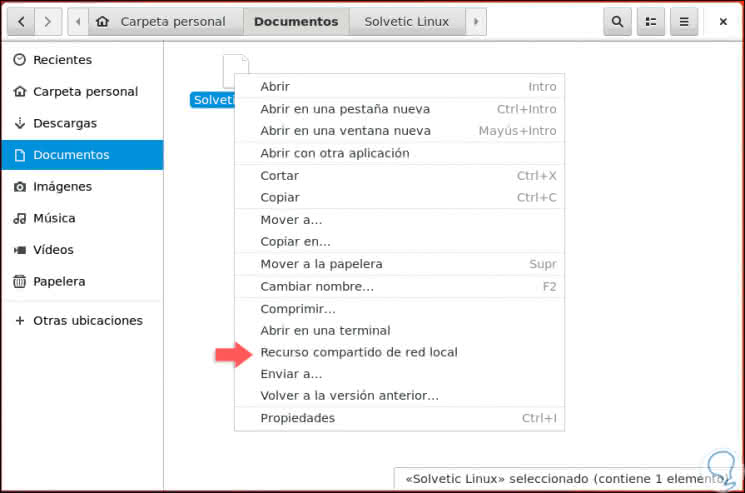
Once this function is installed, we will right click on the folder and in the expanded list we select the option "Local network shared resource":
Step 4
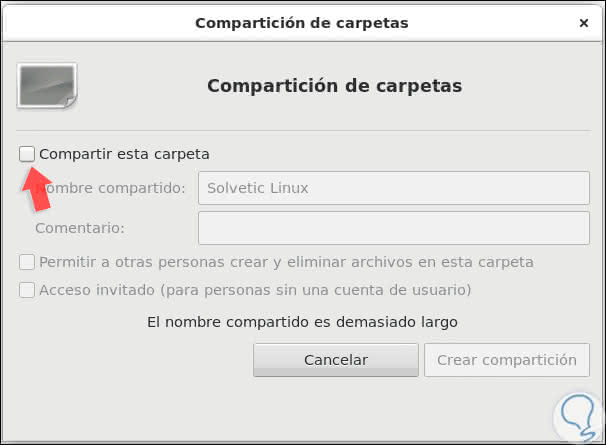
The following window will be displayed:
Step 5
There we activate the "Share this folder" box and the following message will be displayed:

Step 6
There we can see that the service to share the folder, Samba, is not installed, we must click on the button "Install the service" so that automatically the process is executed, we can receive the following message:
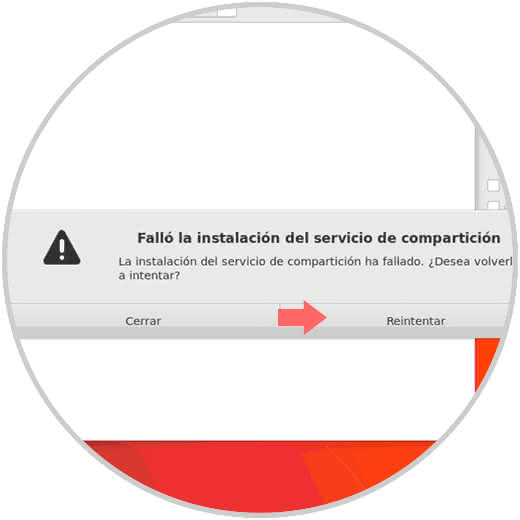
Step 7
If we see that the installation automatically fails we must perform it manually, for this we go to the terminal and execute the following command:
sudo apt install samba
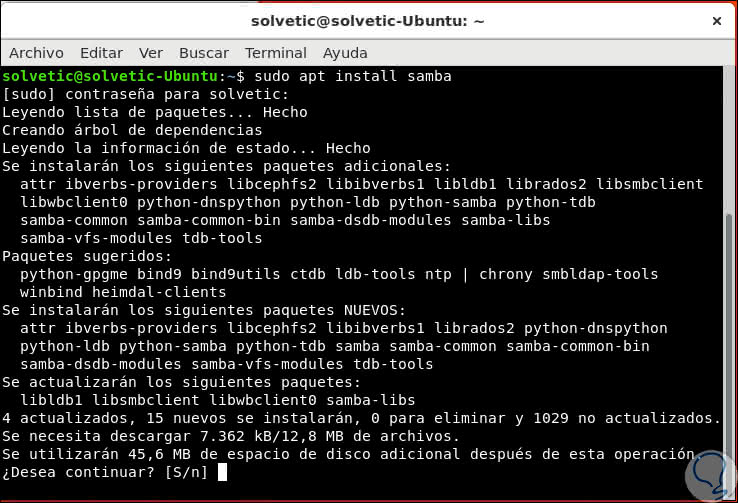
Step 8
We confirm the download and installation of Samba in Ubuntu and once it is installed we can activate again the "Share this folder" box as well as check the boxes "Allow other people to create and delete files in this folder and Guest access (for people without user account)":
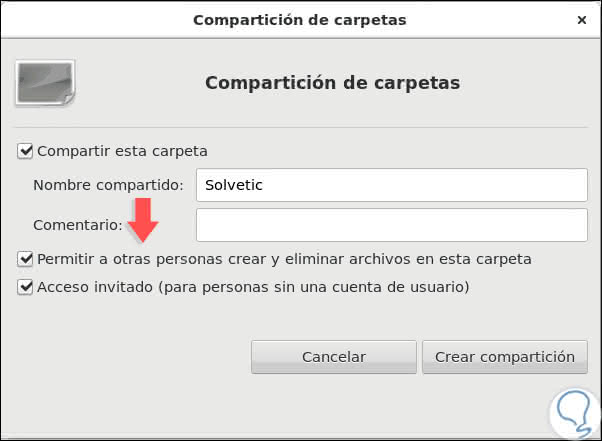
Step 9
Defined this we click on the "Create share" button so that this folder is shared in Linux, we will see the following message:
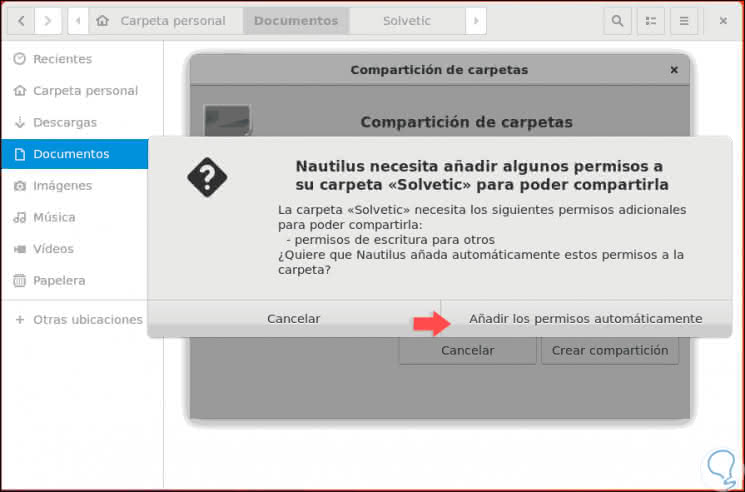
Step 10
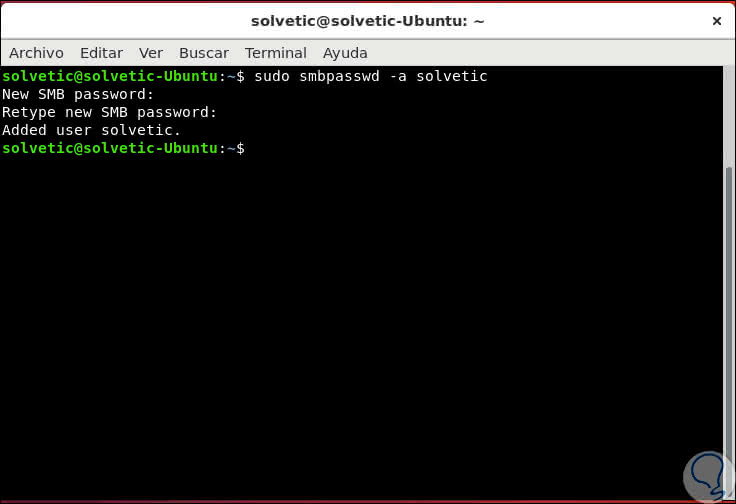
There we click on the "Add permissions automatically" button to complete the process. Now let's go to the terminal in order to assign the password to the Samba user, for this we execute the following syntax:
sudo smbpasswd -a "user"
Step 11
There we must assign and confirm the password to use:
Step 12
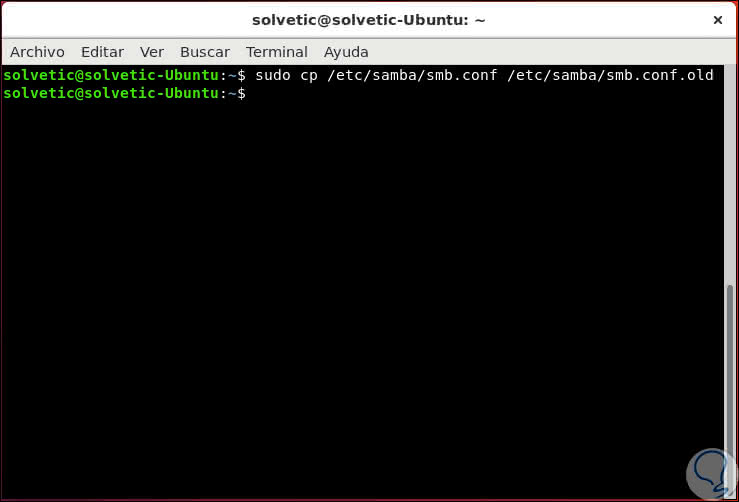
Next, we will create a copy of the Samba configuration file by running the following line:
sudo cp /etc/samba/smb.conf /etc/samba/smb.conf.old
Step 13
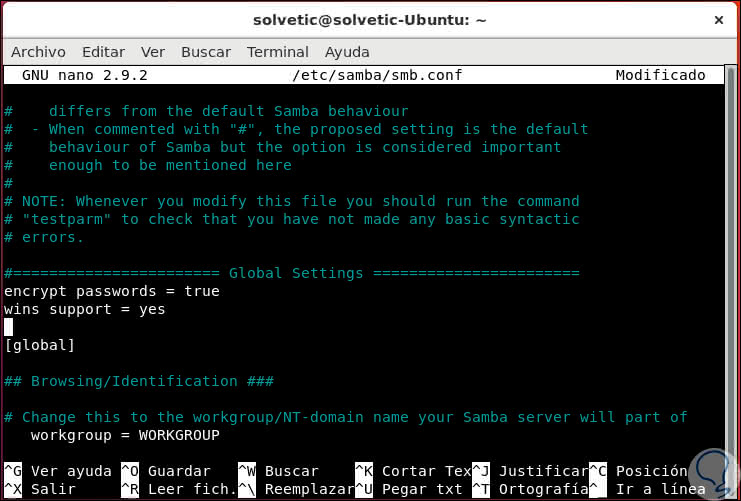
Later we will access the Samba configuration file using the desired editor, in this case nano:
sudo nano /etc/samba/smb.conf
Step 14
In the displayed file we go to the Global Settings section and there we will add the following lines:
encrypt passwords = true wins support = yes
Step 15
We save the changes using the following key combination:
+ O Ctrl + O
We exit the editor using:
+ X Ctrl + X
Step 16
Finally we restart the Samba service executing:
sudo service smbd restart
Step 17
The next step is to validate the access from Windows, in this case Windows 10, to Linux, for this we go to Windows 10, we use the following key combination and in the popup window we execute the following syntax:
+ R
\\ team or IP \ share_resource
Note
To know the IP of the Linux we can execute the command ifconfig or ip add
Step 18
Once we execute this syntax the following window will be displayed where we will enter the Samba user credentials created in Linux:
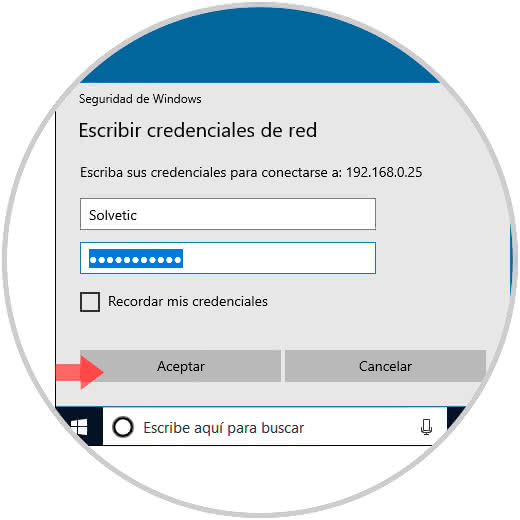
Step 19
Click on "OK", if we wish we can activate the "Remember my credentials" box to connect automatically, and clicking on OK we will be redirected to the path where the shared resource is located in Linux. There it will be possible to create, edit or paste elements which will be available in real time in Ubuntu 18.

2. Access Windows 10 shared folder from Linux
Step 1
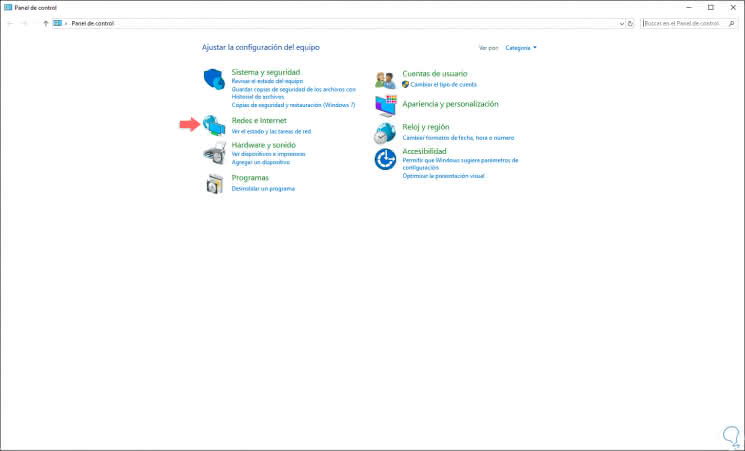
Now it is time to perform the process in Windows 10, for this case the first point is to enable the option to share in the system, for this we go to the Control Panel:
Step 2
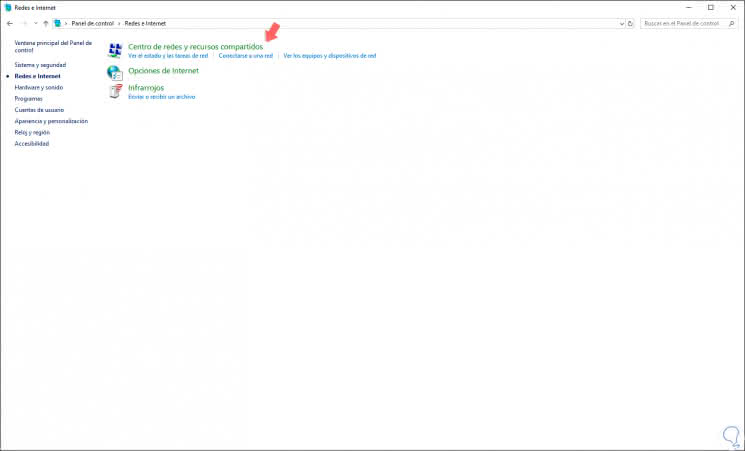
There we select the line "Networks and Internet" and the following will be displayed:
Step 3
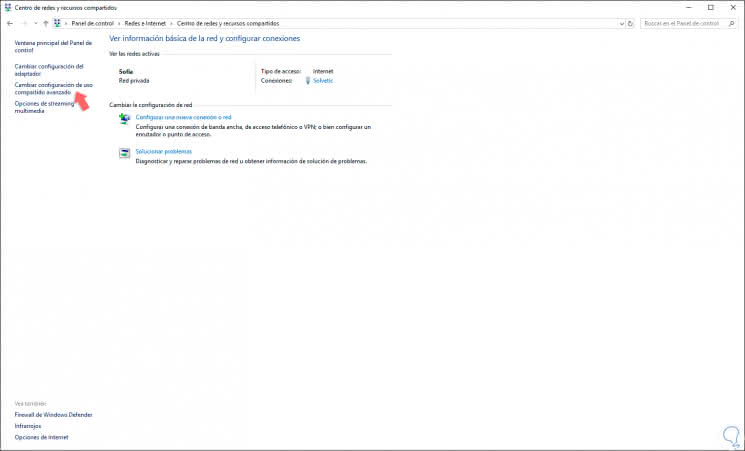
We click on the line "Center of networks and shared resources" and in the next window we will click on the line "Change advanced sharing settings":
Step 4
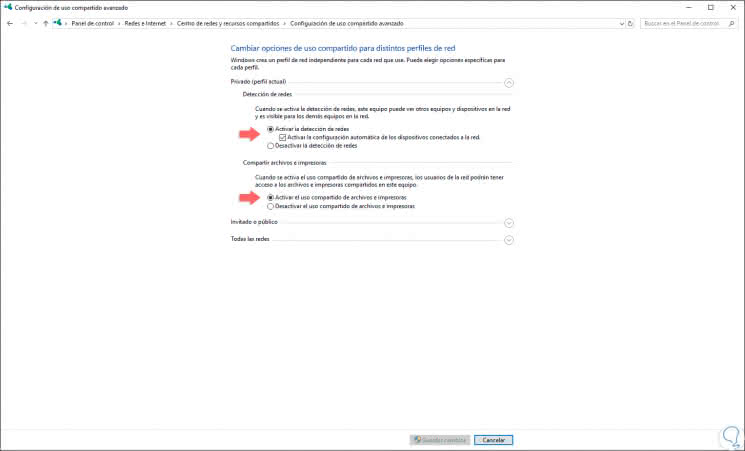
In the displayed window we must activate the following options. Click on the "Save changes" button so that they are applied.
- Activate network detection.
- Activate file and printer sharing.
Step 5
The next step is to share the desired folder, for this we must right click on the folder and in the options displayed select the option "Properties":
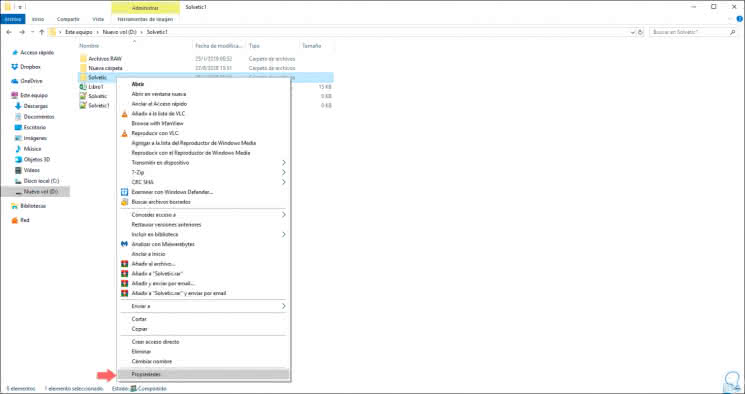
Step 6
In the window that will be displayed, go to the "Share" tab:
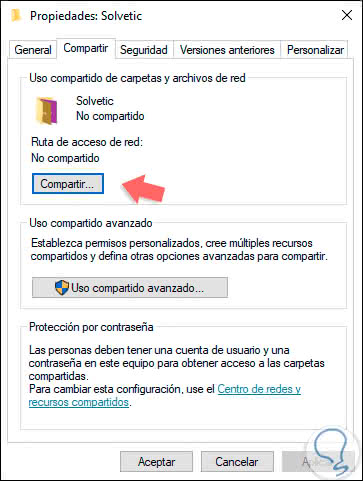
Step 7
There we will click on the button "Advanced sharing" and in the next window we activate the "Share this folder" box:
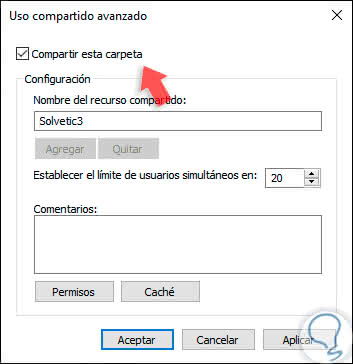
Step 8
There we can add comments or set the maximum limit of users connected to this folder. Click on the "Apply and Accept" button to save the changes and we will see the path of said shared folder:
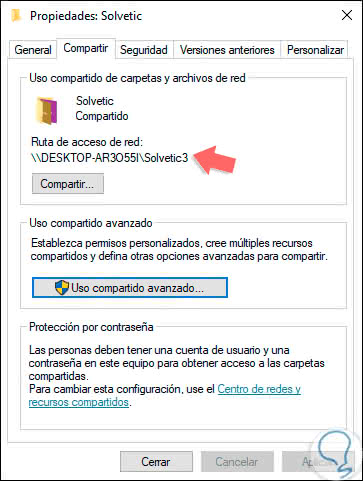
Step 9
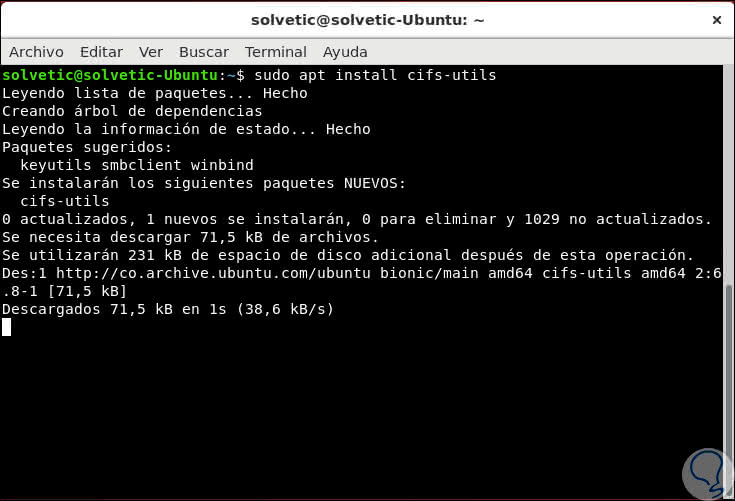
Click on Close to exit the assistant. Now, in Linux we must install the cifs-utils package, this cifs package is a Windows file access protocol which will allow the connection from Linux. For this we will execute the following:
sudo apt install cifs-utils
Step 10
Once installed, we will create a folder in a Linux path either by right clicking on it or using the mkdir command, it will be mounted for the file sharing process. Then we will execute the following line, in this case, to mount the folder and thus have the facility to transfer files between both systems:
sudo mount.cifs //192.168.0.6/TechnoWikis3 / home / solvetic / Desktop / Windows -o user = solvetic
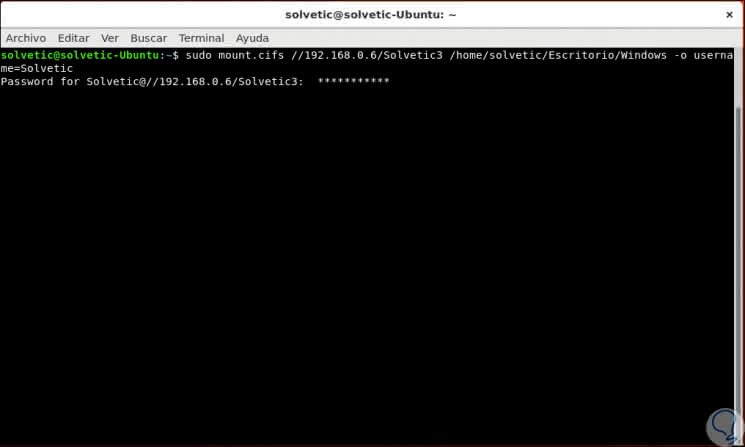
Step 11
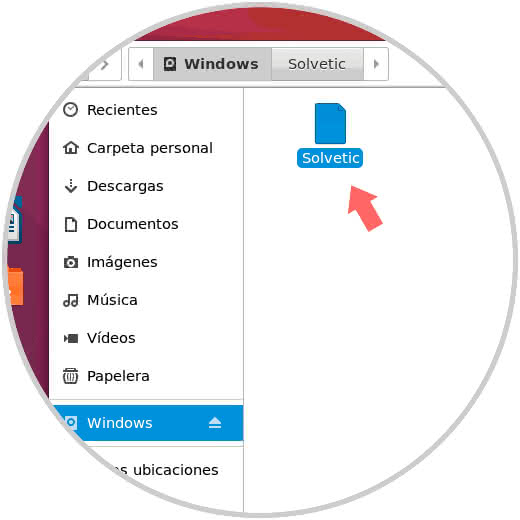
There we will enter the respective password and now that the assembly process is done we can access from the browser. To unmount it we can right click and select eject or use the umount command.
With these methods, we have learned to share files in a safe and useful way between Windows and Linux through the LAN network.