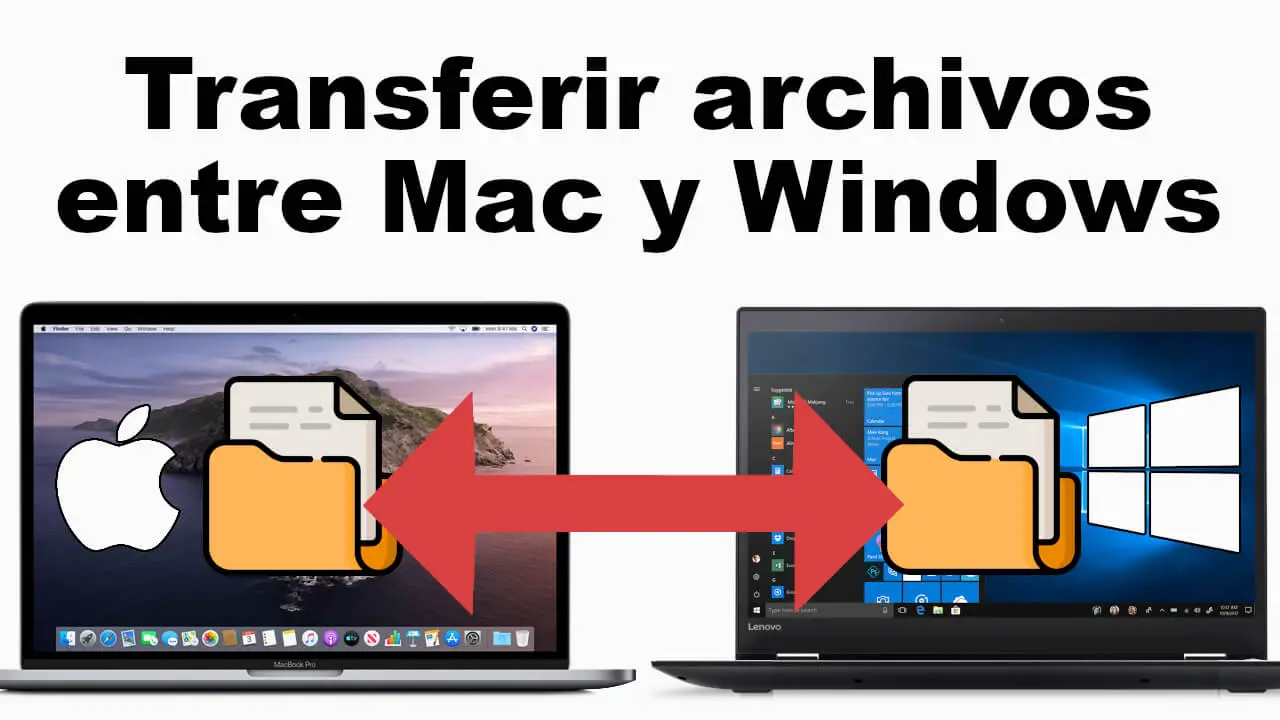
One of the most feared headaches is transferring files between a Mac and a Windows computer. At Downloadsoruce.es we have already mentioned on occasion that because the Mac OSx and Windows 10 operating systems use a different file system, this prevents us from transferring files between these operating systems using a Pendrive (USB memory).
Related: How to make a Windows USB memory stick compatible with MacBook Air or Macbook Pro OSX
The file system used on USB sticks used on Windows 10 computers is usually NTFS while USB sticks used on Mac OSx devices is usually HFS +. The problem is that Windows is incompatible with USB flash drives with the HFS + file system, so when you connect this USB flash drive to your Windows computer, it will simply not be detected by the operating system..
Something similar happens in the case of having a USB memory with a Windows compatible NTFS file system, and we try to use this Pendrive on a Mac OSx. In this case we will be able to see all the files inside it, even transferring them from inside the USB memory to your Mac OSx. However, you will not be able to copy any Mac file to the USB memory to transfer it to your Windows computer.
It is true that a USB memory can be formatted with the FAT32 or exFAT file systems. These two formats are compatible with both operating systems, however, these two formats are very old, have limitations and are usually unstable causing them to continuously fail and risk losing information..
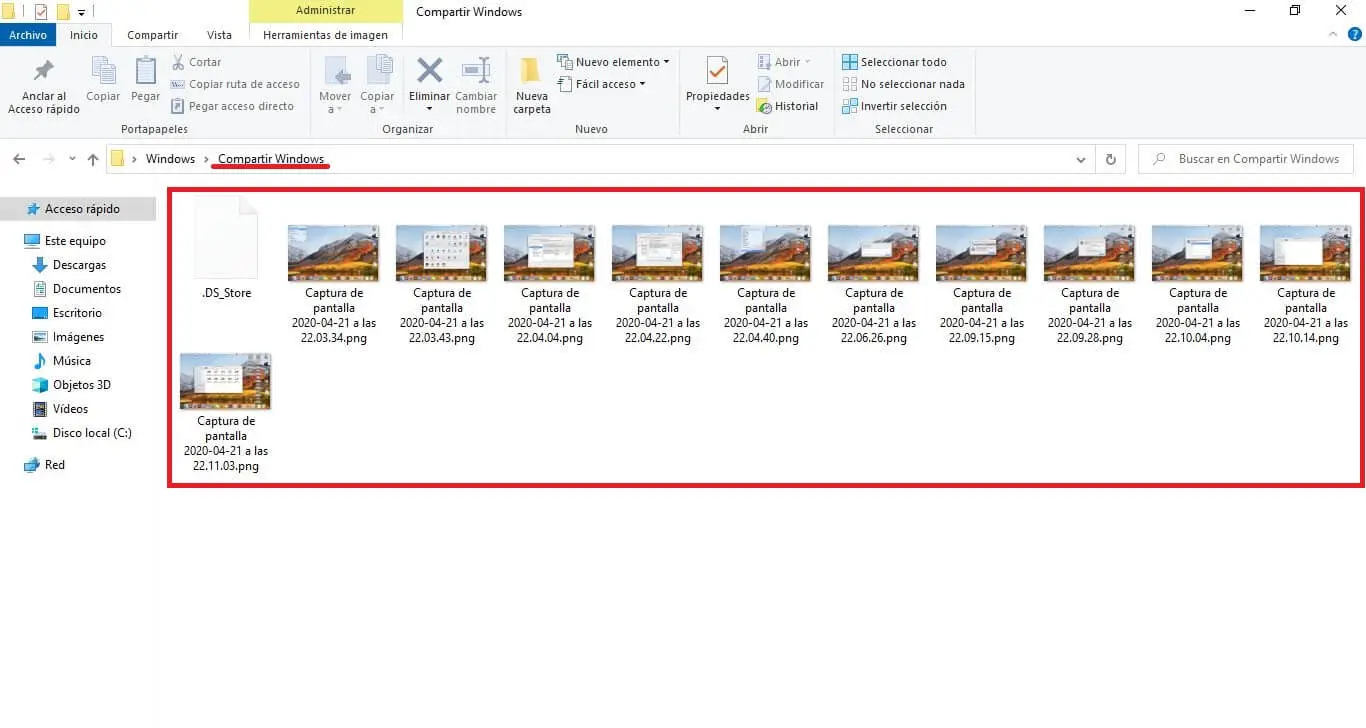
Fortunately, both on Mac and Windows there is the possibility of creating a shared folder which allows you to transfer files directly between Mac OSX and a Windows 10 computer, with the only requirement that being connected to the same WiFi network. This folder allows you to transfer files between computers in both directions and remotely without having to use a USB memory.
That said, below we show you step by step how to transfer files between Mac OSX and a Windows 10 computer remotely and easily, without having to use a USB memory, thanks to shared folders. It will NOT be necessary to install any type of program:
How to share and transfer files between a Windows computer and a Mac with OS X
- The first thing we will have to do is turn on your Windows 10 computer..
- Connect to the WiFi network
- Use the keyboard shortcut or: Windows key + I
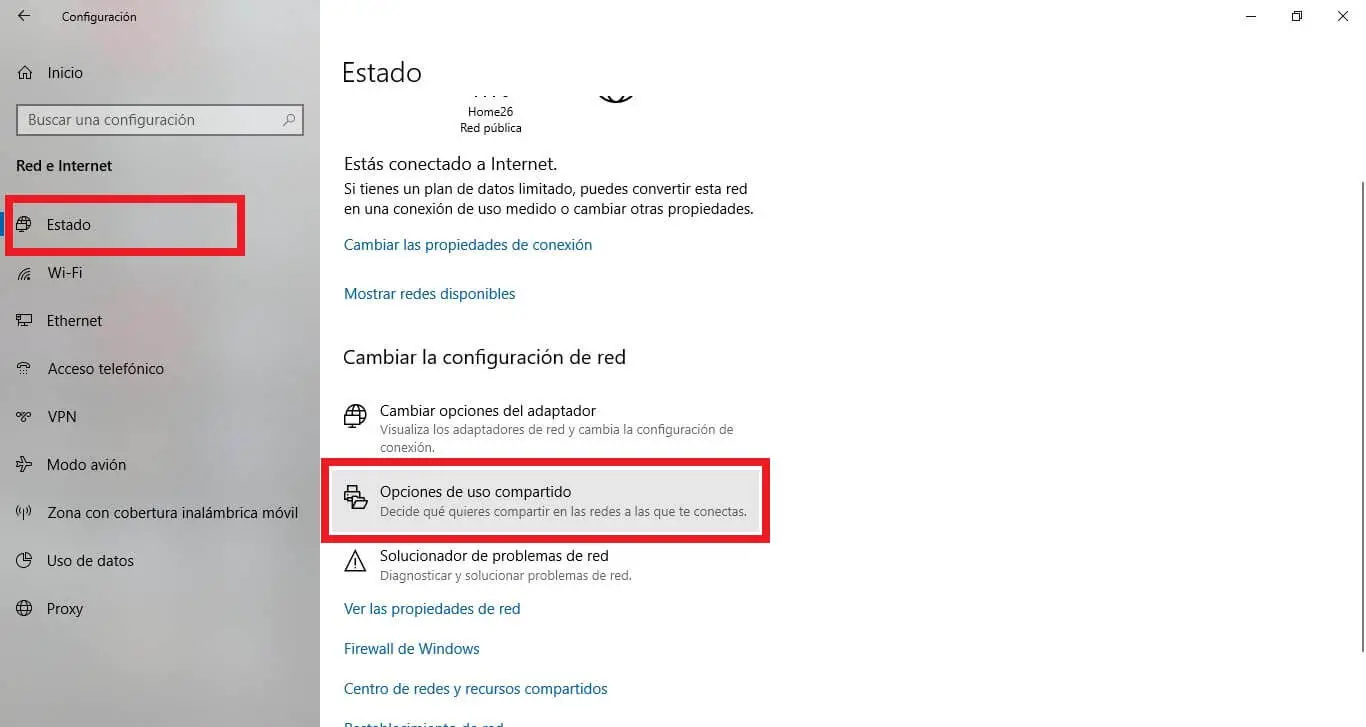
- When the Configuration is displayed, go to: Network and Internet
- Select the Status option in the menu on the left.
- Scroll the main screen to the option: Sharing Options .
- On the new screen, under the Private section; you will have to make sure that the following options are checked:
- Turn on network discovery
- Activate automatic configuration of devices connected to the network.
- Enable file and printer sharing.
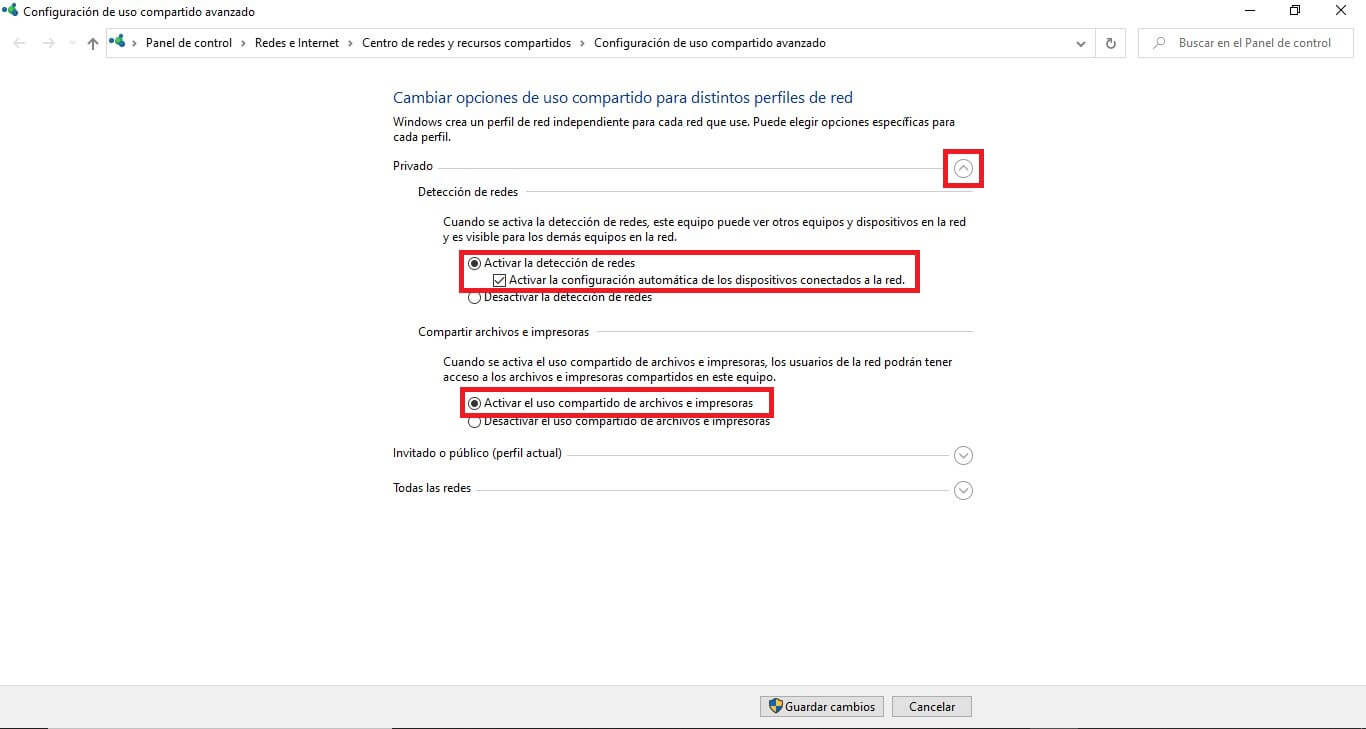
- To save the changes you will have to click on the button: Save Changes .
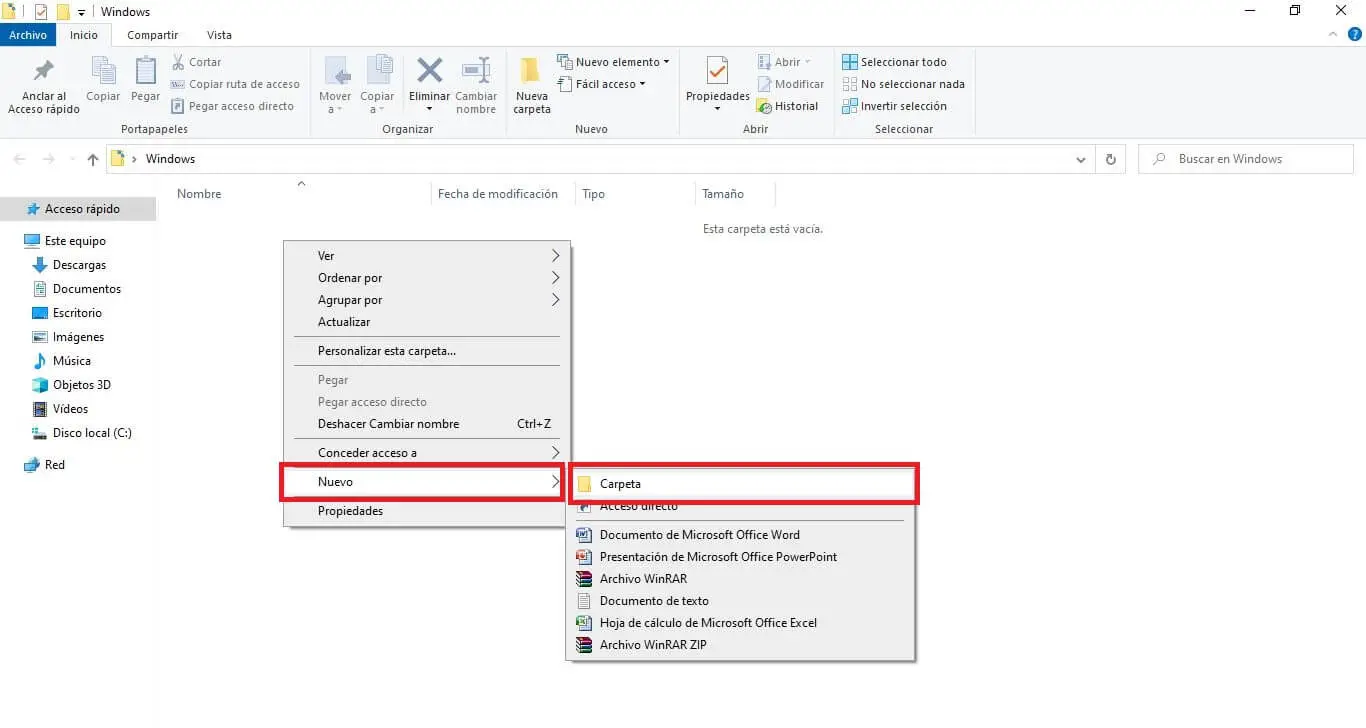
- Close the window and go to the directory where you want the shared folder to be stored.
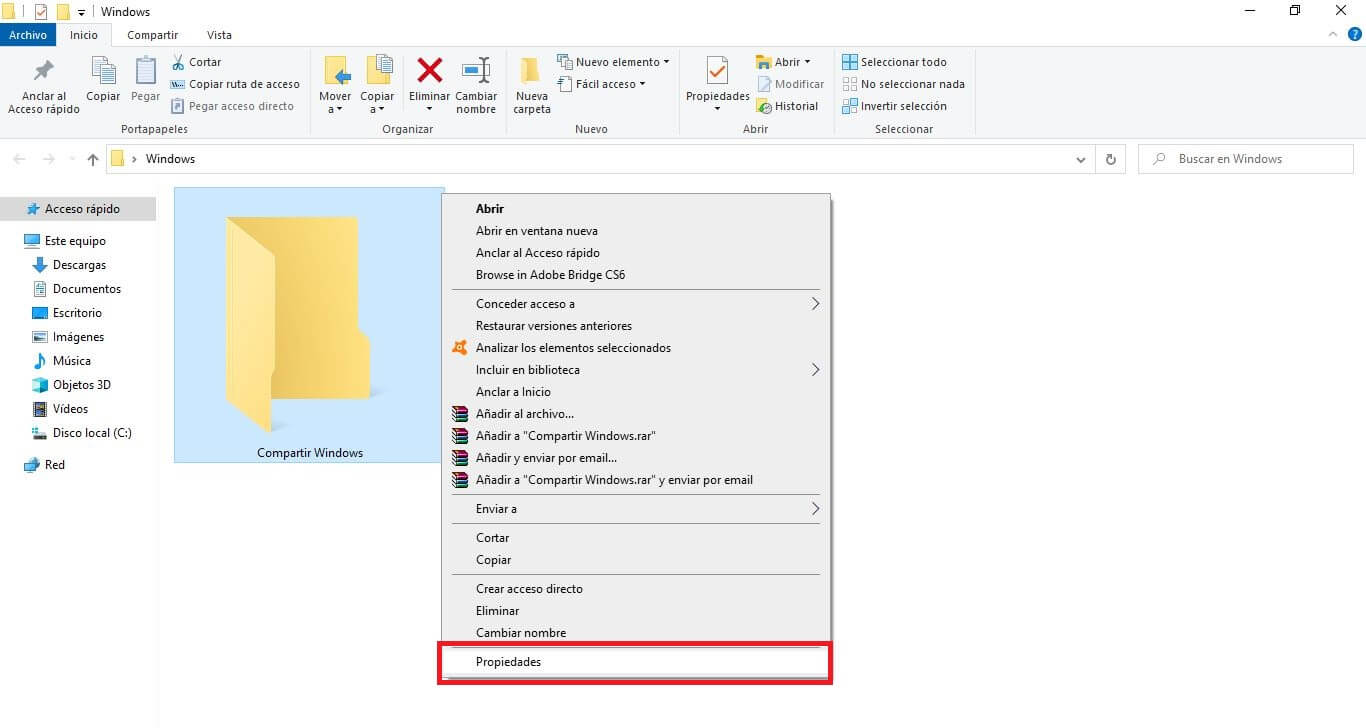
- Right click with the mouse and select the option: New> Folder
- When the folder has been created, right click on it.
- In the drop-down menu you will have to select the option: Properties .
- In the new window you will have to go to the tab: Share
- Click on the button: Advanced Sharing .
- Now you will have to make sure that the option: Share This Folder is checked .
- In this same window you will have to click on the button: Permissions .
- Here you will have to make sure that all the boxes in the Allow column are checked.
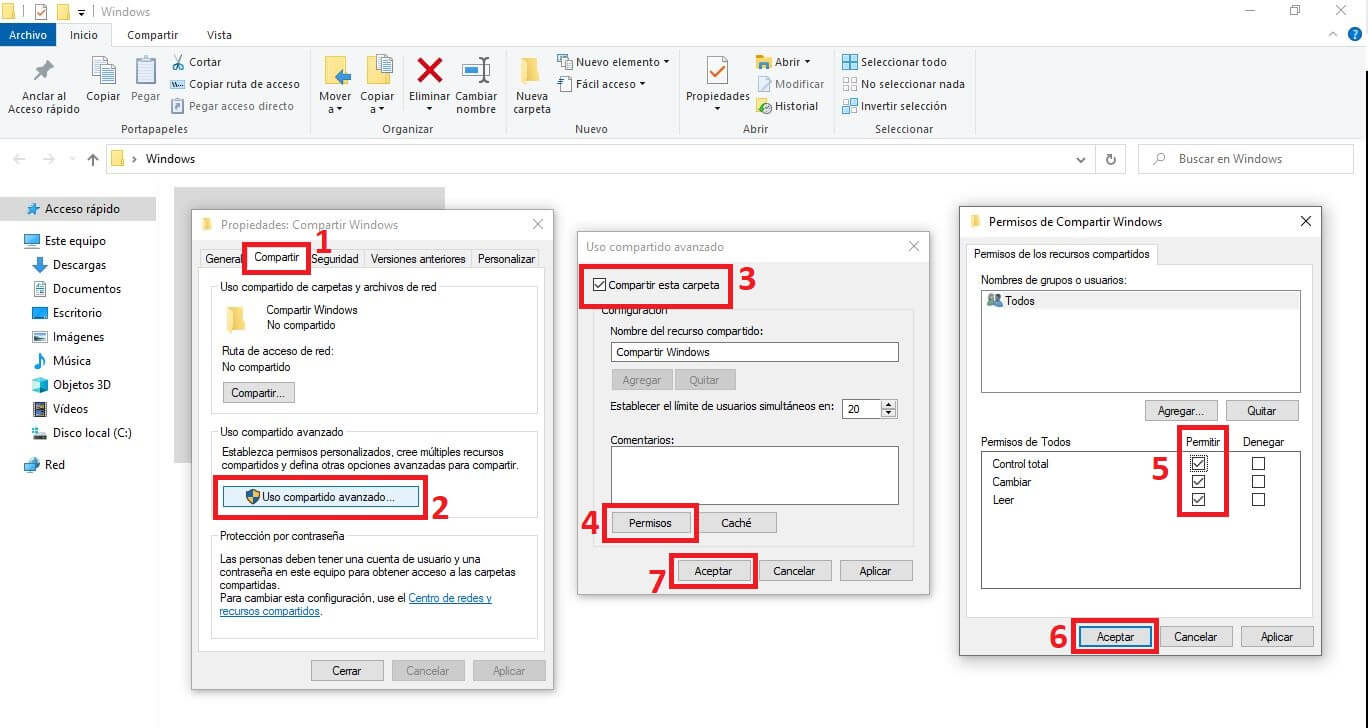
- Finally you will have to click the OK buttons in all the windows so that the changes of the new configuration are saved.
- The next thing will be to open the CMD, if you do not know how to do it follow the steps shown here: How to open the Windows CMD.
- Here you will have to enter the following command:
- After pressing Enter the network information will be displayed. Copy on paper the IP shown next to: IPv4 address.
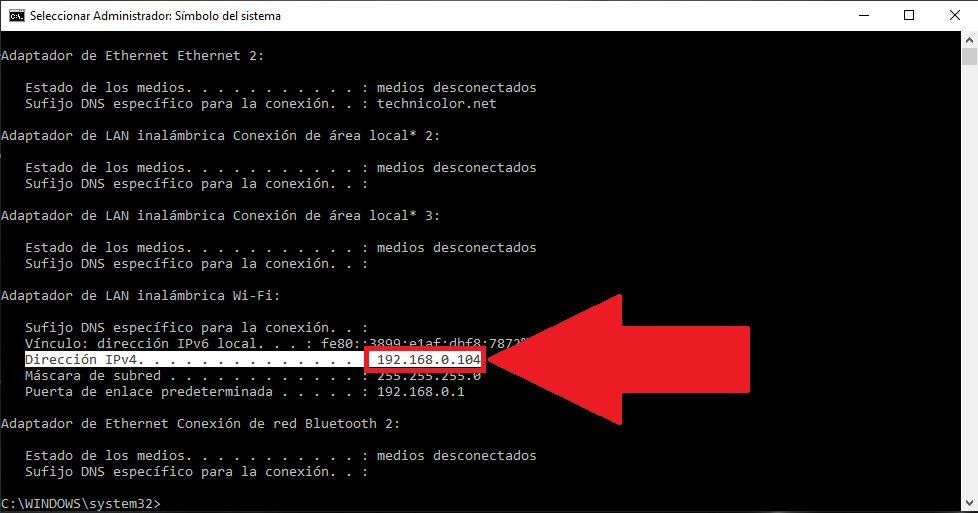
- Close the CMD and up to here the Windows configuration.
- Turn on your Mac OSx
- Connect to the same Wifi network to which the Windows computer is connected.
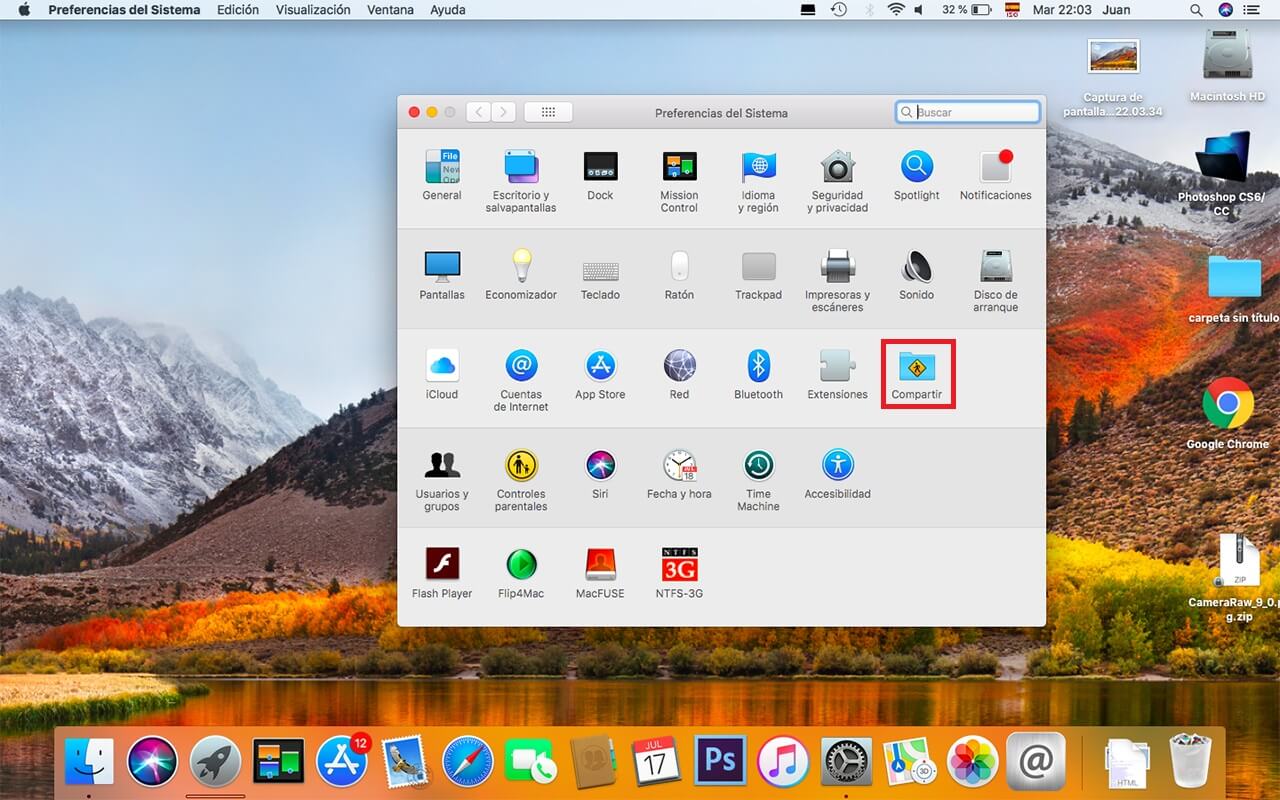
- Click on the apple icon in the upper left corner of the desktop and in the menu click on the option: System Preferences.
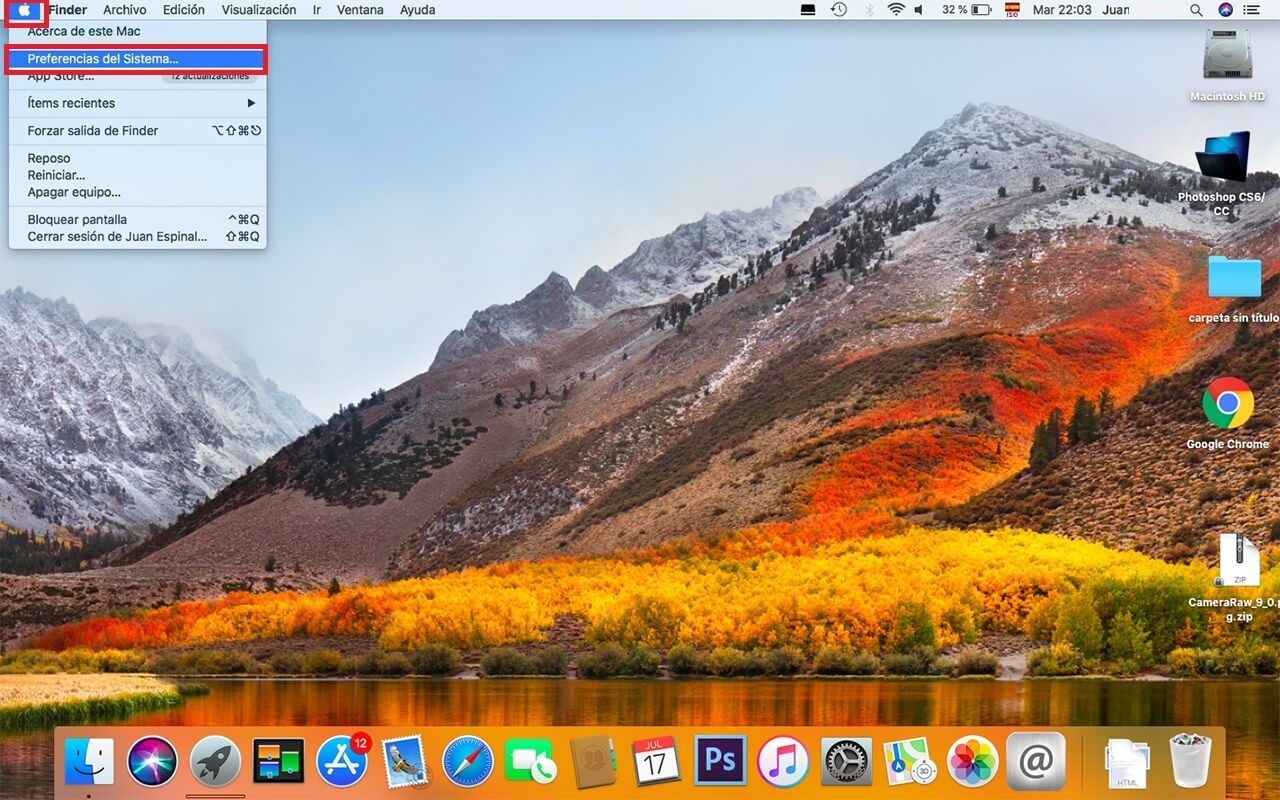
- In the new window you will have to select the option: Share.
- When the screen opens you will have to mark the service: File Sharing
- Now click on the Options button .
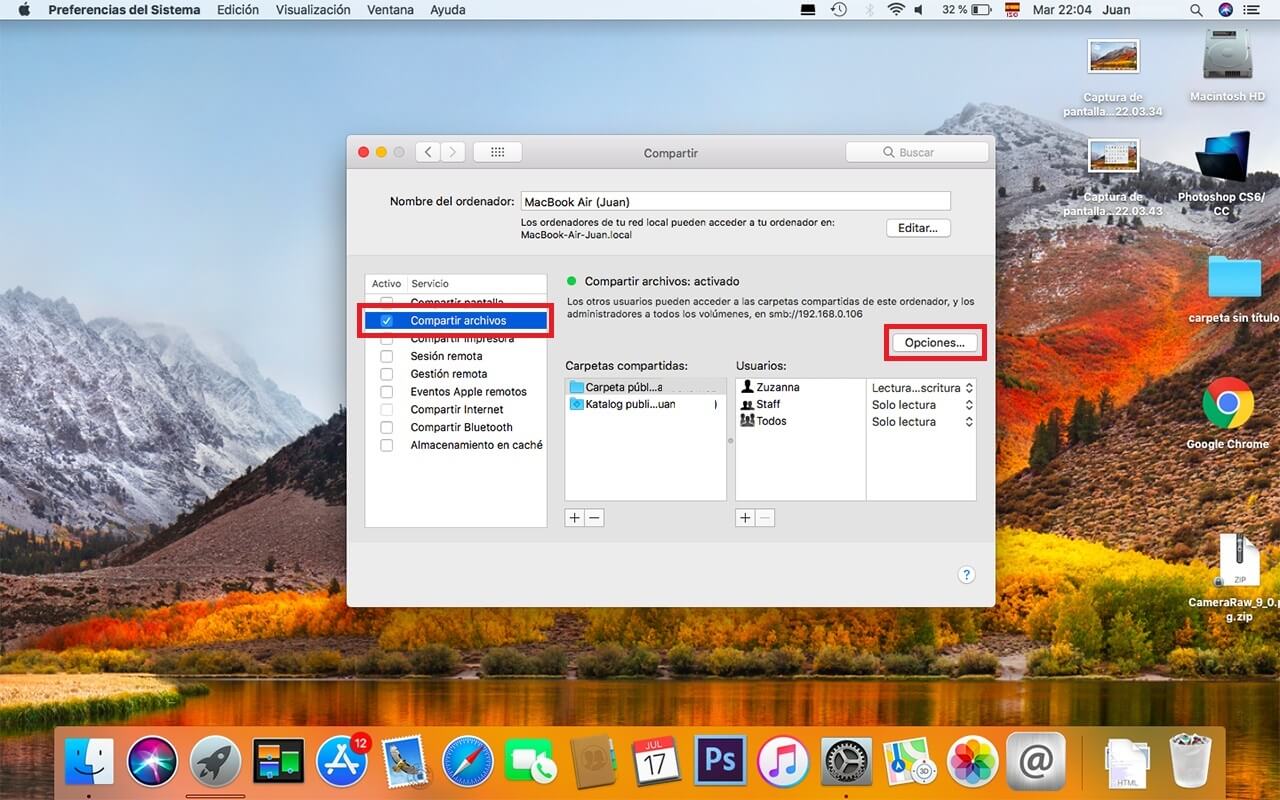
- On this screen you will have to mark the Account (user) that you are going to use to share files. (You may have to enter the password for this user account)
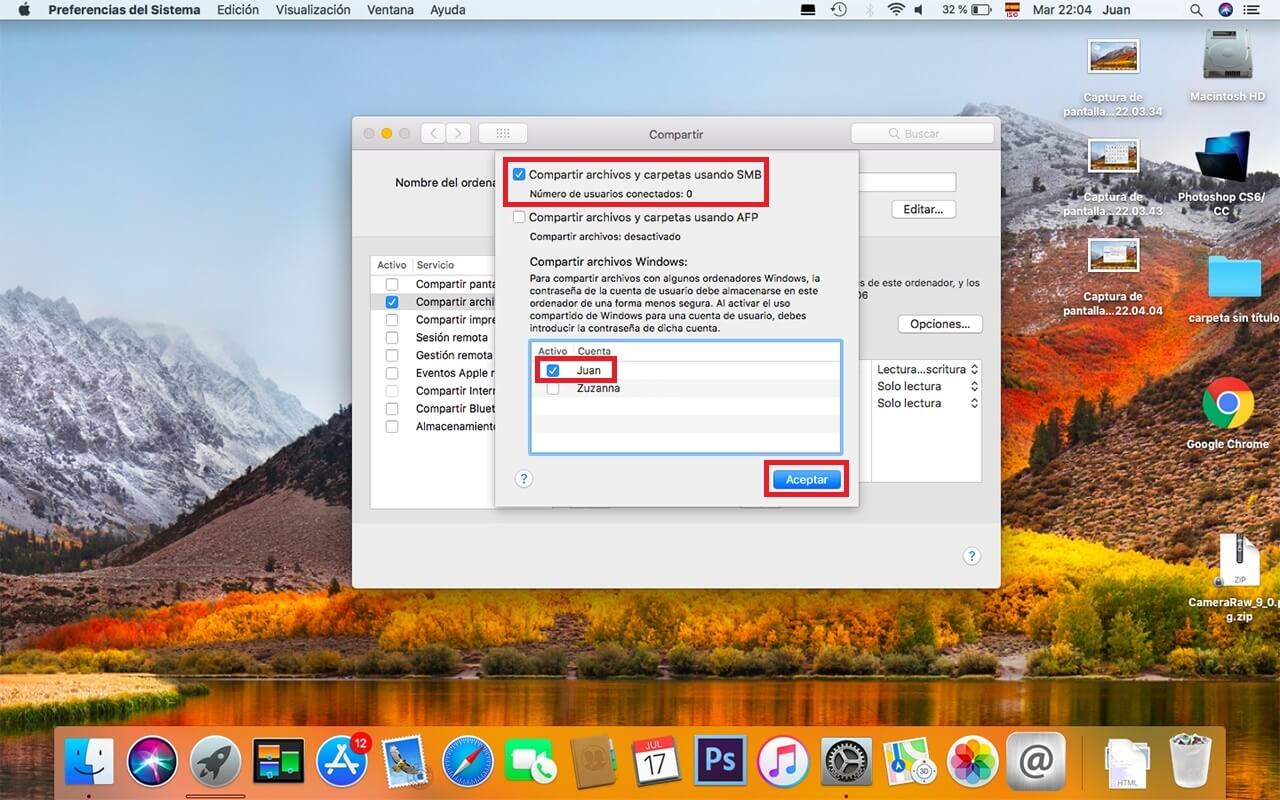
- Then Check the option box: Share files and folders using SMB
- Click OK to save the changes.
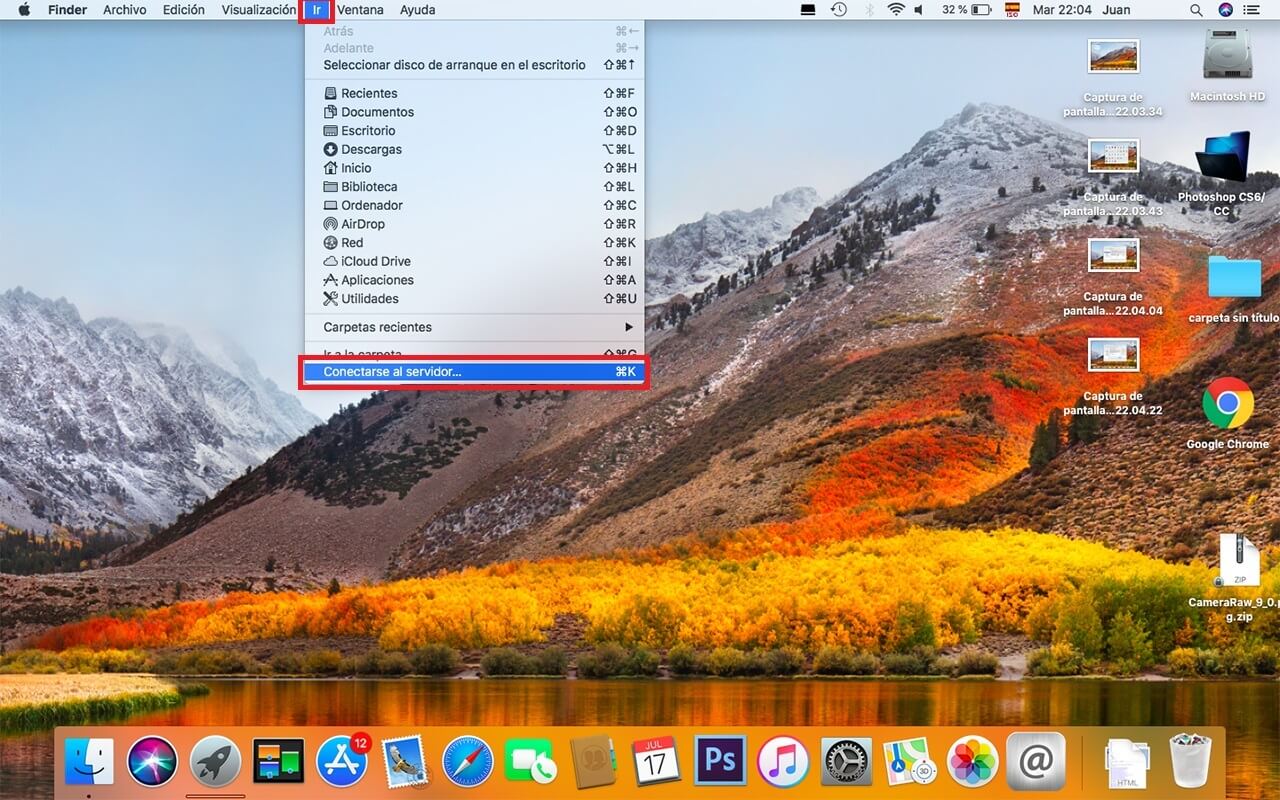
- Close the window and from the desktop click on the option: GO
- In the menu you will have to select the option: Connect to the Server ...
- In the new window you will have to enter the IPv4 Address that you copied in Windows with the prefix smb: //. This way if your IPv4 is 192.168.19.167, you should enter the following: smb: //192.168.19.167
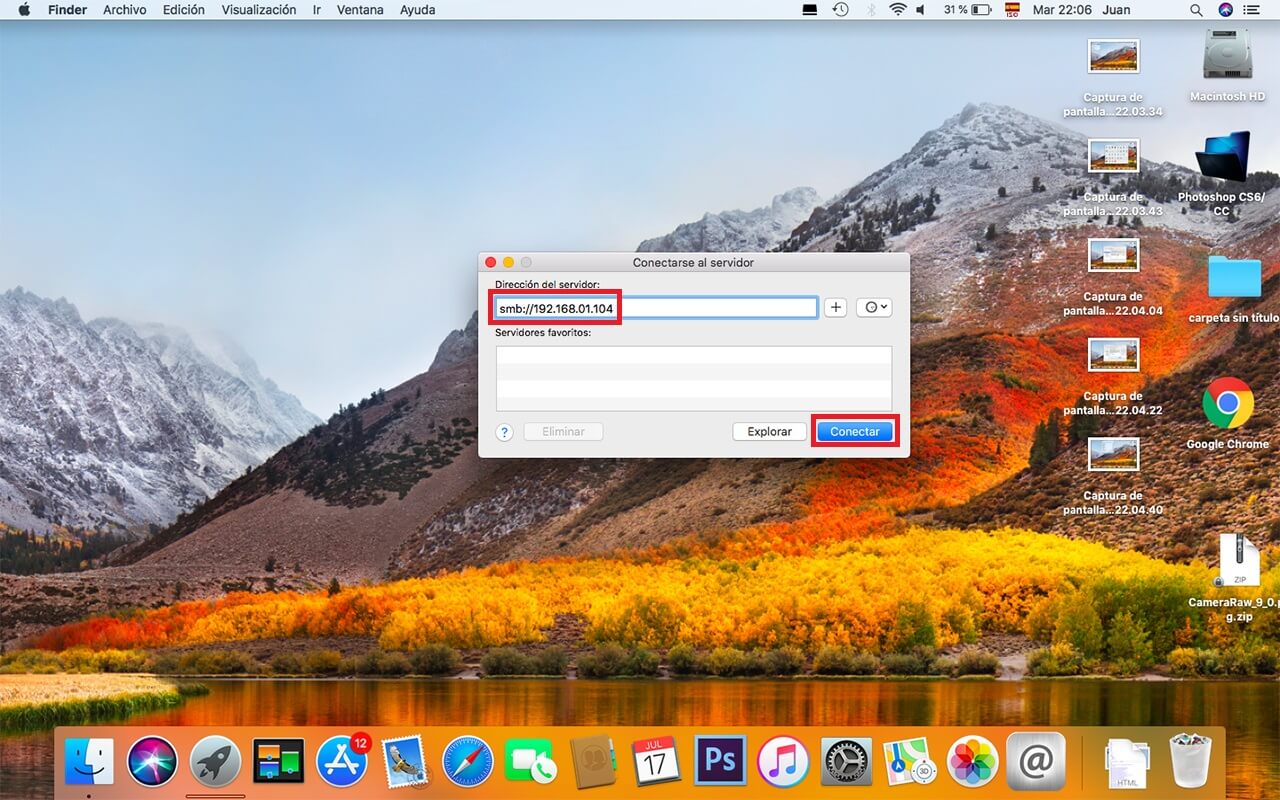
- Click on the Connect button.
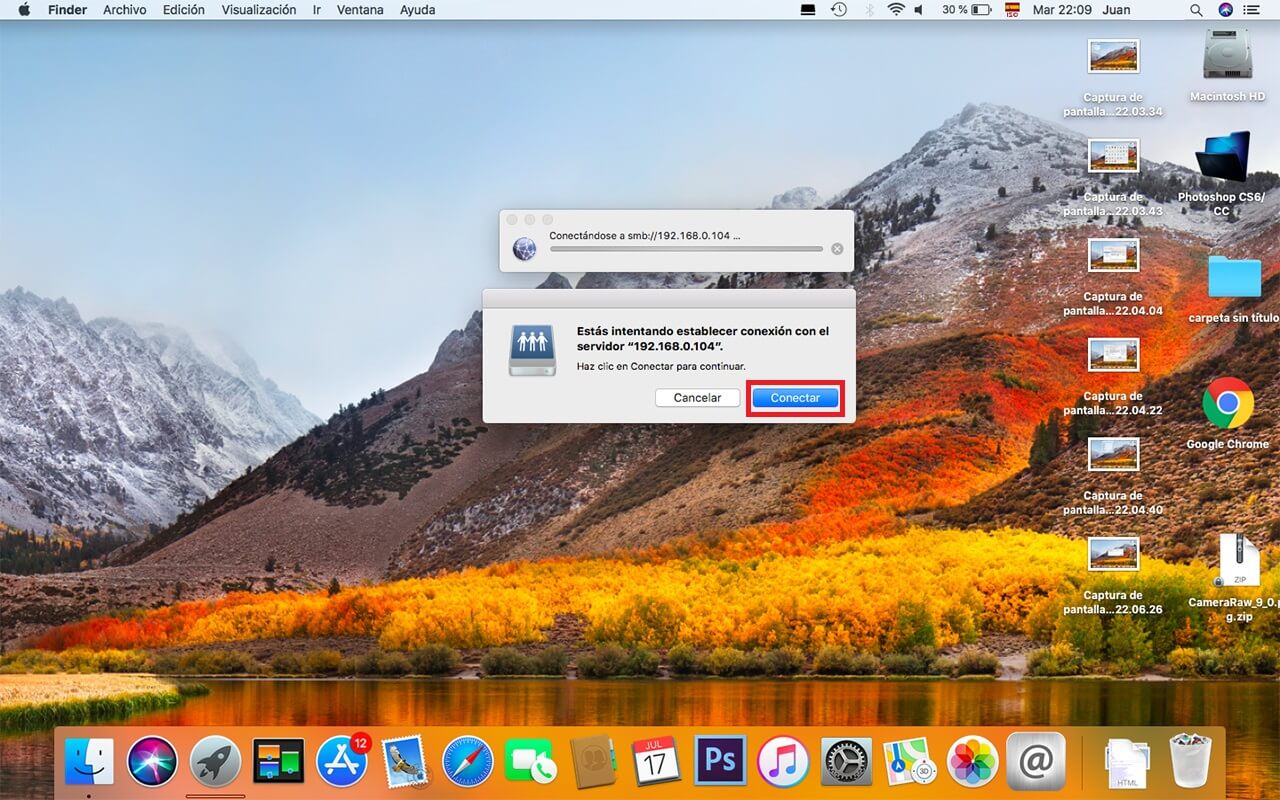
- If your Windows account is protected with a username and password, a window will be displayed in which you will have to select the option: Registered User. Just below you will have to enter the Username and password that you use to log in to your Windows account.
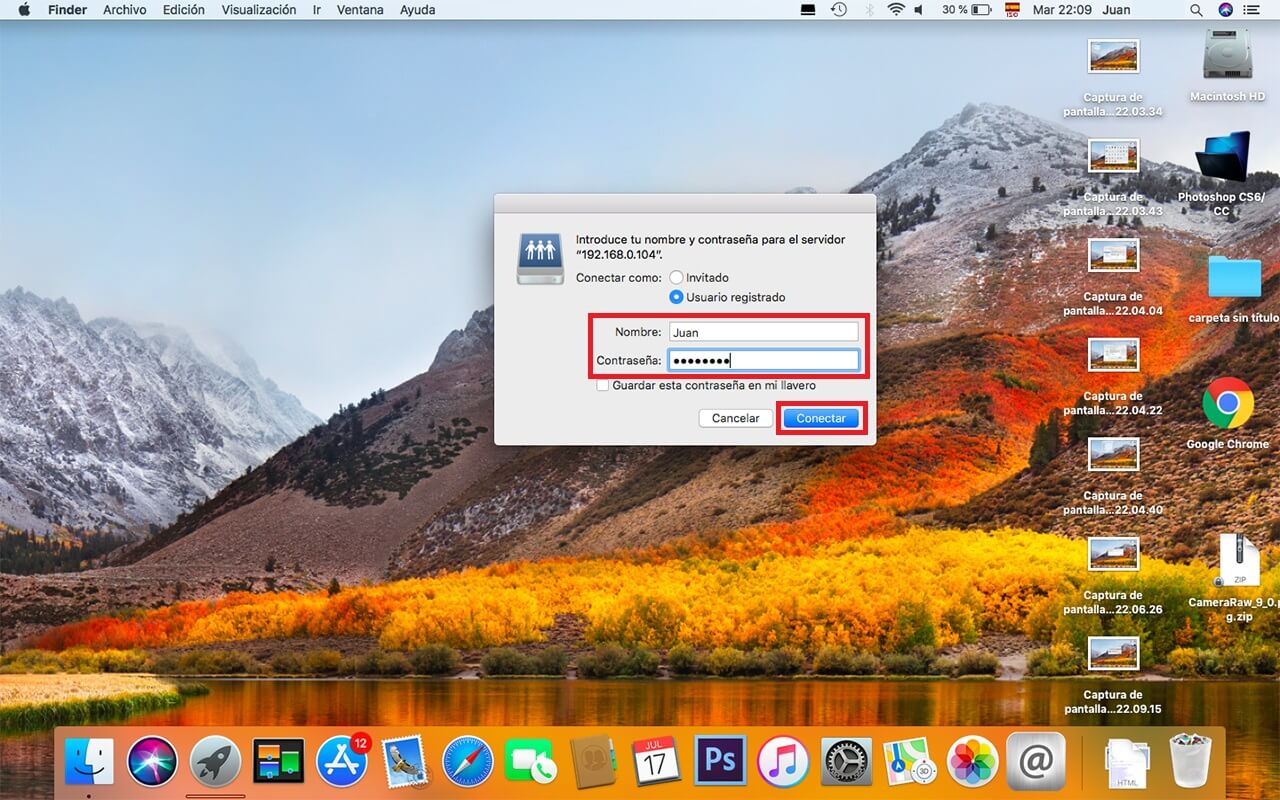
- Click the button again: Connect
- Now your Mac will connect to your Windows computer. When connected, on Mac a window appears in which you will have to select the shared folder in Windows, that is, click on the name of the shared folder that we created previously in Windows. If we had created more than one folder, all of them will appear in this window and you can select any of them.
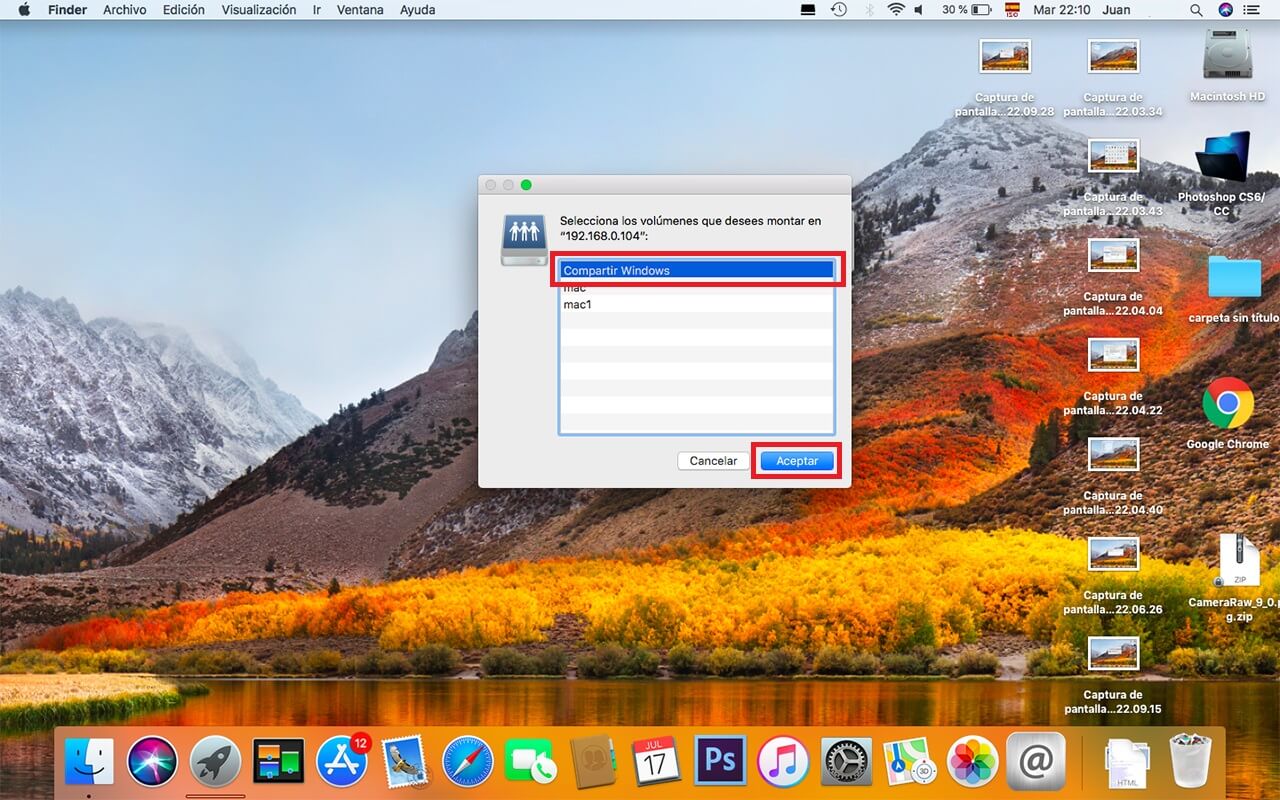
- This causes the shared folder to open on Mac.

- At this point, any file that we copy or move to the shared folders of both Windows and Mac OSx will automatically appear on the other device. For example, if I copy a photo in the Windows shared folder, said photo will automatically appear in the Mac shared folder and it will be fully functional, so we can move it to another folder or edit it as we like. The same is true in the other sense, that is, if we copy a file into the Mac shared folder, this file will automatically appear in the Windows shared folder.
Without a doubt this is the best way to transfer files from a Mac to Windows or vice versa, especially if they are large. The process saves us a lot of time by not having to copy the files from one computer to the USB memory and then transfer it from said Pendrive to the second computer. This allows us to do it directly from one to another.