Ubuntu has recently released its new version of system for corporate areas and it is Ubuntu 20.04 Server with the code name Focal Fossa which belongs to the LTS segment (Long-term support -LTS). Logically, the objective of each edition is to present the user and administrator with the best solutions for their work. That is why Ubuntu 20.04 Server has support for automated installations and during installation it will be possible to install the bootloader on multiple disks offering its availability..
The ISO image of Ubuntu 20.04 Server Focal Fossa is available at the following link:
Ubuntu 20.04 Focal Fossa
News
At the news level in Ubuntu 20.04 Server we highlight:
- Full support for Amazon Web Services (AWS) Instance Metadata Service (IMDSv2)
- IPv6 support in Microsoft Azure
- Available to be installed on x86-64, ARM v7, ARM64, POWER8, POWER9, IBM s390x (LinuxONE) architectures
- Compatible with Canonical until 2025 and ESM coverage until 2030
- Update of services and applications QEMU (v4.2), libvirt (v6.0), PHP (v7.4), Ruby (v2.7), GCC (V9.3), Python (v3.8), MySQL (v8 .0), NGINX (v1.17)
- Integrate Linux 5.4 kernel
- SSH now supports two-factor authentication
VirtualBox is one of the most comprehensive solutions for creating virtual environments and testing systems or applications without affecting the production environment. This can be downloaded at the following link:
VirtualBox
IF you still don't feel safe to install or upgrade Ubuntu to Ubuntu 20.04, we recommend you continue reading this tutorial and learn how to create a virtual machine of Ubuntu 20.04 Server in VirtualBox and know its functionalities before putting it in a real environment.
1. How to create Ubuntu 20.04 Focal Fossa virtual machine in VirtualBox
Step 1
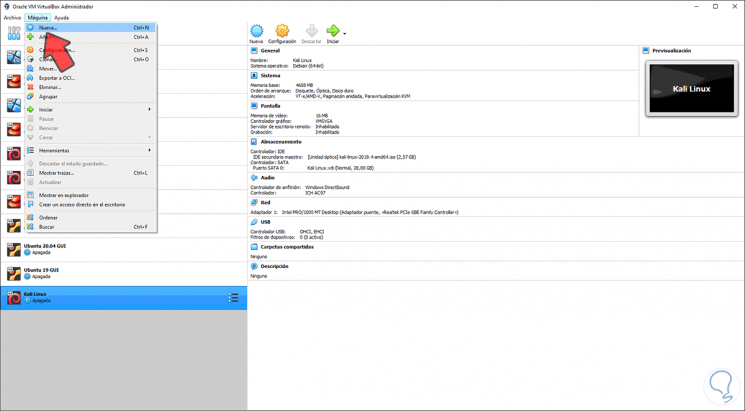
The first step will be to access VirtualBox and create the virtual machine using one of the following options:
- Use the key combination Ctrl + N
- From the Machine menu and select the New option
Step 2
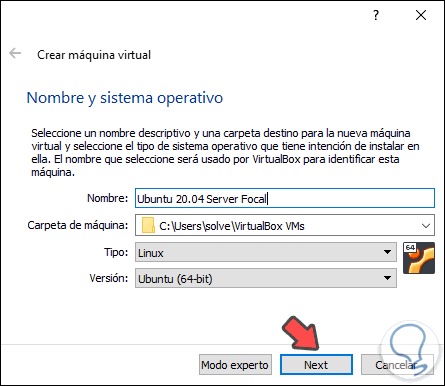
In the displayed window we will assign the following:
- Name of the virtual machine to be created
- Location where the virtual machine will be hosted
- Type of operating system to use, we select Linux
- System version to use, we select Ubuntu (64-bit)
Step 3
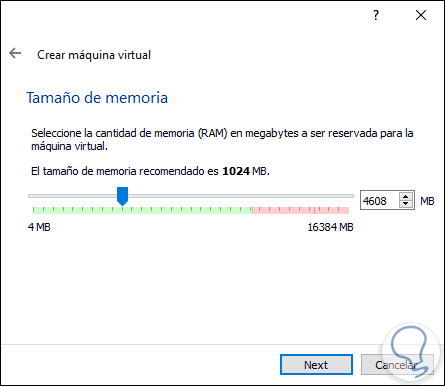
We click Next and define the amount of RAM that we will allocate to the virtual machine:
Step 4
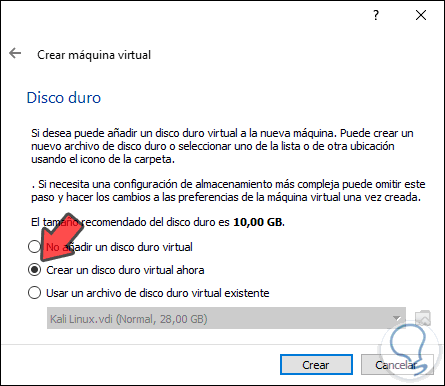
We click Next and we will get to the hard drives section, there we have the following options:
- Do not add a virtual hard disk: with this option, we can add the hard disk after the virtual machine is executed.
- Create a virtual hard disk now: when using this option, which is the default, a hard disk will be created and its size will be adjusted based on the selected operating system, Linux uses a minimum of 10 GB.
- Use an existing virtual hard disk file: with this option we can resort to a disk in VHD or VDI or VMDK format to be mounted on the machine we are creating.
We leave the default option and click "Create"
Step 5
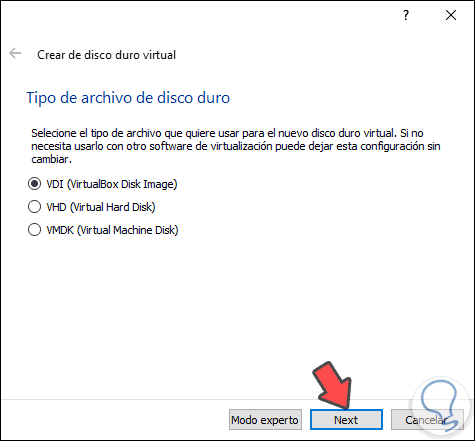
It is time to select the type of hard disk that will be created and click Next
Step 6
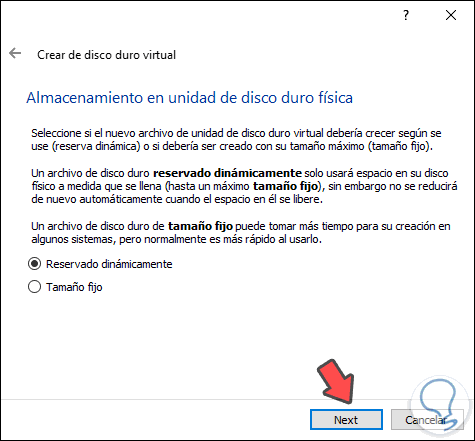
We must define the storage format. The options to use are:
- Dynamically reserved: with this option the space on the physical hard disk is filled in such a way that we save data in the virtual machine, the problem is that, if we delete data, the space cannot be recovered.
- Fixed size: as its name implies, here the use of data is established and limited to the size that we indicate.
Select the desired option and click "Next"
Step 7
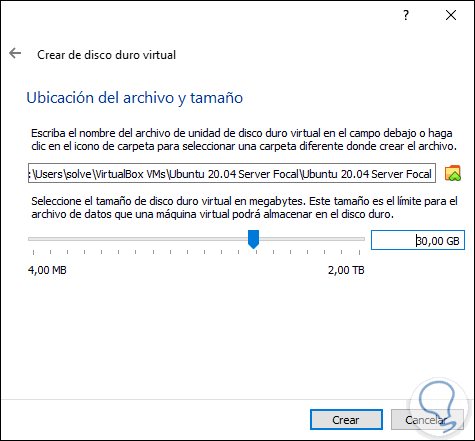
Now we define the following parameters:
- Path where the Foca Fossa virtual machine will be saved
- Size of hard disk to create
We click on "Create" to finish the process of creating the virtual machine values:
Step 8
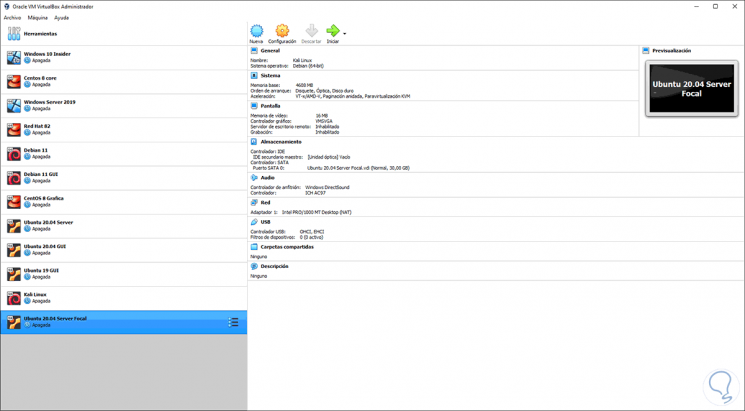
Finally we will see that it has been created correctly.
2. How to configure virtual Ubuntu 20.04 Focal Fossa in VirtualBox
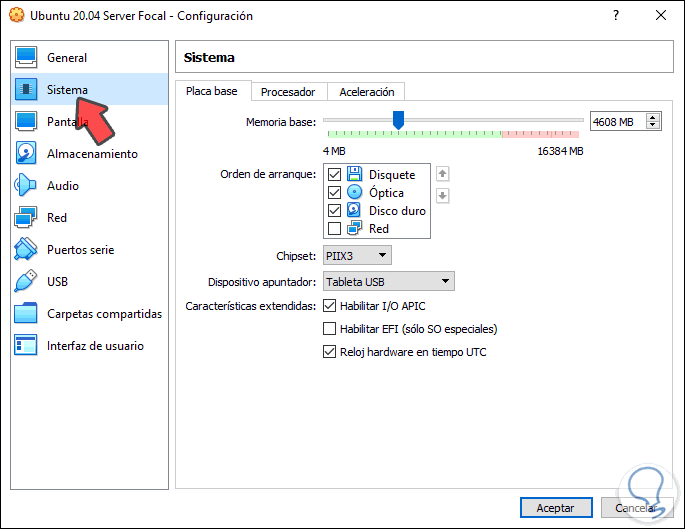
TechnoWikis advises you to make some changes to the virtual machine configuration for proper operation, such as increasing processors, activating the network adapter and more.
Step 1
For this we click on the "Configuration" button and from the "System" section we can adjust the processor values, acceleration, etc:
Step 2
In the "Network" section we must enable the Bridge Adapter so that the Ubuntu 20.04 Server virtual machine has access to the network:
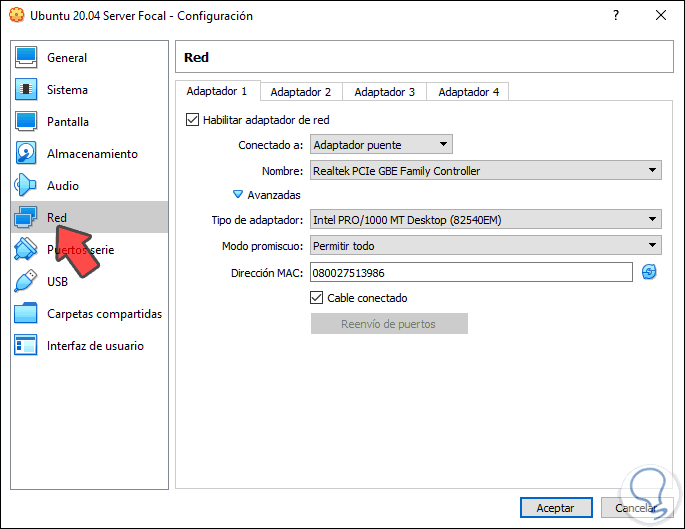
The rest are extra values that we can define based on the needs..
3. How to start virtual machine in Ubuntu 20.04
With this defined it is time to finish the process.
Step 1
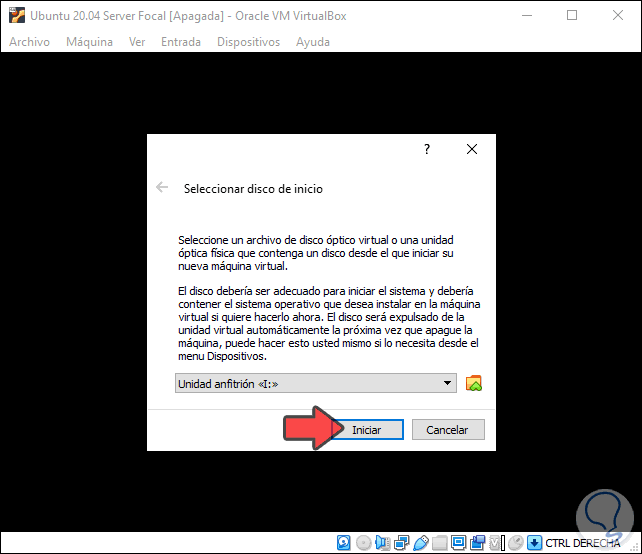
For this we click on the "Start" button and the following will be displayed:
Step 2
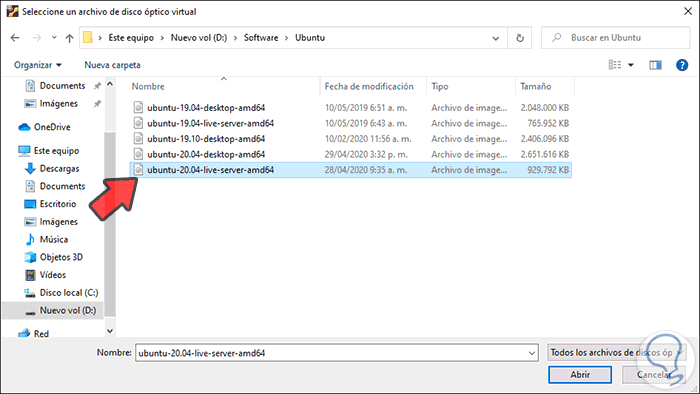
Click on the folder icon and look for the ISO image that we have downloaded from Ubuntu 20.04 Server:
Step 3
We click "Open" and we will see the following:
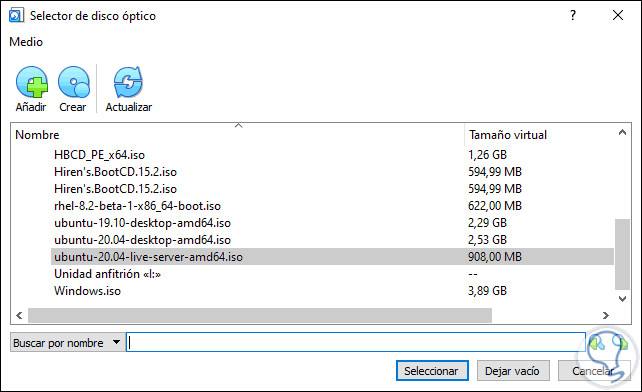
Step 4
We click "Select" and the image will be added to VirtualBox:
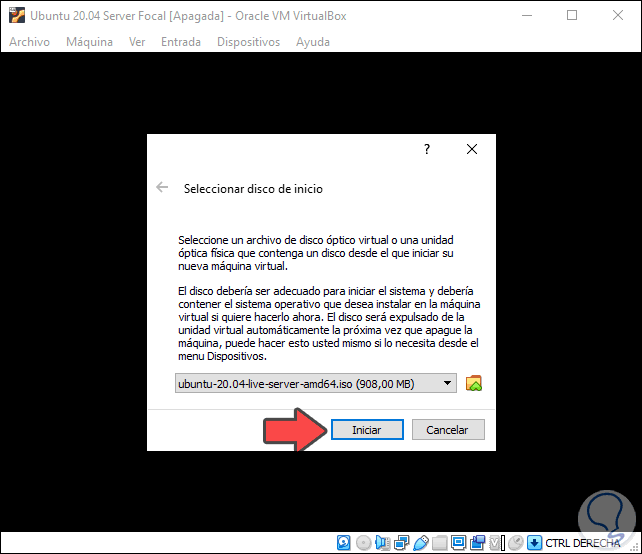
Step 5
We click on "Start" so that the process of running Ubuntu 20.04 is passed, the first window we will see will be a security check:
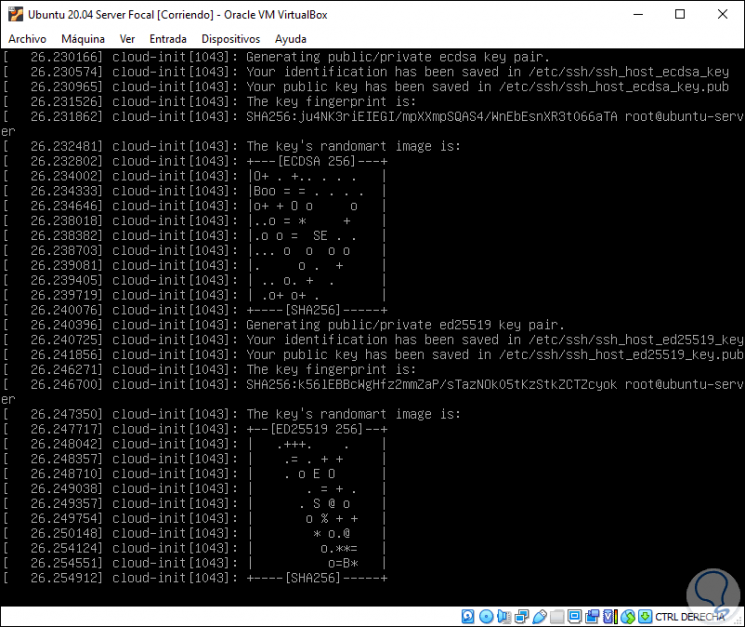
Step 6
Next, we select the server language:
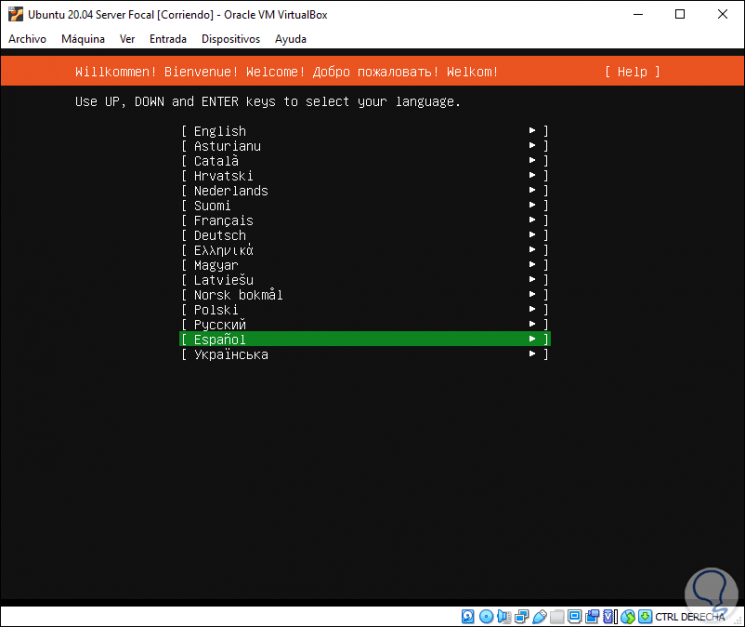
Step 7
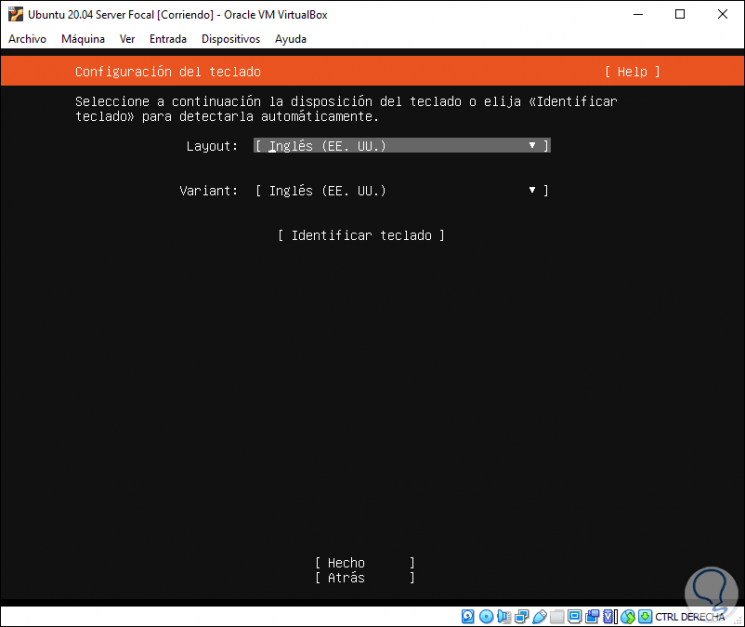
Press Enter and now we will see the keyboard configuration:
Step 8
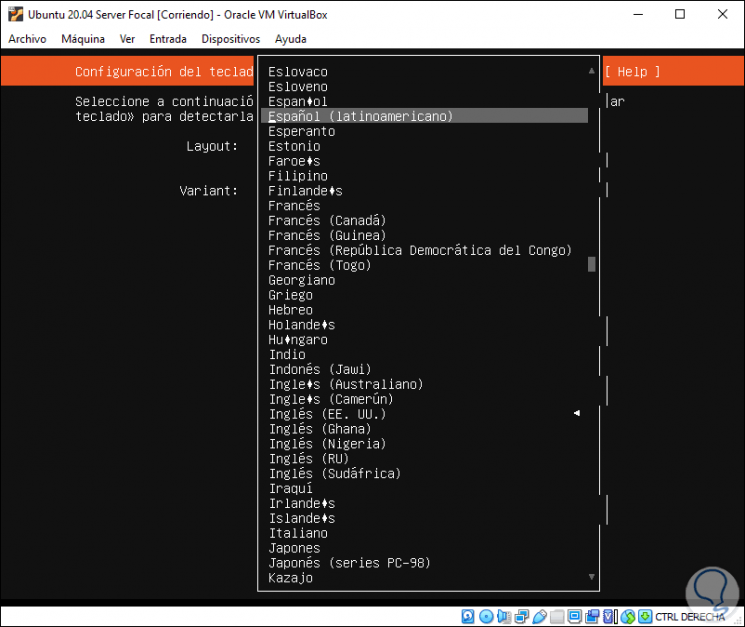
By default it will be in English, to edit your language we use the keyboard arrows to select the appropriate option and then press Enter to choose a new language:
Step 9
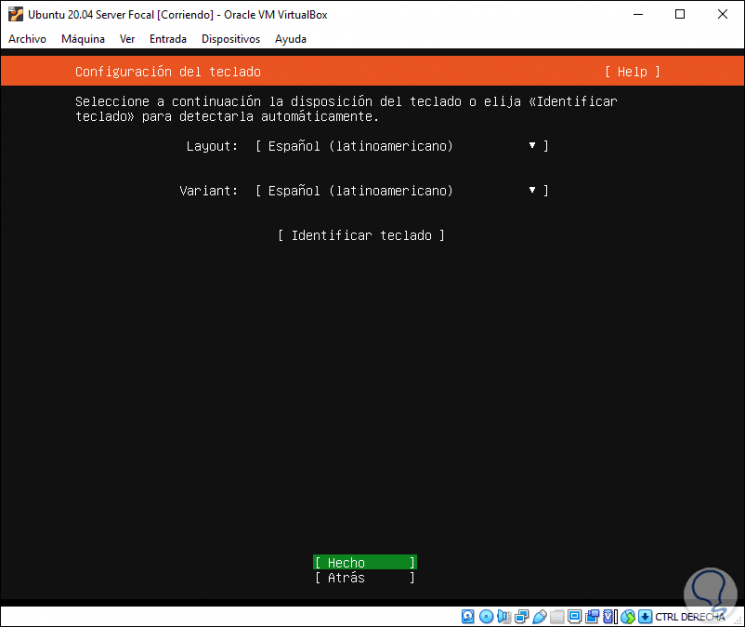
With the Enter key we select it:
Step 10
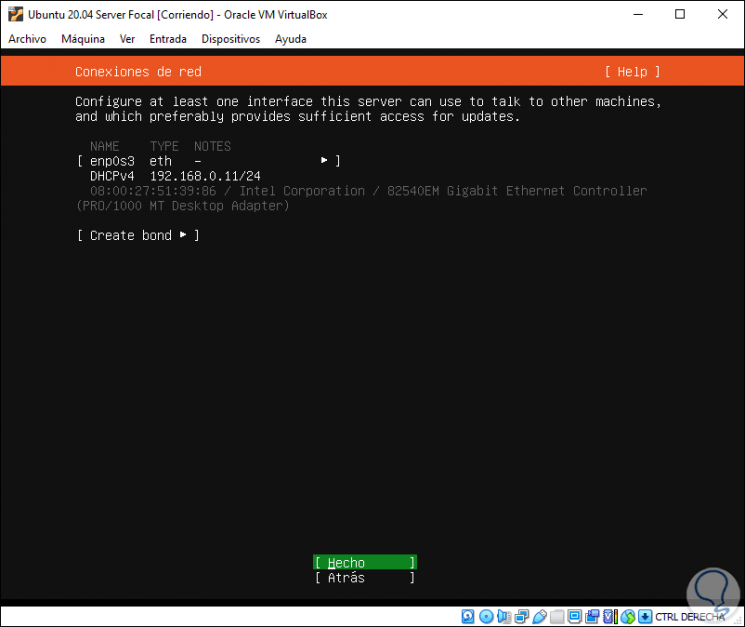
We select "Done" and then Ubuntu 20.04 will automatically detect the network configuration with values such as:
Step 11
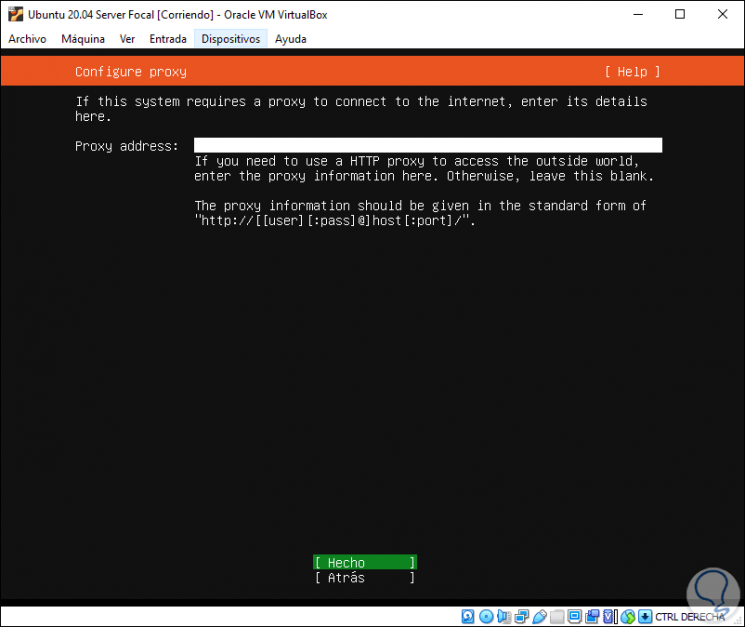
We select "Done" and now we can enter the name of the proxy server if we manage one, it can be left blank:
Step 12
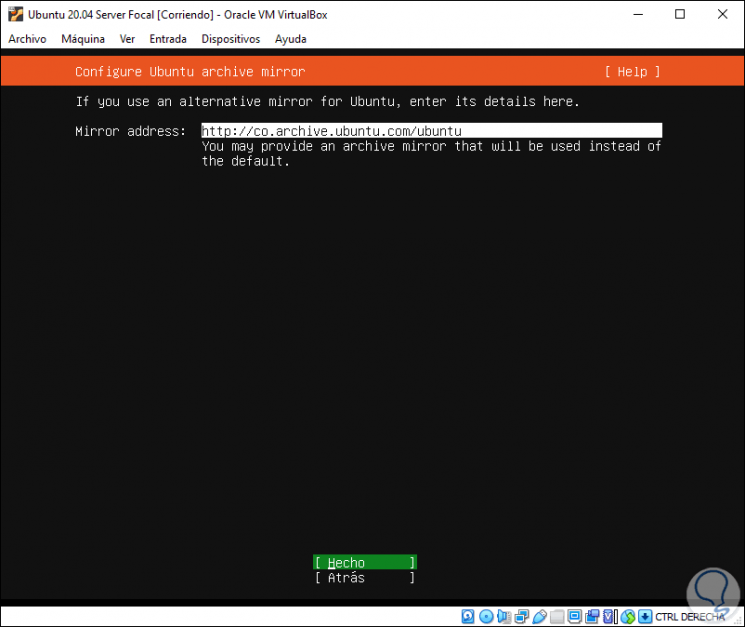
In the next window we can choose one of the Ubuntu 20.04 mirrors which allow access to system resources for administrative tasks:
Step 13
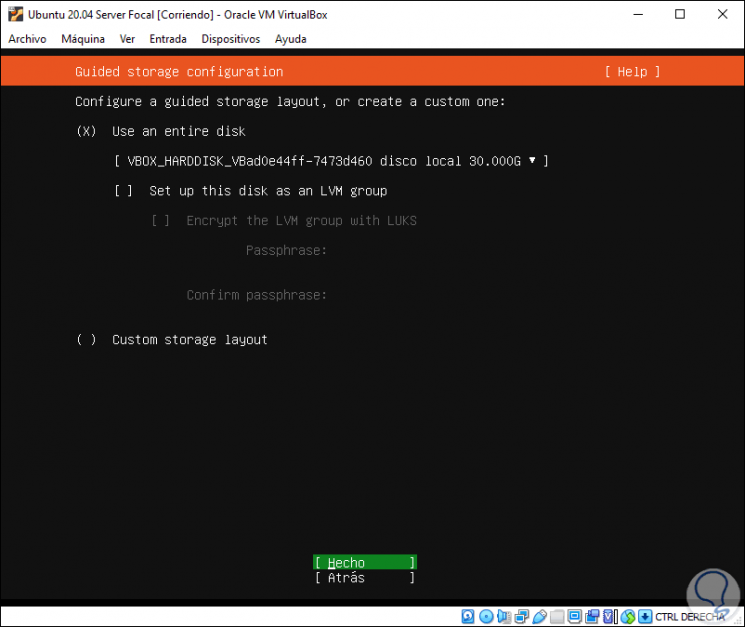
Next, it's time to configure your hard drive:
Step 14
By default the option to use the entire hard drive and let Ubuntu 20.04 manage the partitions is selected, but if we want to set them manually in the following TechnoWikis link you can see how to do it in an integral way:
Step 5
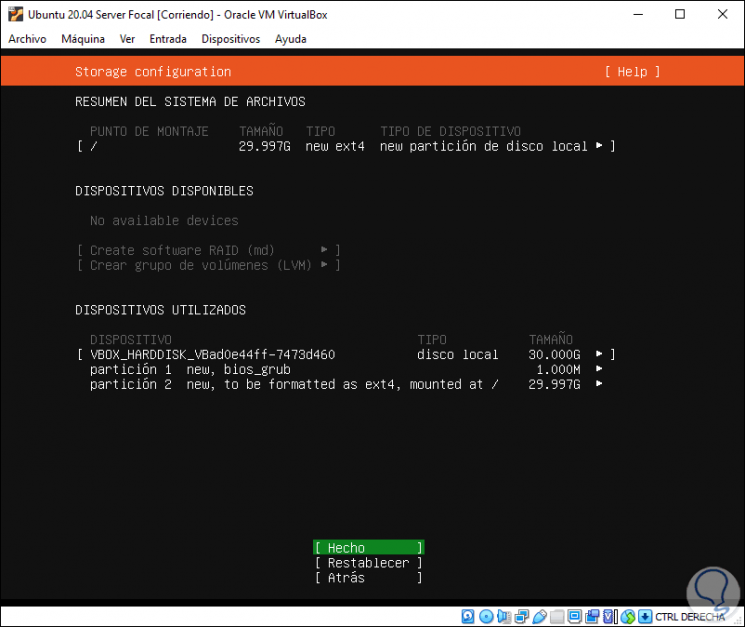
In this case we leave the default option and select "Done" to display the default structure:
Step 16
If we agree, select "Done" and we must confirm the changes by selecting "Continue":
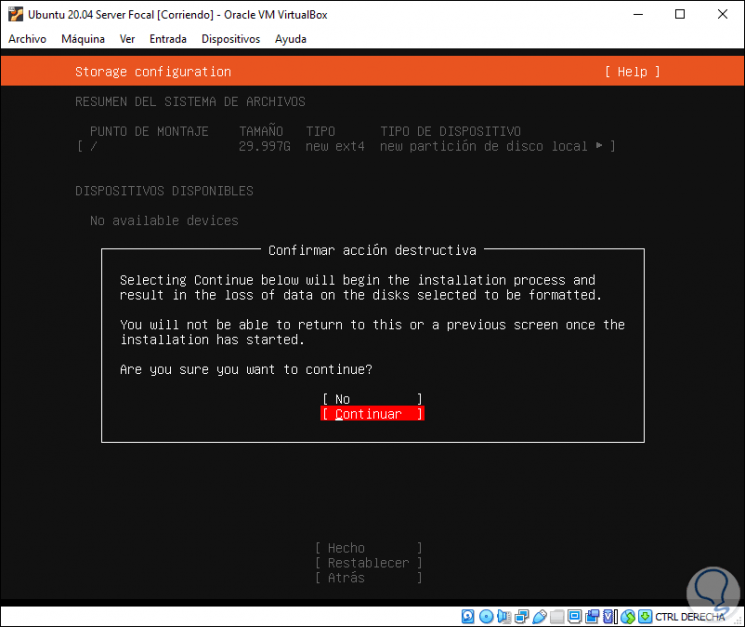
Step 17
After this we must configure the profile by entering details such as username, passwords, organization, etc:
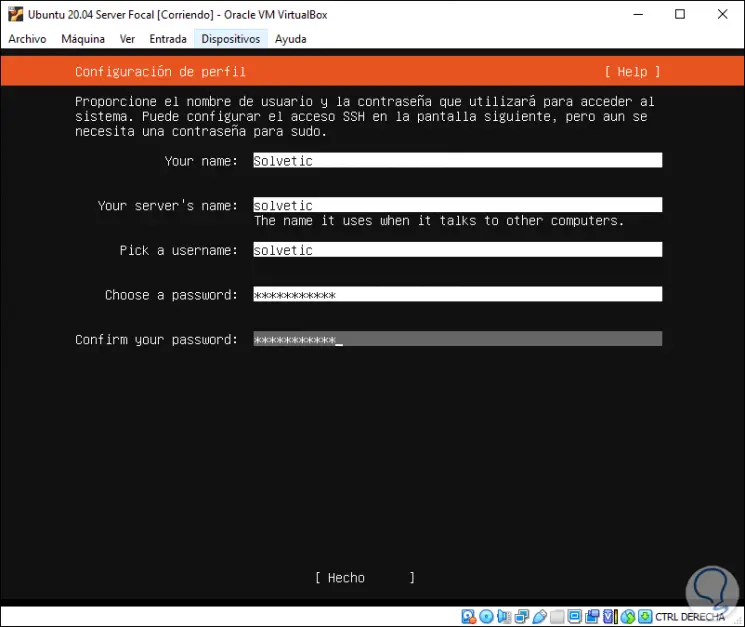
Step 18
In the following window we can enable the OpenSSH server for remote server management:
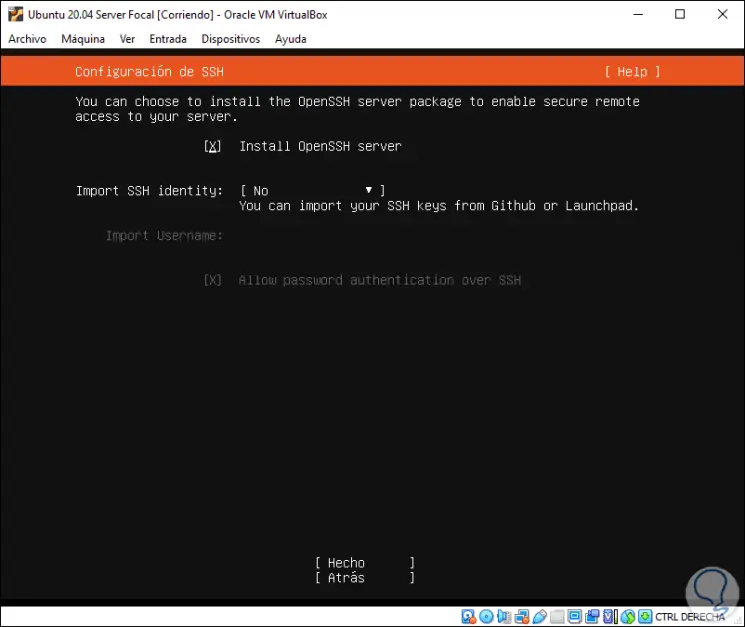
Step 19
We select "Done" and then a series of available functions will be displayed to be installed in Ubuntu 20.04 Server:
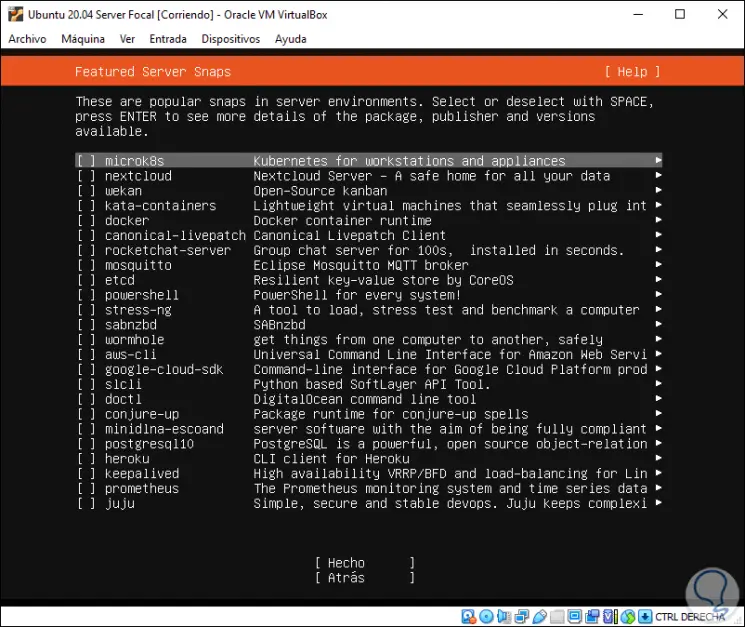
Step 20
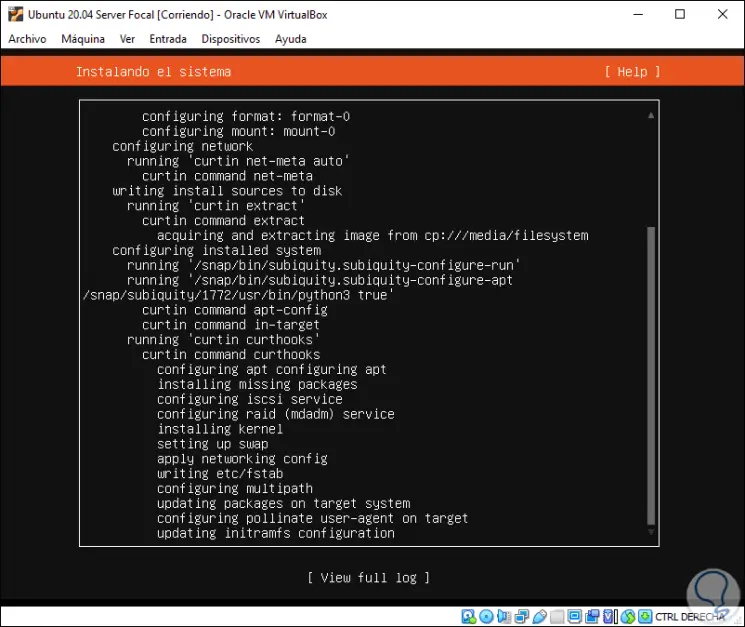
These can be selected with the space bar, select "Done" and the installation of Ubuntu 20.04 will start:
Step 21
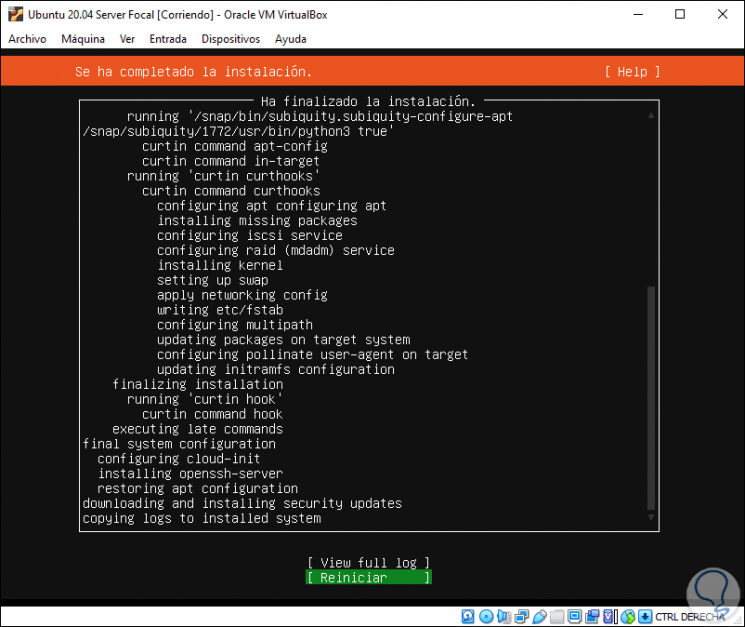
When this process ends we must select "Restart":
Step 22
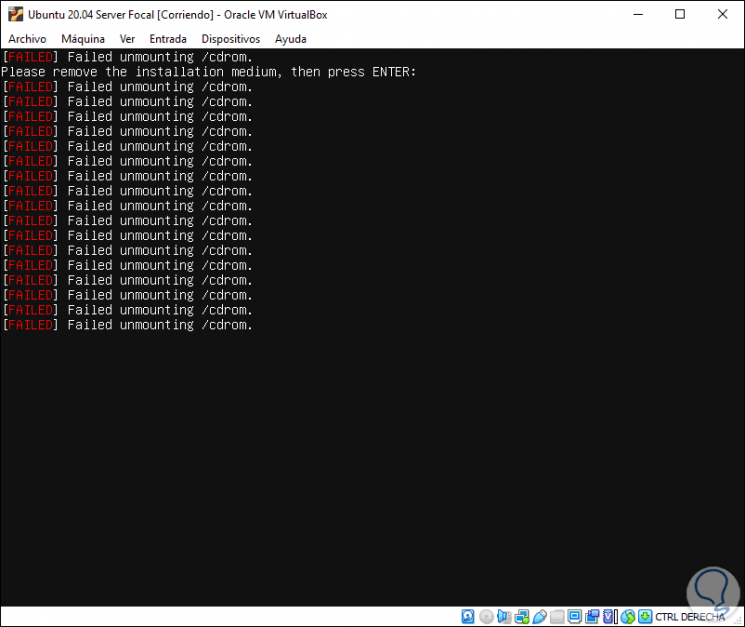
We will see the following:
Step 23
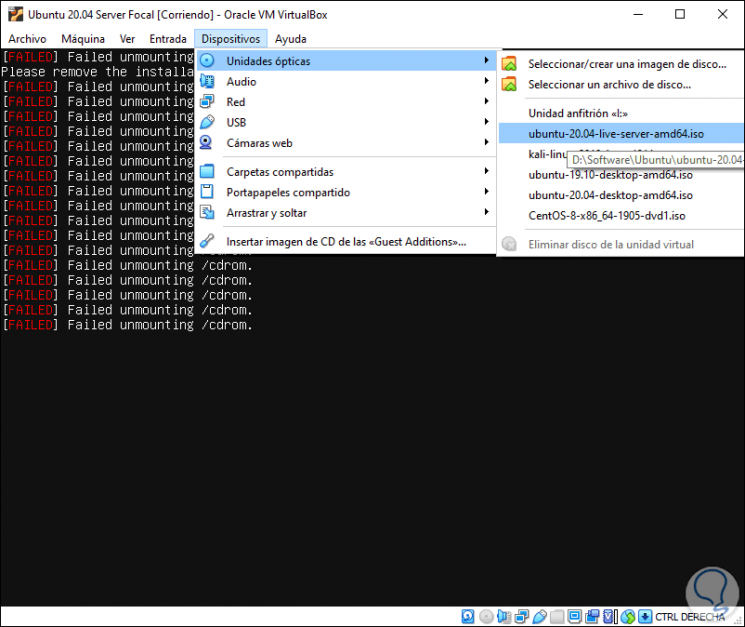
There we must go to the "Devices - Optical Drives" tab and unmark the ISO image that we have used:
Step 24
After this we restart Ubuntu 20.04 and it will load normally:
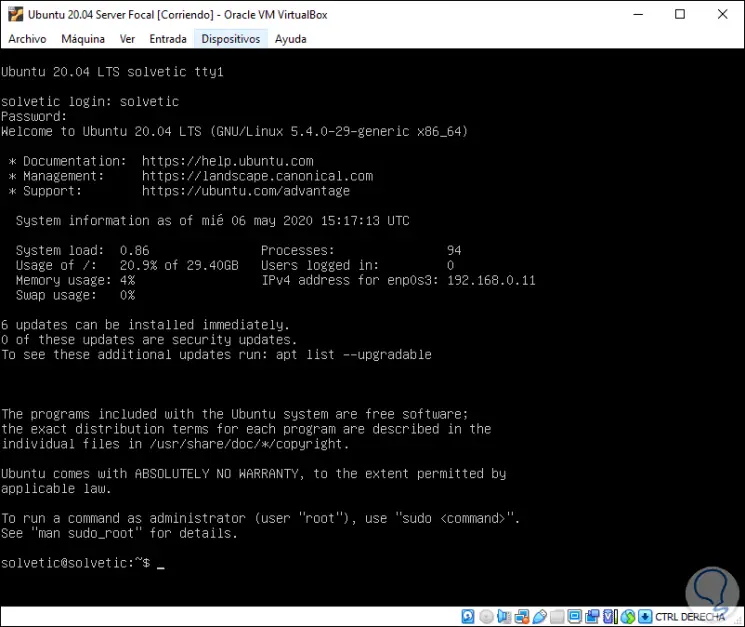
Up to this point the installation of Ubuntu 20.04 Server in VirtualBox has finished and with this we can know everything that this new version of Ubuntu offers us.