Virtualization every day takes more strength. Thanks to the practicality, safety, performance and ability to test, validate, analyze and detect failures and virtues both in operating systems and in applications before they are launched into a productive environment, in which there is no room for errors as it can trigger a series of events, in some fatal cases, for many corporate processes..
Advantages offered by virtualization
- It is not required to buy more hardware resources.
- You can try all kinds of operating systems and applications.
- There are no direct negative impacts on active applications and systems.
- It offers an environment identical to the real one.
- Low consumption of local resources.
One of the most used platforms in the world for all virtualization issues is VirtualBox , which is offered free of charge through the following link:
Virtualbox
VirtualBox is available for 32 and 64 bit architectures for operating systems such as Windows, Linux, Mac or Solaris; and with each of them it is able to support multiple guest operating systems such as Windows (NT 4.0, 2000, XP, Server 2003, Vista, Windows 7, Windows 8, Windows 10). ), DOS / Windows 3.x, Linux (2.4, 2.6, 3.x and 4.x), Solaris and OpenSolaris, OS / 2 and OpenBSD.
In general we can use VirtualBox in the following systems:
Microsoft systems
- Windows Server 2008 (64-bit)
- Windows Server 2008 R2 (64-bit)
- Windows 7 (32-bit and 64-bit)
- Windows 8 (32-bit and 64-bit)
- Windows 8.1 (32-bit and 64-bit)
- Windows 10 RTM build 10240 (32-bit and 64-bit)
- Windows Server 2012 (64-bit)
- Windows Server 2012 R2 (64-bit)
- Windows Server 2016 (64-bit)
On Linux systems
- Ubuntu 14.04 LTS, 16.04 LTS, and 17.04
- Debian GNU / Linux 7 ("Wheezy"), 8 ("Jessie") and 9 ("Stretch")
- Oracle Enterprise Linux 5, Oracle Linux 6 and 7
- Redhat Enterprise Linux 5, 6 and 7
- Solaris 10 (U10 and higher)
With the new version 6.0 of VirtualBox we find news such as:
What's new in VirtualBox 6.0
- Improvement in the user interface with improvements in HiDPI compatibility and scaling, offering better detection and configuration per virtual machine created.
- Integration of the vboximg-mount utility for Apple equipment which provides the option to access the content of guest disks on the host.
- Improvements in 3D graphics compatibility for Windows guests, and VMSVGA 3D graphics device emulation for Linux and Solaris guest systems.
- Integration of a new file manager thanks to which we can control the guest's file system and copy files between the host and the guest.
- Support integration for surround sound speaker configurations.
Now, in April 2019, Ubuntu 19.04 will be launched which gives us features such as:
Ubuntu 19.04 functionalities
- OpenSSL 1.0 has been deleted in order to integrate only OpenSSL 1.1.1 LTS.
- Python 3.7 integration as the default version of the Python3 language.
- New usr directory configuration merged by default in new Ubuntu 19.04 installations.
- Native JavaScript implementation of the KDE Connect protocol.
- Steam available as Snap application.
- Integration of Chromium as an alternate browser to Firefox.
The download of the Ubuntu 19.04 ISO image is available at the following link:
Ubuntu 19.04
Note
This is a trial version so it may still be unstable in the execution of some tasks.
Once we have the ISO image of Ubuntu 19.04 and VirtualBox installed, we can give way to the process of installing this new system in VirtualBox.
1. How to create the Ubuntu 19.04 virtual machine
Step 1
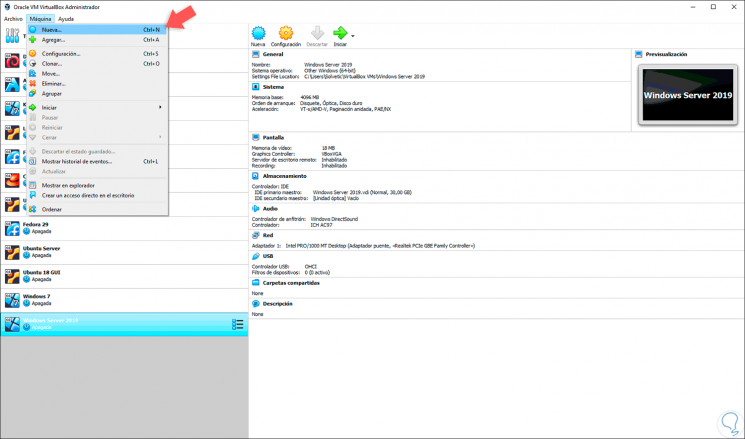
Once we access VirtualBox we proceed to create our virtual machine and for this we have the following options:
Option 1
Click on the "New" icon
Option 2
Use the following key combination:
+ N Ctrl + N
Option 3
Go to the Machine menu and select the option "New"
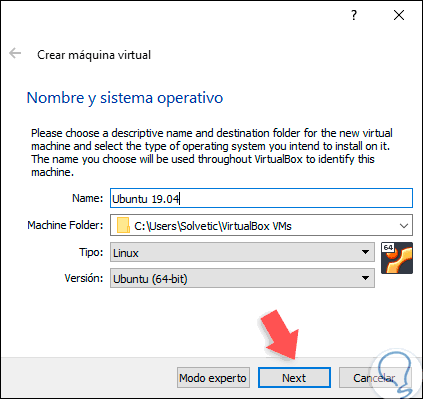
Step 2
Once selected, the following window will be displayed where we configure the following:
- Name of the virtual machine to create.
- Location where you will stay.
- Type of operating system to use, in this case we select Linux.
- System version to use, in this case we select Ubuntu (64-bit).
Once this is defined, click on "Next"..
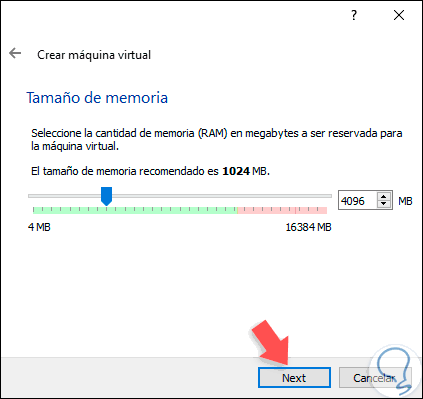
Step 3
Now we are going to allocate the virtual memory for the Ubuntu 19 virtual machine, the default value is 2048 MB, but it is possible to use the slider to set a new value according to the capacity of the available memory. Click on "Next" again.
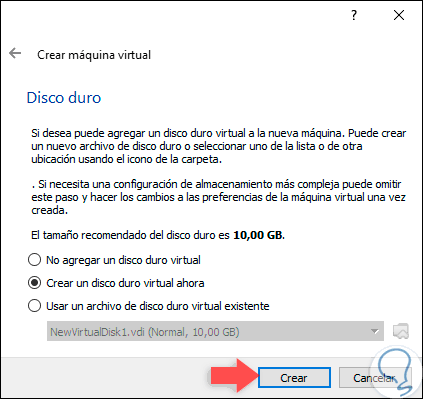
Step 4
Now we configure the options of the hard disk, there we have options such as:
Do not add a virtual hard disk
If we select this option, we can add the hard disk later before the virtual machine runs.
Create a virtual hard drive now
With this option, which is by default, a hard disk will be created and its size will be subject to the system we have selected, in this case it will be 10 GB.
Use an existing virtual hard disk file
With this option it will be possible to use a disk in VHD or VDI or VMDK format to be implemented in the virtual machine.
Click on "Create" to confirm the creation of the virtual hard disk.
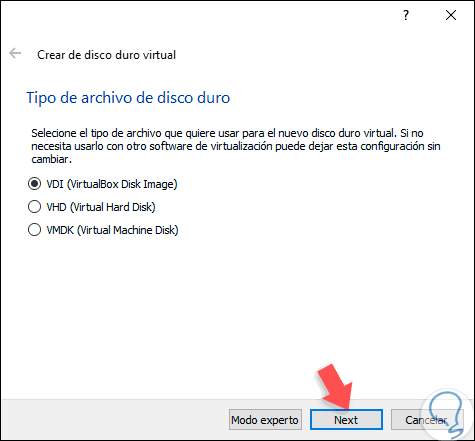
Step 5
Now we define the type of disk to create and this option is based on whether this virtual machine will be used only in VirtualBox or imported to other platforms, by default the value is VDI, click on "Next".
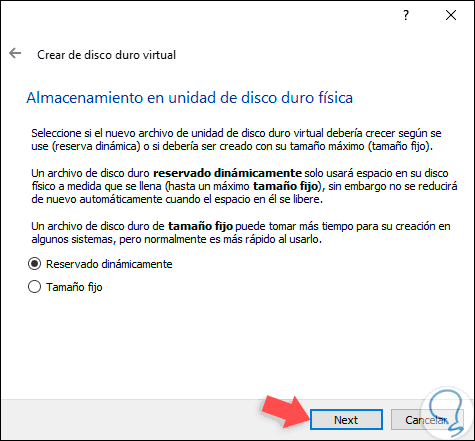
Step 6
Now we define how the storage of this disk will be managed, the options to use are:
Dynamically reserved
With this option, the space on the physical hard disk will be filled as data is entered into it, but if we delete information this space will not be recovered so that space can be lost
Fixed size
As the name implies, this option establishes and limits the use of information to the size that we have specified.
Again click on "Next"..
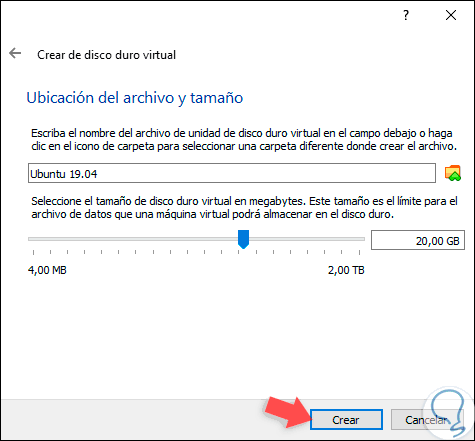
Step 7
Now we configure aspects such as:
- Route where the virtual machine of Ubuntu 19.04 is going to be hosted.
Click on "Create".
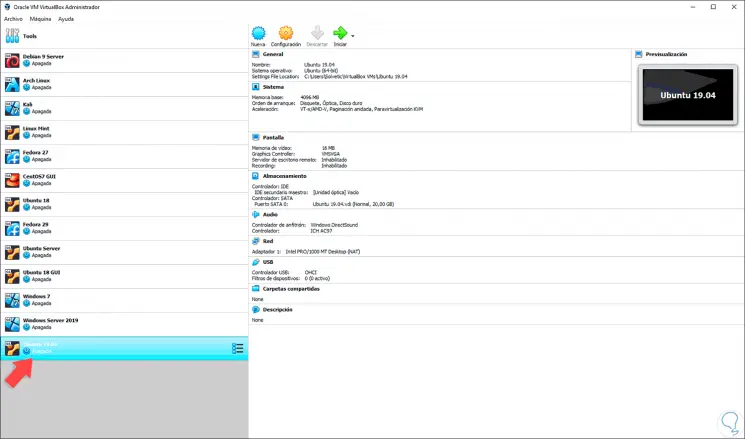
Step 8
The process of creating the virtual machine of Ubuntu 19.04 in VirtualBox will conclude:
2. How to configure the virtual machine created Ubuntu 19.04 in VirtualBox
Step 1
It is time that we configure our virtual machine as necessary, for this we can use any of the following options:
Option 1
Use the following keys:
+ S Ctrl + S
Option 2
Right click on the virtual machine and select "Settings"
Option 3
Click on the "Configuration" button
Option 4
Go to the menu Machine / Configuration
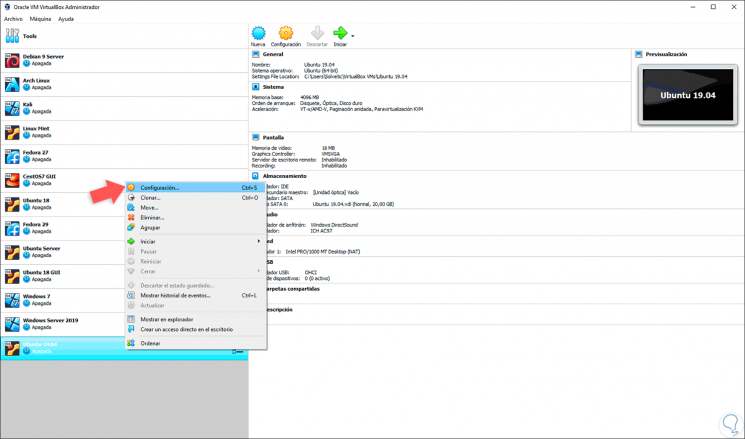
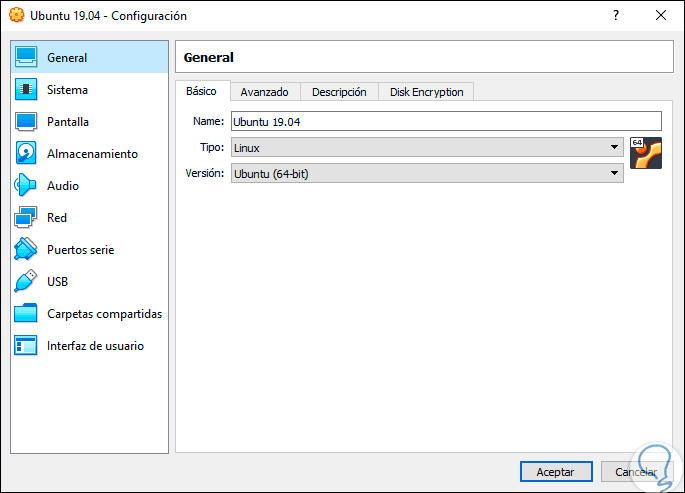
Step 2
These options are divided into categories such as:
general
There we can apply changes like:
- Name and location of the virtual machine.
- Type and version of the operating system used.
- Configure the folder where the snapshots will be hosted.
System
From here it will be possible:
- Assign the RAM to the machine.
- Perform processor settings such as number of virtual CPUs, execution limits or enable PAE / NX.
- Adjust acceleration parameters
screen
In this section it will be possible to perform:
- Define the number of monitors to use.
Storage
From here it will be possible:
- Assign new disks and other drives.
- Configure the CD-DVD drive.
Audio
There it will be possible:
- Enable audio inputs and outputs.
- Define the audio driver to use.
Net
As the name implies, it will be possible:
- Assign up to 4 virtual adapters
- Configure the type of network connection (NAT, bridge, internal network, generic controller, etc.
Serial ports
There we can configure and enable serial ports for the virtual machine.
USB
Activate the USB media input to the virtual machine until version 3.0.
Shared folders
There it will be possible to add shared folders to be used between both computers.
User interface
Here it will be possible to define the way the VirtualBox interface will look.
Up to this point it will be possible to configure our Ubuntu 19.04 virtual machine.
3. How to start Ubuntu 19.04 virtual machine in VirtualBox
Step 1
With this configured we proceed to click on the "Start" button and the following window will be displayed. There we click on the side folder icon.
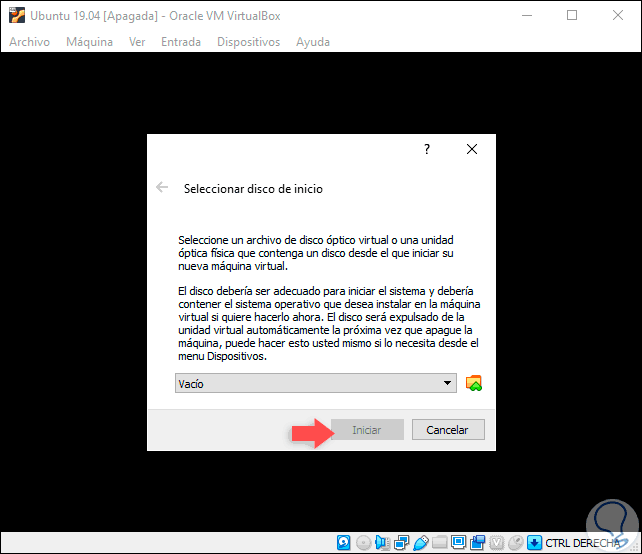
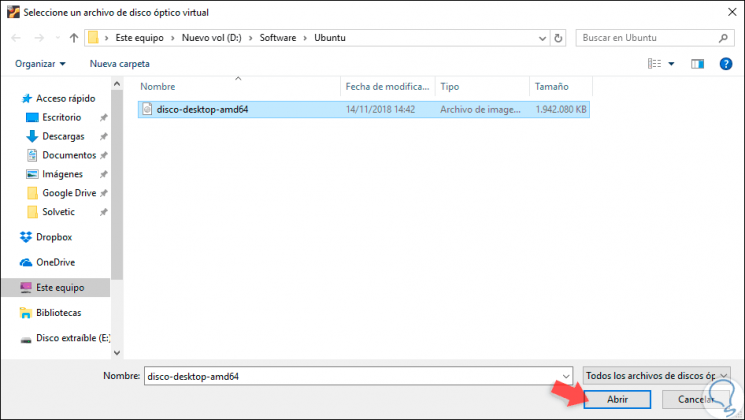
Step 2
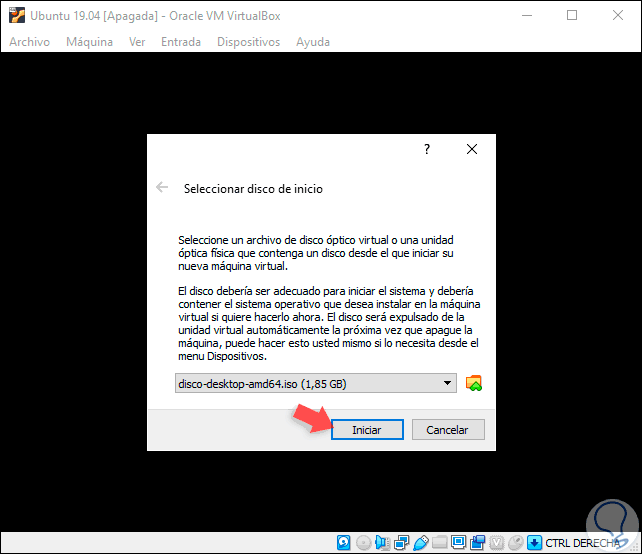
To go to the site where the Ubuntu 19.04 ISO image has been downloaded. Select the ISO image and click on "Open":
Step 3
Click on "Start" to start the installation of the virtual machine.
Step 4
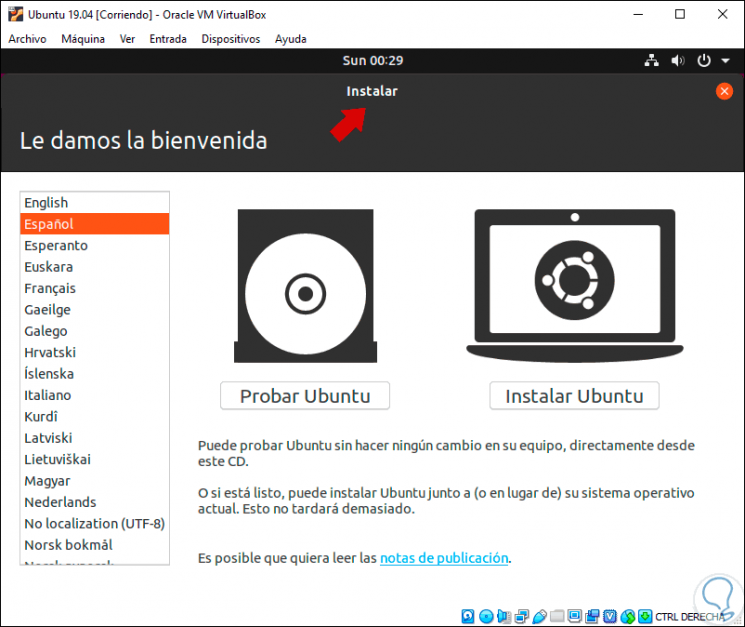
After the previous analyzes we will see the following. There we define if we want to test or install Ubuntu 19.04, we can select the desired language, the difference is that if we choose to try Ubuntu 19.04 all the changes we make will be eliminated when you log out or turn off the computer. Select the option "Install Ubuntu" and click on "Continue".
Step 5
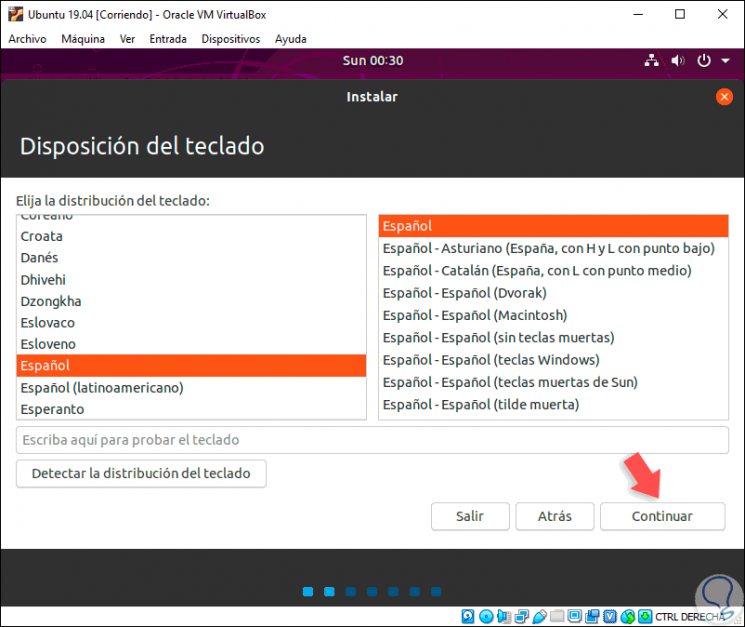
Then we select the keyboard language which is based on the selected language. Click on "Continue".
Step 6
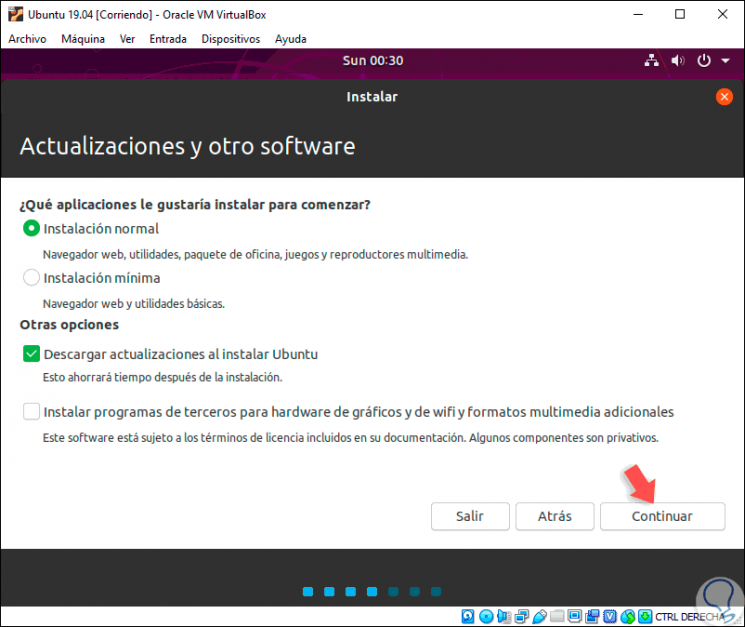
We will see the following. There we define the type of installation to perform Ubuntu 19.04 as well as activate or not the download of updates or third-party programs. Click on "Continue".
Step 7
The disk usage options will be displayed. As we see there we have options such as:
Erase disk and install Ubuntu
This option deletes all information on the selected disk and installs the system.
Encrypt the Ubuntu installation for added security
When activating this option we can select a password which must be entered at system startup.
Use LVM in Ubuntu installation
With this option the logical volumes management is done to have greater security options
If we want to customize the installation, such as adding new partitions for swap memory, root directory, home, etc, we must check the "More options" box.
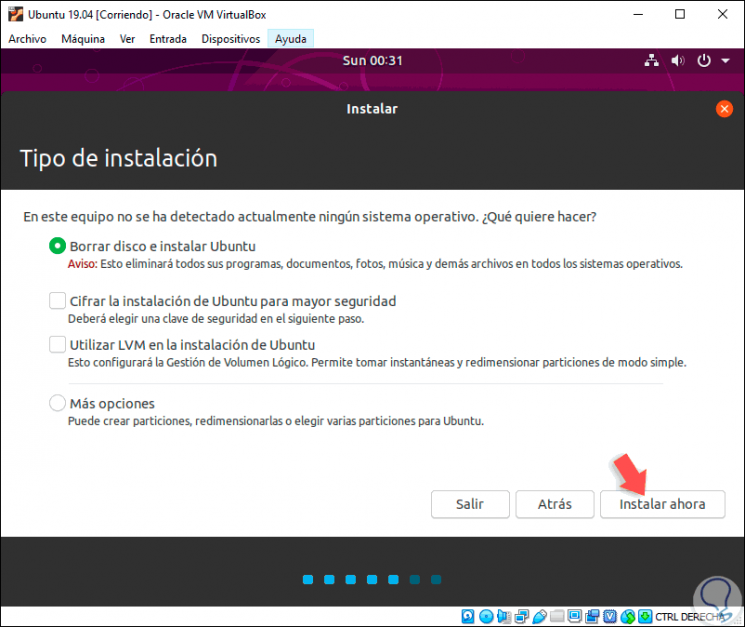
Step 8
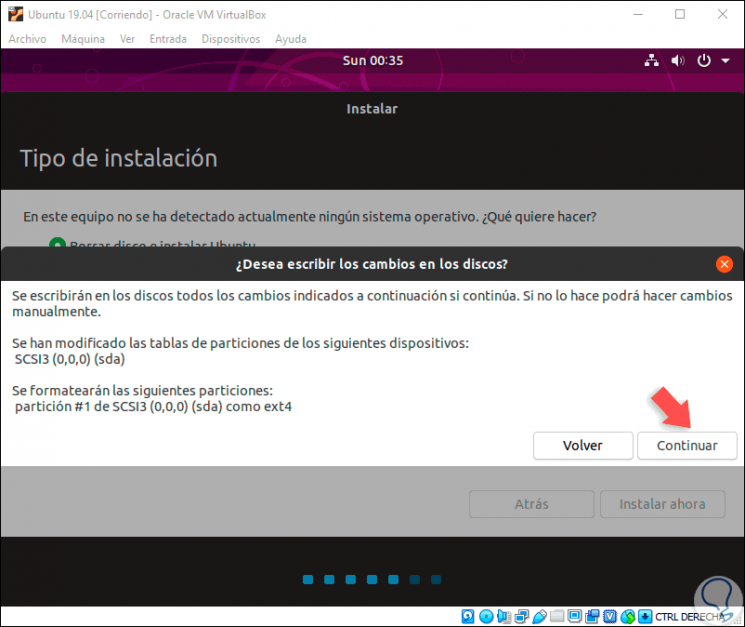
In this case we leave the default option and the following message will be displayed. There we click on "Continue".
Step 9
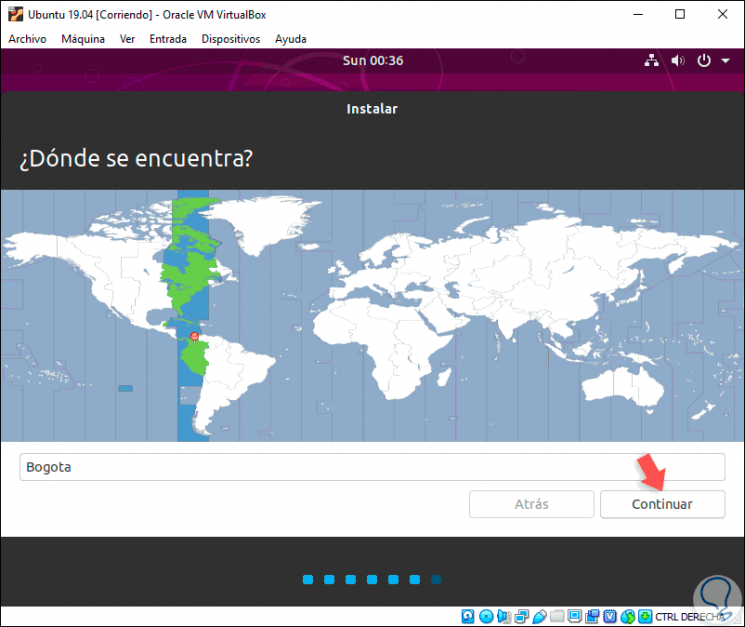
To continue with the process and then the following window will be displayed where we select our geographical location. Click on "Continue".
Step 10
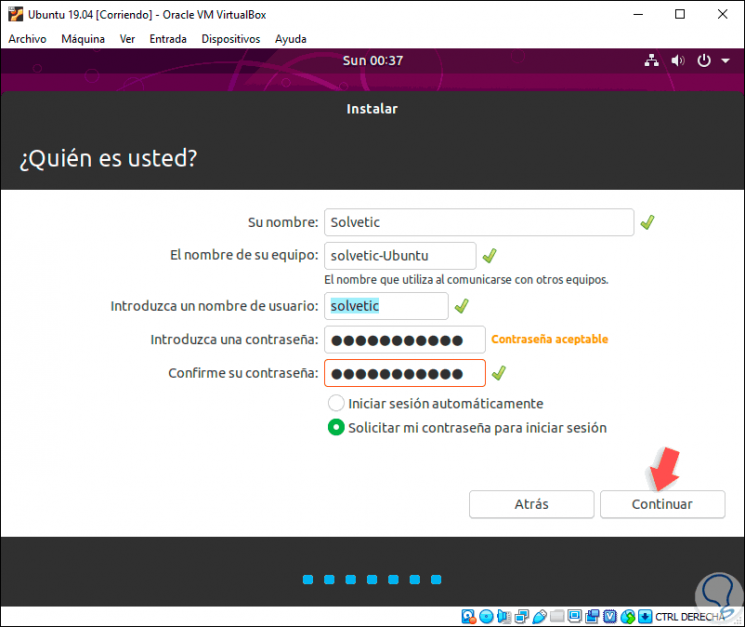
Now we define user and password of access to Ubuntu 19.04. Note that it is possible to log in automatically to avoid entering the password, but this implies a security vulnerability. We click on "Continue".
Step 11
The Ubuntu 19.04 installation process on VirtualBox will begin:
Step 12
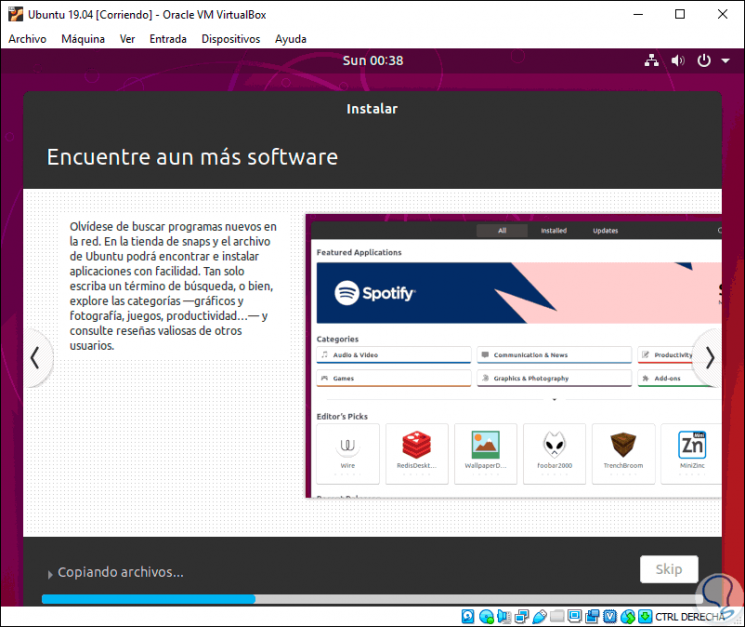
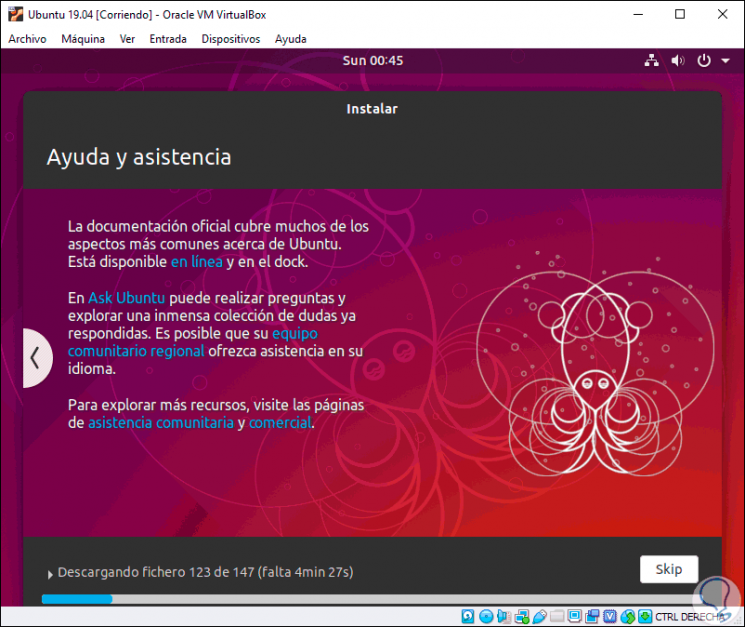
There we expect all system components to be downloaded and installed:
Step 13
Once this process is complete we will see the following:
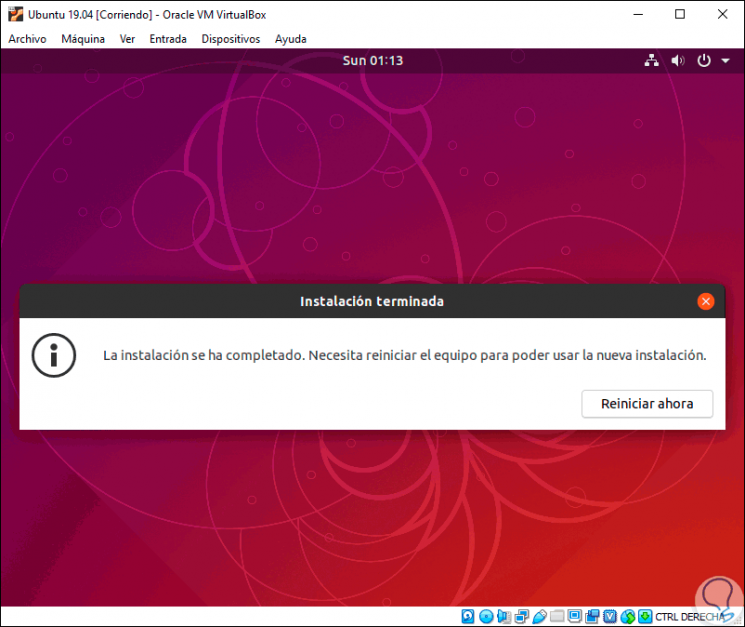
Step 14
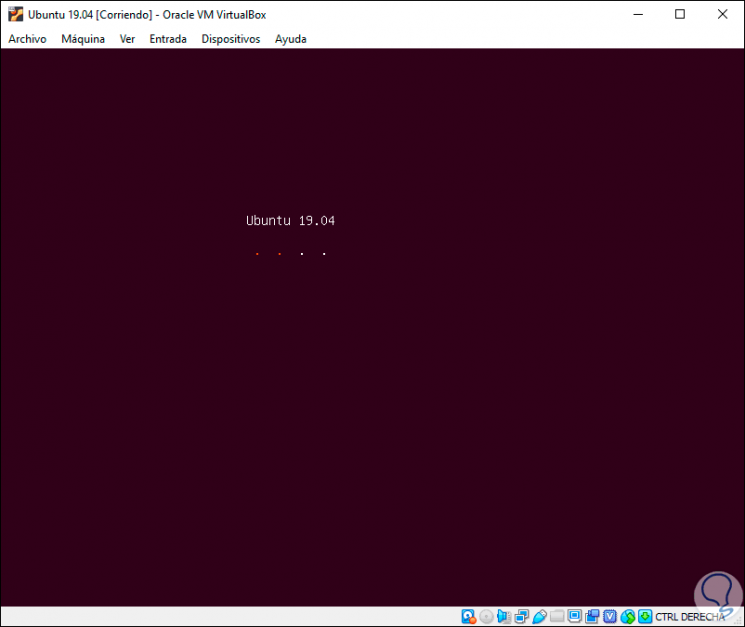
There we must reboot the system, first removing the installation media, to begin loading Ubuntu 19.04:
Step 15
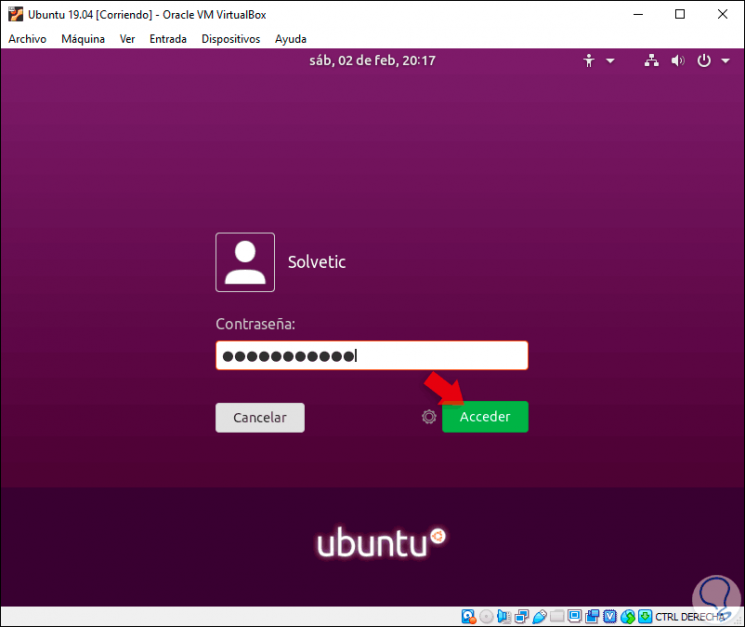
After this process we must enter the credentials configured during installation. We click on "Access".
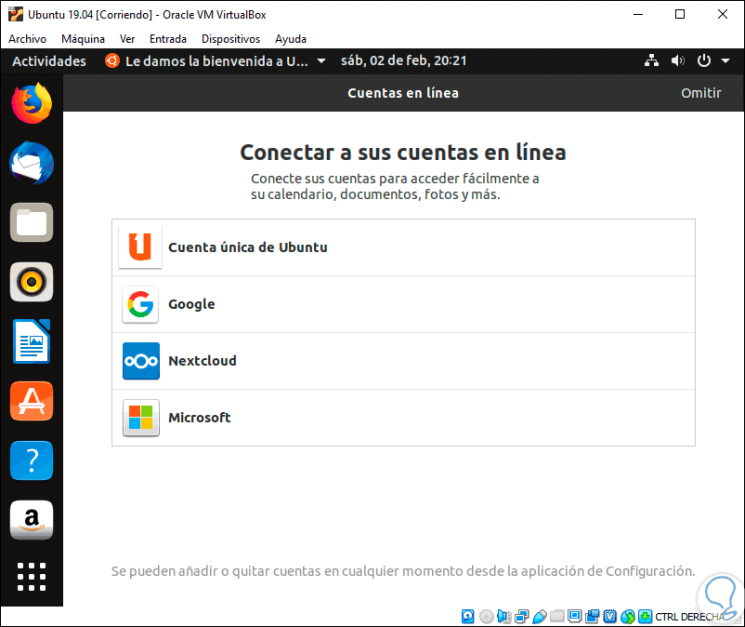
Step 16
So we will see the Ubuntu 19.04 environment where the following wizard will be deployed for the configuration of some system parameters:
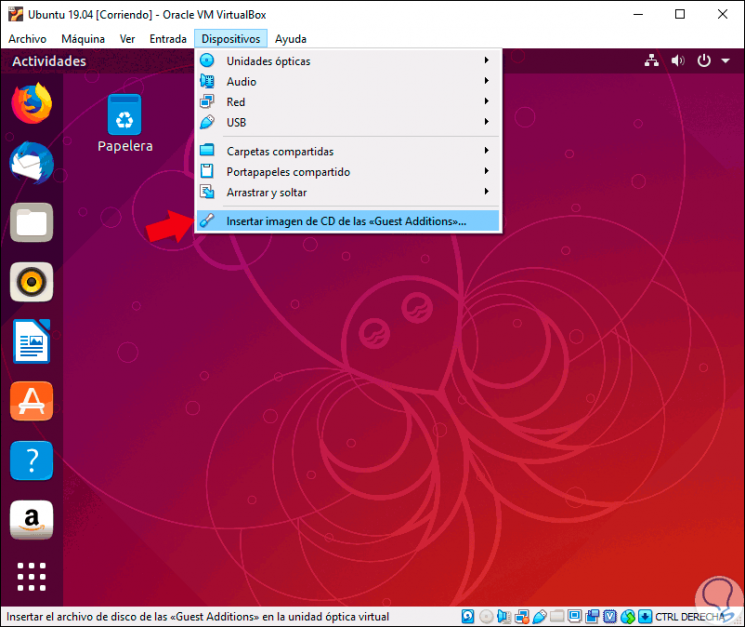
Step 17
Now, to access all the VirtualBox functionalities, as well as the best viewing options, we must install the Guest Additions which are a set of VirtualBox features to maximize the use of the application, for this we go to the Devices menu and there select the option Insert CD image of Guest Additions:
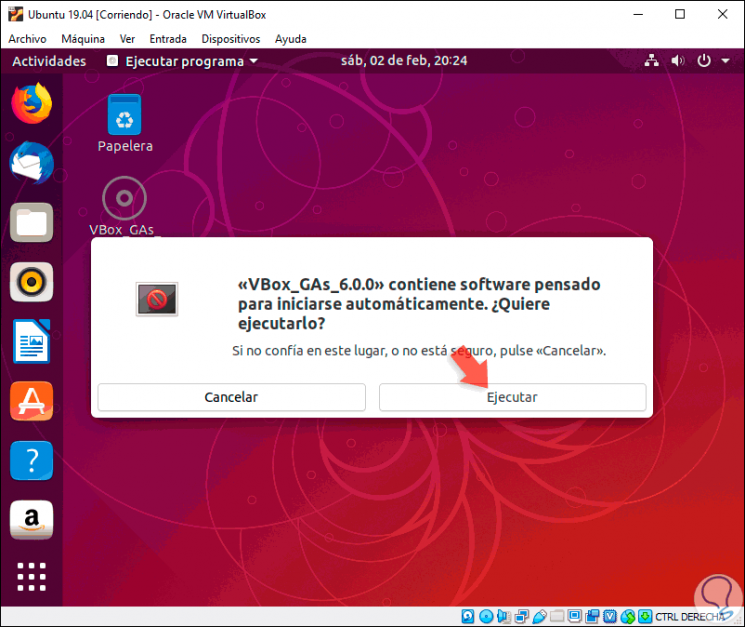
Step 18
The following will be displayed. Click on "Run".
Step 19
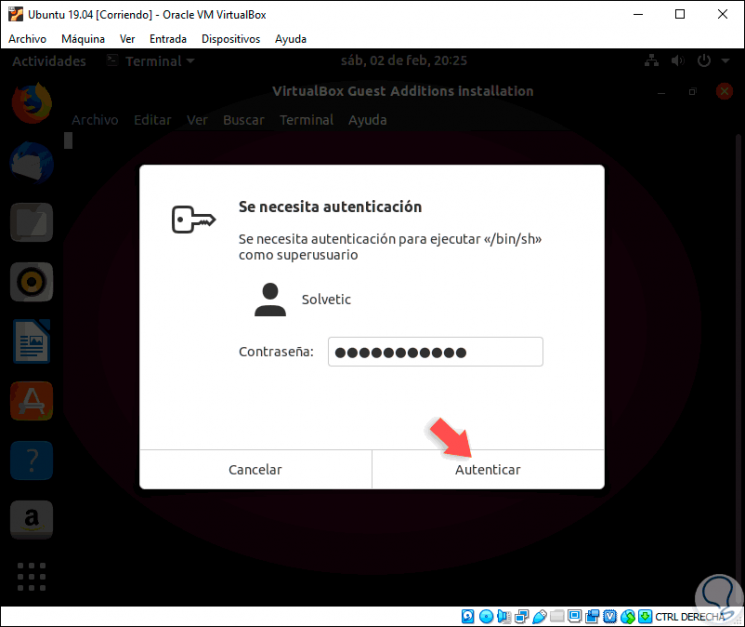
We must enter the administrator password. Click on "Authenticate".
Step 20
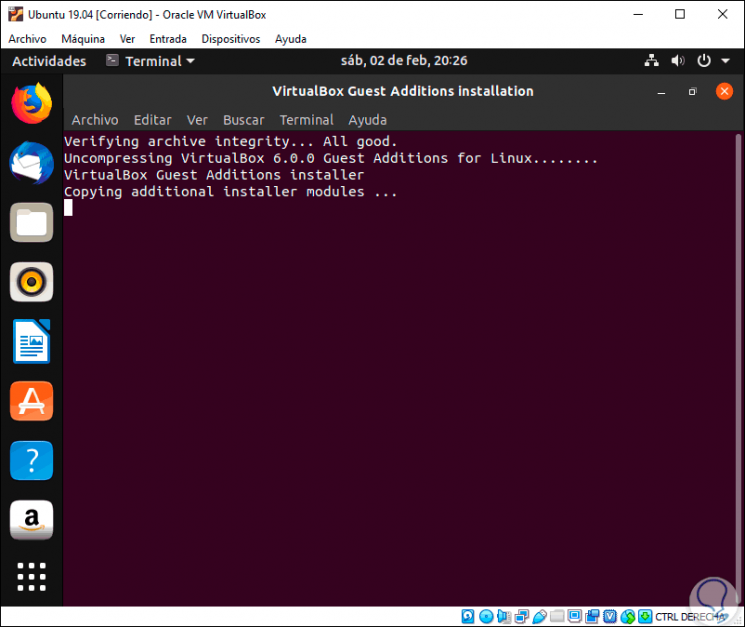
We will be redirected to the terminal:
Step 21
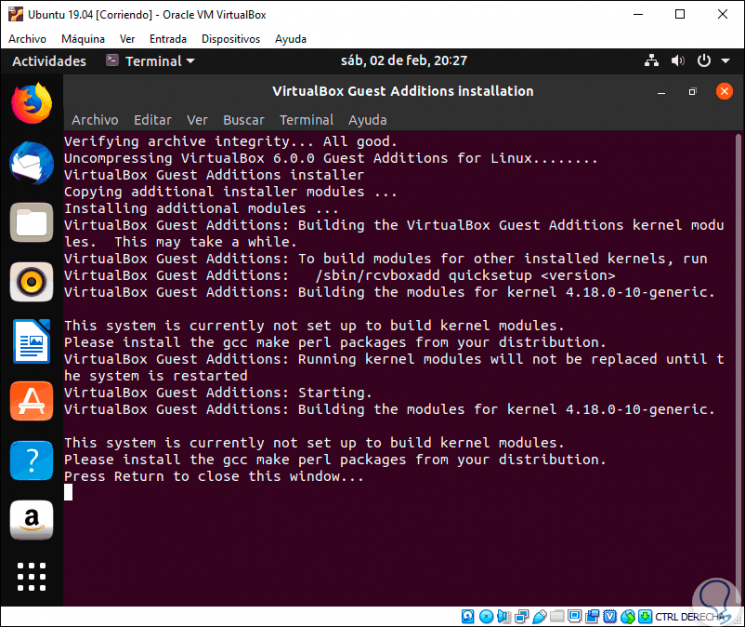
Once this process is finished we will see the following. There we press "Enter."
Step 22
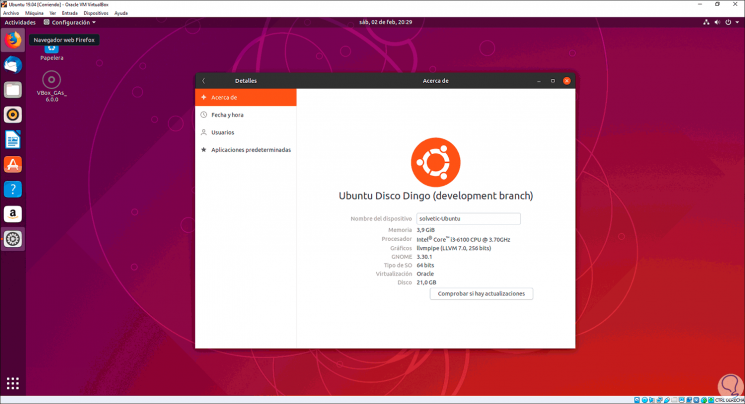
In this way we can make use of the VirtualBox functions, as well as enjoy a total visualization of this:
Thus, we have learned to install Ubuntu 19.04 in VirtualBox and get the maximum benefits of using virtualization to try everything that this new system offers us.