Virtualization is one of the best technologies that we can implement to avoid causing damage or errors in production environments, since thanks to a virtualized environment it will be possible to run and test operating systems, applications or perform architectural simulations in order to know the real impact this can have on a real environment..
One of the most versatile platforms for this type of virtualization is VirtualBox , which is available for x86 (32 bit) and AMD64 / Intel64 architectures for both businesses and home use. One of its advantages is that it is available for free as open source software based on the terms of the GNU General Public License (GPL) version 2.
VirtualBox can run smoothly on Windows, Linux , Mac or Solaris servers and supports a large number of guest operating systems within which we have Windows, Solaris and OpenSolaris, OS / 2 and OpenBSD. This is why TechnoWikis will explain how we can install VirtualBox on Linux, punctually on Ubuntu 19.04 , and thus get the most out of virtualization tasks..
1. How to install VirtualBox on Ubuntu 19.04
Note
VirtualBox can be installed through the Ubuntu 19 Software Center, but a more practical and simple method is to use the terminal for it.
Step 1
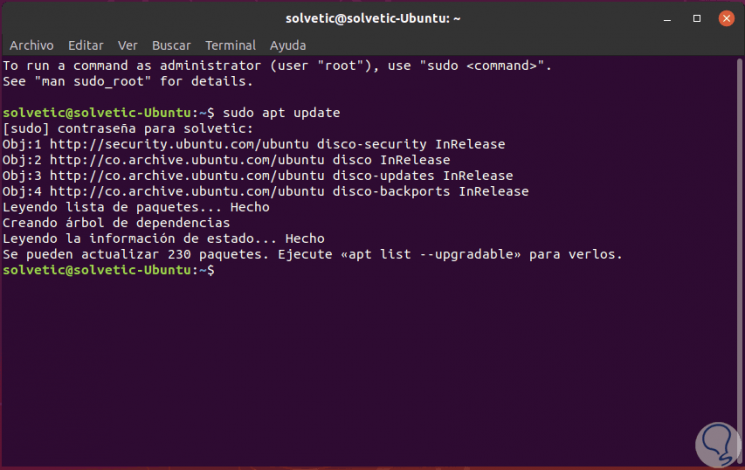
First, let's update the system packages by running:
sudo apt update
Step 2
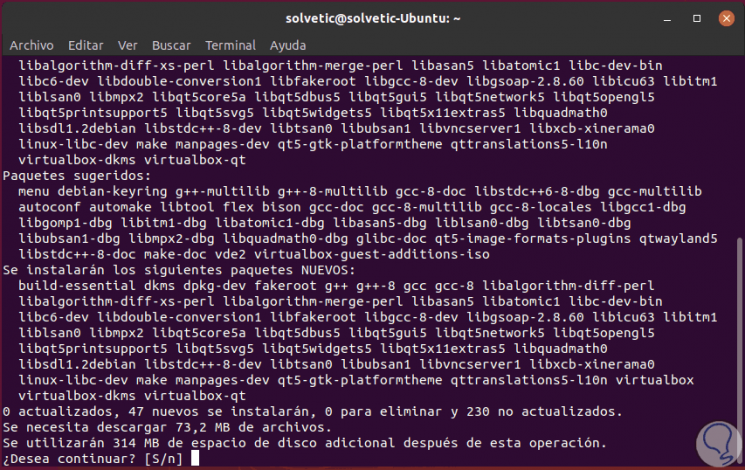
Once the packages are updated, we proceed to install VirtualBox by running:
sudo apt install virtualbox
Step 3
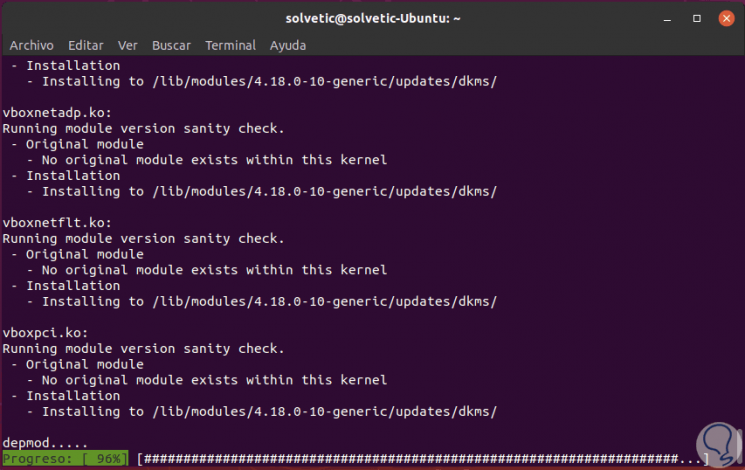
Enter the letter S to confirm the download and installation of VirtualBox in Ubuntu 19, we can see the progress of the installation:
Note
By default "virtualbox-qt" should be installed automatically together with other VirtualBox dependencies. This is a package that has the task of deploying a graphical user interface for VirtualBox. Yes, it is not installed, we can do it manually with the following command
sudo apt install virtualbox-qt.
2. How to access VirtualBox
Step 1
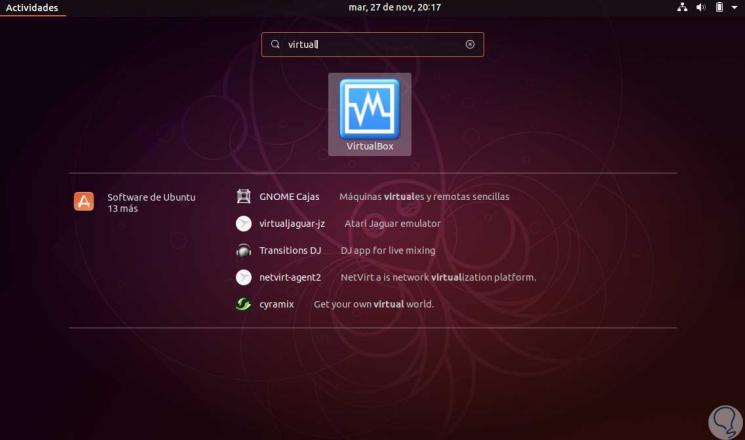
Once the VirtualBox installation process is complete, we can access it from the "Show applications" option:
Step 2
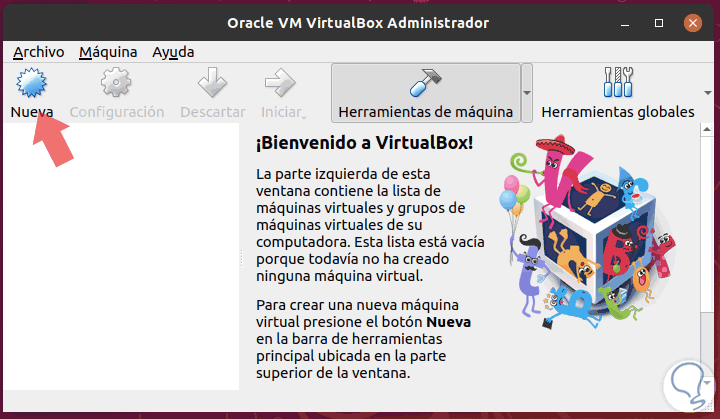
When accessing the application we will see the following. There we can create our virtual machine:
Option 2
Using the keys:
+ N Ctrl + N
Option 3
By clicking on the "New" button
Step 3
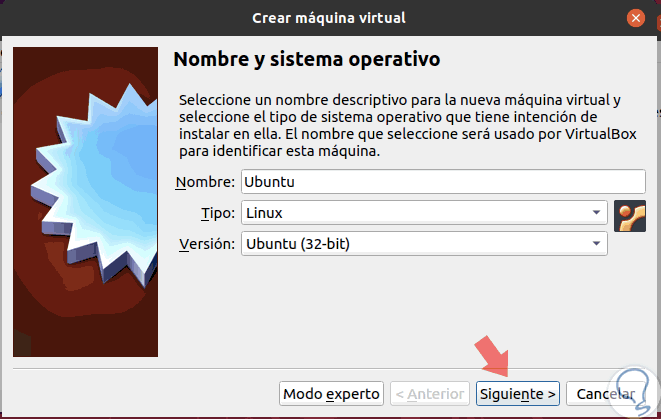
The following window will be displayed where we will assign the name and define the type of system and its version. Click on "Next".
Step 4
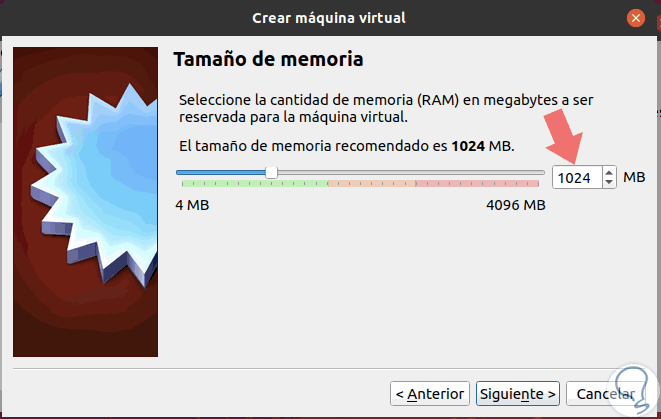
Here we can define the RAM memory to allocate to said machine:
Step 5
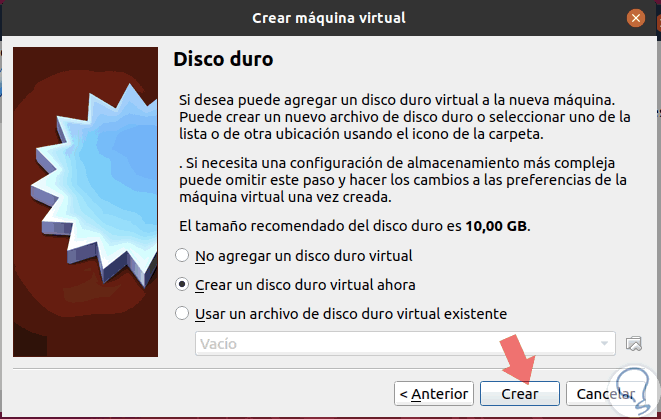
In the next window it will be possible to define the type of hard disk, either using an existing one or creating a new one. Click on the "Create" button
Step 6
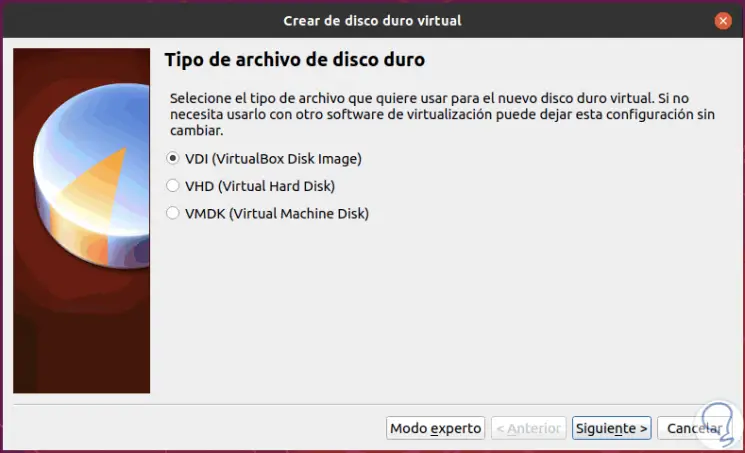
Now we define the type of hard disk to create:
Step 7
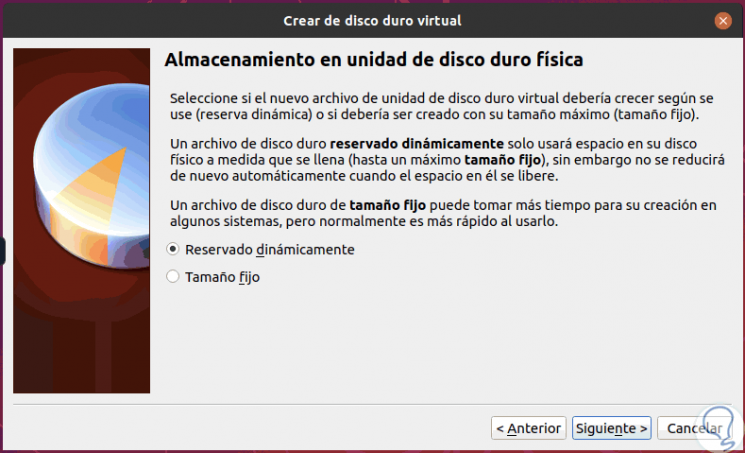
In the next window we will define the type of disk storage created:
Step 8
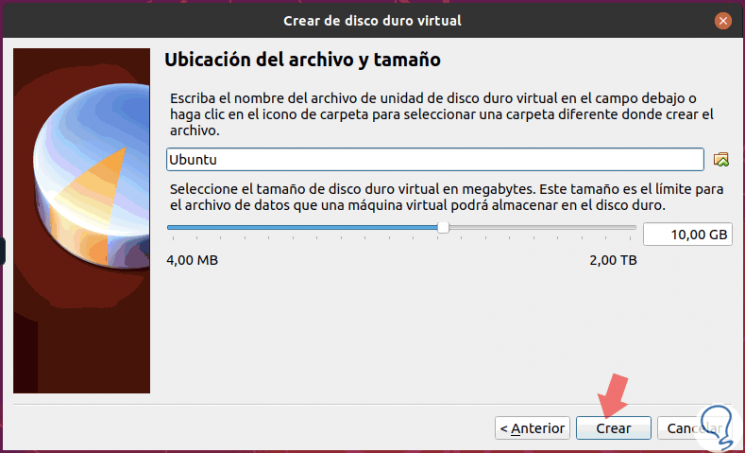
Then we define the disk size, as well as its location in Ubuntu 19.04. Click on "Create".
Step 9
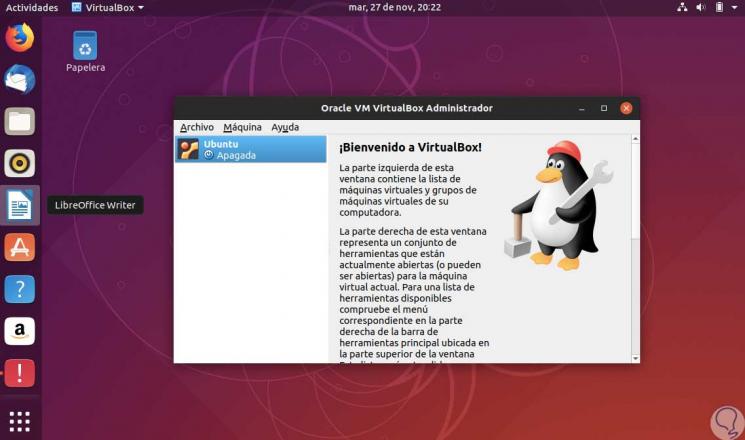
The virtual machine creation process in VirtualBox will be completed:
Step 10
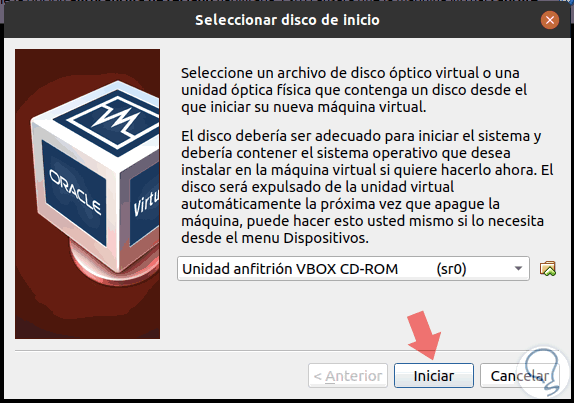
There we can double click on the machine or go to the "Machine / Start" menu to start its execution and the following will be displayed. There we define the ISO image to be used for the installation and click on "Start" to begin the entire installation process of the operating system.
Step 11
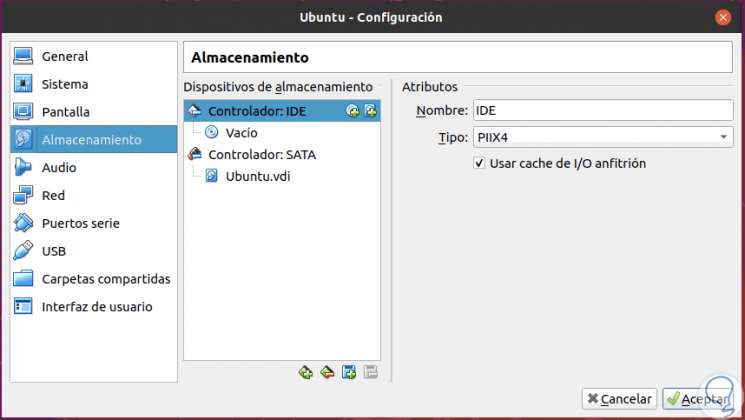
After this, we can access the configuration of the machine to set its various options for setting it:
VirtualBox is one of the best alternatives to run various operating systems and thus never affect our real system and its productive environment.