Ubuntu has launched the beta of its Ubuntu 21.04 Server (Hirsute Hippo) operating system, which we will officially have in April 2021, but from now on it is possible to know its environment and its various functions. Ubuntu Server 21.04 does not yet have the entire portfolio of features, but we can highlight some such as:
Ubuntu Server Features
- Linux Kernel 5.10 or 5.11
- Enhanced SSH Two-Factor Authentication
- Updating applications such as QEMU, libvirt, PHP, Ruby, GCC, Python and MySQL
To learn more about Ubuntu Server 21.04 we can resort to virtualization means and what better way to use VirtualBox for it . VirtualBox is a platform compatible with most current operating systems and thanks to which we can virtualize systems of different types with full performance, performance and use, VirtualBox is available at the following link:
VirtualBox
Let's see how to install Ubuntu Server 21.04 in VirtualBox step by step..
To stay up to date, remember to subscribe to our YouTube channel! SUBSCRIBE
How to install Ubuntu Server 21.04 in VirtualBox
Step 1
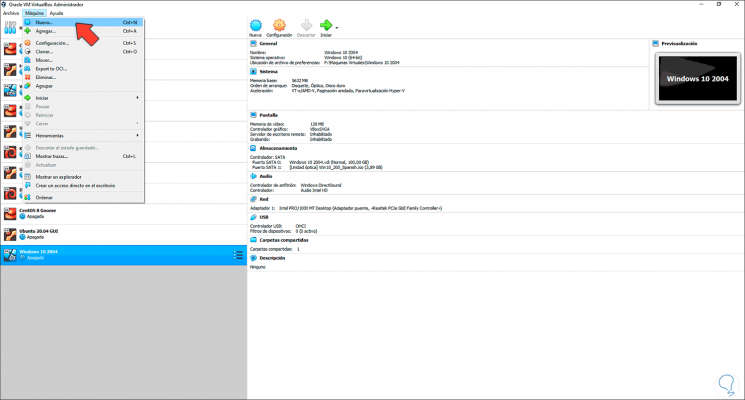
We open VirtualBox, we are going to create a new virtual machine with one of the following options:
- From the "Machine - New" menu
- Using the following keys:
Ctrl + N
Step 2
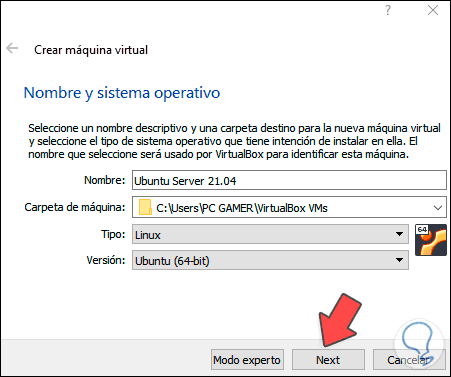
The following window will be launched where we define:
- Name of the machine to create
- Path where it will be installed
- Type of system to use (Linux)
Step 3
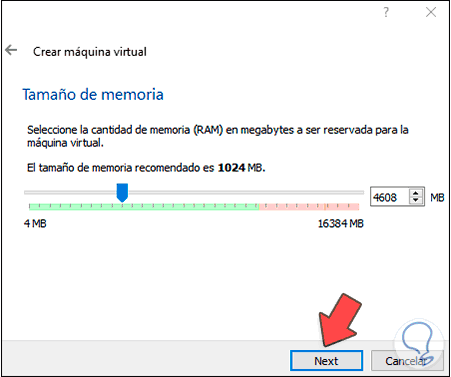
We click Next and assign the RAM memory to the Ubuntu Server 21.04 virtual machine:
Step 4
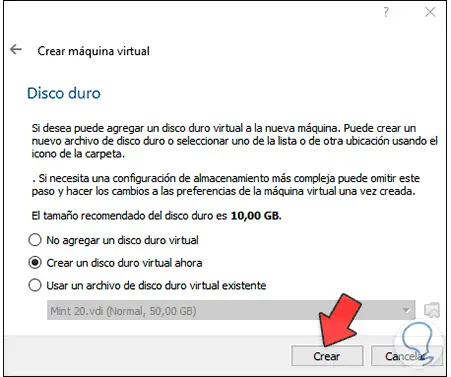
In the next window we create the hard disk for the machine:
Step 5
We click on "Create", we define the type of hard drive to create:
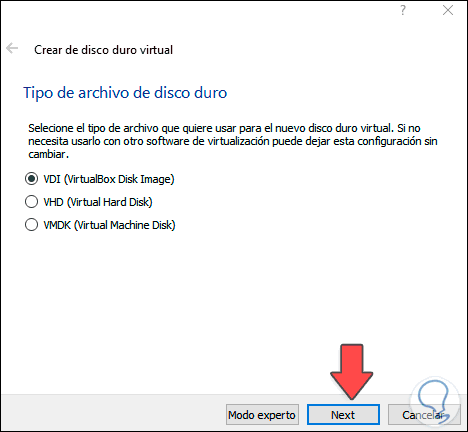
Step 6
We configure the storage of this:
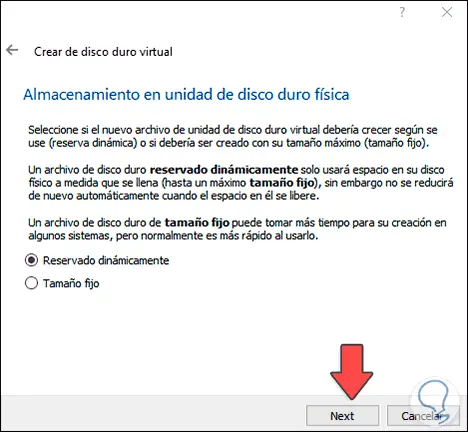
Step 7
Click Next and configure:
- The path where the disk will be stored
- The size of the hard drive
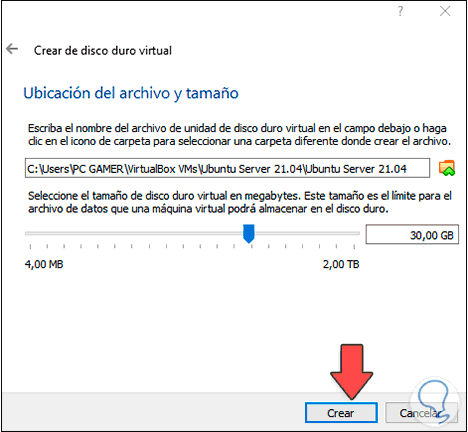
Step 8
With this defined, we click on "Create" and we will see our virtual machine created:
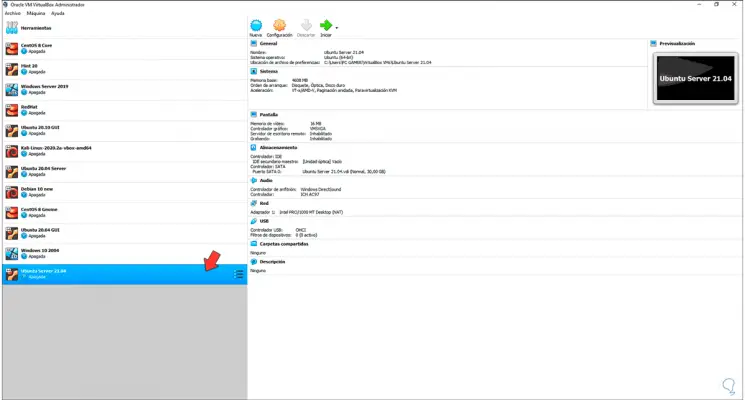
Step 9
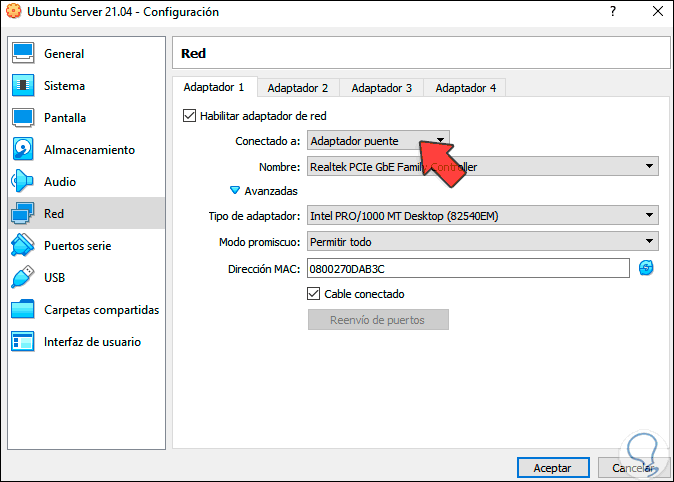
We click on the "Configuration" button and we must activate the network adapter, for this in the "Connected to" field we select "Bridge adapter" and select the physical network adapter:
Step 10
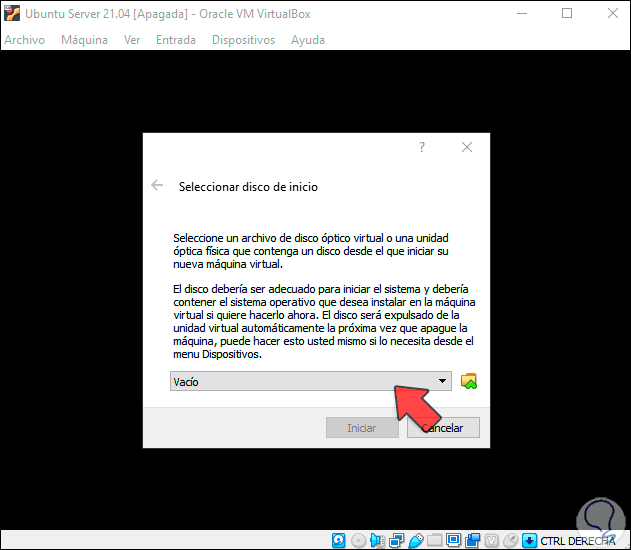
We save the changes, start the virtual machine and we will see the following:
Step 11
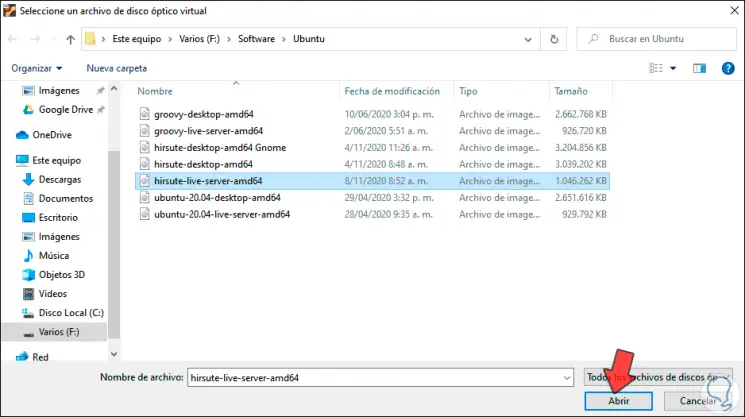
We click on the button to find the ISO image that we have downloaded from Ubuntu 21.04 Server, it is available at the following link:
Ubuntu 21.04 Server
Step 12
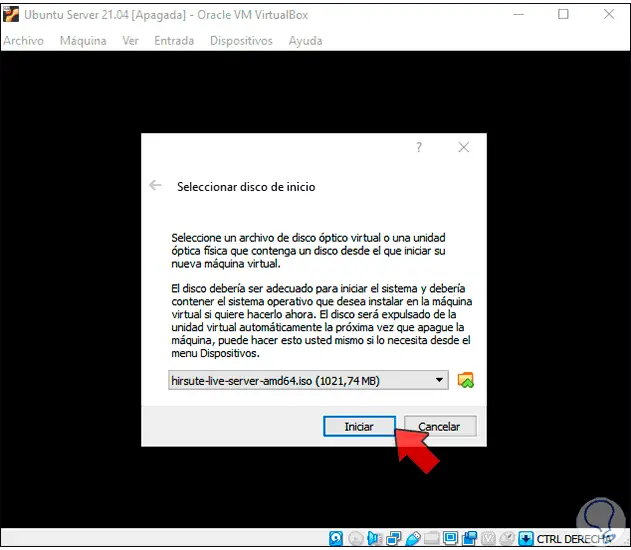
We click on "Open" and we will see the ISO integrated into the VirtualBox:
Step 13
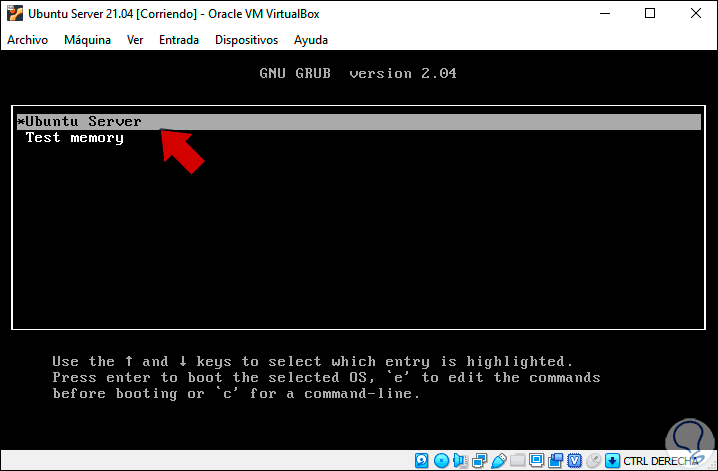
We click on "Start" and in the next window we select "Ubuntu Server":
Step 14
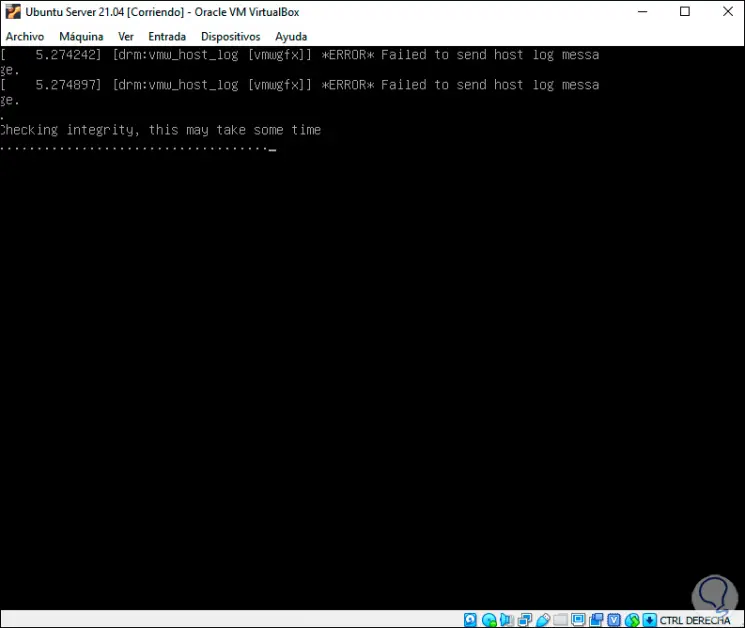
The system will scan the hard drive for errors:
Step 15
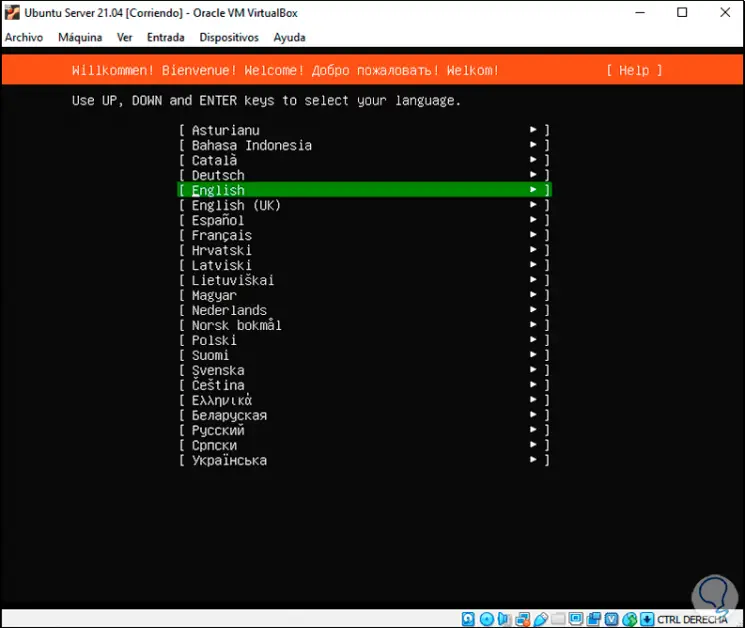
When it is finished we select the desired language for the system:
Step 16
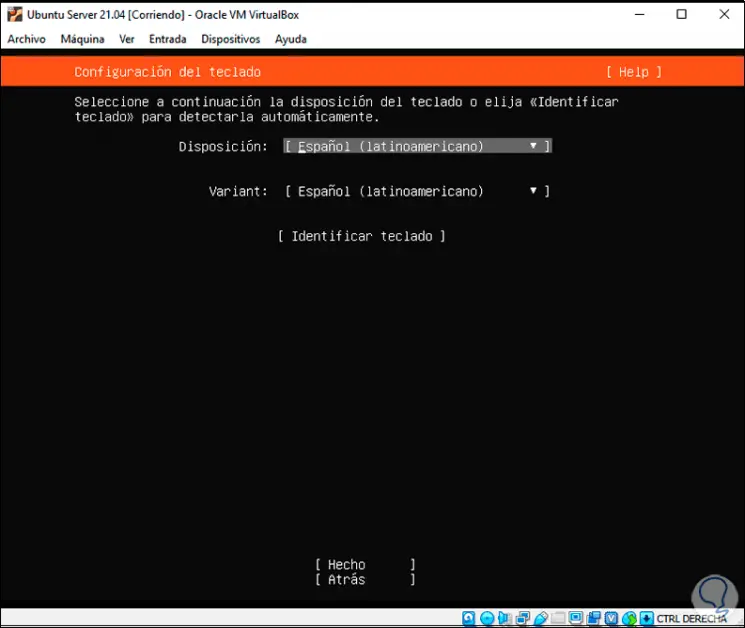
We confirm it with Enter and then configure the keyboard:
Step 17
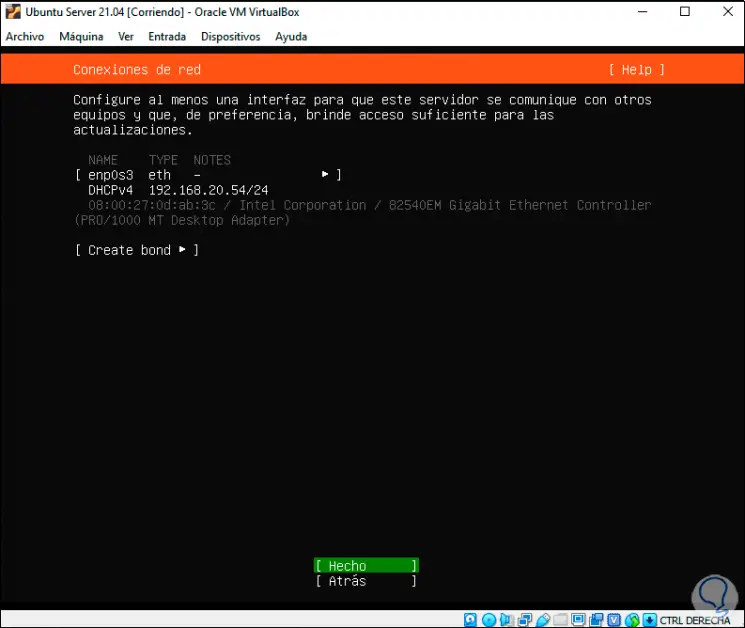
In the next window the network will be adjusted automatically:
Step 18
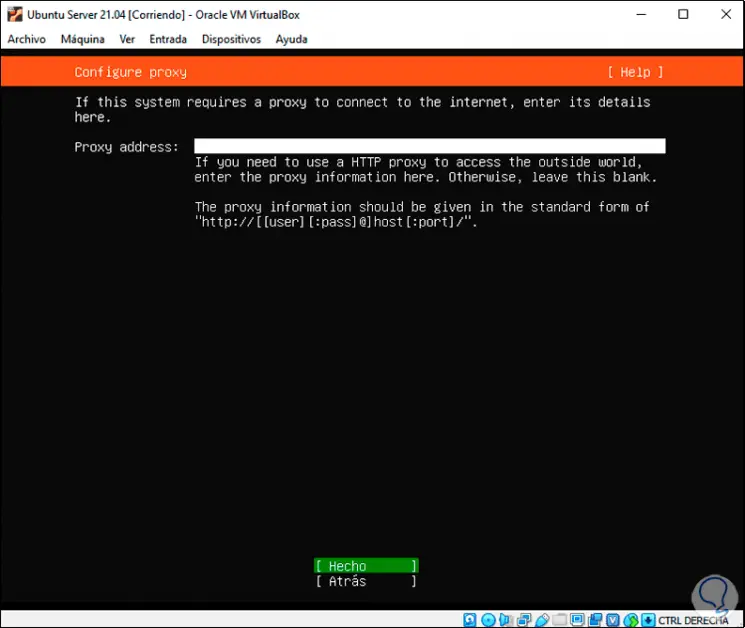
We click on Done and then we can add a proxy server if we have one:
Step 19
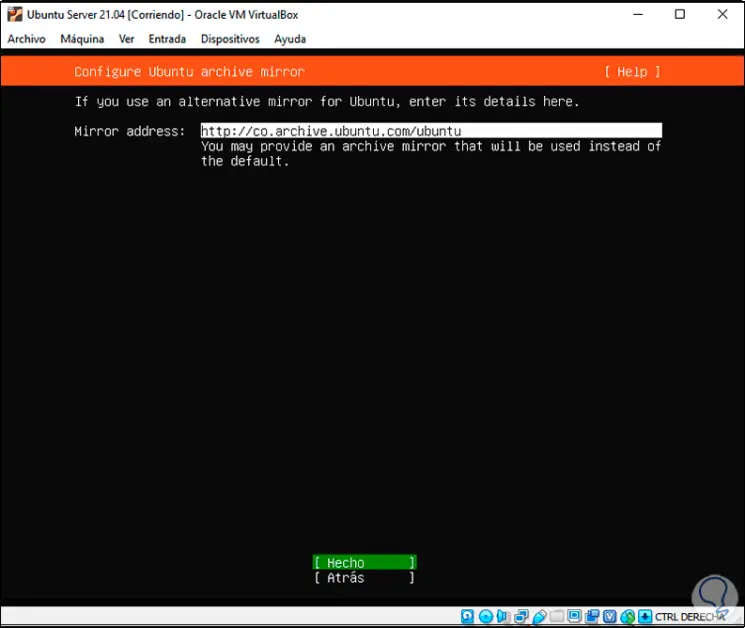
In the next window we confirm the mirror of Ubuntu Server:
Step 20
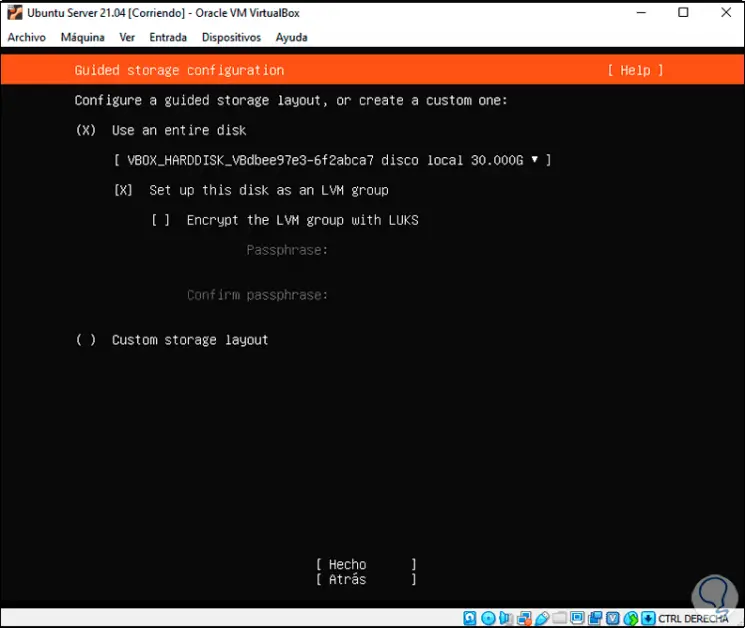
Click Done and access the disk configuration for the installation of Ubuntu Server 21.04:
Step 21
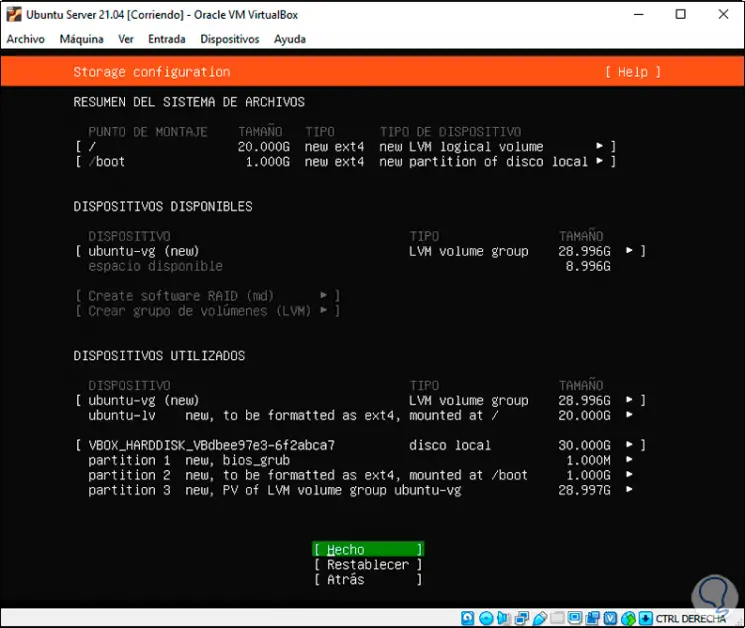
We select the complete disk or we can create partitions, click on Done and we will see the following:
Step 22
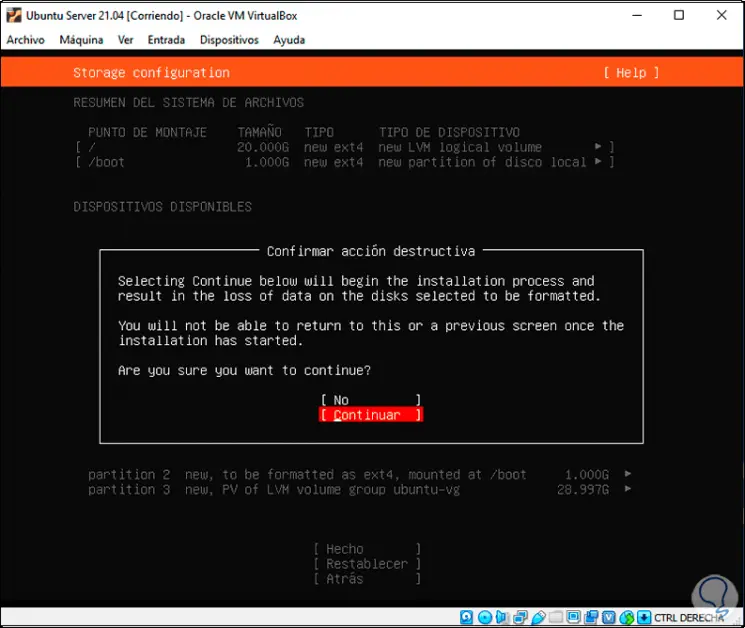
There we can see the structure of the disk, if we agree we click on Done and we must confirm:
Step 23
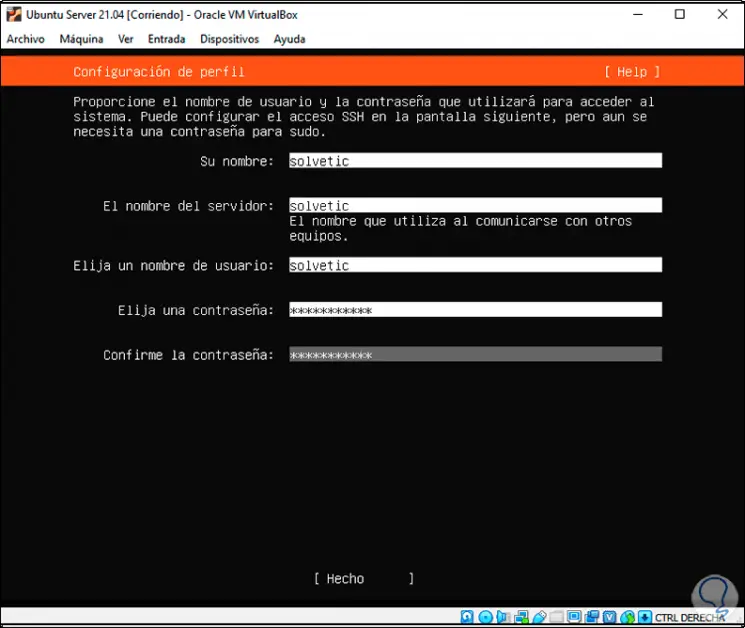
We click on "Continue" and then we enter the team name and the user credentials to use:
Step 24
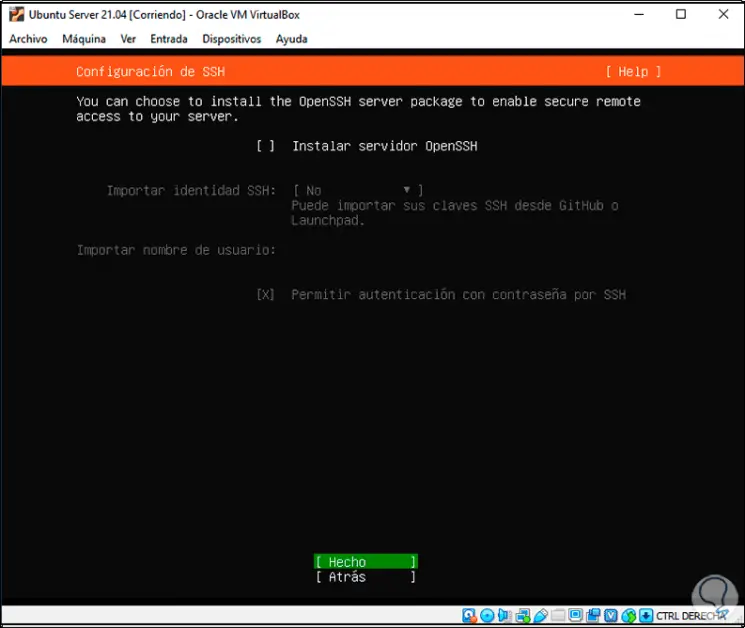
Click Done and the option to install OpenSSH is offered:
Step 25
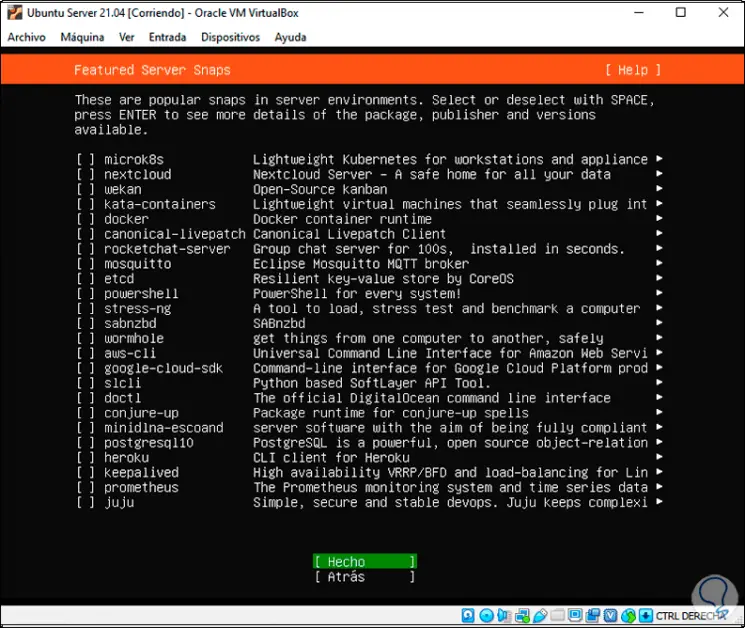
Click on Done and now we can install additional features if we want:
Step 26
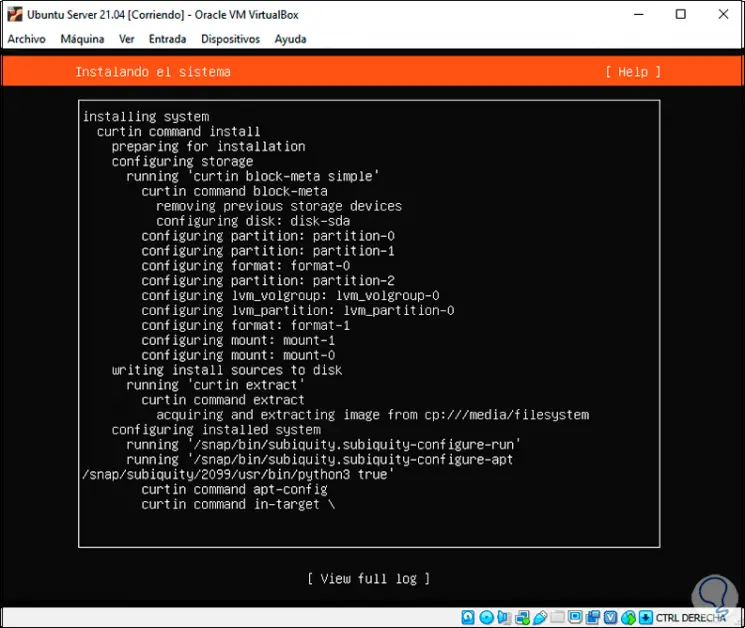
We click on Done to start the installation of Ubuntu Server 21.04:
Step 27
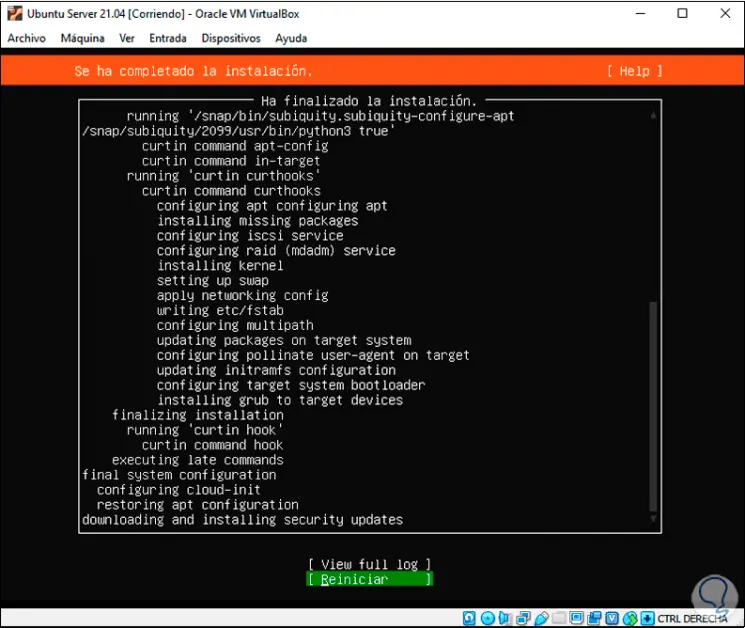
At the end we will see the following:
Step 28
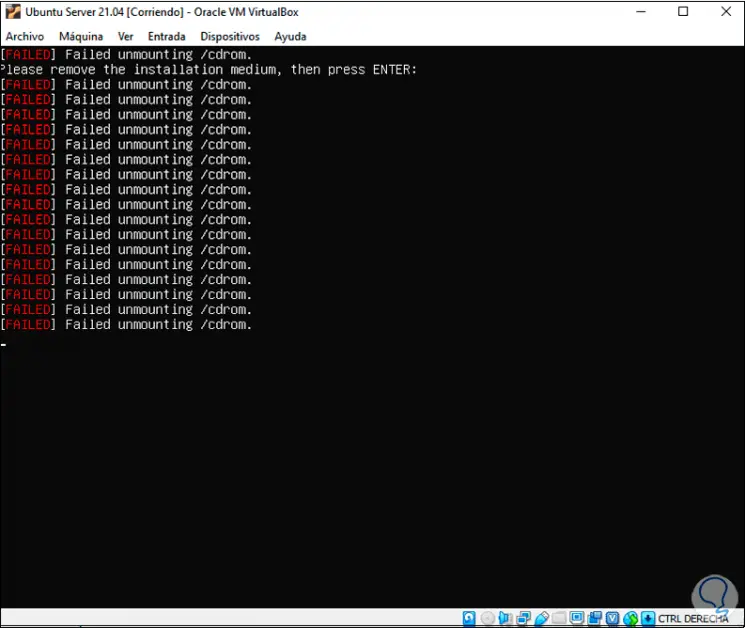
We click on "Restart", we will see the following error:
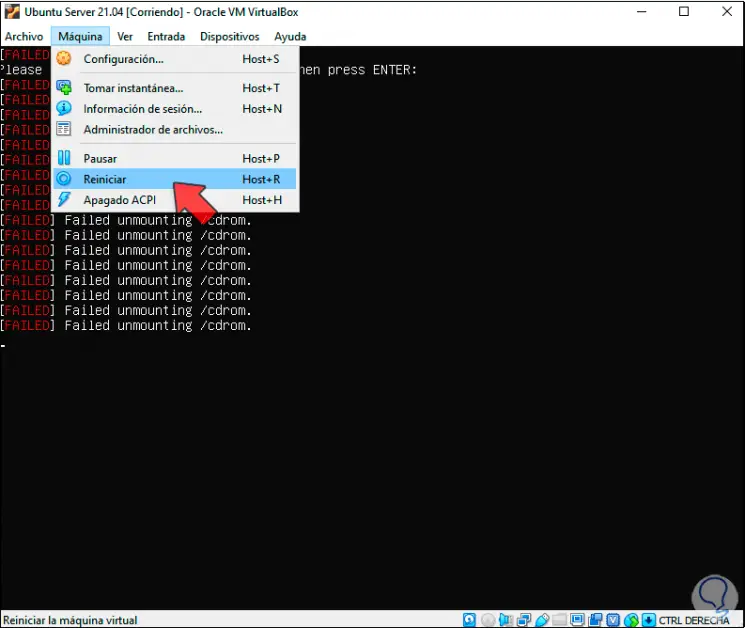
Step 29
To correct it, go to the "Machine - Restart" menu:
Step 30
Ubuntu Server 21.04 will start again:
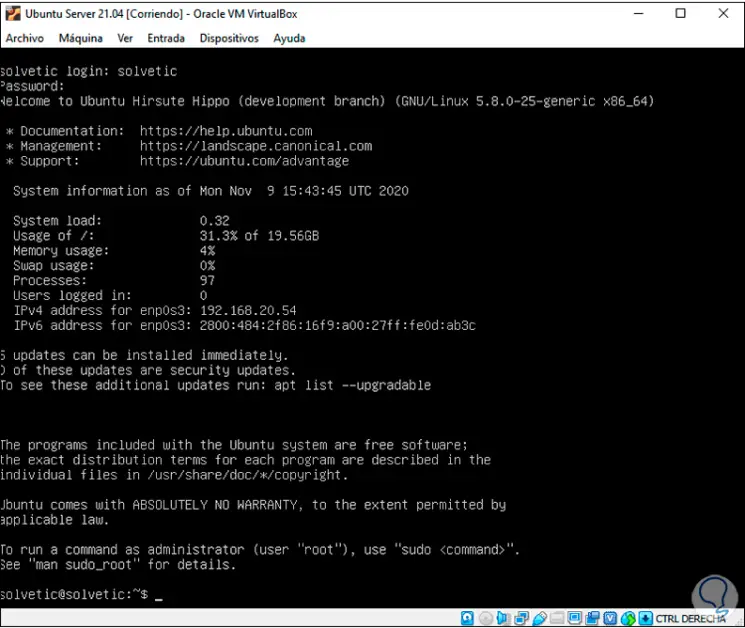
Step 31
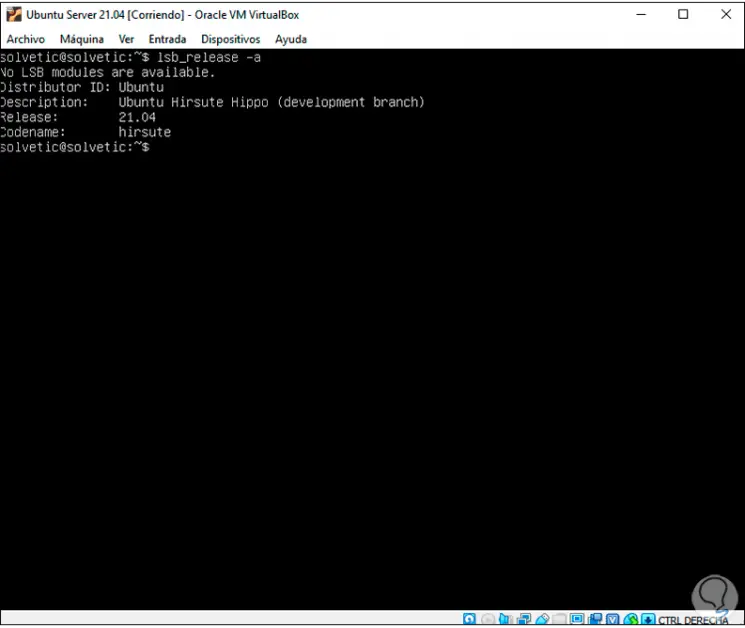
We log in and execute the following command to validate the Ubuntu version:
lsb_release -a
With TechnoWikis you have seen how to install Ubuntu Server 21.04 in a practical way in VirtualBox.