VirtualBox is one of the most popular platforms to create virtualized environments by means of which we can know in depth the new features and functionalities of a recently launched operating system (which can usually present bugs) or of new applications, as well as being able to check the compatibility between these scenarios. VirtualBox is available to be downloaded for free at the following link:
VirtualBox
With VirtualBox we can install systems and applications in a tester way without having to resort to a traditional installation that ends up consuming excessive resources from our team. In this case we will see how to have Ubuntu within Windows thanks to VirtualBox in a complete way. Ubuntu has released its beta of the new Ubuntu 21.04 Hirsute Hippo system which is available for download at the following link:
Ubuntu 21.04
With this combination we can test Ubuntu 21.04 in VirtualBox to know in depth what we will find in this new version which will be officially launched in April 2021..
To stay up to date, remember to subscribe to our YouTube channel! SUBSCRIBE
How to install Ubuntu 21.04 in VirtualBox
Step 1
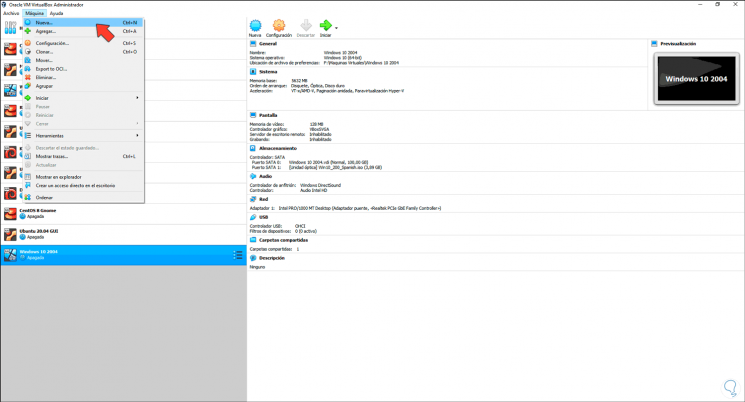
The first step will be to create the virtual machine using one of the following options:
- Clicking on "New" in the central panel
- From the "Machine - New" menu
- Using the following keys:
Ctrl + N
Step 2
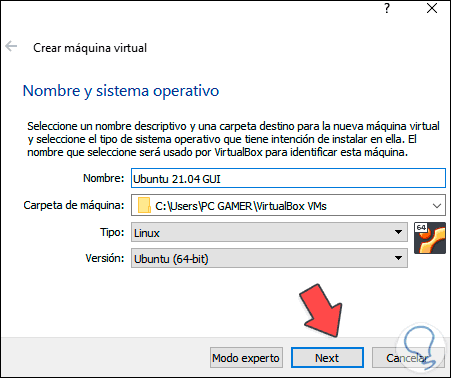
In the displayed window we define:
- Name of the virtual machine to create
- Path where the virtual machine will be installed
- Type of operating system (in this case Linux)
- Version to use (in this case Ubuntu)
Step 3
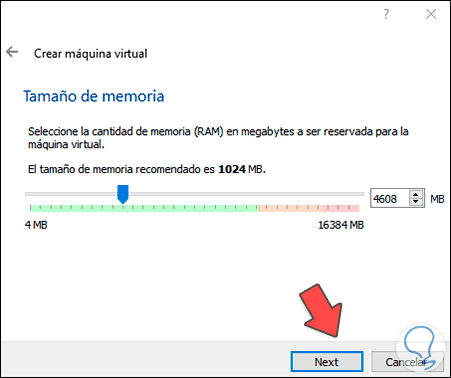
We click Next and now we define the amount of RAM to allocate in the virtual machine:
Step 4
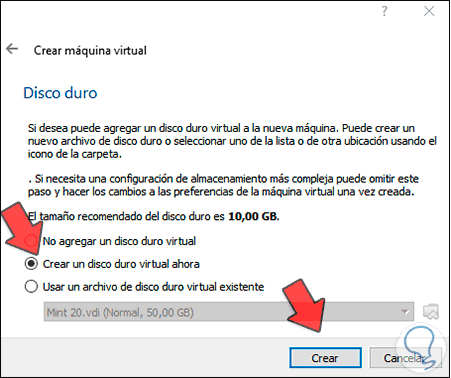
In the next window we must activate the option to create a new virtual hard disk:
Step 5
We click on "create" and select the type of hard drive to create:
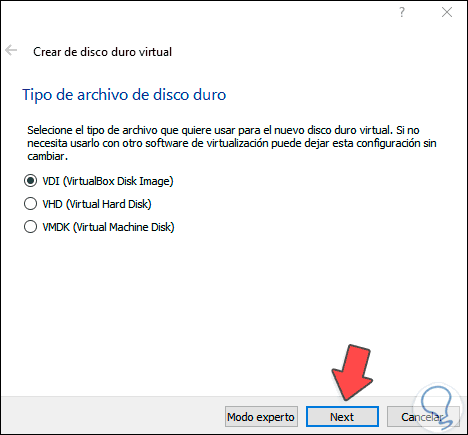
Step 6
We click Next and set the way the space is managed:
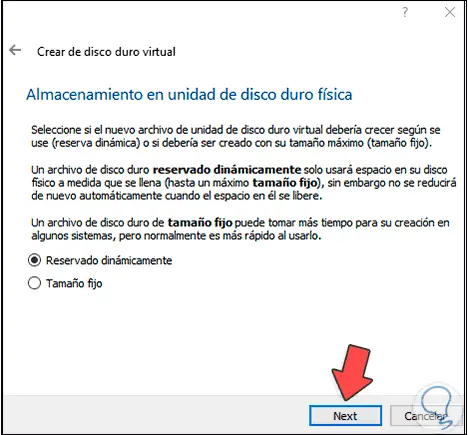
Step 7
In the next window we define:
- Path where the virtual hard disk is set
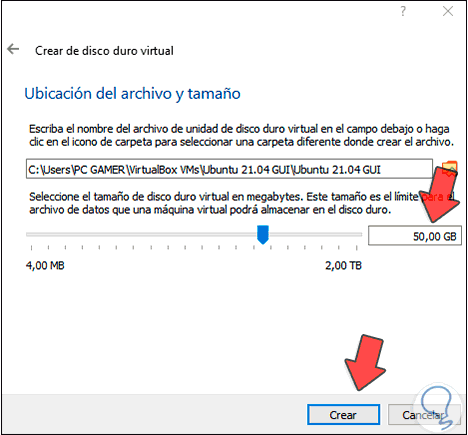
Step 8
We give "Create" and we will see the created machine:
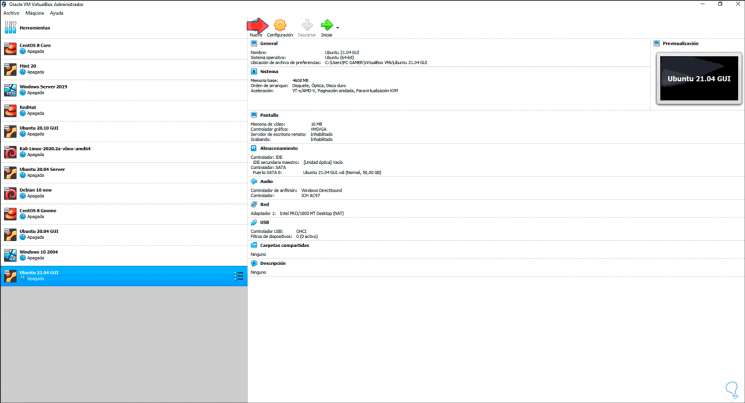
Step 9
Now we click on "Configuration", we go to the "Network" section and there we must connect the bridge adapter of the physical equipment. We accept the changes.
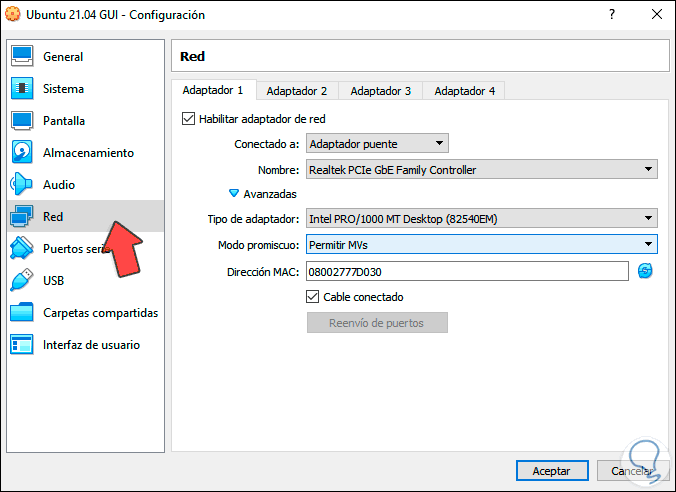
Step 10
We click on "Start" and we will see the following:
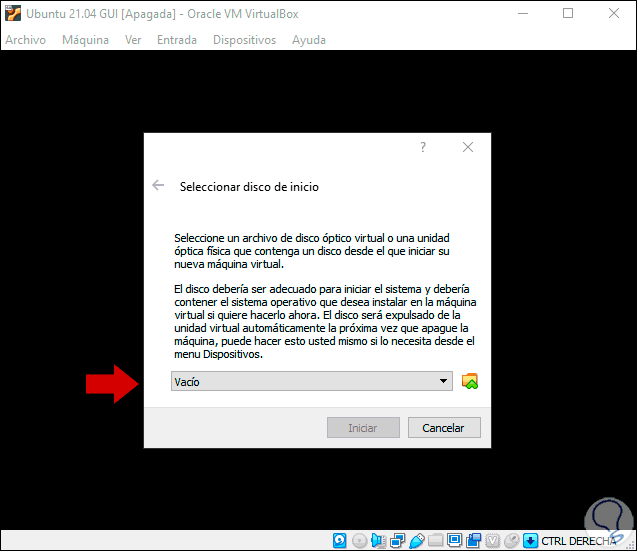
Step 11
We click on the side icon to select the Ubuntu 21.04 ISO image:
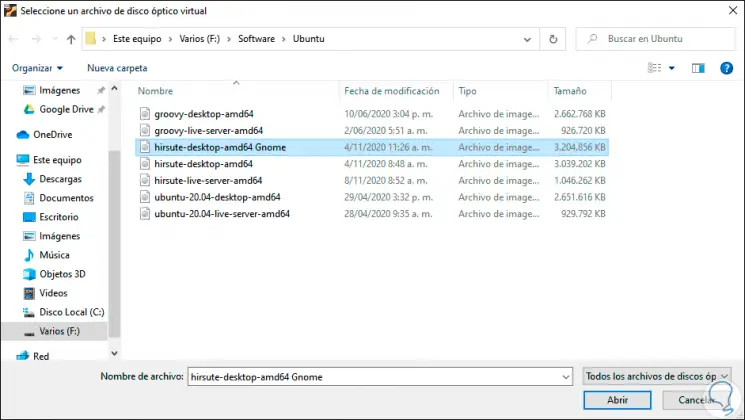
Step 12
We click Open and see that said ISO image is attached:
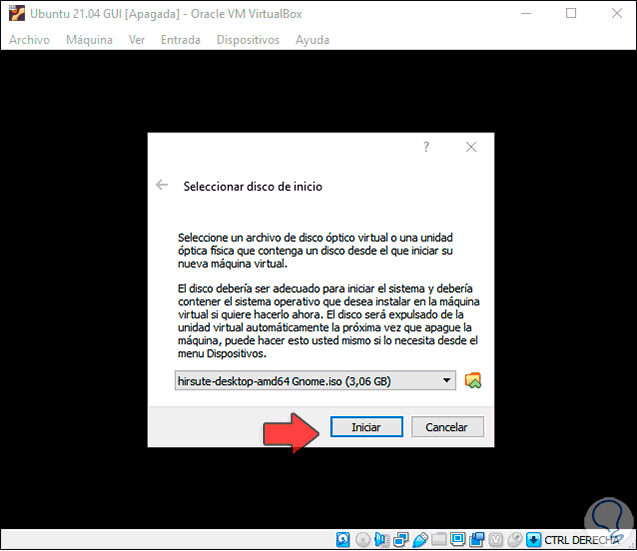
Step 13
We click on "Start" to begin the installation process of Ubuntu 21.04 in VirtualBox:
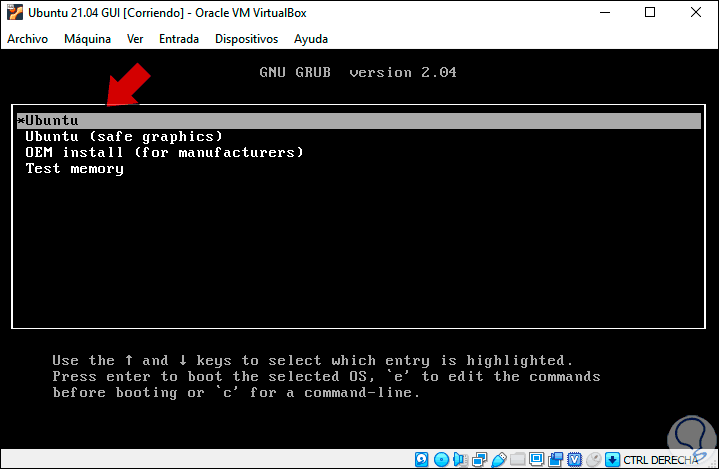
Step 14
We select "Ubuntu" and then the system will analyze the status of the hard disk:
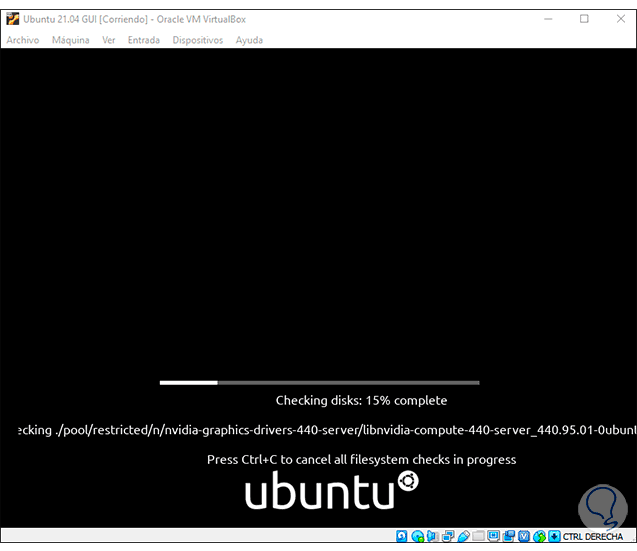
Step 15
At the end of this, we must select the language with which Ubuntu 21.04 will be installed:
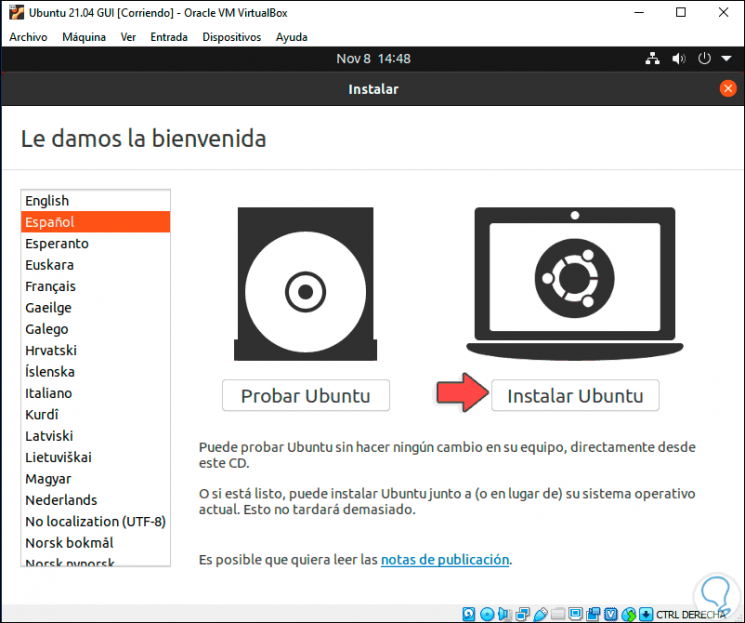
Step 16
We have the option to try Ubuntu 21.04 (this does not save anything we do) by clicking on "Test Ubuntu" or we click on "Install Ubuntu" to start the installation locally, now we define the keyboard language:
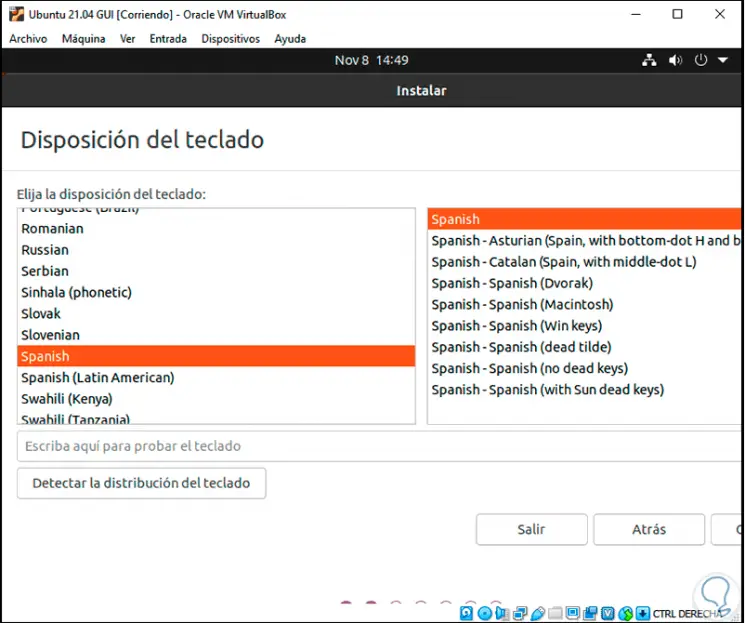
Step 17
After this we define the type of installation:
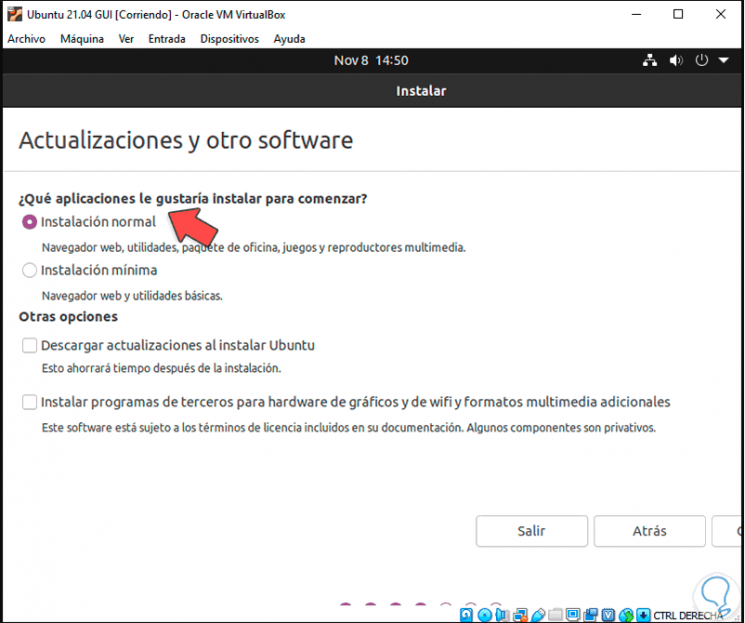
Step 18
We click on "Continue" and we will see the discs section:
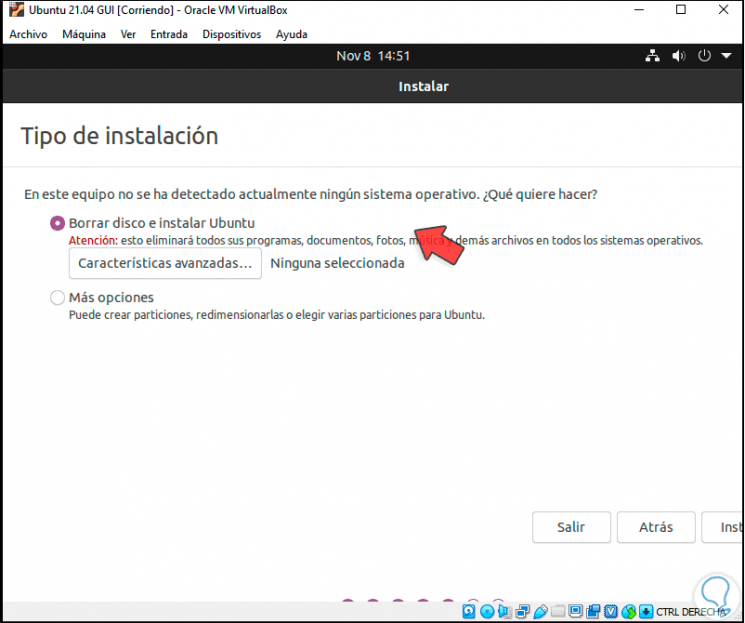
Step 19
There we can activate the box "More options" to create the partitions manually, in this case we leave the default option and click on "Install", the following message will be launched:
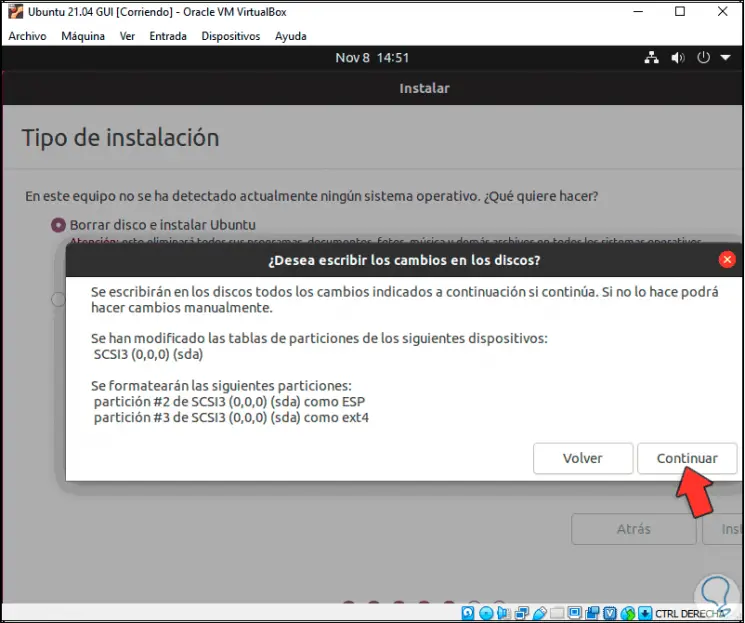
Step 20
We click on "Continue" and now we define the geographical area where we are located:
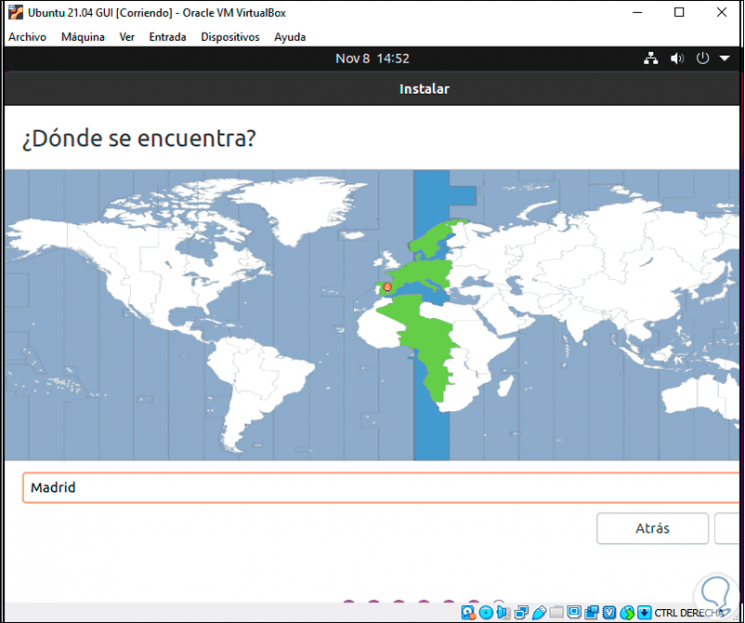
Step 21
In the next window we define the name of the computer and the user's credentials:
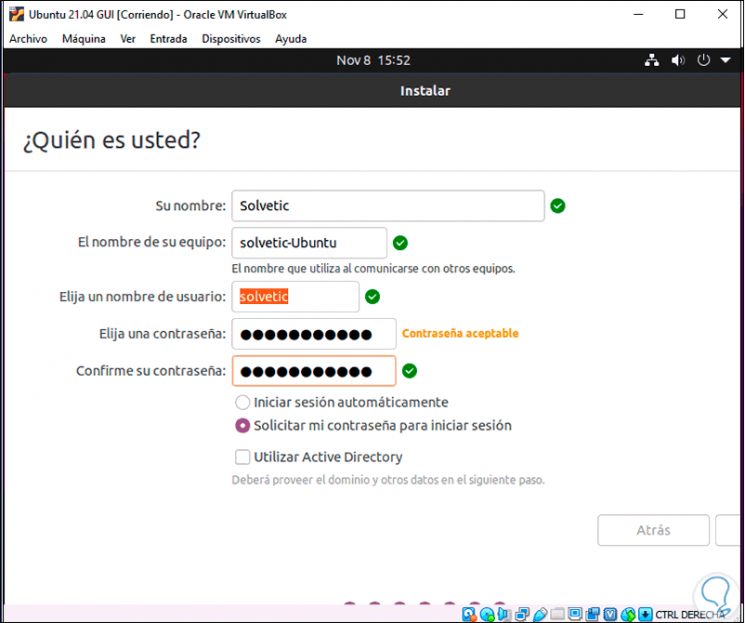
Step 22
We click on Continue to give way to the Ubuntu 21.04 installation process in VirtualBox:
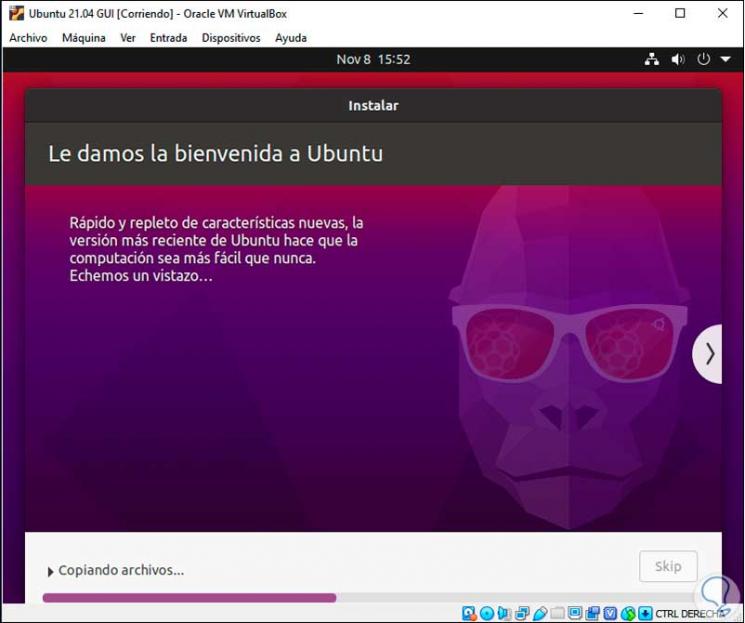
Step 23
We can see that the system is installed:
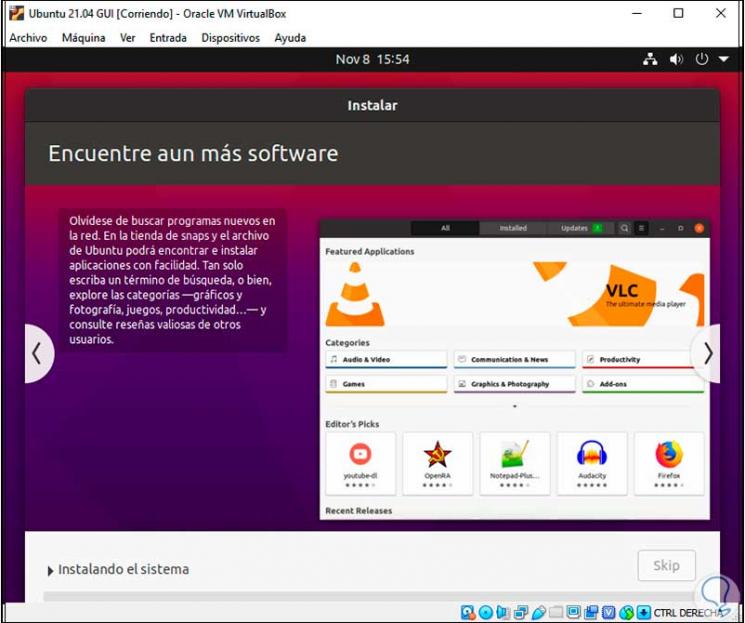
Step 24
When it has reached its end we will see the following:
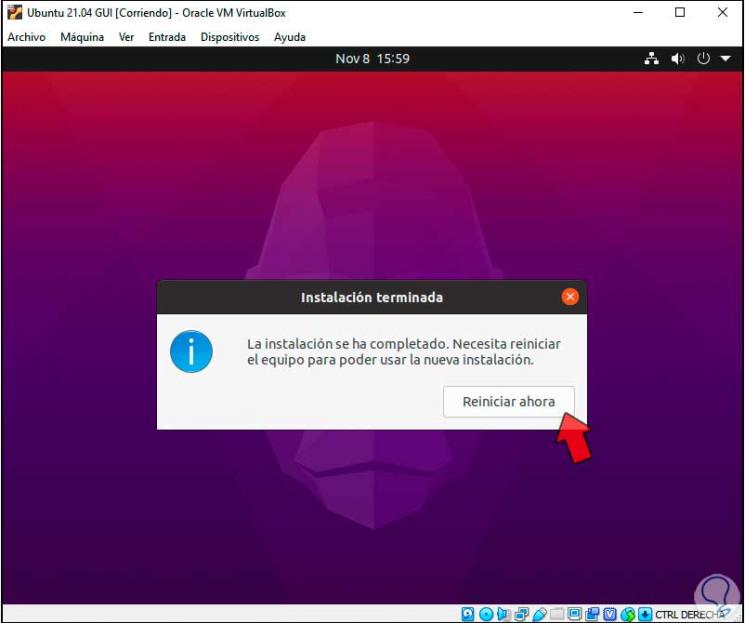
Step 25
We click on "Restart now" and at the time of restart we will see the following error of the disk with the ISO image:
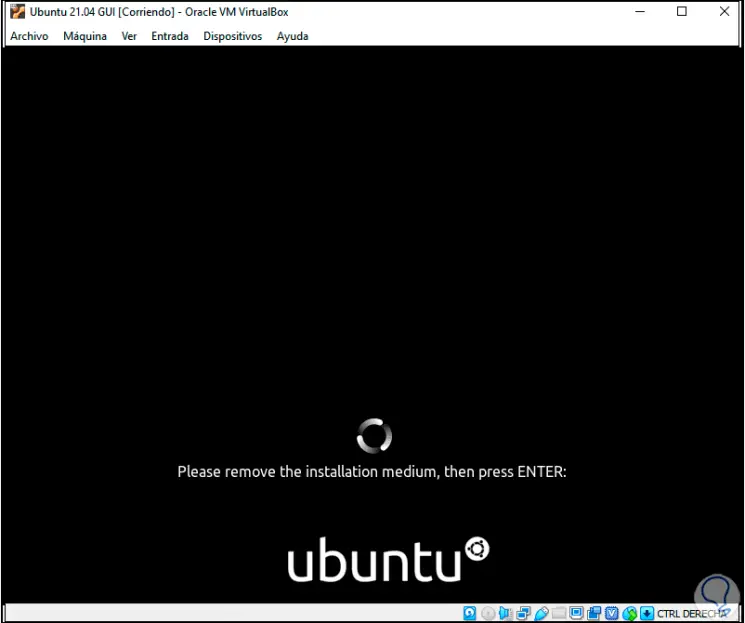
Step 26
To correct this we go to the "Machine - Restart" menu:
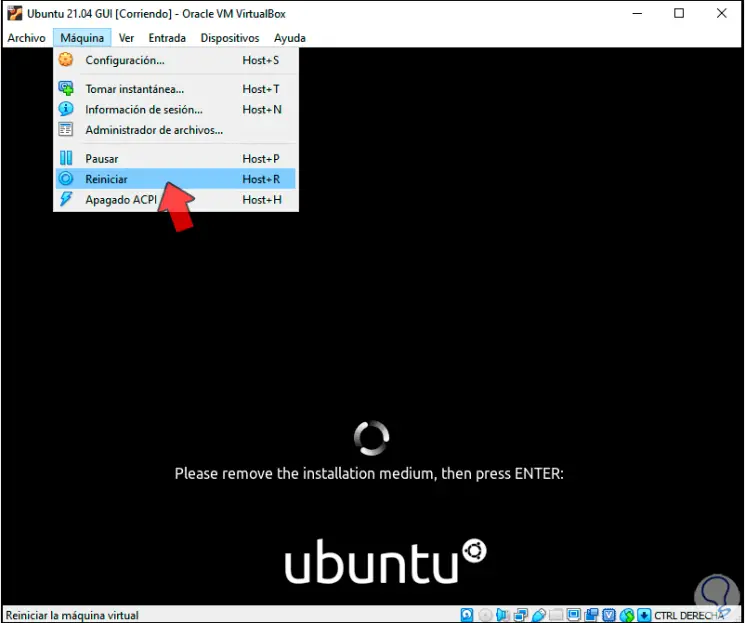
Step 27
After this the system will reboot and we access the login screen:
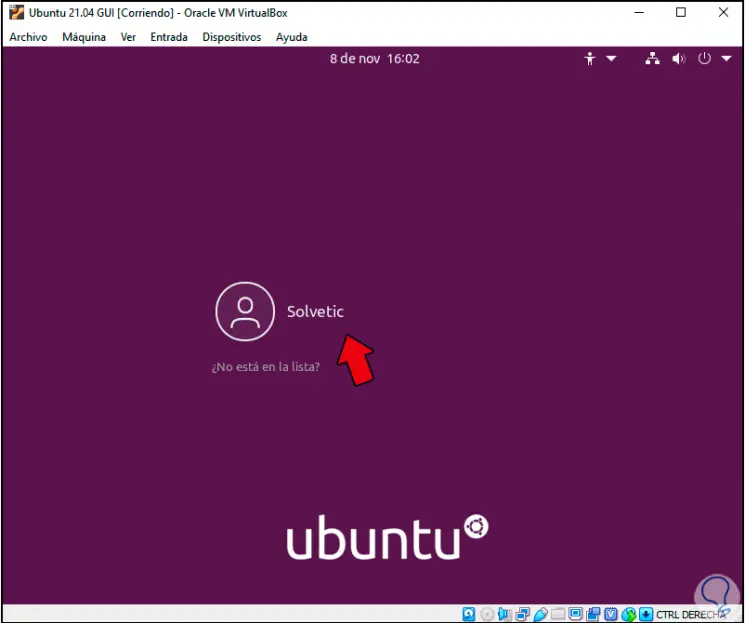
Step 28
We enter the password:
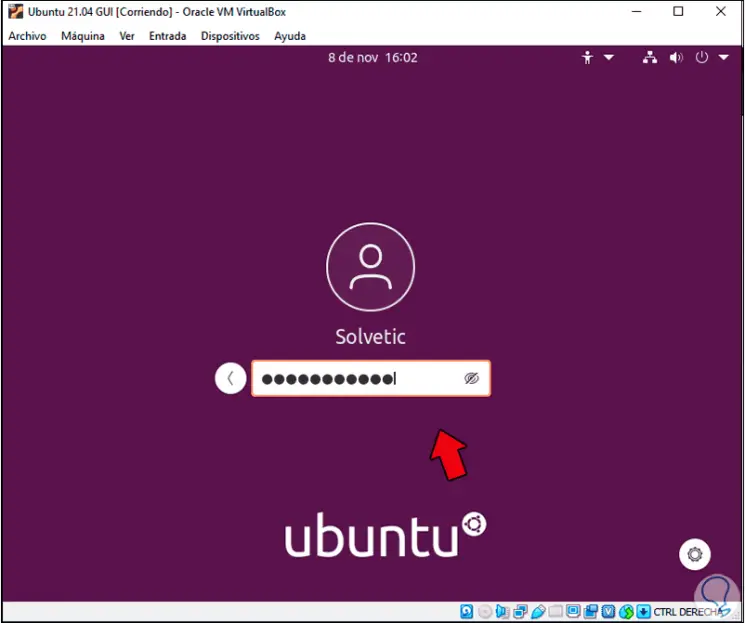
Step 29
Logging into Ubuntu 21.04 will complete the system setup process:
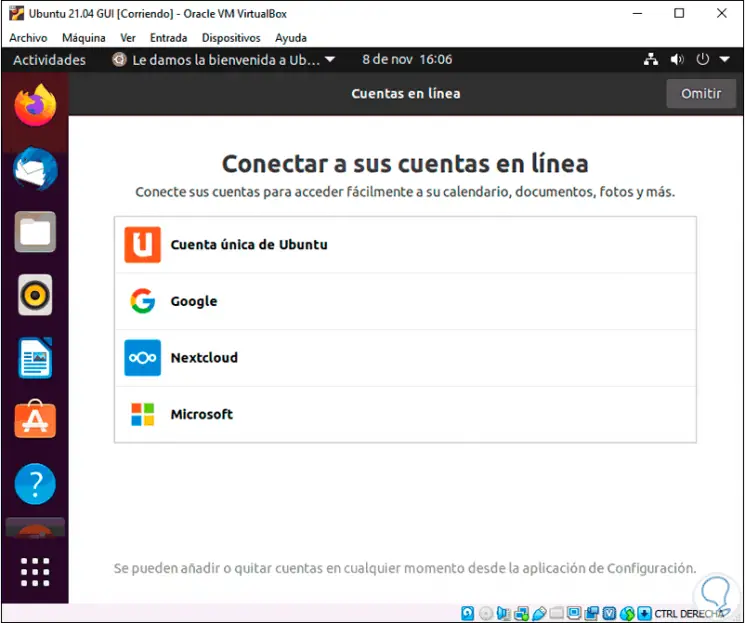
Step 30
In the next window we configure privacy:
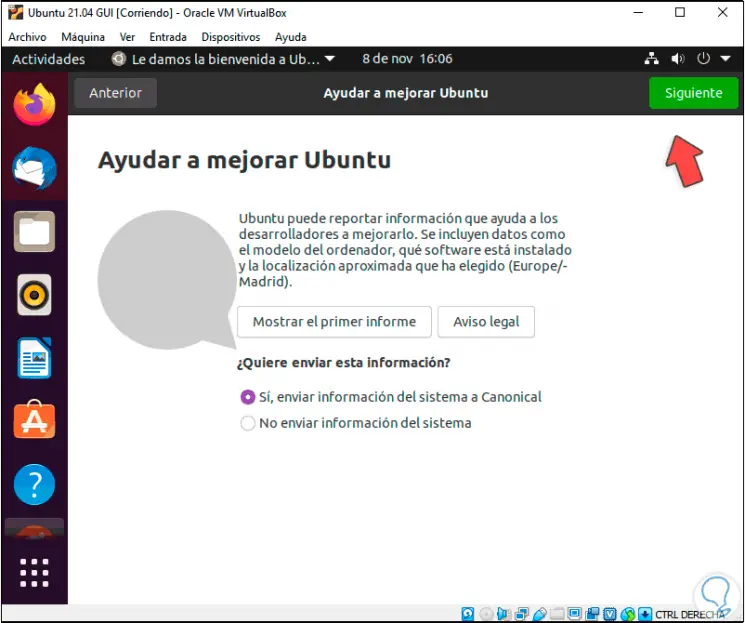
Step 31
Then this setup process is complete:
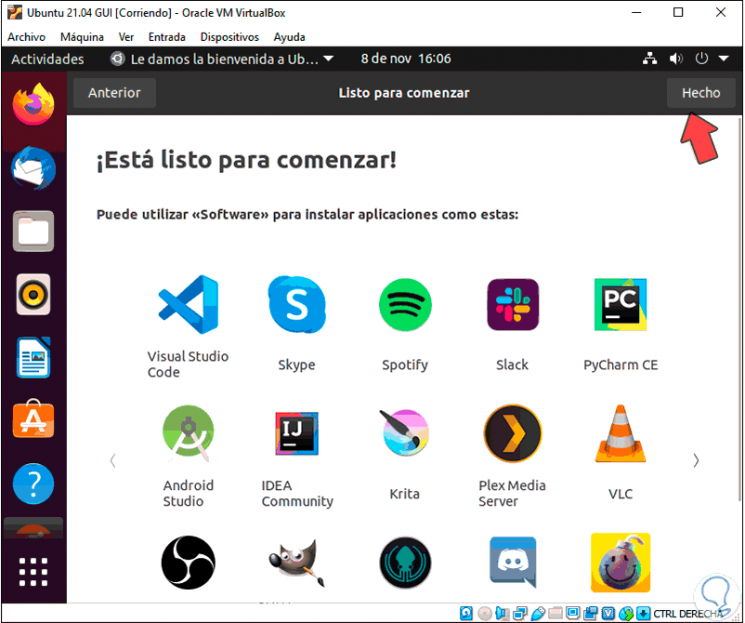
Step 32
So we access Ubuntu 21.04:
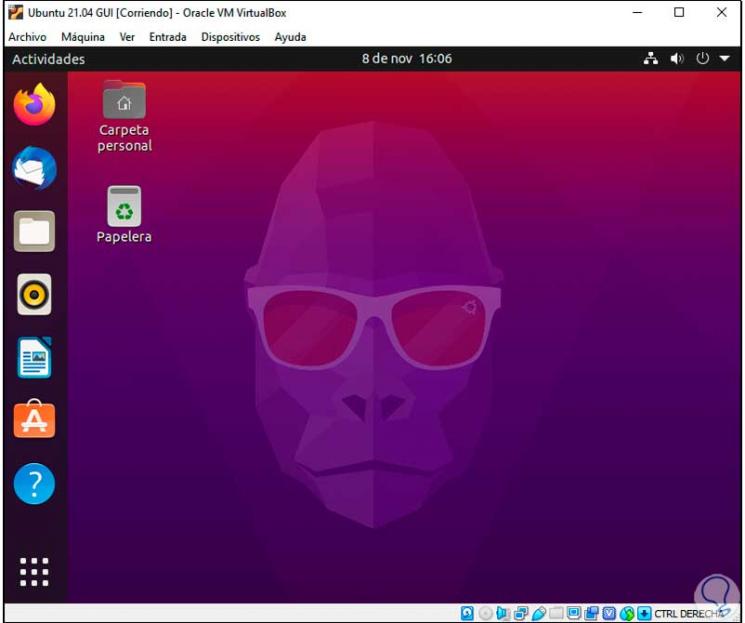
Step 33
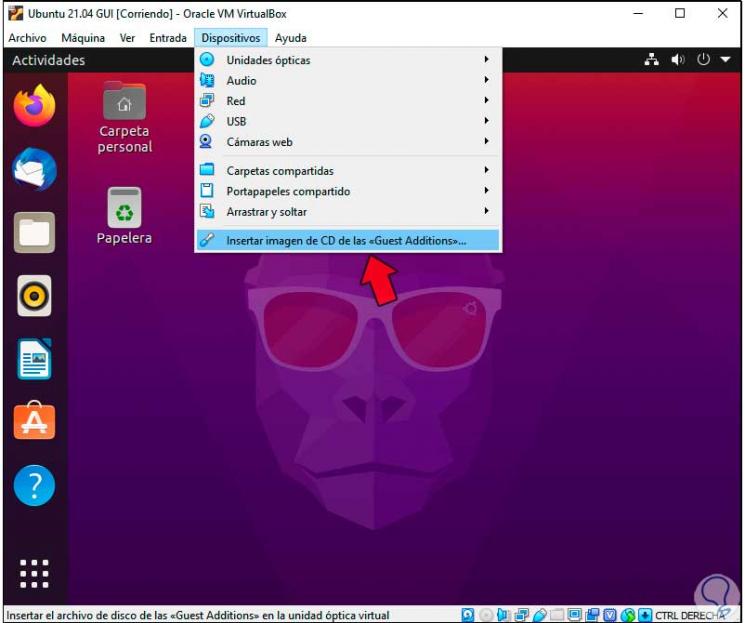
Finally, we are going to add the VirtualBox Guest Additions with which we seek to increase the capacities and functions of the virtual machines with the physical equipment, for this we go to the menu "Devices - Insert CD image of the Guest Additions":
Step 34
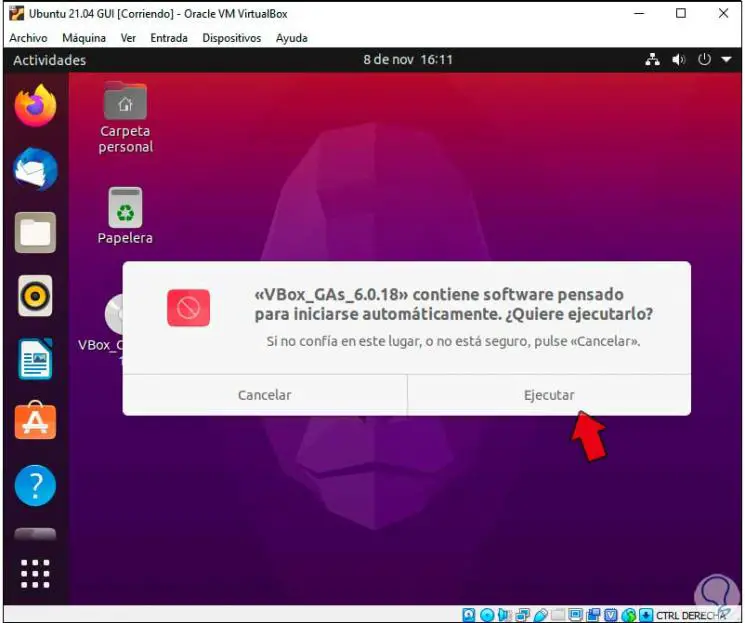
The following message will be displayed:
Step 35
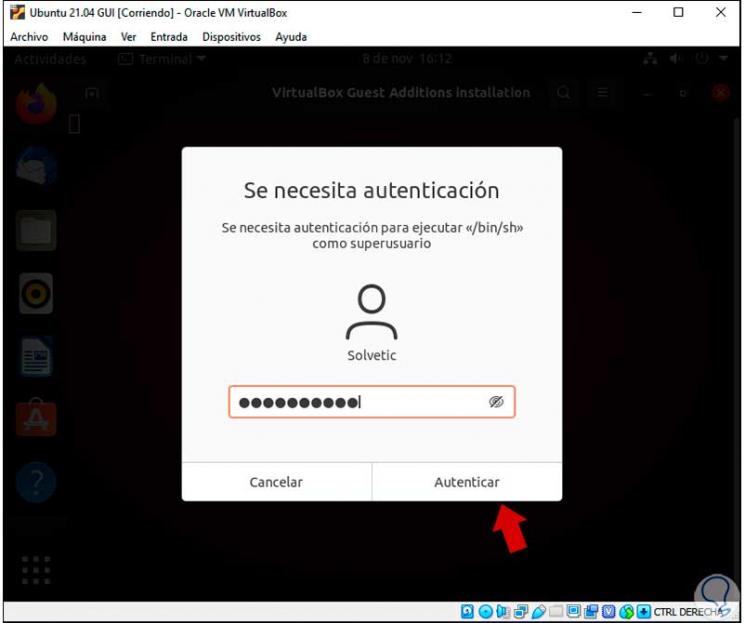
We click on Run and we must enter the administrator password:
Step 36
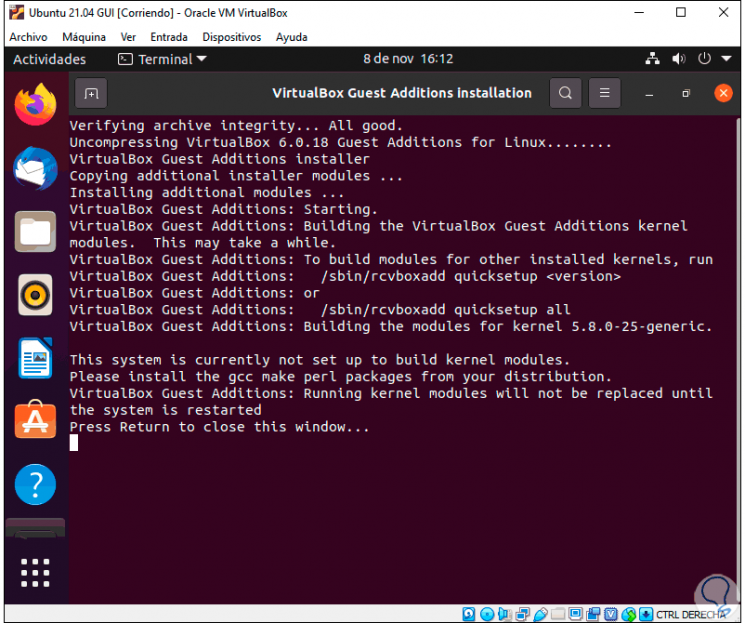
This will open the terminal to configure the installation process:
So TechnoWikis has explained how to install Ubuntu 21.04 in VirtualBox.