If your work is in the area of network management or maintenance of the mimes, you will undoubtedly know that there are a series of protocols, tools and functions at the network level that have been developed so that the entire connectivity process is adequate and that in an organization (and actually anywhere) if network connection issues fail, it can lead to various errors . This will make the work of the systems area increase and so we can know what it is to work under pressure since a computer with connectivity failures will not be able to access the server, will not be able to establish connection and much more..
As an IT staff when configuring a server, it is ideal to understand that it must fulfill various roles within the organization and one of these, perhaps one of the most essential, is that said server fulfills the function of DHCP server, have you heard that term ?, well, TechnoWikis will explain in detail how DHCP works and how you can install and configure this server in Ubuntu 18.04, 18.10 or in the new edition Ubuntu Server 19.04.
What is DHCP?
DHCP (Dynamic Host Configuration Protocol) is a protocol that has been defined by IETF (Internet Engineering Task Force) and as such is based on the BOOTP protocol which has been helping network administrators for many years to have better control over everything related to local connections in organizations, although DHCP applies to all types of environments (home - business).
DHCP acts as a client / server model protocol thanks to which we can automatically grant an Internet Protocol (IP) host which has an integrated IP address and more information about the configuration of the cattle, such as the mask Subnet and default gateway, essential elements for proper connection and navigation in the local or external network..
As we mentioned, DHCP is based on another protocol called BOOTP and this is a protocol that interacts with DHCP in order to adjust various network implementation values, so that the DHCP protocol offers the possibility that configured client computers can access to the TCP / IP configuration information established on the server and thus obtain its IP address for 100% effective communication, something we all want when we are administrators.
To understand how DHCP works a little, we must be aware that each object in the local network based on TCP / IP requires a unique unicast IP address which gives you the possibility to access the network and the resources that we have configured in she. This applies to shared folders , file servers, printers and more, so if we have not configured a DHCP server all the computers that are integrated for the first time to the network must be configured manually and we know very well that this implies resources , time and possibility of errors, so DHCP will do the “strong†job of assigning these network parameters since it is an automated process which is managed centrally from the server where said role has been configured..
When the DHCP server is configured, it must have a group of IP addresses available for new computers and devices that wish to connect to the network. This makes the DHCO server "lease" an IP address to these computers, which must have DHCP active, when connecting to the network.
The IP addresses that DHCP delivers and assigns are dynamic, hence their name, but they are not static IP addresses, this allows addresses that are no longer used by the client computer, can automatically return to the group on the server to be assigned to other computers that require connectivity.
The DHCP server is responsible for saving the address configuration information in a local database which is made up of parameters such as:
- The TCP / IP configuration parameters for all client computers in the network.
- Reserved IP addresses associated with special DHCP clients, this applies in situations where some equipment or machines require the same address for the type of work they do.
- Valid IP addresses ready to be offered to computers that require connection.
- Possibility to exclude IP addresses which may be available for administrative tasks.
- Configuration of the time in which the IP address will be active before a renewal of the lease is requested
We have talked a lot about DHCP and we hope you understand all its benefits, so now we go to the practical part and we will learn how to install this role and its respective configuration on Ubuntu Server, for this case we will use version 19.04 but the process applies equally to versions 18.04 and 18.10.
1. How to install the DHCP role in Ubuntu 18/19
In order to install this functionality on our server and enjoy a central administration of the address, we will execute the following command on the server:
sudo apt install isc-dhcp-server
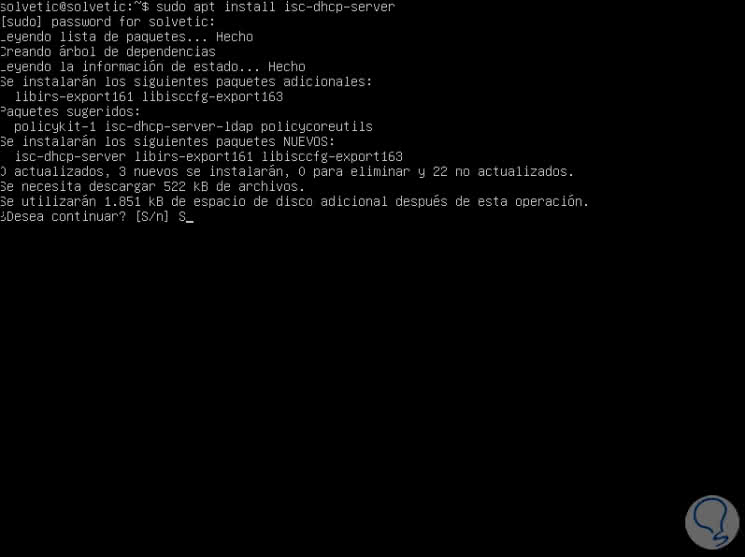
Enter the letter S to confirm the download and installation of the role and once this process is finished we will see the following:
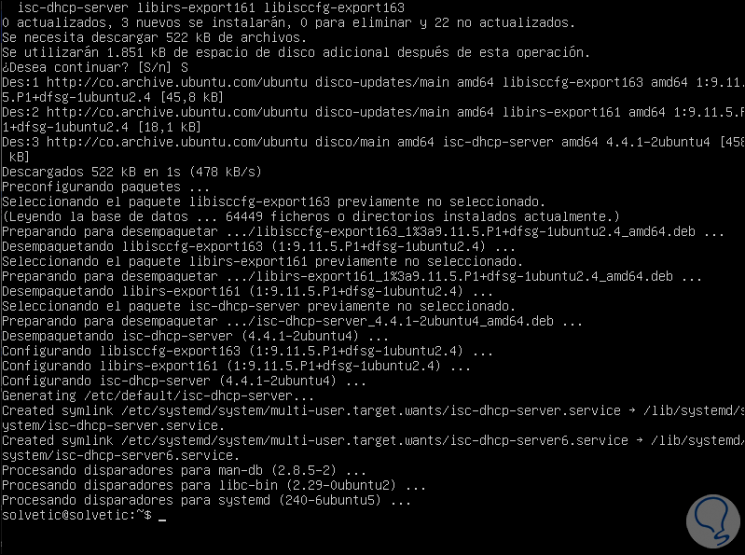
We have already installed the DHCP role on the Ubuntu server.
2. How to configure the network card in Ubuntu 19
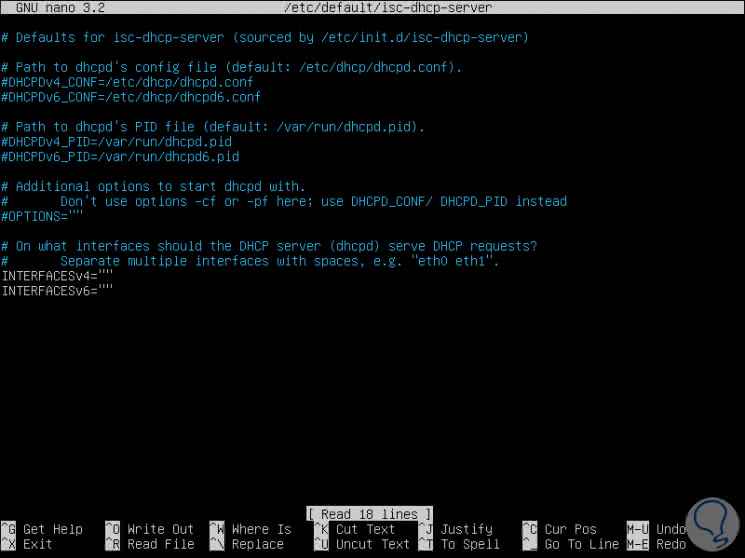
The next step to achieve full control of DHCP is to configure the network card of our team, for this we must edit the file isc-dhcp-server in order to establish the values ​​associated with the network card since its function will be the to deliver the IP address.
Step 1
To perform this task we can use some text editor and execute the following:
sudo nano / etc / default / isc-dhcp-server
There we will see the following:
Step 2
At the bottom we find the following lines:
INTERFACESv4
This allows you to configure IPv4 addressing
INTERFACESv6
This allows you to configure IPv6 addressing
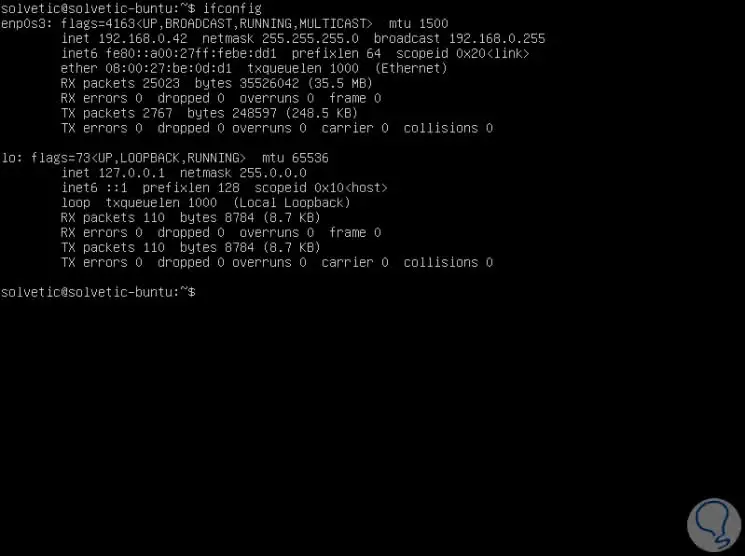
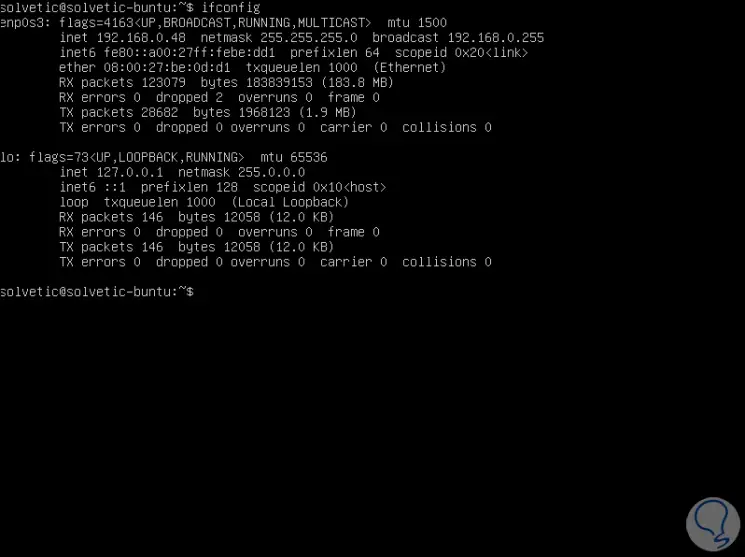
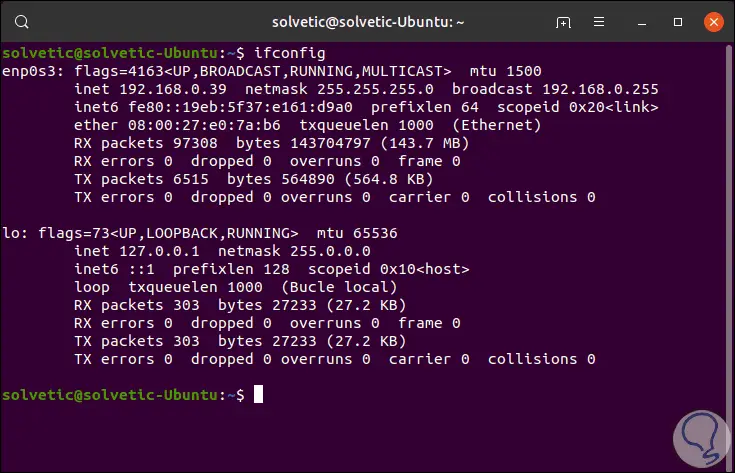
At this point we must know in detail the name of the server's network card, for this we can execute, before accessing the file, the ifconfig command and there we will see the name of the card which in this case is enp0s3:

Step 3
Now we go back to the DHCP configuration file and in the INTERFACESv4 section we enter the name of the network card:
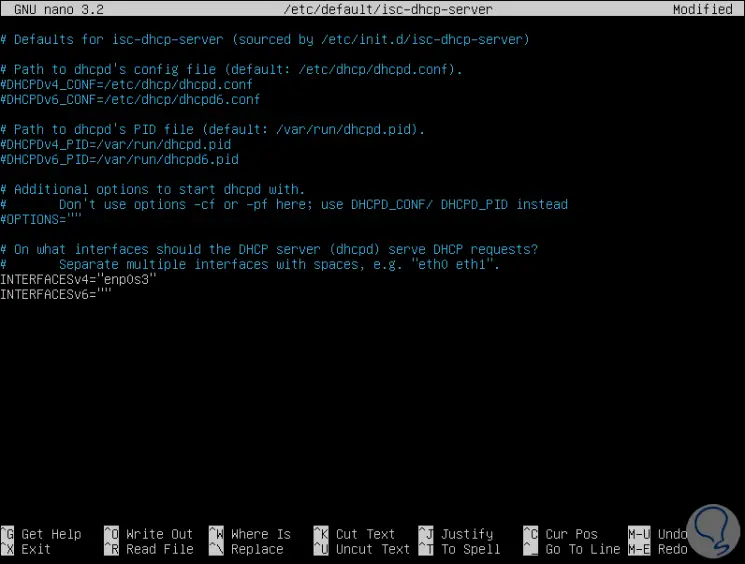
We save the changes using the key combination Ctrl + O and exit the editor using the keys Ctrl + X
3. How to configure the DHCP role in Ubuntu 18/19
Step 1
The next step is to configure the DHCP parameters according to the need, this includes having defined values ​​such as:
- Range of addresses to use
- Gateway address and more.
To perform this configuration, we must execute the following line:
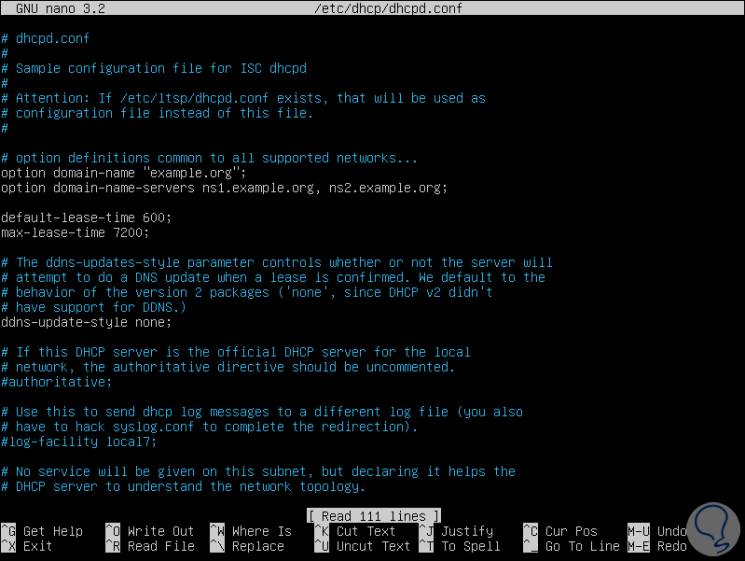
sudo nano /etc/dhcp/dhcpd.conf
Step 2
There we will see the following:
Step 3
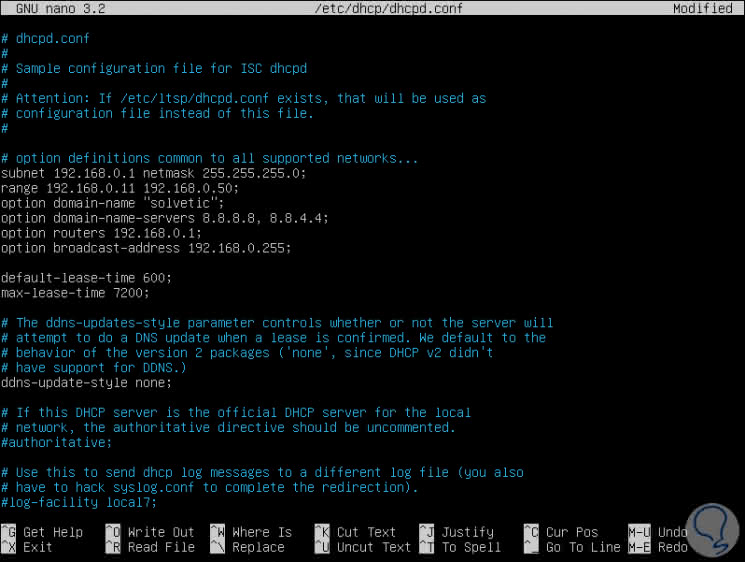
The values ​​that we must assign will be the following:
subnet 192.168.0.1 netmask 255.255.255.0 range 192.168.0.11 192.168.0.50; option domain-name-servers 8.8.8.8, 4.4.4.4; option domain-name "solvetic"; option routers 192.168.0.1; option broadcast-address 192.168.0.255; default-lease-time 600; max-lease-time 7200;
Note
As of Ubuntu 19.04 the configuration file already integrates some default values, we only have to edit them as the case may be.
Step 4
Once we enter this information, we save the changes with the Ctrl + O keys and exit it with the Ctrl + X keys.
What we have done
To know what we have done, TechnoWikis will tell you:
- We have added the IP address and network mask of the DHCP server in Ubuntu
- The range of addresses to be assigned to the equipment has been configured
- Supported public DNS have been configured such as Google's which are stable and secure
- The domain name has been defined in option option domain-name
- We have entered the broadcast or broadcast IP address which will always end in 255
- The default-lease-time line will indicate the reservation time of an IP address to a device (time in hours)
- The max-lease-time value refers to the maximum time in which an IP will be reserved to a local computer
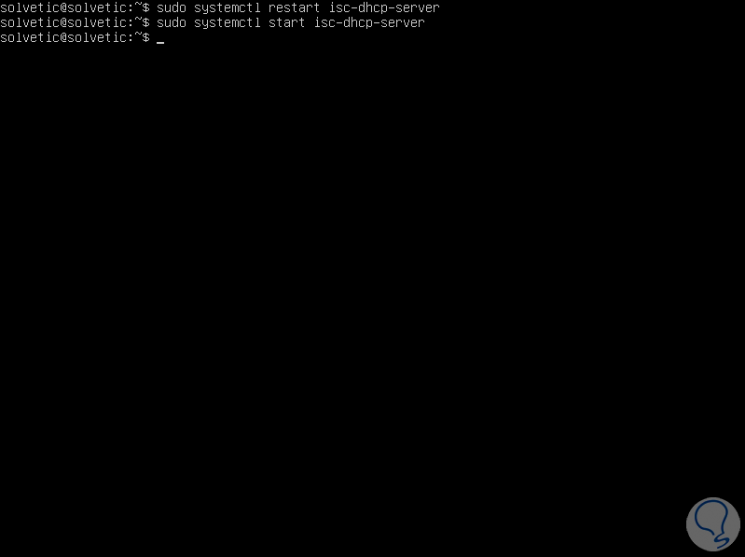
Once the changes are saved, we will restart the isc-dhcp-server service with the following command:
sudo systemctl restart isc-dhcp-server
Additionally, we can make use of the following orders:
- sudo systemctl start isc-dhcp-server (start DHCP service)
- sudo systemctl stop isc-dhcp-server (stops DHCP service)
4. How to make use of the DHCP server
Up to this point we have installed and configured the DHCP server with the necessary parameters so that the connectivity is correct, so that we will now see how DHCP works on the client computers.
Step 1
We have an Ubuntu 18.04 device which has the following network configuration:
- MAC Address: 08: 00: 27: be: 0d: d1
Step 2
We can go to the dhcp.conf configuration file and set an IP address reserved only for that equipment, we execute the following:
sudo nano /etc/dhcp/dhcpd.conf
There we will register the following lines:
host localhost Ubuntu {ethernet hardware 08: 00: 27: be: 0d: d1; fixed-address 192.168.0.48;} 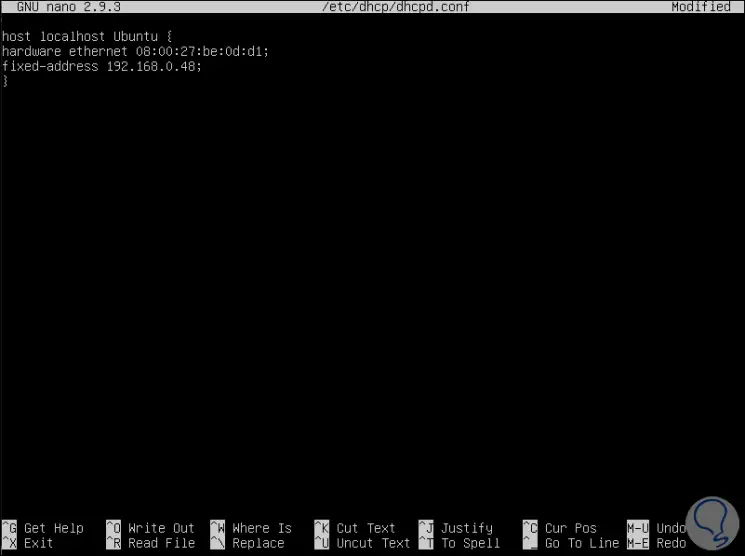
In this case we have indicated the MAC address of the network card as well as an IP address of the DHCP server range, we save the changes with the Ctrl + O keys and exit with the Ctrl + X keys.
Step 3
Restart the system and when executing the ifconfig command we will see that the DHCP server has granted that exclusive IP to said equipment:
Step 4
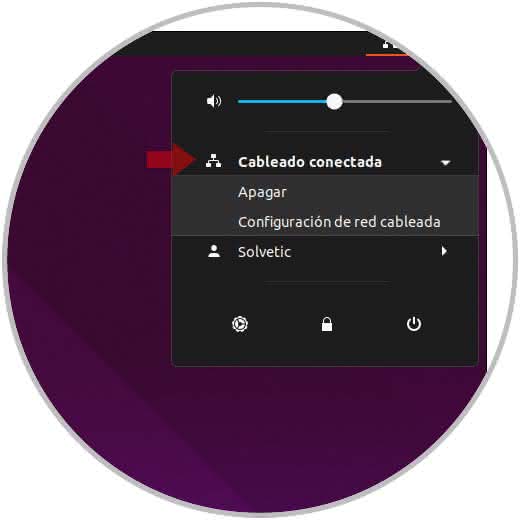
Now, so that IP addresses are granted automatically and randomly, in this case we will use a client computer with a graphical interface, there we must click on the network icon located at the top of the screen and click on our type of network and then select the option “Wired network configuration†in this case:
Step 5
The following will be displayed:
Step 6
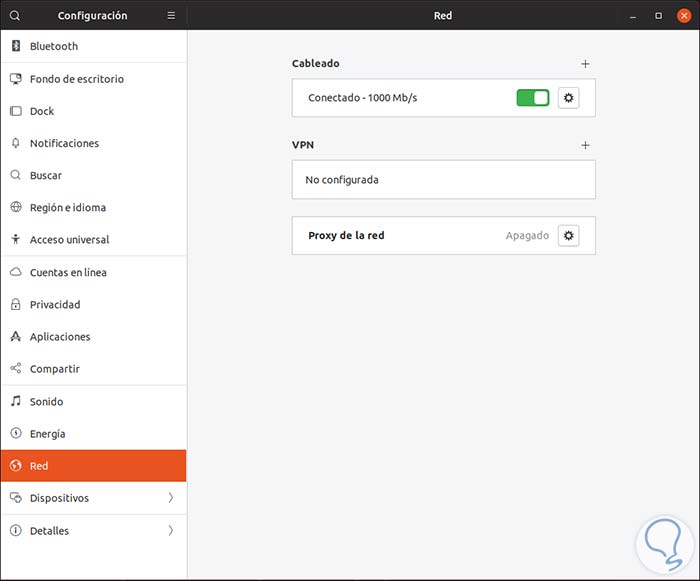
There we click on the pinion icon located in the type of network and in the displayed window we go to the IPv4 tab and there we define the Automatic box (DHCP) in the IPv4 Method field
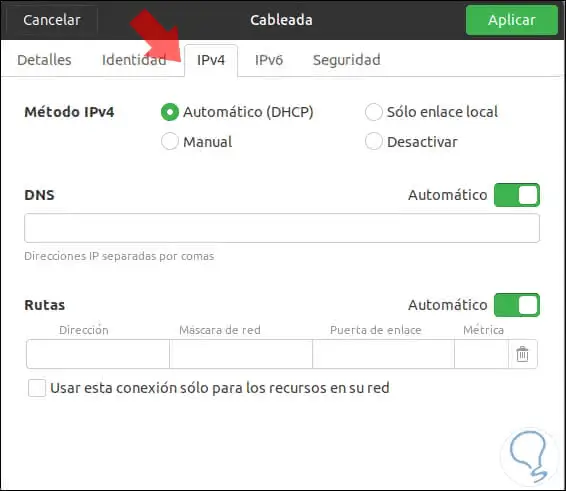
Step 7
Click on Apply to save the changes and from now on in each connectivity the DHCP server will be responsible for assigning the IP address to that equipment:
We have learned the importance that DHCP has in our daily connectivity tasks and with TechnoWikis you can see how you can install and configure DHCP in Ubuntu 18/19 in a functional, safe and best of all way thanks to which address assignment tasks IP will be something much more dynamic from now on.