At the networking level the DHCP (Dynamic Host Configuration Protocol) protocol is one of the most used for its function and capabilities that provide for IP addressing in a local network..
The DHCP protocol is based on the client / server model and its basic mission is to allow a server to automatically assign an IP address along with other network configuration parameters such as the subnet mask and the gateway to a client in a network. This simplifies the tasks of the administrators since it avoids doing this work manually which implies time and resources.
One point to keep in mind is that the IP address assigned through the DHCP server to a DHCP client goes into a "lease" state, and this lease time will depend on how long the DHCP connection or configuration is requested. Thanks to DHCP, we will know that client computers will have an assigned IP address, which guarantees their browsing and connectivity on the network..
This is why in this tutorial TechnoWikis will explain how we can install and configure a DHCP server in CentOS 7 and Ubuntu 18.04.
1. How to install the DHCP protocol on CentOS 7 and Ubuntu 18.04 (Linux)
Step 1
The DHCP server package is available in the official repositories of the Linux distributions, for this we execute the following commands:
If we use Ubuntu 18.04
We will execute the following:
sudo apt install isc-dhcp-server
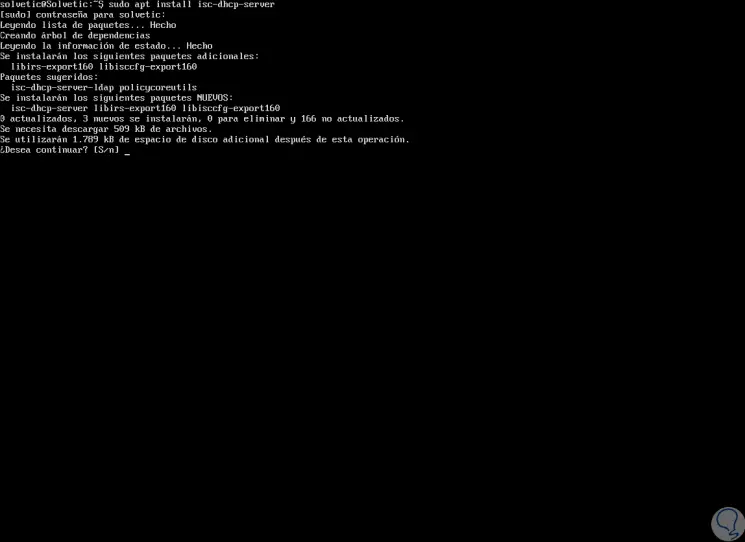
There we enter the letter "S" to confirm the download and installation.
In the case of CentOS 7
We execute the following:
yum install dhcp
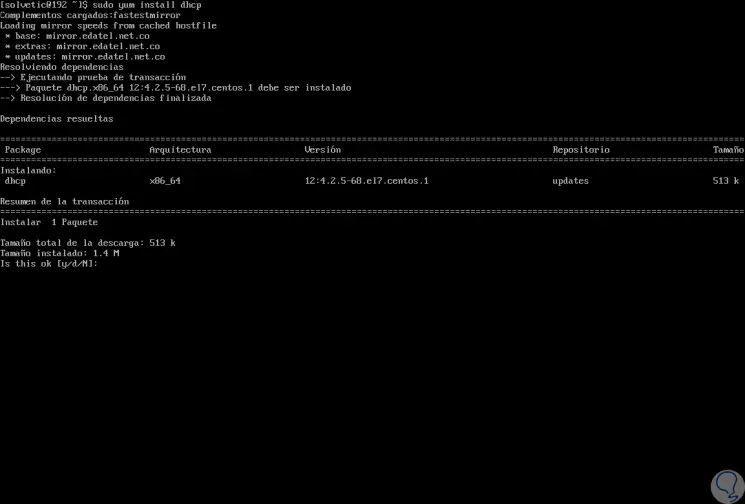
Enter the letter "y" to confirm the download and installation of DHCP.
Step 2
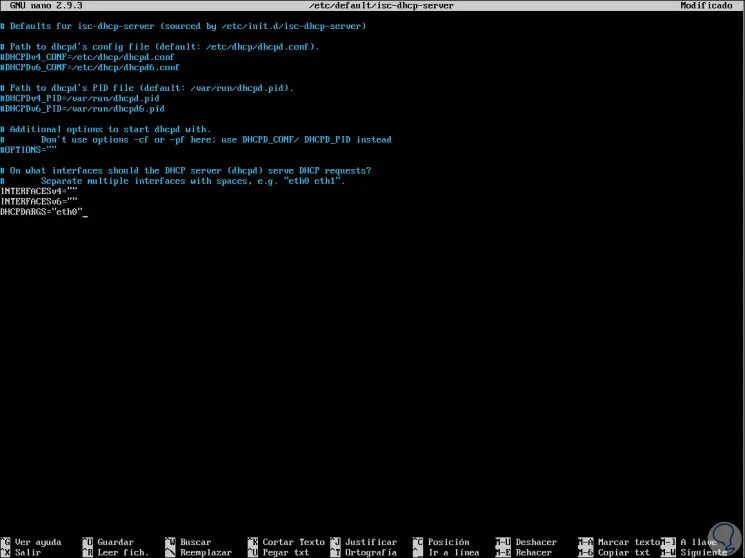
Once the installation process is finished, we must configure the interface on which it is desired that the DHCP daemon manage and manage the requests through the configuration file:
/ etc / default / isc-dhcp-server
or
/ etc / sysconfig / dhcpd
In the case of CentOS 7 we execute
nano / etc / sysconfig / dhcpd

At the bottom we must add the line:
DHCPDARGS = â€eth0â€
We save the changes with the keys:
+ O Ctrl + O
We leave the editor with the keys:
+ X Ctrl + X
In Ubuntu 18.04
We will go to the next line
sudo nano / etc / default / isc-dhcp-server
We also add the line:
DHCPDARGS = â€eth0â€
2. How to configure DHCP on CentOS 7 and Ubuntu 18.04 (Linux)
The main DHCP configuration file is located in the path:
/etc/dhcp/dhcpd.conf
The configuration associated with all the network parameters that must be ready for the clients is hosted there.
This file is based on a list of statements grouped into two categories that are:
Global parameters
There you can specify how a task is to be executed, which network configuration parameters are to be delivered to the DHCP client and more.
Declarations
There we can define the network topology, the current state of the clients, generate addresses for the clients or apply a group of parameters to a group of specific declarations.
Step 1
To access this file we execute the following:
In CentOS 7
cp /usr/share/doc/dhcp-4.2.5/dhcpd.conf.example /etc/dhcp/dhcpd.conf vi /etc/dhcp/dhcpd.conf
In Ubuntu 18.04
sudo nano /etc/dhcp/dhcpd.conf
Step 2
There, first, we will define the global parameters for all compatible networks, at the top of the file, this will apply to all statements, there we enter the following:
option domain-name "solvetic.lan"; option domain-name-servers ns1.solvetic.lan, ns2.solvetic.lan; default-lease-time 3600; max-lease-time 7200; authoritative;
Then we must define a subnet for an internal subnet.
subnet 192.168.1.1 netmask 255.255.255.0 { option routers 192.168.1.1; option subnet-mask 255.255.255.0; option domain-search "solvetic.lan"; option domain-name-servers 192.168.0.1; range 192.168.0.20 192.168.0.40; range 192.168.0.50 192.168.10.80; } 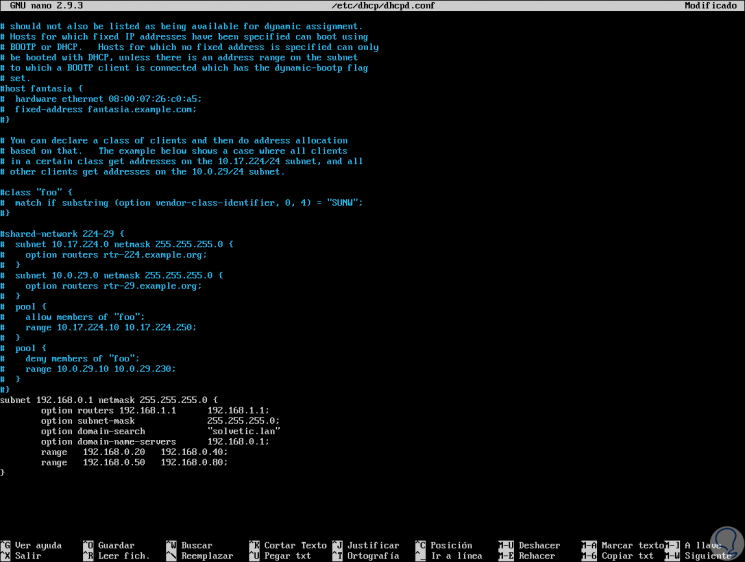
After this we save the changes..
Step 3
Once the DHCP server daemon is configured, it will be necessary to start the service and enable it in order to start automatically at the next system startup, and verify if it is working in the manner with the following commands:
In CentOS 7
systemctl start dhcpd systemctl enable dhcpd systemctl enable dhcpd
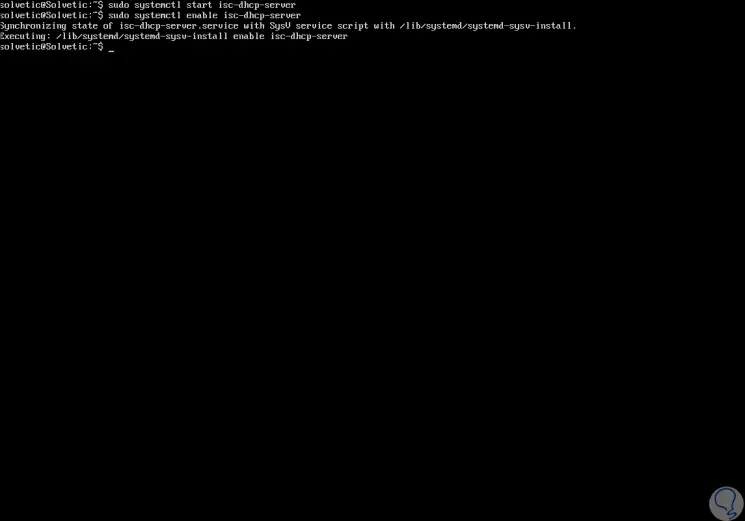
In Ubuntu 18.04
sudo systemctl start isc-dhcp-server sudo systemctl enable isc-dhcp-server sudo systemctl enable isc-dhcp-server
Step 4
After this, we must allow requests to the DHCP daemon in Firewall, which listens on port 67 / UDP, so that we execute the following:
In CentOS 7
firewall-cmd --zone = public --permanent --add-service = dhcp firewall-cmd --reload
On Ubuntu 18
sudo ufw allow 67 / udp sudo ufw reload

3 . How to configure clients for DHCP on CentOS 7 and Ubuntu 18.04 (Linux)
The last step is to validate if the DHCP server works correctly, for this we must log on the client machines on the network and configure them so that they automatically receive IP addresses from the configured DHCP server.
There we must modify the appropriate configuration file for the interface in which the clients will automatically receive the IP addresses.
Configuration in CentOS 7
In the case of CentOS 7 we must access the following file:
nano / etc / sysconfig / network-scripts / ifcfg-eth0
There we enter the following lines or validate that they already exist:
DEVICE = eth0 BOOTPROTO = dhcp TYPE = Ethernet ONBOOT = yes
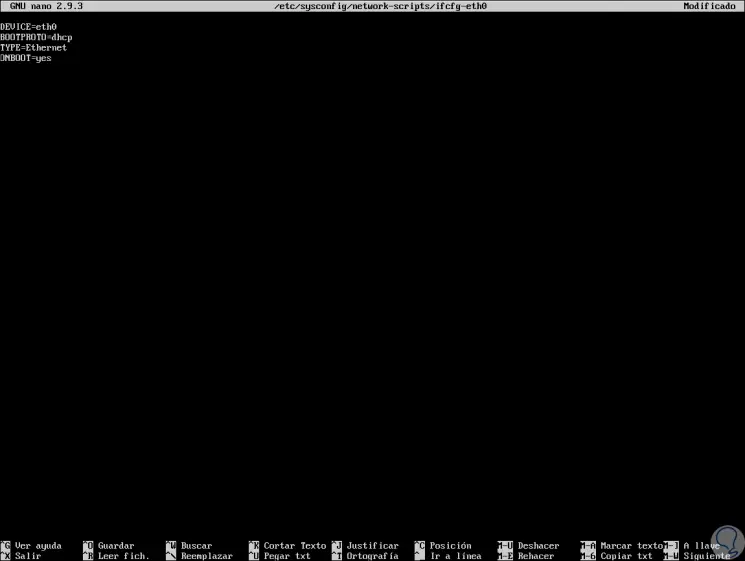
We save the changes and restart the service by running:
systemctl restart network
Ubuntu 18.04 configuration
In the case of Ubuntu 18.04 we will access with the following line:
sudo nano /etc/netplan/01-netcfg.yaml
There it will be necessary to enable dhcp4 on a specific interface and comment on the settings related to static IP:
network:
version: 2 renderer: networkd ethernets: eth0: dhcp4: yes
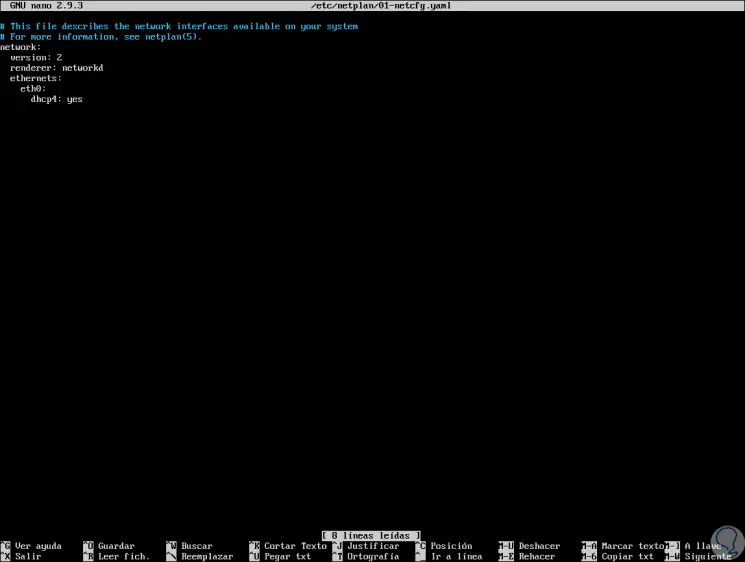
We save the changes and update them by executing:
sudo netplan apply
Note
To access more DHCP help we can execute any of the following commands:
man dhcpd man dhcpd.conf
Thus, DHCP is a useful protocol for management and address control .