One of the most essential network aspects in all types of organization as well as at the household level is the DNS. Many times we have heard about this term but we do not usually know in detail what DNS is and how it works in our systems (it is vital to understand a bit to be up to date with its use). Therefore it is more than vital to understand this term to know more about the functioning of the Internet when we access a page..
The DNS (Domain Name System) fulfills a very simple task, providing us with access to websites. We all access the Internet daily, right?, Entering the host name directly but not your IP address. Let's see it this way, it is much easier to enter the URL www.solvetic.com than to enter the IP address 46-105-203-22, or do you prefer to learn all the addresses of the visited sites ?, the decision is yours but the DNS saves us A lot of mental waste in this task.
Assignments between host and IP addresses are hosted on the DNS servers . This facilitates the task of translating domain names into addresses with the clear objective that computers in the network can detect and redirect to those sites or devices..
DNS benefits
When we use a DNS we acquire advantages such as:
- It facilitates access to a site directly by its name.
- It allows the use of a domain name hierarchy which may be independent of another IP address assignment.
- It allows to establish a new IP address in case the IP address of the host is modified.
- Facilitate routing to the destination.
Within this whole world you must stop worrying about configuring or managing DNS in Linux since this is a process that is automatically integrated with the ISP (Internet Service Provider) when it is linked to the configuration of company network. But it is possible to change this DNS if it presents errors, slowness, failures in the delivery of packages or more, for this reason has created this tutorial, to teach you to change the DNS servers in Linux and for this case we will see how to do it in Ubuntu 19.04 but the process is similar in Ubuntu 18.04 or Ubuntu 18.10.
1. How to change the DNS in Ubuntu 19.04 or Ubuntu 18.04
Step 1
To start this process we will access the network configuration directly from the top menu of Ubuntu:

Step 2
There we click on the line "Connected wiring" and in the options that we will see the section "Wired network configuration":

Step 3
We click there to access the configuration parameters of the available network in Ubuntu whether wired or wireless:
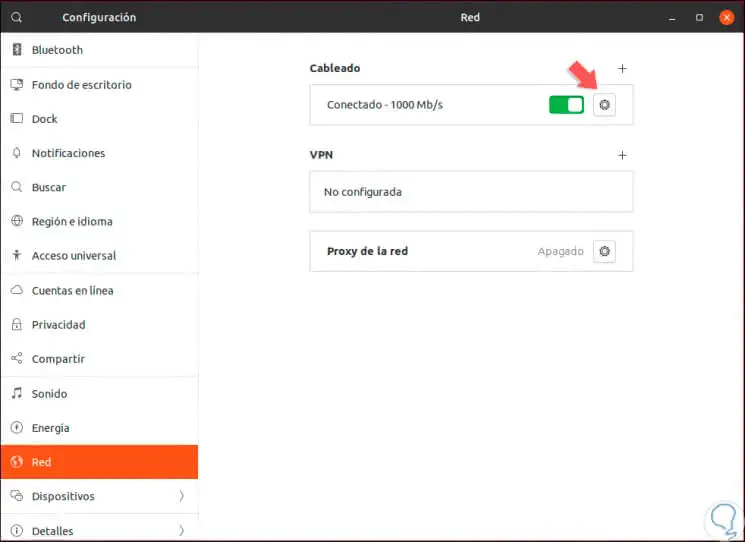
Step 4
There we click on the gear icon in the "Wired" section and the following window will be displayed where we will see by default the following:
- IPv6 address assigned (if enabled)
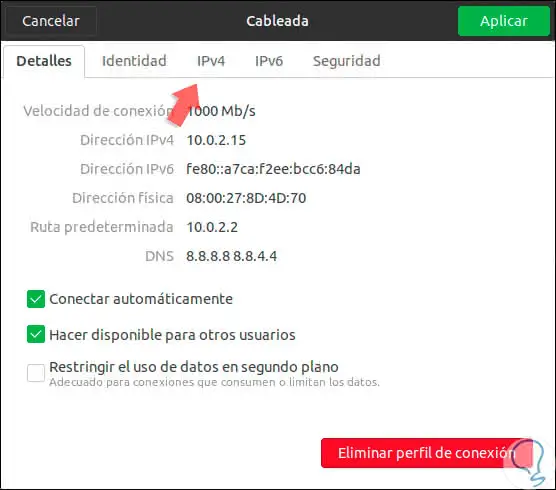
Step 5
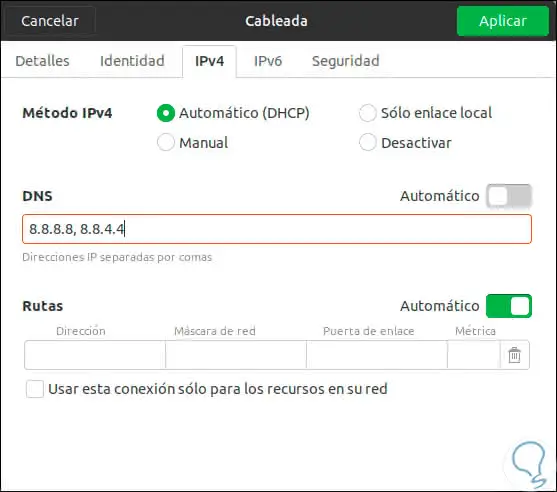
To proceed with the change of the DNS server we will go to the tab "Ipv4" where we will see the following:
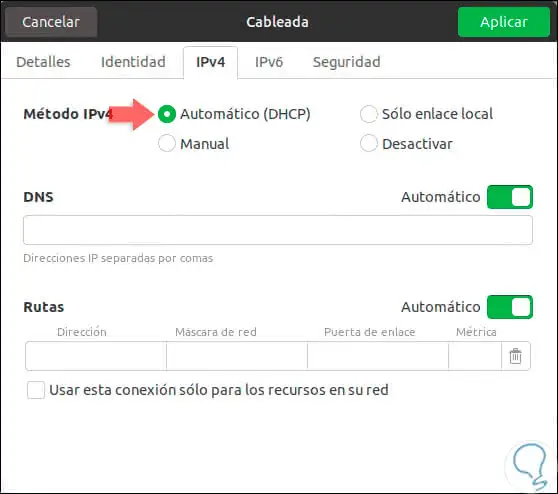
Step 6
As we can see, the default method is "Automatic (DHCP)", that is, the DNS server address is being taken directly by the configuration of the ISP, to change the DNS of Ubuntu we must press the "Automatic" switch in the DNS section and there enter the desired address:
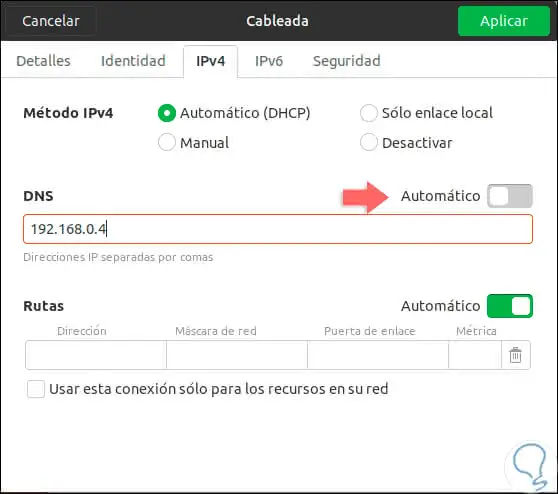
Step 7
Another option is to make use of Google's public DNS servers which are reliable and reliable with great performance capacity, they use the following IP addresses. Remember that each entered address must be separated by commas. When we enter these values ​​we click on the Apply button to complete the process.
2. How to change the DNS with commands in Ubuntu 19.04 or Ubuntu 18.04
Step 1
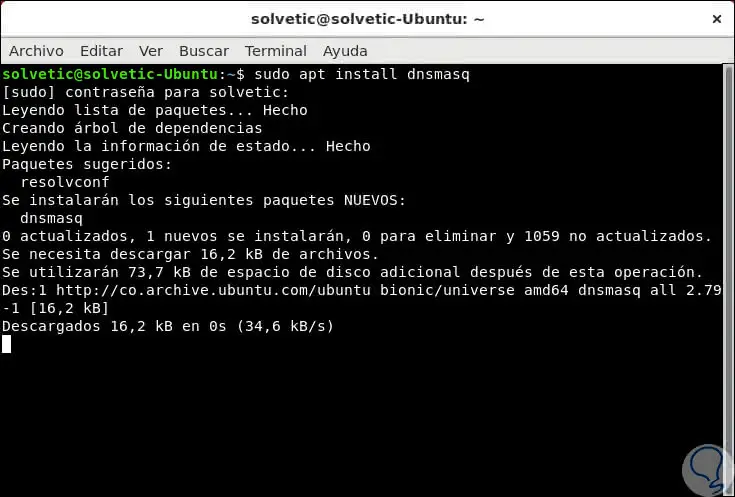
Now, if you are curious users who want to work with the TechnoWikis terminal has a surprise for you, this is that we can make this change directly from the console, for this we access the terminal and there we execute the following line:
sudo apt install dnsmasq
Step 2
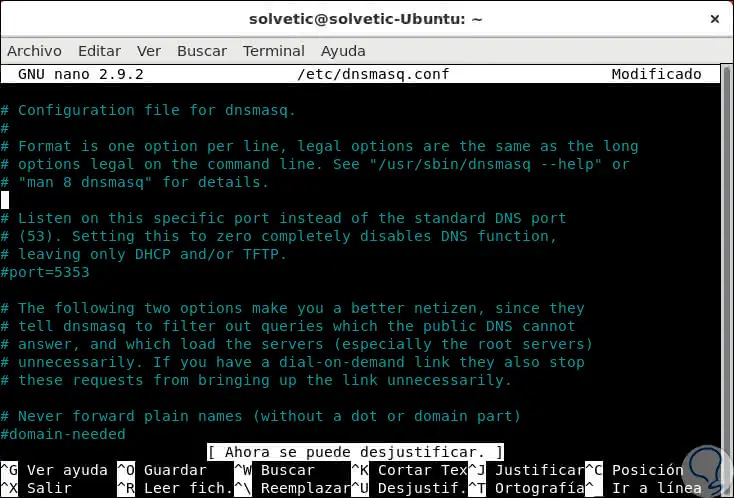
Once this utility is installed, we will access the dnsmasq configuration file by executing the following line:
sudo nano /etc/dnsmasq.conf
Step 3
There we will find the following:
Step 4
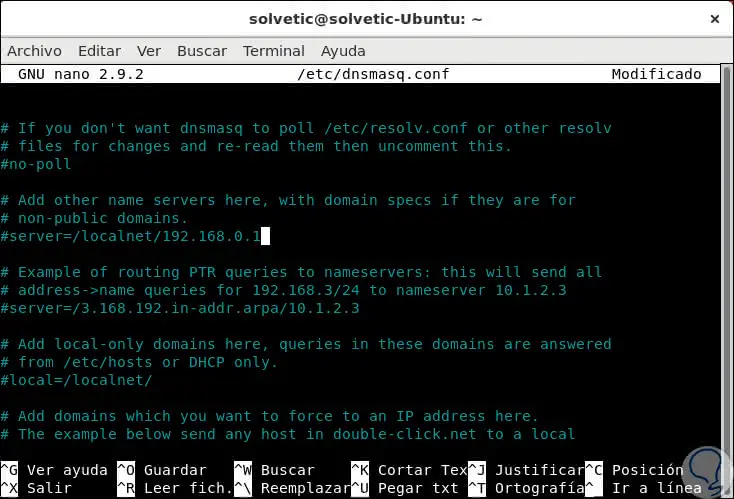
In this file we will place the line "Add other nameservers here" and there we enter the IP address of the desired DNS server:
Step 5
We save the changes using the following key combination:
+ O Ctrl + O
We exit the editor using:
+ X Ctrl + X
Step 6
Another option available through the terminal is to access the file of the network interfaces, for this we execute the following:
sudo nano / etc / network / interfaces
Step 7
If we are using DHCP we will see the following:
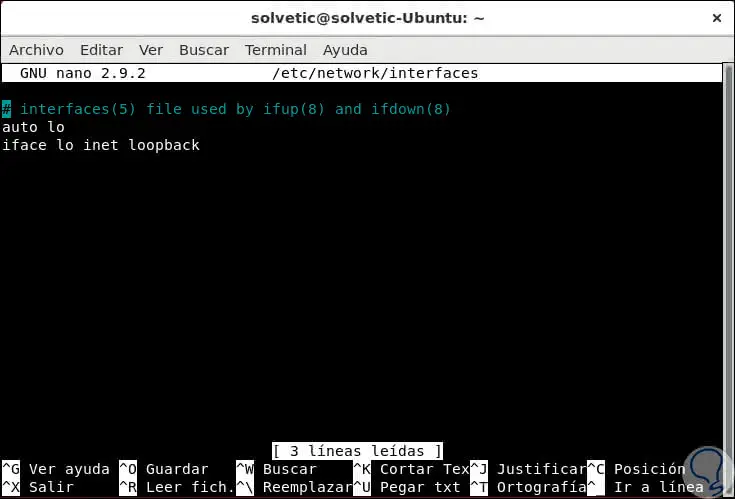
Step 8
At the bottom of this file we will add the following line with the desired IP address:
dns-addresses 8.8.8.8,8.8.4.4

Step 9
We save the changes using the following key combination:
+ O Ctrl + O
We exit the editor using:
+ X Ctrl + X
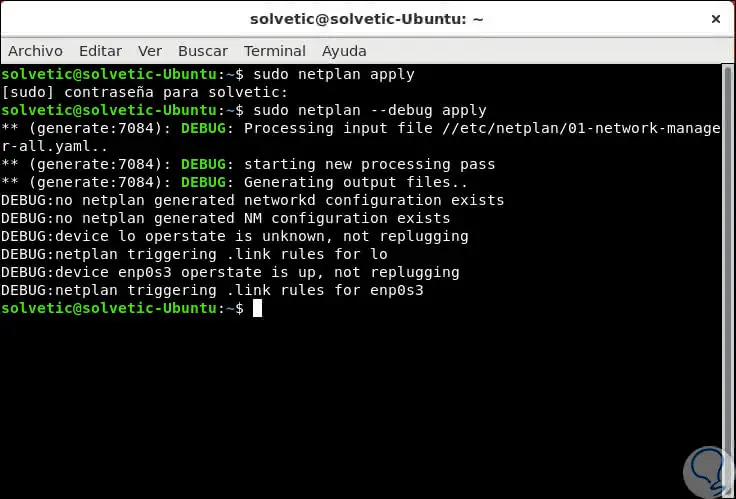
Step 10
Now to apply the changes in the network we will execute the following:
sudo netplan apply sudo netplan --debug apply
Step 11
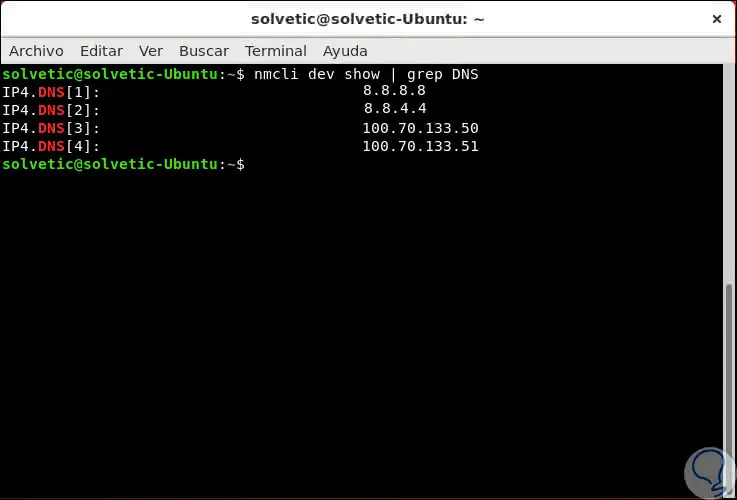
Finally we can verify the IP addresses of the DNS servers in Ubuntu by executing the following:
nmcli dev show | grep DNS
With some of these methods it will be possible to establish a new DNS in Ubuntu 18.04 or 19.04 to improve all the connectivity and navigation tasks..