I did not know very well what title to give to this article, since I will collect a series of instructions with which to
recover a system that returns a kernel panic error
. This type of error is well known and quite frustrating, since the operating system does not start, remaining inaccessible. Specifically we will talk about the solution when we find the error message:
kernel panic - not syncing: VFS: Unable to mount root fs on unknown - block (0,0).

The origin of the error.
In my case the problem came after updating an Ubuntu server with the usual commands:
sudo apt-get update
and
sudo apt-get upgrade
. After the update, I saw a message on the screen asking me to restart the system.
My surprise was that after rebooting, I came across the error message
"kernel panic - not syncing: VFS: Unable to mount root fs on unknown - block (0,0)"
and there began the stress. It was a VPS server with the operating system Ubuntu Server 16.04
(64 bits)
hired in the company Vultr.
Although it is a server, these instructions will work on home computers and will also work on servers from other companies. The solution was found in
this post
from the Ubuntu forums, but I will try to give more details on the subject.
Recover the system once the kernel panic - not syncing error has been identified with Finnix.
Once I had the error identified, the first thing that went through my head is to
create a backup of those important files
. This step is almost
mandatory
, because if for some reason the recovery process goes wrong, we will always have a backup.
As the operating system does not boot, we must resort to a LiveCD recovery. There are many, but the one I liked the most is
Finnix
, based on Debian.
Booting Finnix on a PC.
If we are going to use it on a PC, we will have to create a bootable USB pendrive with this LiveCD or we can burn it directly to a CDROM. Once it starts, we must follow the instructions on the screen to get a shell in the system.
Booting Finnix in Vultr.
I have chosen Finnix, because it is also available in Vultr and
we can upload it as a custom ISO
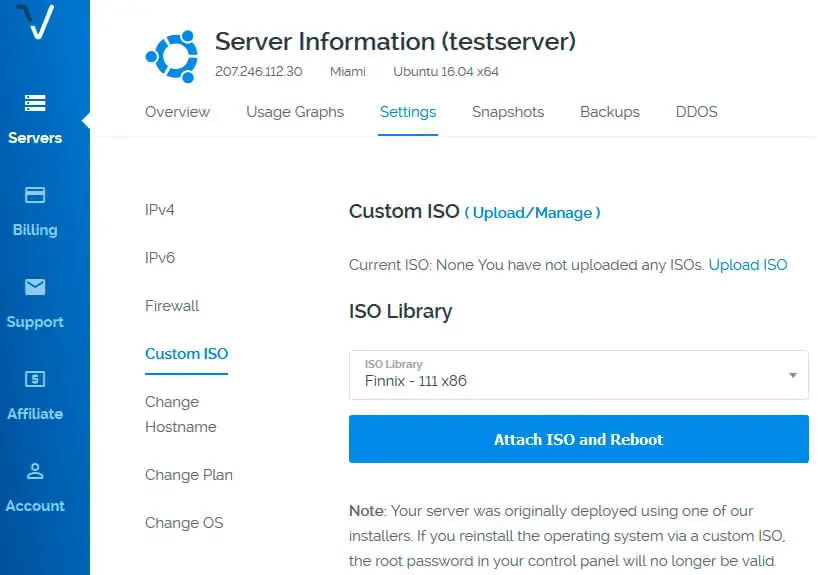
. To load Finnix, we access the Vultr control panel, then select the server we want to recover and go to the
Settings → Custom ISO
and select
Finnix - 111 x86
. Finally we press the
Attach ISO and Reboot
.

Now we will wait for the ISO transfer to finish and click on the
View console
button.

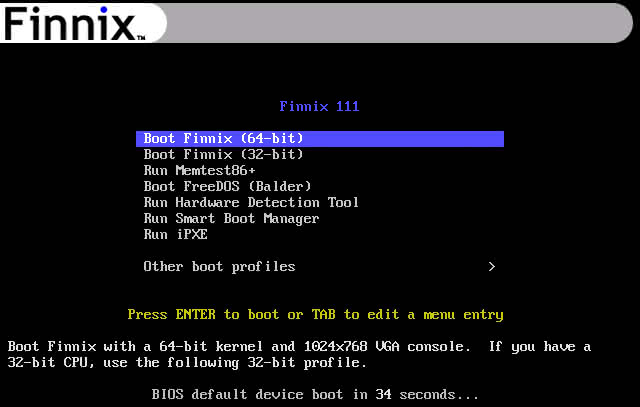
At this point we will have on screen something similar to what we see in the following image.

We only have to
select the architecture with which we want to start Finnix
. In my case and in most modern systems, we will select
"Boot Finnix (64-bit)"
. We wait for all modules to load in memory and after a few seconds, we will have a terminal from which to work to recover the system.
Recovering the system and booting with Grub.
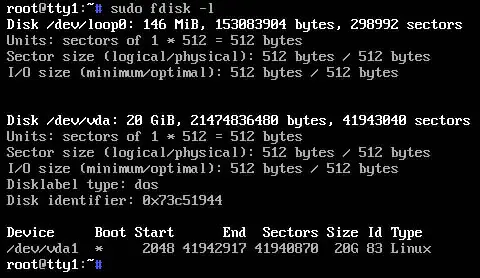
We start by mounting the operating system files that we want to recover. For this, we execute the
sudo fdisk -l
command and see what the system boot partition is.

In my case the partition is
/dev/vda1
, so now I have to mount this partition with the command:
sudo mount /dev/vda1 /mnt
Using the Finnix terminal to make a backup of the files.
In my case the important files will be inside the folder
/mnt/home/zeokat/www
, so the first step is to compress this folder with the command:
tar -zcf backupfiles.tar.gz /mnt/home/zeokat/www
The next step was to transfer the backup file to my PC, for which we can use SFTP or another method you can think of. To be able to access via SFTP, we have to
assign a password to the root user
, for which we execute the
passwd
command.

Next, we start the SSH server with the command:
/etc/init.d/ssh start

Now we can use our favorite
SFTP client
to download the backup files.
We already have the important files backed up, so we will try to recover the system so that it starts correctly. Now we execute the following commands:
sudo mount --bind /dev /mnt/dev
sudo mount --bind /dev/pts /mnt/dev/pts
sudo mount --bind /proc /mnt/proc
sudo mount --bind /sys /mnt/sys
To finish, we execute:
sudo chroot /mnt
update-initramfs -u -v
grub-install --recheck /dev/vda
update-grub
reboot
If you are on a Vultr server, when you execute the
reboot
command, a message will surely appear on the screen saying
"Running in chroot, ignoring request"
. So you must first execute the
exit
command and then you can execute the
reboot
command. Finally, we use the button that says
Remove ISO
in the
Settings → Custom ISO
of the Vultr control panel.