Each new operating system that is released always brings with it expectations, improvements, new features and a host of functions with which it seeks to attract the attention of the end user, which is why Apple has introduced macOS Big Sur which promises us new functions such as:
MacOS Big Sur Features
- Updated notification center
- Improvements in Safari, Maps and Messages and much more
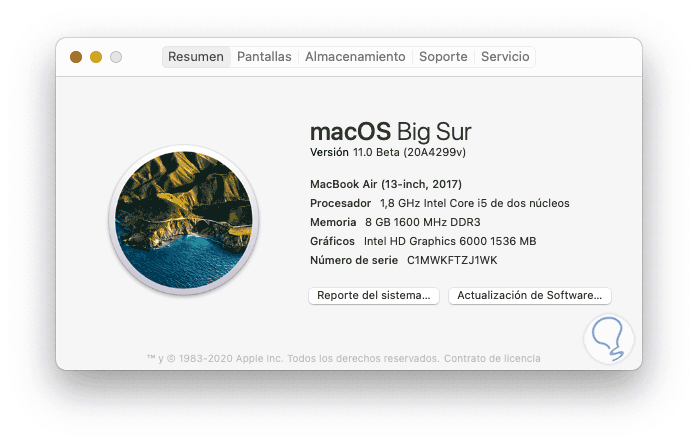
Although all this sounds great, it still takes some time to have macOS Big Sur officially, but if you belong to Developer Apple you can download the beta of macOS Big Sur and install it on your computer to get the idea of what awaits you. But this can carry with it a series of problems since being a beta edition is prone to errors, this is precisely the purpose of the developers. Know the Mac bugs to correct them in the stable edition , so if your team is experiencing instability or errors..
TechnoWikis will explain how to uninstall macOS Big Sur and return to macOS Catalina.
1. Uninstall macOS Big Sur and return to macOS Catalina with TimeMachine
TimeMachine is the backup utility that is integrated into macOS and thanks to it we will have integrity and availability of information, this is therefore one of the options to return from Big Sur to Catalina.
Step 1
This method consists of creating a backup of Time Machine before we have updated the system to macOS Big Sur, we go to TimeMachine from System Preferences and we will see the following:

Step 2
There we click on "Select backup disk" and proceed to select the disk that we will use to host the backup:

Step 3
We click on "Have Disk" and then select the information to be backed up.
When the backup has been created, it is time to restore the operating system to macOS Catalina using the TimeMachine backup, in this case we must restart or turn on the computer and during this process we press the Command + R key combination which allows us to open the macOS utilities:
⌘ + R
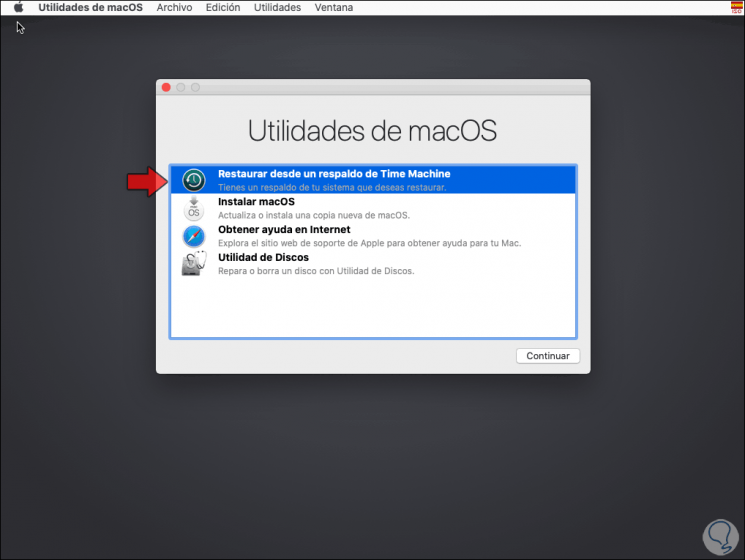
Step 4
Select the option "Restore from a TimeMachine backup" and click "Continue" and we will see the following:
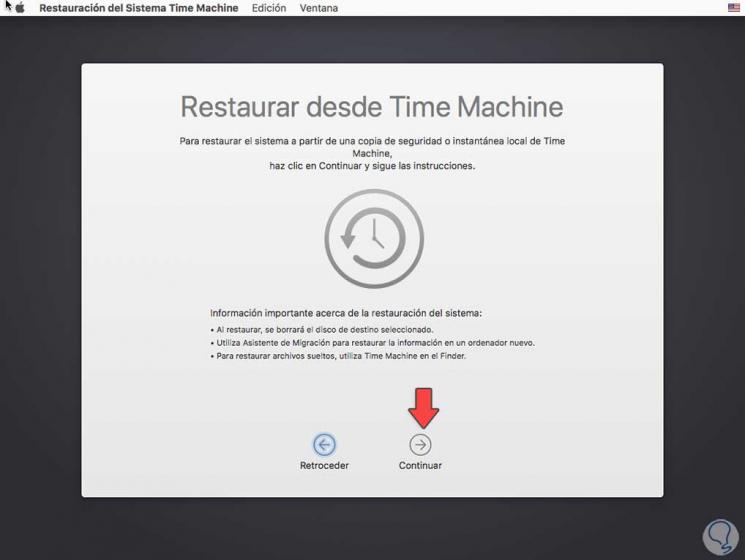
Step 5
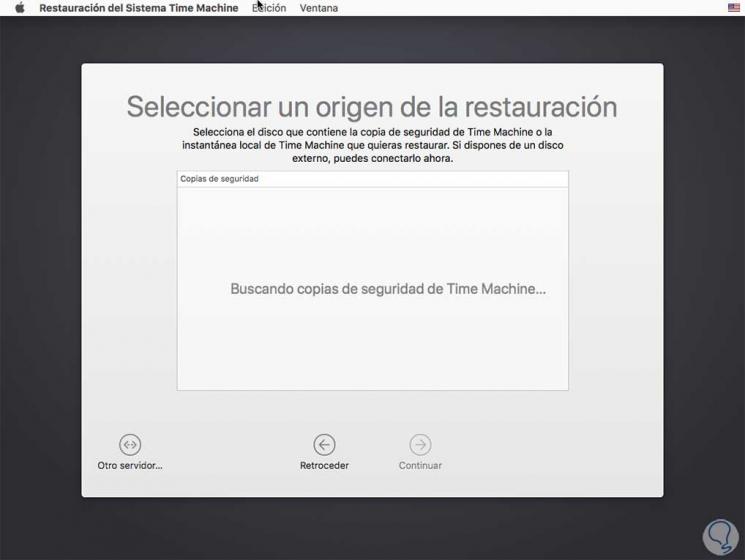
There we click "Continue" and TimeMachine will search for the backup copies available on the disk:
2. Uninstall macOS Big Sur and return to macOS Catalina with USB
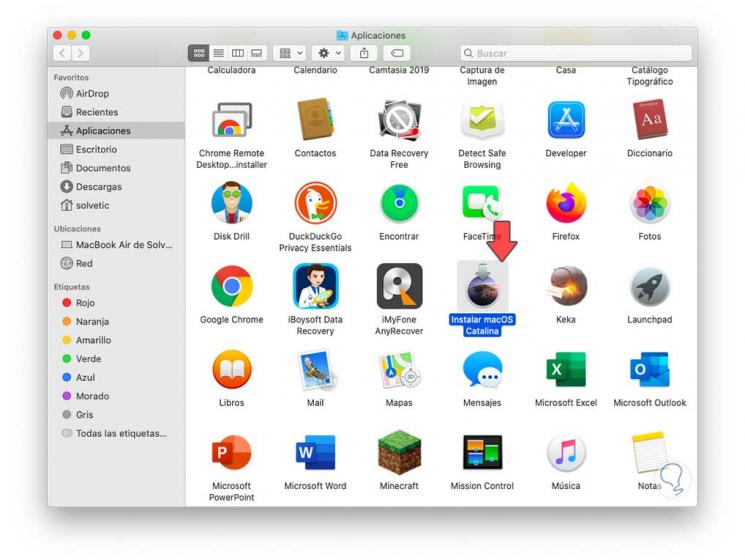
This may seem a more complex method for all that it implies, but be careful and with TechnoWikis you will see that it is simple if you follow the steps in detail, the first thing to do is access the App Store and from there download the macOS Catalina executable.
Step 1
We will see this available from Applications:
Step 2
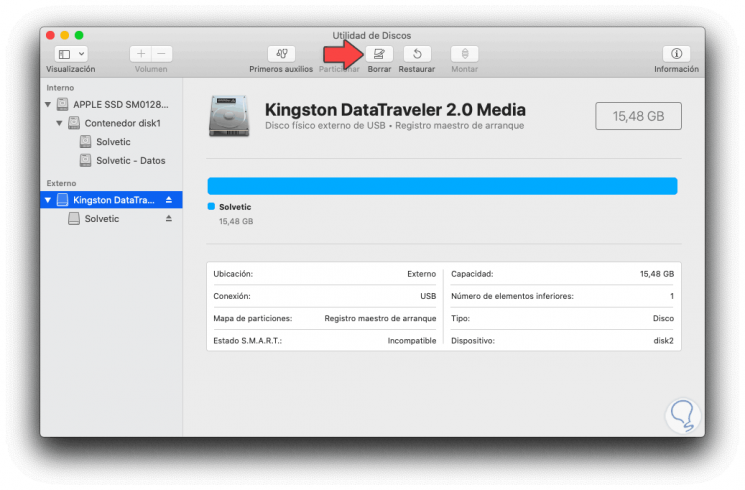
With this installer available it is time to connect the USB on the computer and go to Disk Utility, there we will see the connected USB:
Step 2
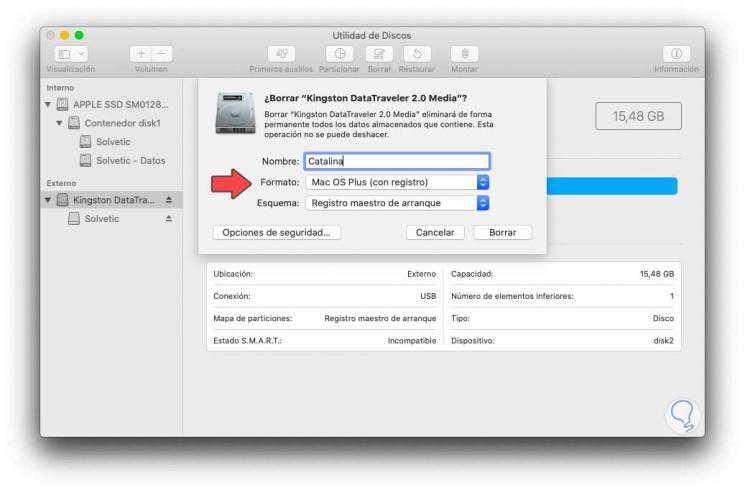
We click on the "Delete" button and in the pop-up window we define the following:
- Name to assign to the USB that we have connected
- In the Format field we must assign the Mac OS Plus option (with registration)
Step 3
We click "Delete" to proceed with the USB format, this will cause all data to be lost:

Step 4
When the process is complete we will see the following:

Step 5
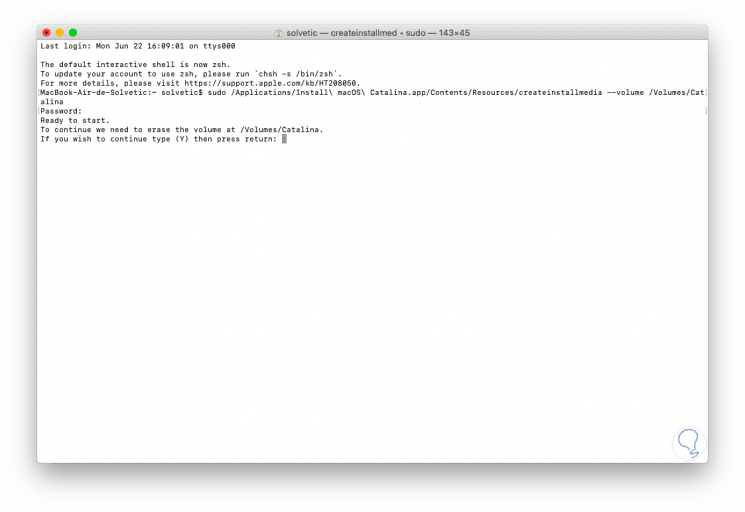
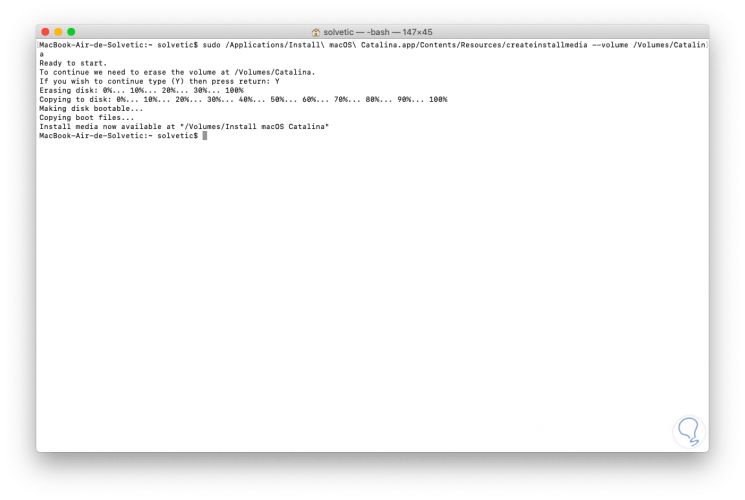
After this we access the terminal and we will create the USB media with macOS Catalina by executing the following:
sudo / Applications / Install \ macOS \ Catalina.app/Contents/Resources/createinstallmedia --volume / Volumes / "USB Name"
Note
In "USB Name" we must enter the name that has been assigned to the USB in the previous step.
Step 6
We enter the letter "Y" and hope that the USB creation process is complete:
Step 7
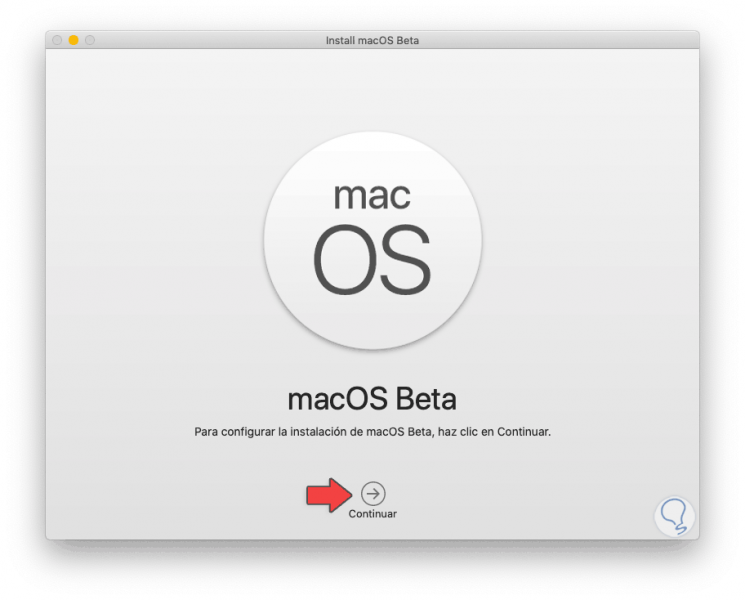
When this ends, we restart the computer and hold down the Command key to display the list of disks, there we must select the disk that we have created and click on it, this will launch the macOS Big Sur beta installation wizard:
3. Uninstall macOS Big Sur and return to macOS Catalina with Restoration
This is a somewhat stricter method since it will erase and restore the computer to its factory state with the operating system utilities..
Step 1
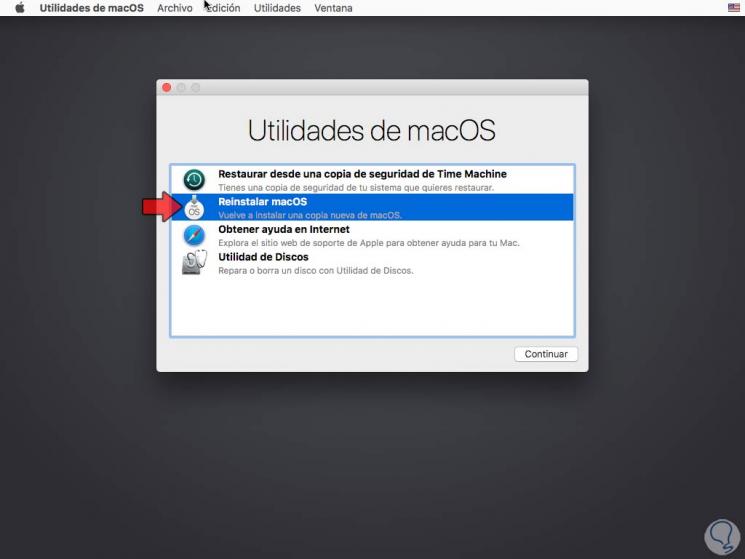
We restart the computer by pressing the Command + R keys and in the deployed utilities we select the option "Reinstall macOS":
⌘ + R
Step 2
This will restore the equipment to the factory state and based on the system used we can download the macOS Catalina installer and complete the update process:
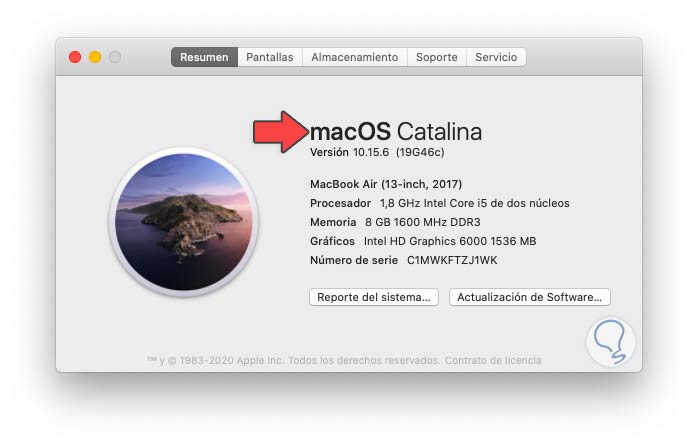
Undoubtedly, macOS Big Sur has a lot to offer us, but if something is not to our liking we can simply revert this installation and return to the previous stable system in this case Catalina.