File systems are designed for each particular operating system and this is why we can see how Windows handles ExFAT and FAT systems , Linux manages ext3, etx4 and macOS systems works with APFS, MacOS Plus systems, etc..
By default, it is impossible to use a Windows or Linux application in macOS and vice versa, so if we need to connect an external disk in the new macOS Big Sur, it is ideal that we learn to format it so that it can be read in macOS and work on it. TechnoWikis will explain how you should format an external hard drive in macOS Big Sur.
To stay up to date, remember to subscribe to our YouTube channel! SUBSCRIBE
How to format macOS Big Sur external hard drive
Step 1
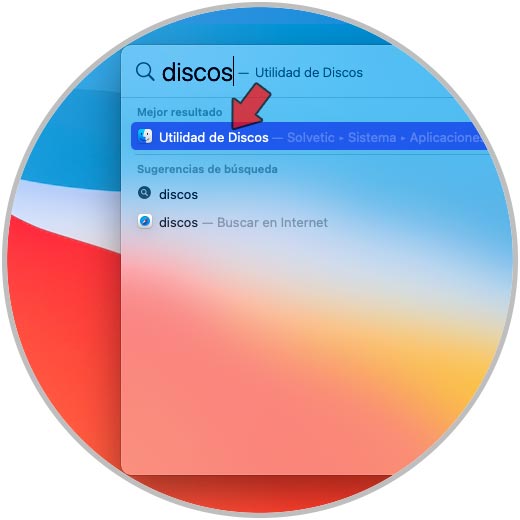
The first thing to do is access Disk Utility and this is accomplished in one of the following ways:
- Entering the term "disks" in Spotligth
- Using the Shift + Command + U keys and in the utilities window select the utility
- On the Go path - Utilities - Disk Utility
Step 2
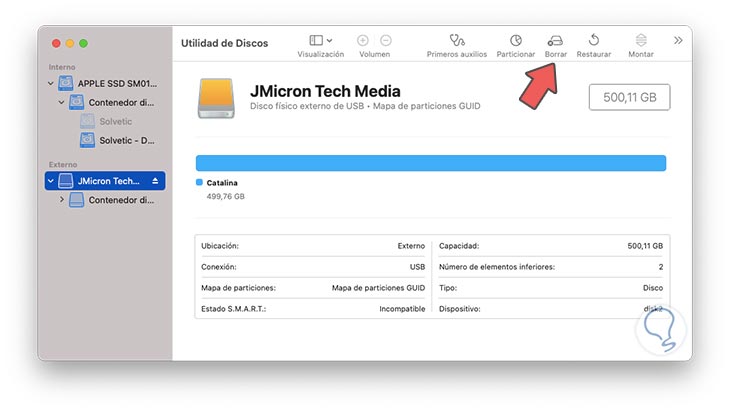
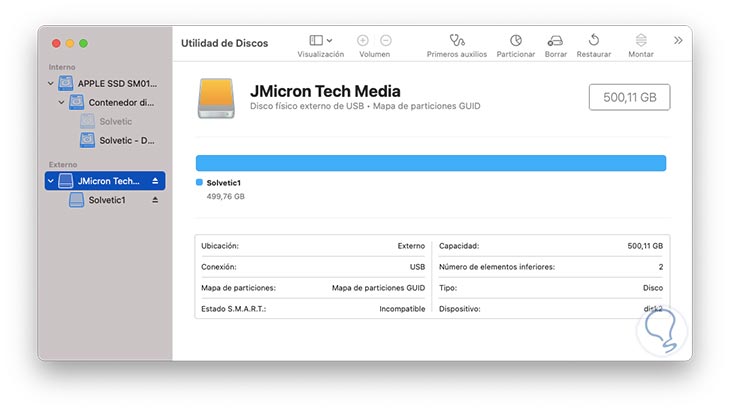
When the utility opens we select the external disk and there we will click on the "Delete" button located at the top of the window:
Step 3
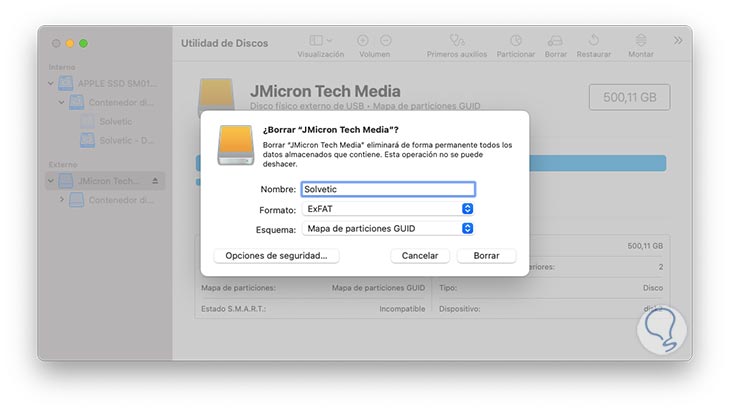
The following wizard will be displayed where we will assign the name to the disk and we can define the file system to apply, the options with:
Apple File System (APFS)
It is the default macOS file system on computers that have solid state drives, it is a system that has encryption improvements, space partitioning, snapshots, fast directory resizing and improved file system fundamentals.
MacOS plus
It is a system not compatible with Windows operating systems and if it supports all the advanced features such as Unicode file, Posix permissions, rich metadata, etc.
MacOS Plus (with registration)
Identical to the previous one only that integrates the advanced file system registry to preserve the integrity of the structure of the volumes that are created
MacOS Plus (case sensitive)
This is a file system that is capable of case sensitive
MS-DOS (FAT)
Known to all, it is a file system compatible with Windows systems, but limited in security and storage capacity.
ExFAT
It is perhaps one of the most popular because it is compatible with all operating systems and has been created in a lightweight, fast format, optimal for use in flash memory and greatly improves security.
Step 4
For this case we select ExFAT so that the disk can be used in macOS and Windows. We click on "Erase" and the process of formatting the external hard drive in macOS Big Sur will start:

Step 5
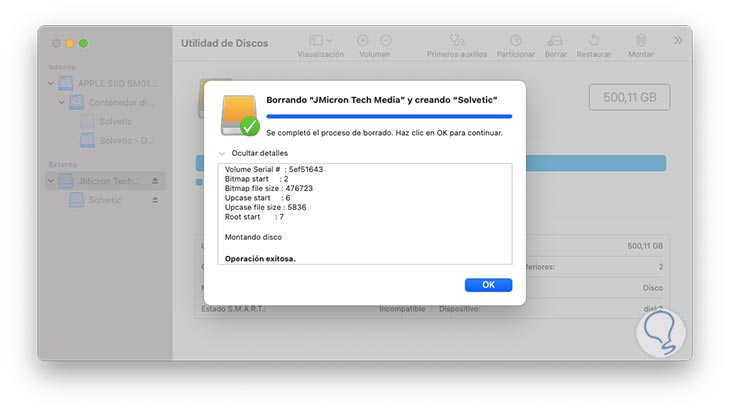
When the process has finished we will see the following:
Step 6
There we find a summary of the actions that were performed on the disc. We click OK to exit the wizard and we will see the properties of the disk that we have formatted:
With this simple method we have formatted an external hard drive in macOS Big Sur..