When we work with the computer, we seek to make the necessary configurations , so that we feel as comfortable as possible and the performance is adequate. Depending on the operating system we are using, these settings may vary, but generally they follow a dynamic in terms of screen, keyboard, etc. settings..
macOS has integrated the Dark mode from previous versions which allows the visual aspect of the desktop in an environment, as its name implies, dark. This mode is used to access a more visually striking design since all the menus, wallpapers and text design will be in this scheme, or if we work at night since the clear aspect has a direct impact on our visual health.
That is why below we will see the steps you must follow to know how to activate dark mode in macOS Big Sur step by step..
To stay up to date, remember to subscribe to our YouTube channel! SUBSCRIBE
How to activate dark mode in macOS Big Sur
Step 1
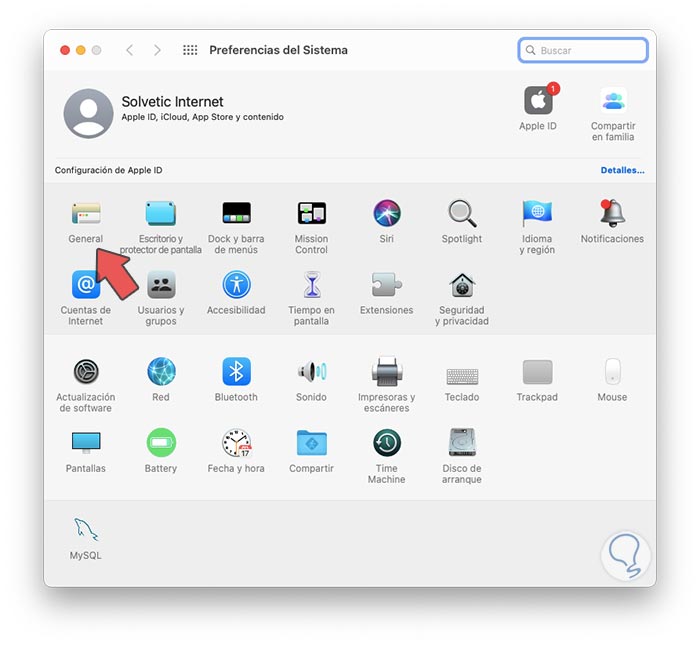
To do this, access System Preferences using one of the following methods:
We will see the following. There we go to the "General" section
Step 2
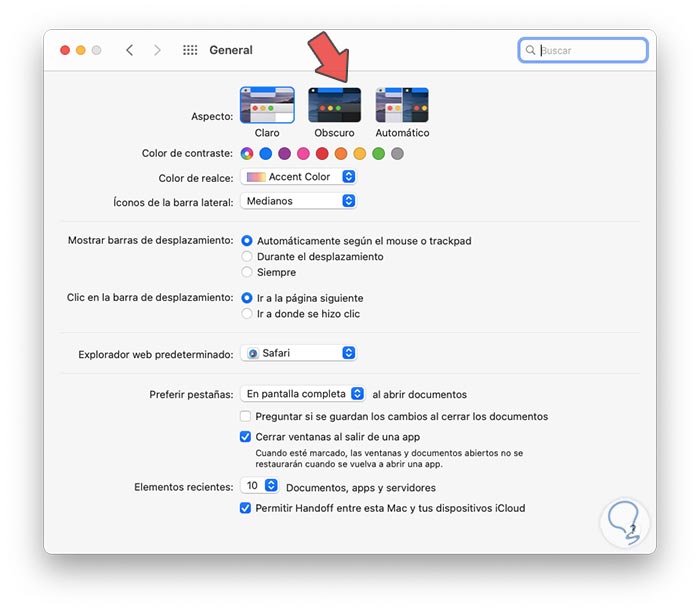
We will see the different options in the "Appearance" section, in this case we click on "Dark"
Step 3
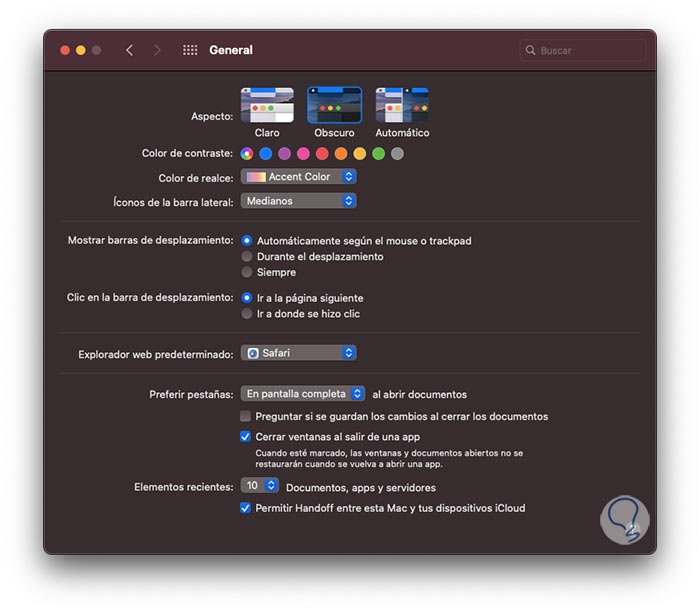
The change will be applied immediately:
Step 4
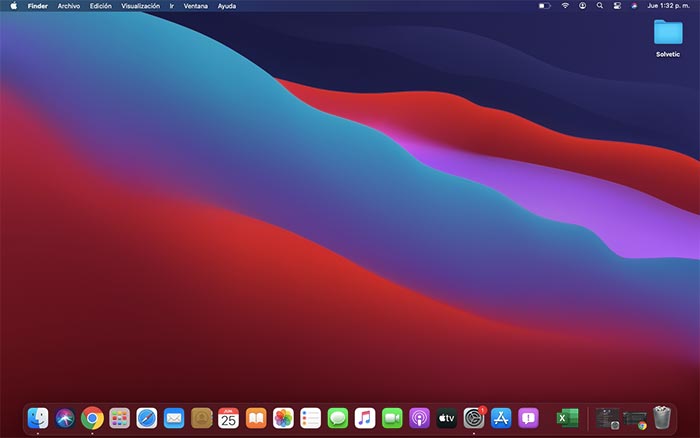
This, as we said, has an impact on the entire design of macOS Big Sur applications and menus:
Step 5
If we go back to General - Appearance, we find the “Automatic” option which is in charge of adjusting the aspect based on the time of day, so if we select Automatic, the mode to use will be clear since it is still daylight:
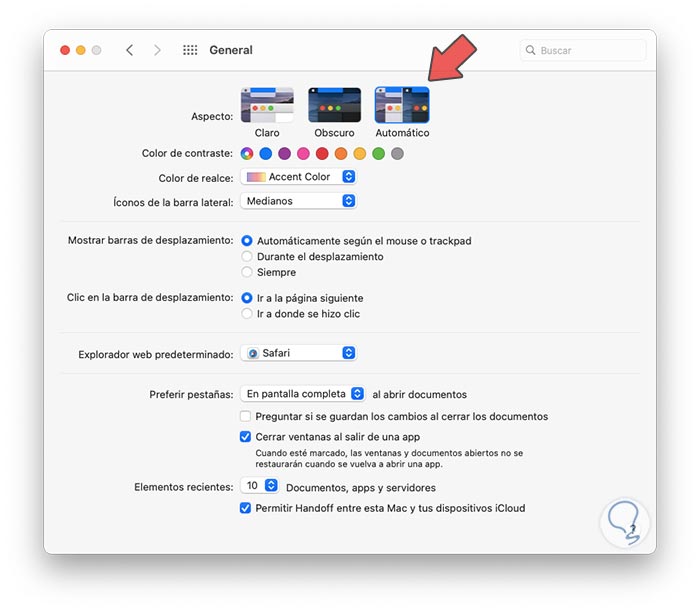
At the bottom we find another series of additional options to adjust the contrast colors of macOS Big Sur.
It's that simple to activate dark mode in macOS Big Sur..