Many of us use the computer on a daily basis, since it has become an indispensable device for many users, both personally and professionally. That is why being comfortable during its use is important, since we usually spend many hours in front of the screen..
Customizing the work environment is something that many users identify from others, since for them it is not enough to use the system default values, but to resort to additional options to improve the visual impact and access to objects. In this way we can identify more directly and quickly what we are looking for on the screen of our Mac.
In the case of macOS Big Sur, we have an option to change the color of the folders or assign text, when we create a folder. For example, on the desktop, we can see the default value of this:
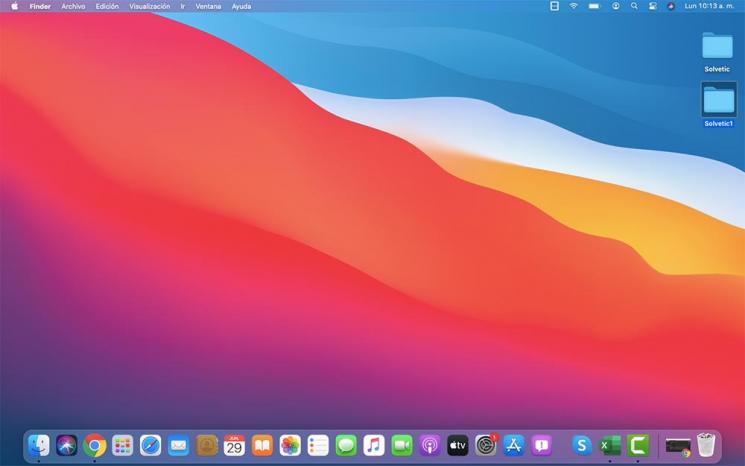
TechnoWikis will explain the functional method to establish a new color to a folder and assign some type of text to better identify it..
To stay up to date, remember to subscribe to our YouTube channel! SUBSCRIBE
How to change the color of folders in macOS Big Sur
Step 1
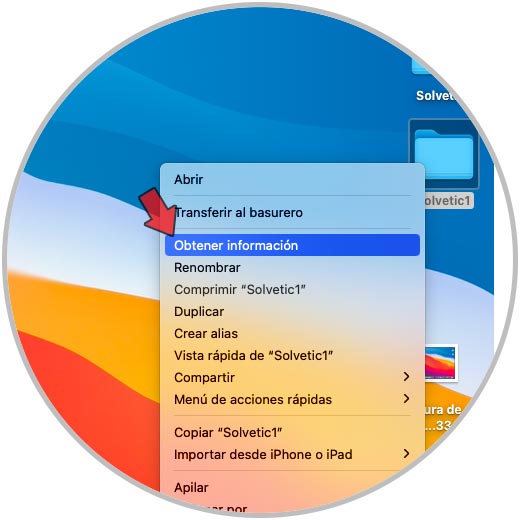
The first thing we must do is right-click (Ctrl + click) on the folder to be modified and in the displayed list select "Get information":
Step 2
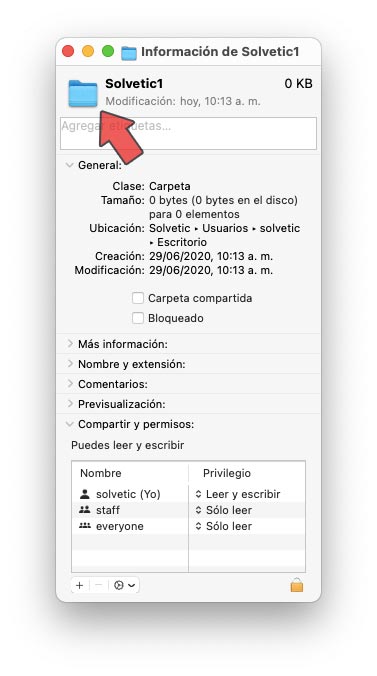
This will display a popup with all the details of the selected folder:
Step 3
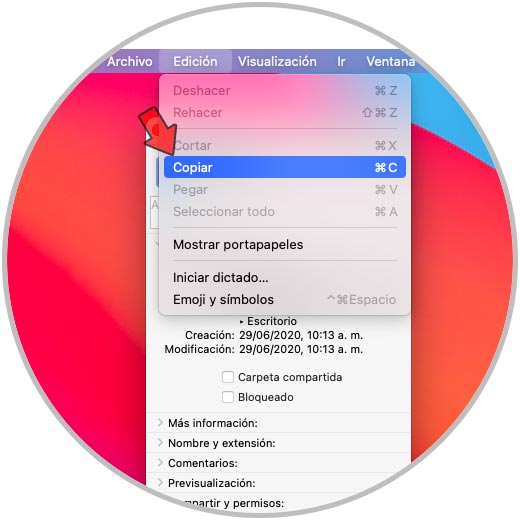
There we click on the folder icon at the top next to the name and from the Edit menu select "Copy":
Step 4
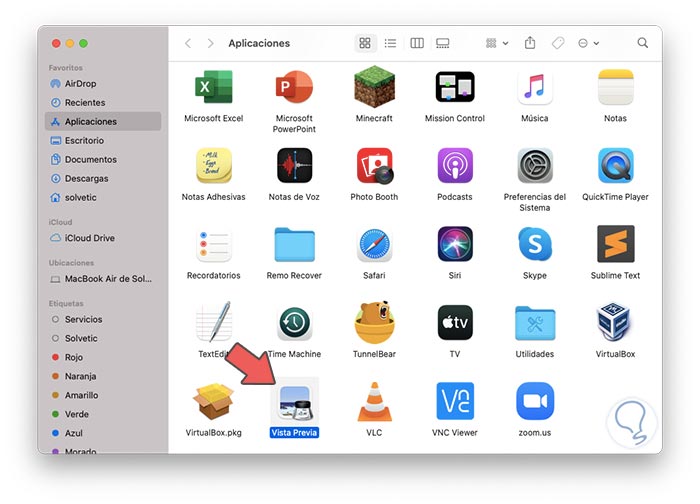
Now we go to Applications, or from SpotLight, and there we run the Preview:
Step 5
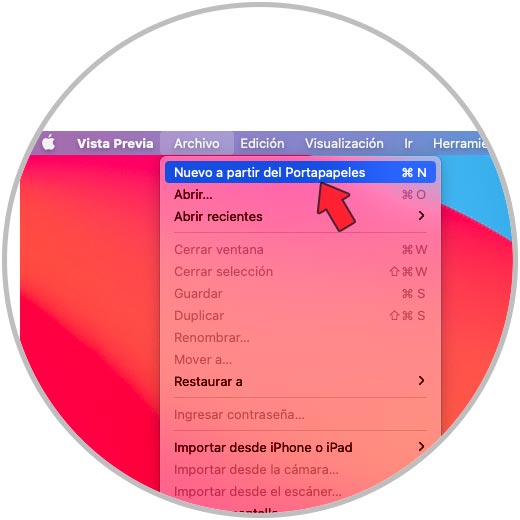
In the Preview menu we go to "File - New from clipboard" or we can use the Command + N keys:
Step 6
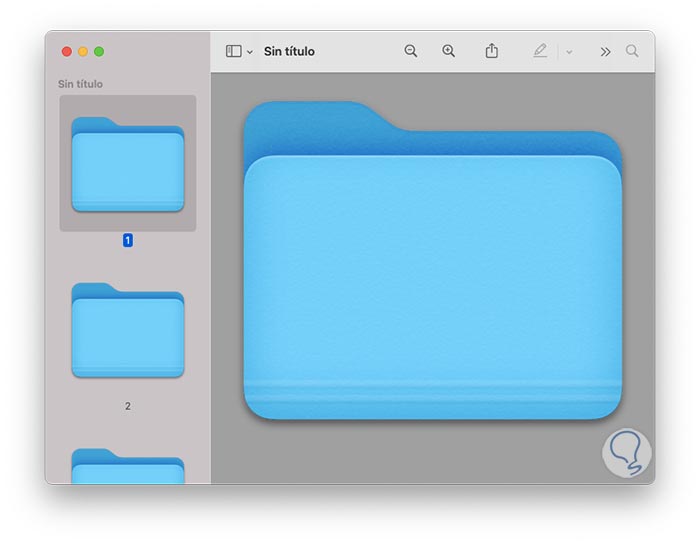
This will open the folder icon that we have previously copied:
Step 7
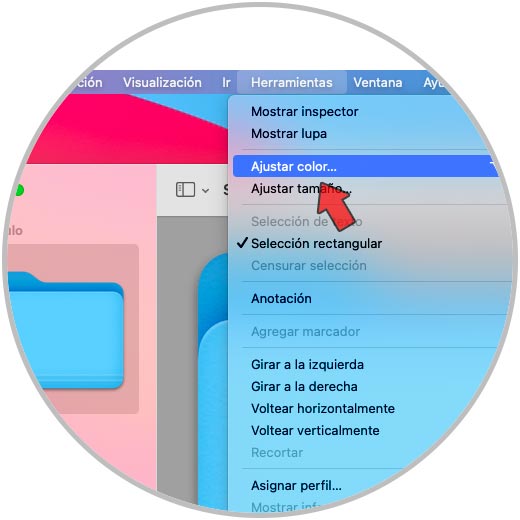
To assign a new color to this folder, we go to the menu "Tools - Adjust color":
Step 8
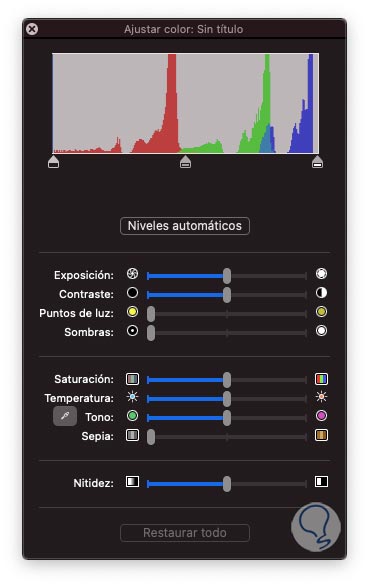
This will display all available color options for the folder in macOS Big Sur:
Step 9
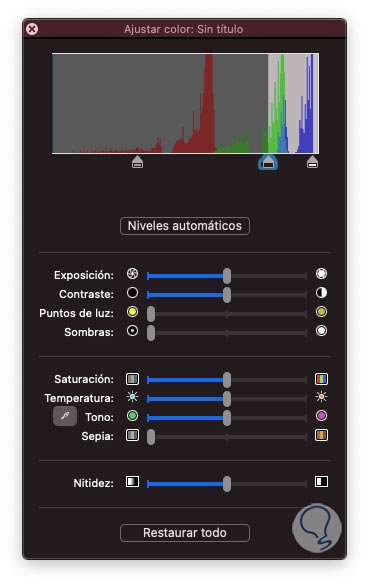
In the upper part we find all the available colors section, there we can drag the levels to the desired tone and in the lower part we can establish aspects such as:
All these adjustments we will make personally to the taste of each one:
Step 10
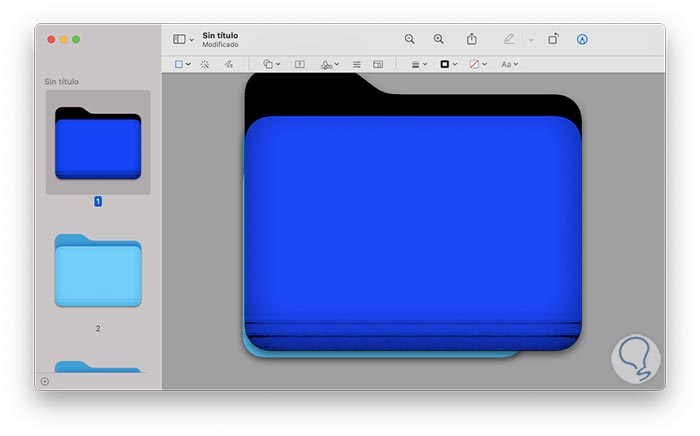
In the Preview we will see the result obtained:
Step 11
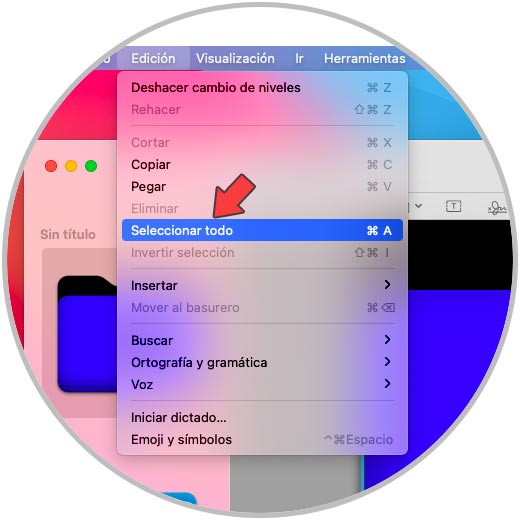
It is time to apply this change to the macOS Big Sur folder, for this we go to the "Edit - Select all" menu or use the Command + A keys:
Step 12
This will select the folder in Preview and we check it by the lines in its quadrant:
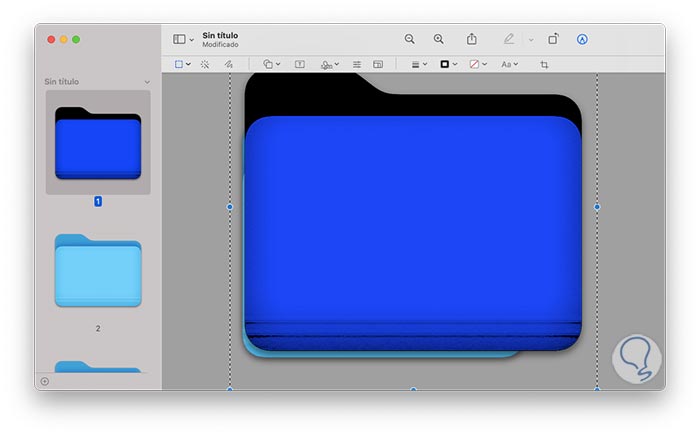
Step 13
Now we use the Command + C keys or the "Edit - Copy" menu:
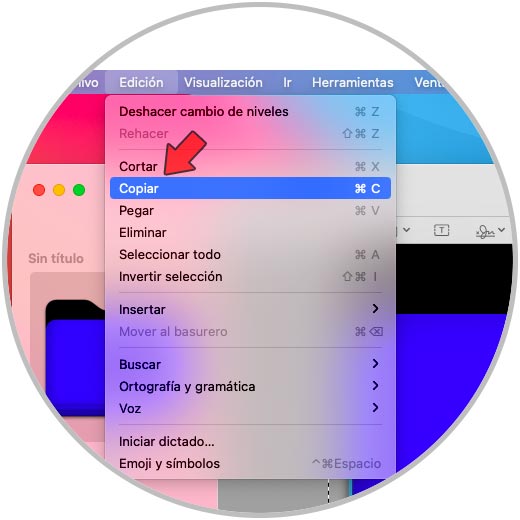
Step 14
Once the selection has been copied, we click on the folder icon in the "Get information" window and from the Edit menu select "Paste":
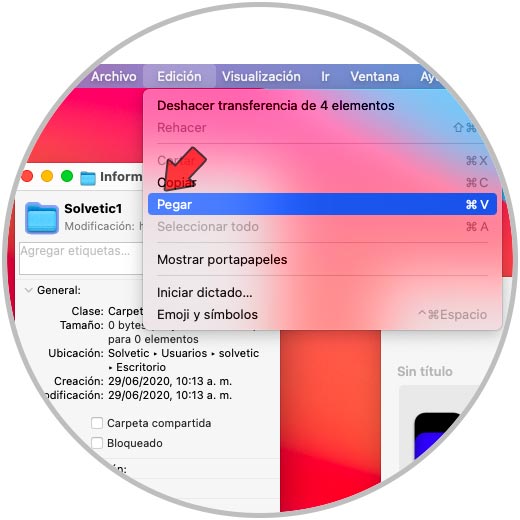
Step 15
This will set the new tone in the folder:
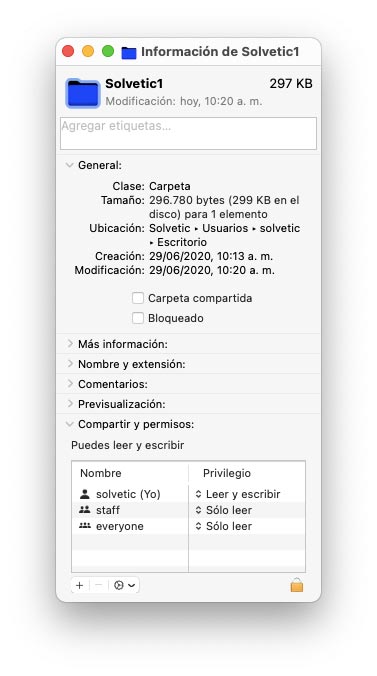
Step 16
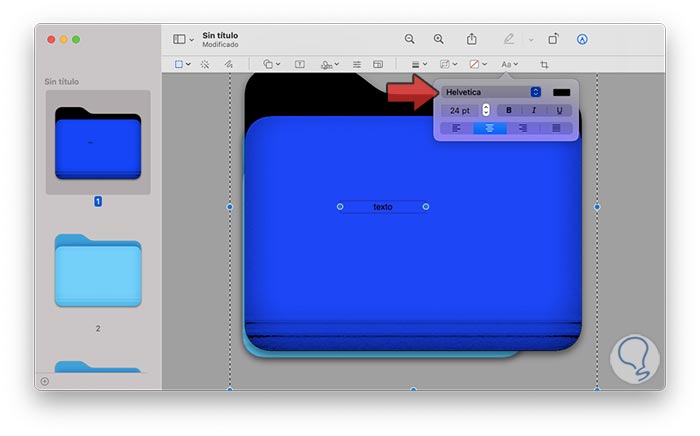
If we want to enter text in the folder, we go to Preview and click on the text box, this will create the box where we enter the desired text and at the top a series of options open to edit the text as necessary as dimensions , font, color, etc:
Step 17
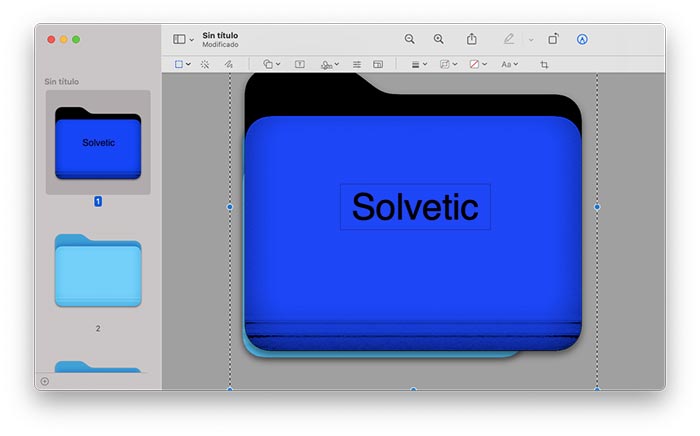
We enter the text to use in the folder:
Step 18
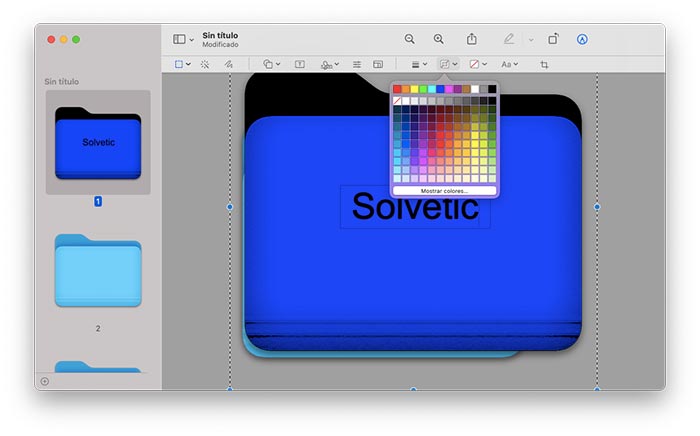
As we mentioned at the top we can make the necessary editing adjustments:
Step 19
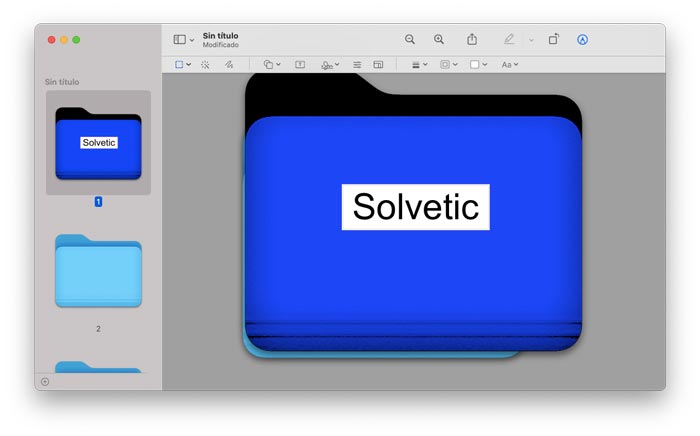
We can change backgrounds, letters, etc:
Step 20
Now, we go back to the menu "Edit - Select all":
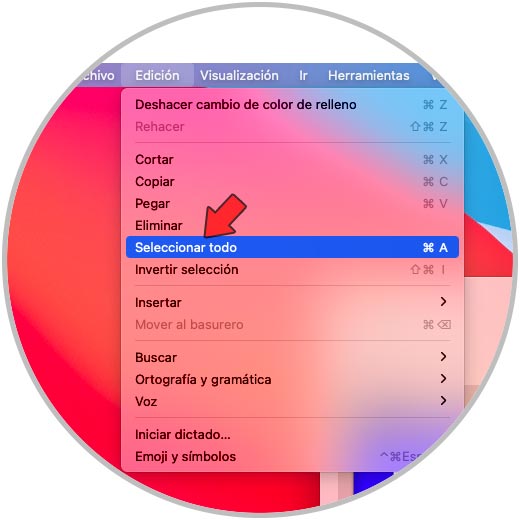
Step 21
We copy the content with Command + C or "Edit -Copy" and go to the "Get information" window, click on the top icon of the folder and from Edit select "Paste":
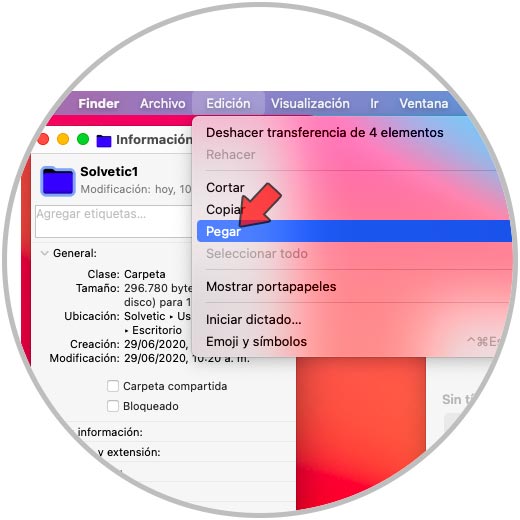
Step 22
As a result of this we will see the text in the folder that has been selected:
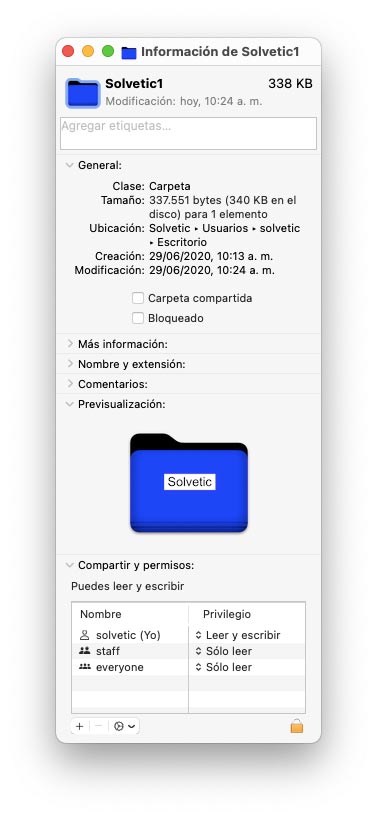
With this method we can edit the colors of the folders and if it is the case, enter text in them in macOS Big Sur.