Microsoft developed Windows 10 looking for the way that the system allows the user to manage when necessary different aspects of their access and configuration, one of these aspects is certificates. In Windows 10 digital certificates are files where different variables of the user's personal and private information are integrated, such as data, access credentials and more which are used to be identified on the Internet. These digital certificates have the task of verifying the identity of the user to carry out queries, procedures and more tasks directly on the Internet..
If we install a certificate in Windows 10, this certificate will be installed in a safe path within Windows 10, this allows that when a program or application needs said certificate, it will be able to request access to it for use.
If for administration or control reasons we want to see which certificates are installed in Windows 10, TechnoWikis will explain different ways to see them..
To stay up to date, remember to subscribe to our YouTube channel! SUBSCRIBE
1. View Windows 10 installed certificates from Run
The Run command is ideal for accessing different applications, libraries and paths in Windows 10, within these options are Windows 10 certificates.
Step 1
To open Run we can use the following options:
To stay up to date, remember to subscribe to our YouTube channel! SUBSCRIBE
Step 2
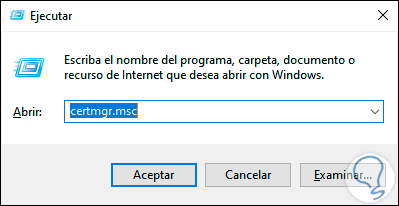
In the popup window we enter the following command:
certmgr.msc
Step 3
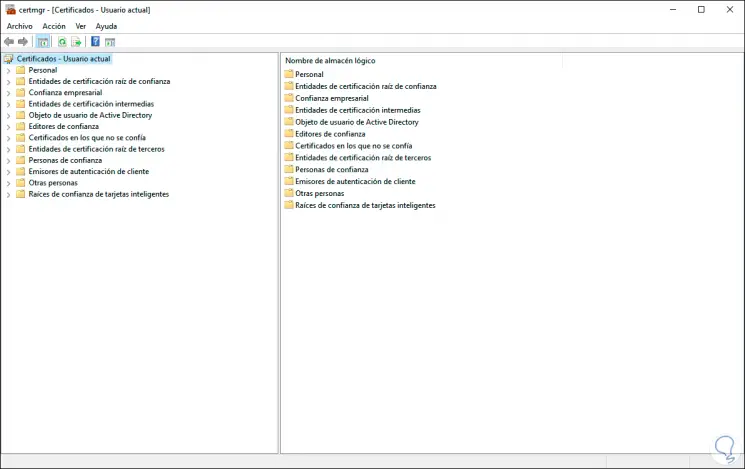
We click OK or press Enter, this will display the certificates window where we find them by type such as:
- Other people and more options available
Step 4
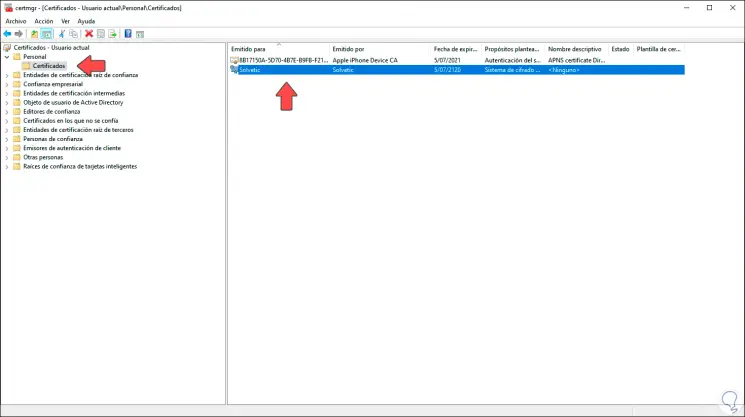
We navigate to one of these folders and find the available certificates, these can be read, copied or removed from the system.
Step 5
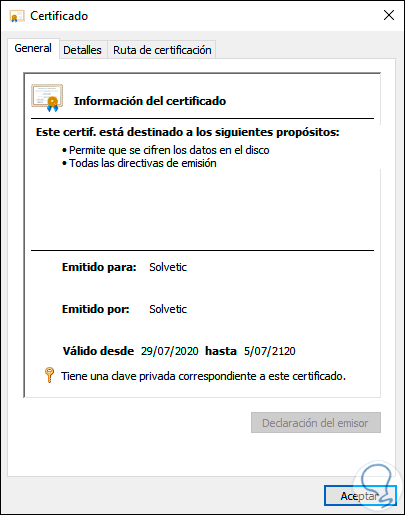
By default, the EFS certificate is in the "Personal - Certificates" folder, we can double-click on the EFS certificate to determine if it has the attached private key, without this key it will not be possible to decrypt the EFS files of the certificate:
2. View installed Windows 10 certificates from local computer
These are a type of certificates that are hosted when creating a secure client or service, in this case the certificates of the local computer apply to the local device, as well as globally to all users of the computer.
Step 1
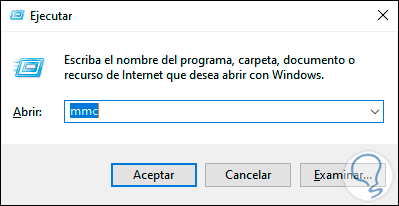
In this case we must make use of the Microsoft Management Console, open Run and in the pop-up window enter:
mmc
Step 2
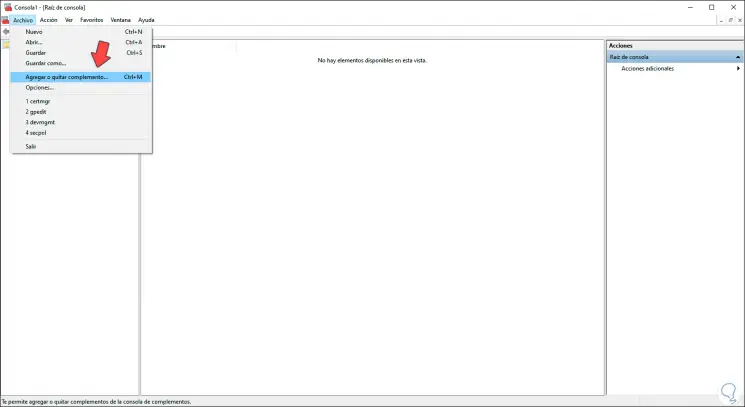
We click OK and in the displayed window we go to the menu "File - Add or remove plugin" or use the following keys:
Ctrl + M
Step 3
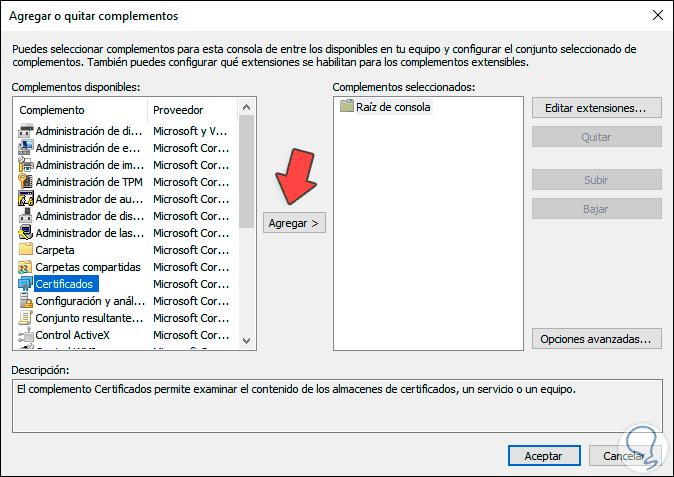
In the following window we select "Certificates":
Step 4
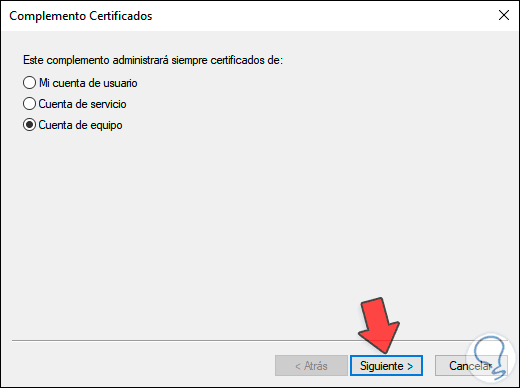
We click on "Add" and in the pop-up window we activate the "Computer account" box which refers to the local computer:
Step 5
We click Next and in the next window we activate the “Local computer” box:
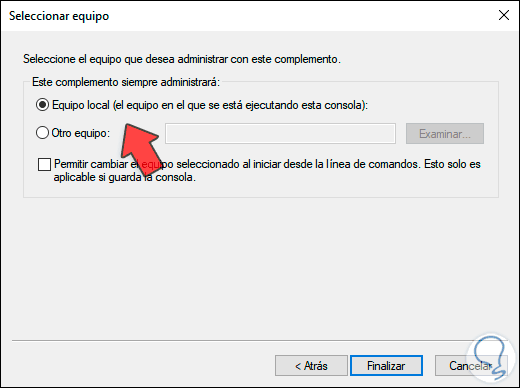
Step 6
We click "Finish" and we will see the integrated certificate correctly. We click OK to save the changes.
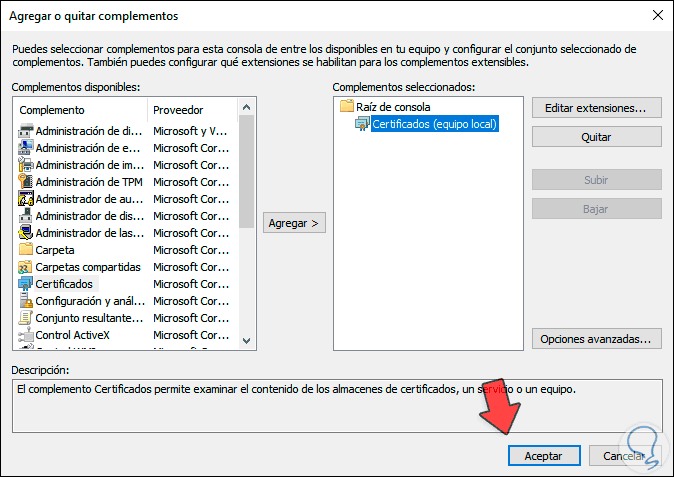
Step 7
Now we can navigate between the different types of certificates available from the local computer:
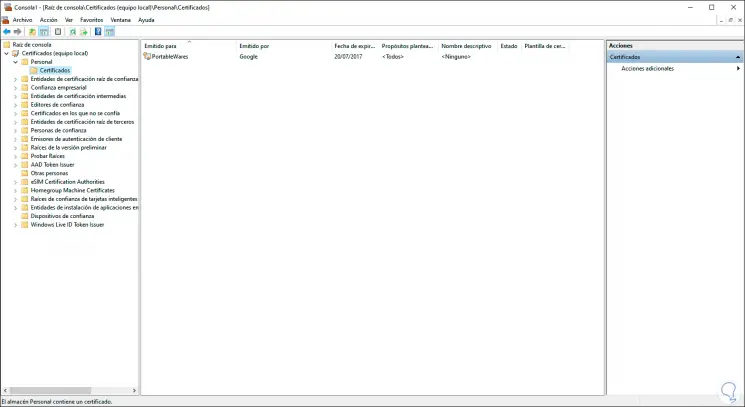
Step 8
We can open the certificates to see their configuration and know their values in detail:
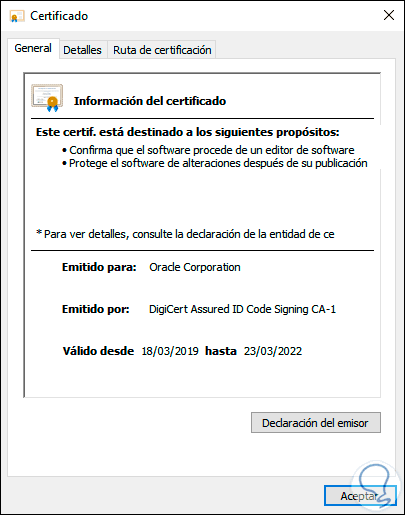
We see how accessing certificates in Windows 10 is a really simple and functional task to have clear control over them. One of the common problems is the expiration of these which affects the correct use of the associated application or service, but with TechnoWikis you will be able to see when a certificate expires and determine if its renewal is necessary..