All the components of our computer, obviously, are important for its operation, or at least very useful for the whole. Some are vital, such as the power supply, RAM, hard drive, motherboard, or graphics card..
But all these components overshadow the importance of one, possibly the smallest of all: the microprocessor . The "brain" of our computer is a circuit with millions of microscopic transistors prepared to carry out the necessary operations to ensure the correct functioning of the computer.
The structure of a modern microprocessor
Microprocessors have advanced a lot since the beginning of computing. Going from being entire rooms in buildings to chips of just a few millimeters, we can consider that the change has been bulky..
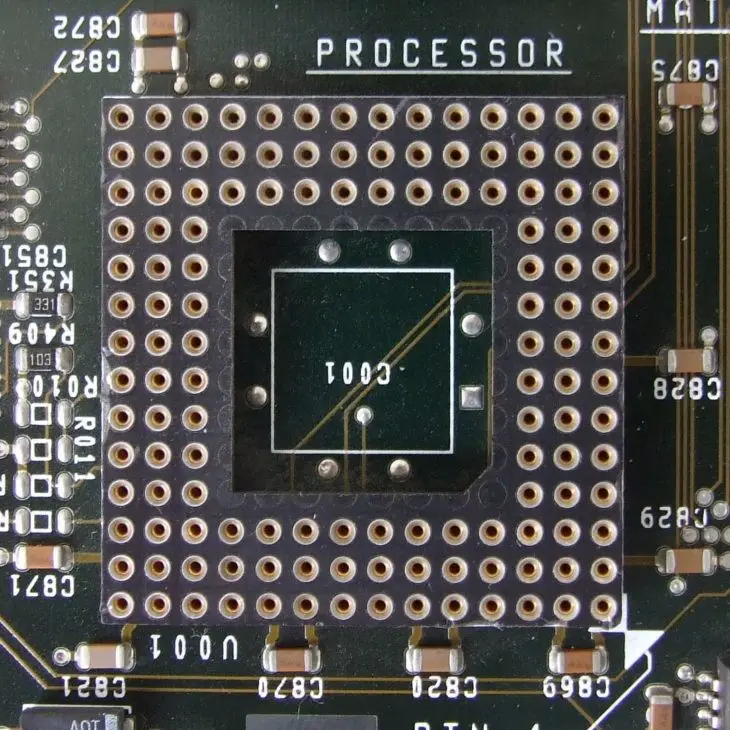
In the first personal computers, the microprocessor came directly soldered to the board, but over the years we have had the opportunity to attach and remove it using different methods.
For years, the "socket" or "socket" has been standardized as the most effective method to house a microprocessor, although we have gone through many types, including one shaped like a cartridge (the Pentium II), in the purest video game console style. the 90s..
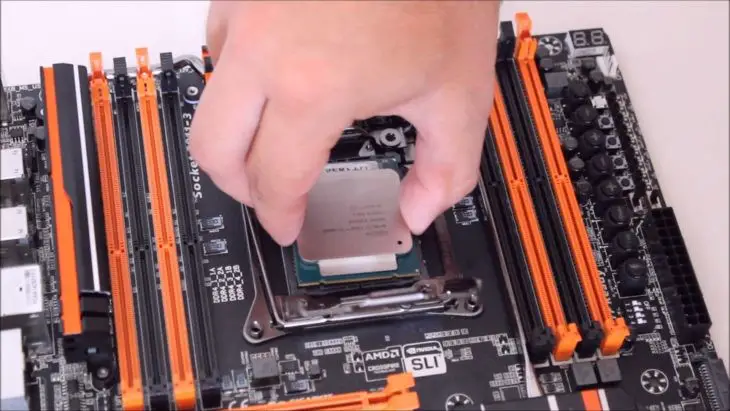
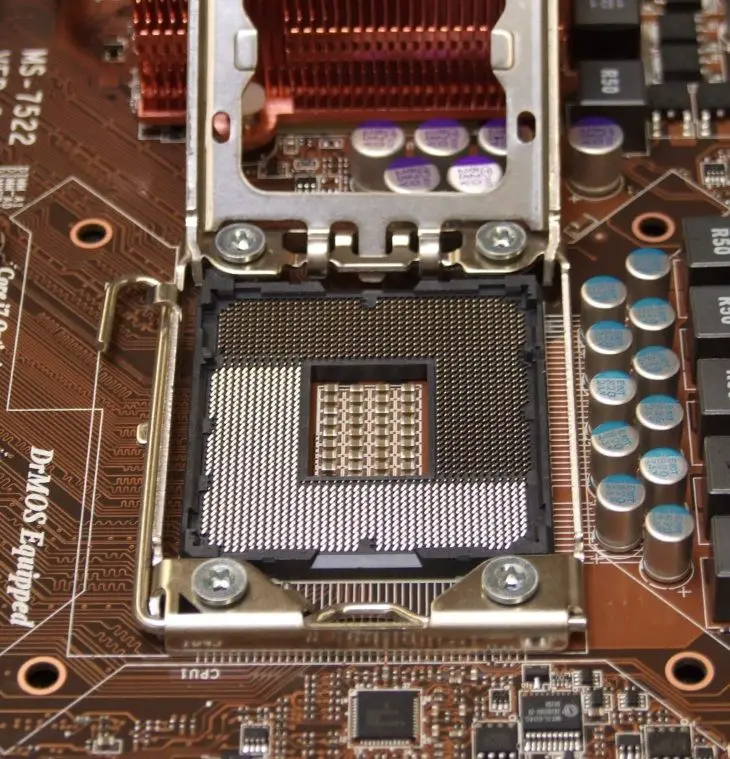
At present, the installation of a microprocessor is carried out using sockets and microprocessors that use metallic contact surfaces to be coupled together with a simple click (called LGA), also called zero pressure sockets or ZIF (Zero Insertion Force).
Reasons and way to change a current processor
Being the component that best defines a desktop computer by giving it its final power, the microprocessor is one of the least interchangeable , although that does not mean that we cannot replace it with another in case of failure or update, but it is one of the most complicated since the socket, the motherboard and the RAM must be compatible with it .
Processors, depending on their architecture, usually have a specific socket model. There are many variants currently, for example, in Intel processors: we have the sockets 1150, 1155, 2011, 1151 ... For example, the new Intel Skylake (those launched at the end of 2015) use an LGA 1151 socket .
It is essential to know the socket model of each microprocessor, since we will only be able to replace them with microprocessors of that same socket in the future, without exceptions .
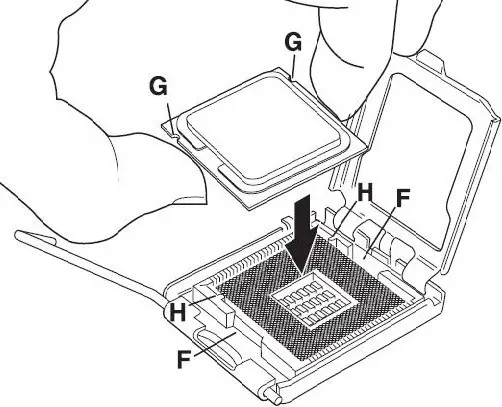
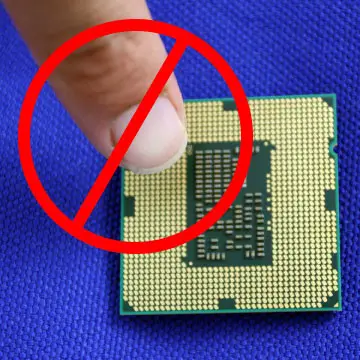
The microprocessors usually incorporate a visual guide with which to help us place it in the correct direction inside the socket, always in a specific direction (with the pins facing down), since we will not be able to touch or much less "mistreat" the metal contacts that serve as connectors (we could spoil it). Normally it is indicated to us thanks to a white arrow, located in one of the corners, but we will also find microprocessors that include notches so that they can only be inserted in a certain way.
Once placed in place, we must know that the closing system of each socket may be different, but, for generations, Intel processors have used a kind of metal lock to immobilize said components that only require the sliding of a small lever to open or close it.
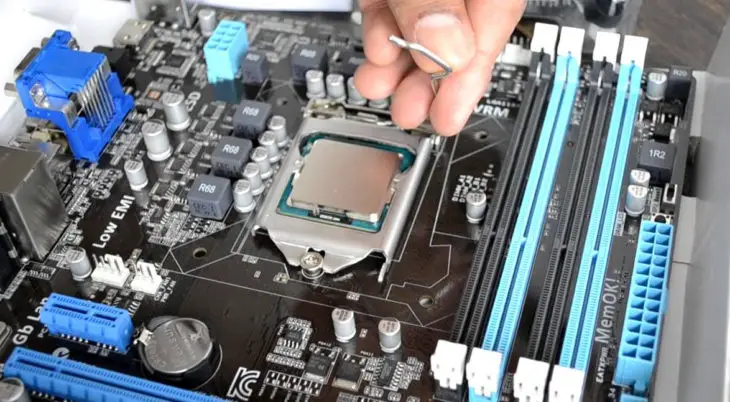
After the microprocessor, we will always place a heatsink (or liquid cooling system) to cool it since, at full performance, it is capable of reaching temperatures of around 90ºC. The fastening system of the heatsinks (those that usually come with the microprocessor in the box when purchasing it) varies depending on the manufacturer.
You can use giant plastic clip hooks to attach it, or also, in the case of modern Intel processors, use a four-point clasp anchored to the motherboard itself.
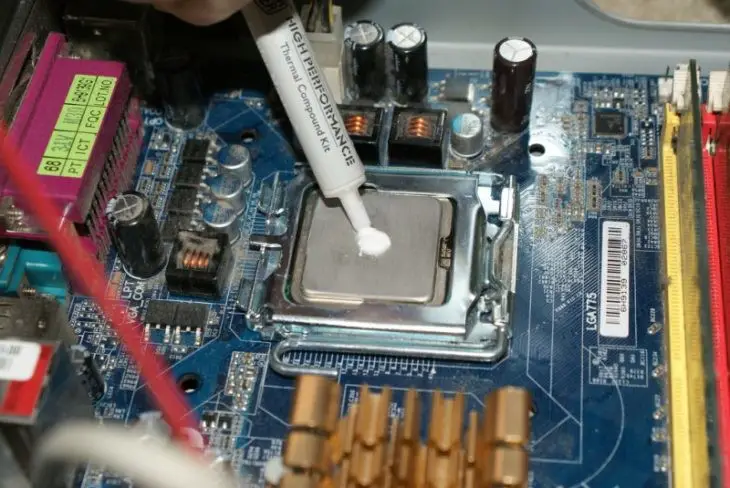
Be careful, before placing the heatsink we have to check that there is thermal paste between the microprocessor and the heatsink (and if not, buy it separately). If the microprocessor and heatsink are new, the heatsink must include thermal paste previously adhered to its base. This viscous and thermoconductive material allows the correct thermal exchange between both devices, and must be reviewed and renewed at least every 2 years, since it tends to dry out and stop being effective.
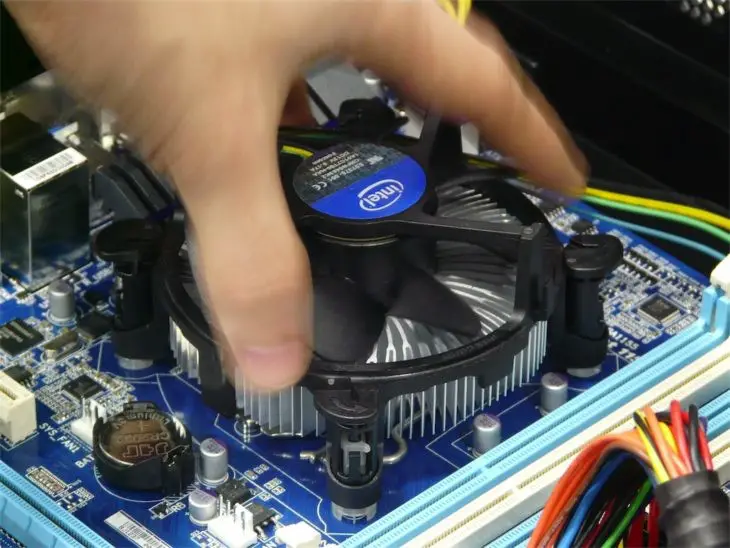
Returning to the Intel heatsink fastening system, although it may be deceiving at first glance, it is very easy to use, we will only have to place it on top of the microprocessor (if we install it for the first time), and press on each of the four anchor screws to the motherboard. We will automatically hear a “click” for each attachment point that will indicate that the anchoring has been completed. To undock it, we will only have to turn the head of each point in an anti-clockwise direction and extract each of the fastening points upwards. To anchor it again, we must do the reverse process, that is, press the points and turn clockwise.
Images | Tildee | Youtube | Youtube | hypertext | Intel | Intel | Wikimedia