VMware is one of the leading platforms for virtualizing various types of operating systems and thus being able to know in advance the news and new functions of systems and applications without using them in productive environments. Hence the importance of using virtualized environments, when we use VMware, there is a set of tools to expand the functions of the virtual platform and these are the VMware Tools..
The VMware Tools have been developed as a set of utilities focused on improving the performance of the guest operating system (virtual machine) and incidentally improving the management of the virtual machine itself.
VMware Tools
When installing these VMware Tools we have:
- Synchronizing the virtual machine clock with the host or client desktop clock
- Shared folders between both operating systems
- Enable copy and paste of text, graphics, and files between the virtual machine and the host desktop
- Improved keyboard and mouse performance
- Using scripts for automation tasks
VMware Tools options
These VMware Tools integrate:
- VMware Tools Control Panel
Now we are going to see how to install these VMware Tools in a Windows Server 2019 and 2022 virtual machine..
To stay up to date, remember to subscribe to our YouTube channel! SUBSCRIBE
How to install VMware Tools on Windows Server
Step 1
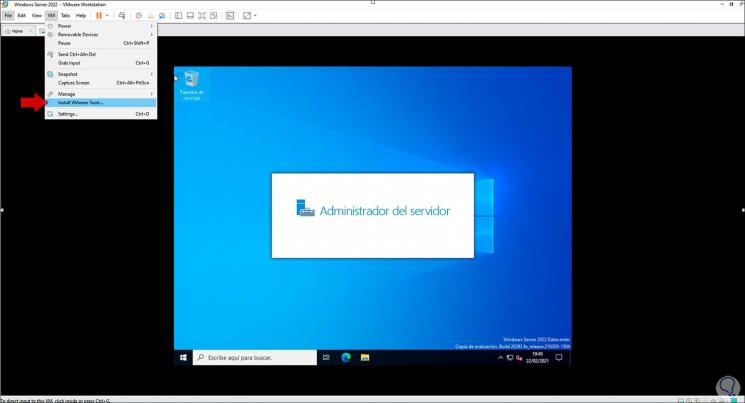
We open VMware, then we go to the "VM - Install VMware Tools" menu:
Step 2
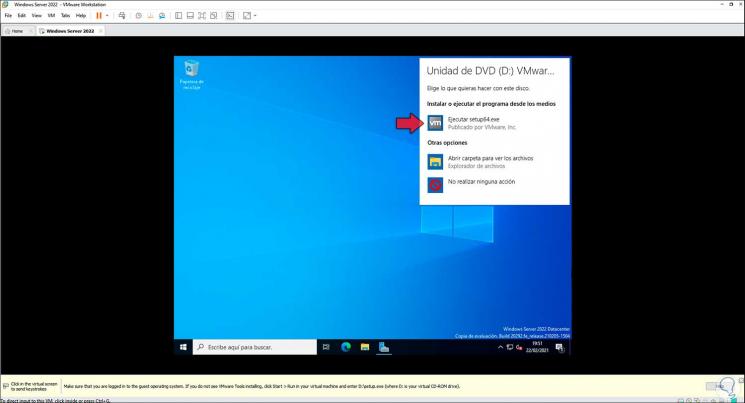
In the virtual machine we click on the CD option to run the wizard:
Step 3
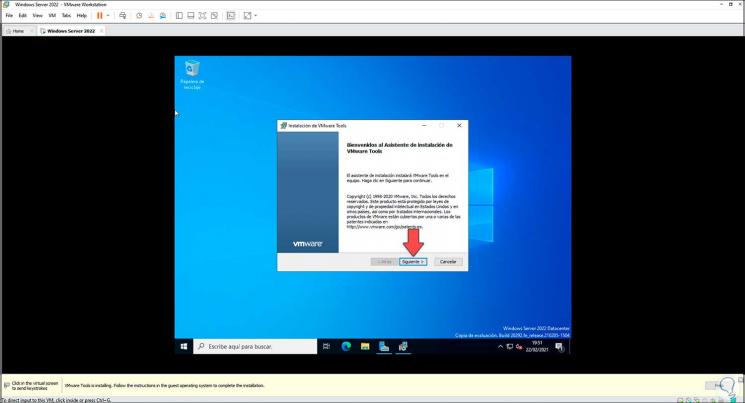
Click on "Run setup64.exe" and the following wizard will be displayed:
Step 4
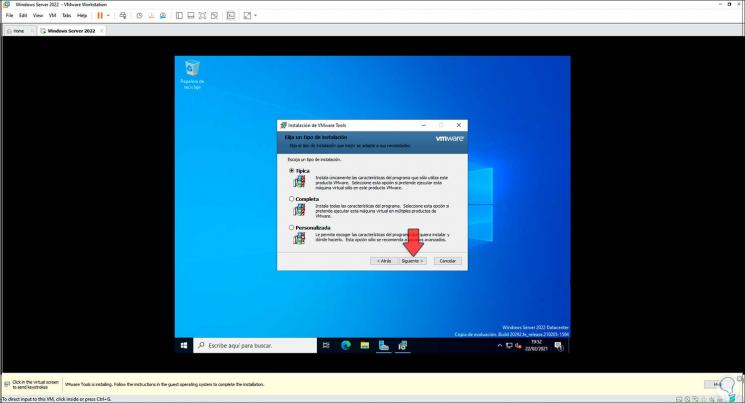
We click Next to select the type of installation to use:
Step 5
In the next window we will see the following:
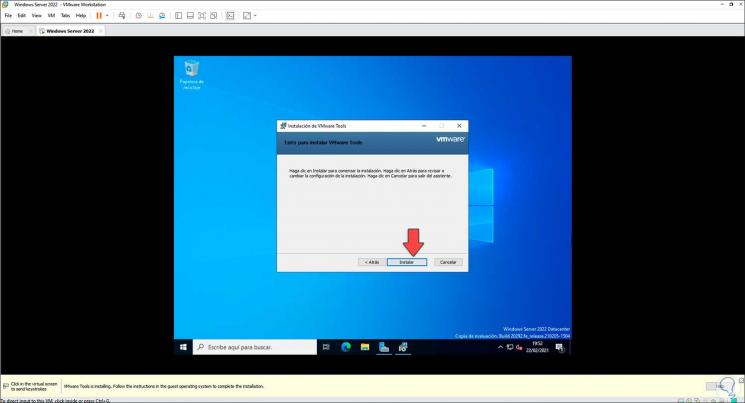
Step 6
We click "Install" to start the installation process of VMware Tools in Windows Server 2019/2022:
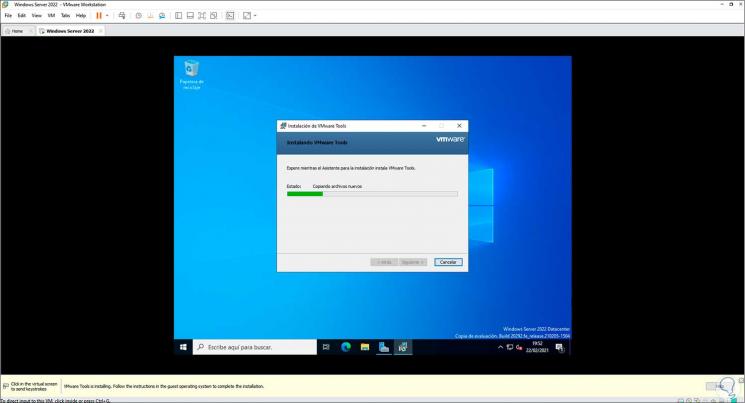
Step 7
At the end we will see the following:
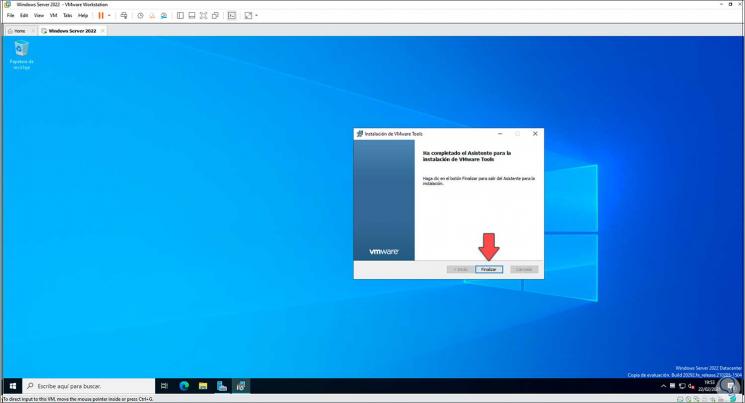
Step 8
We click on “Finish and we will see the following message:
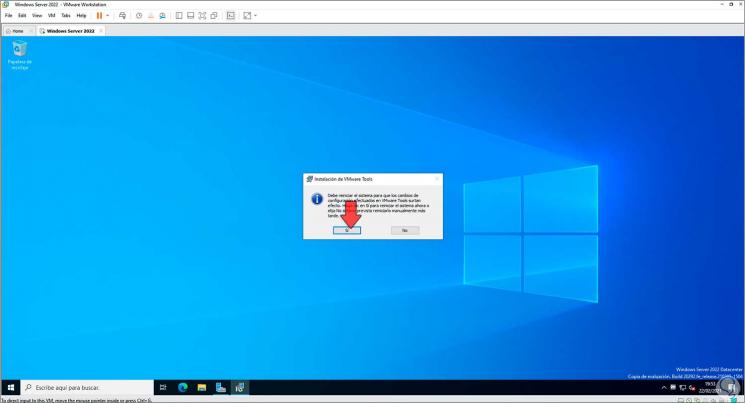
Step 9
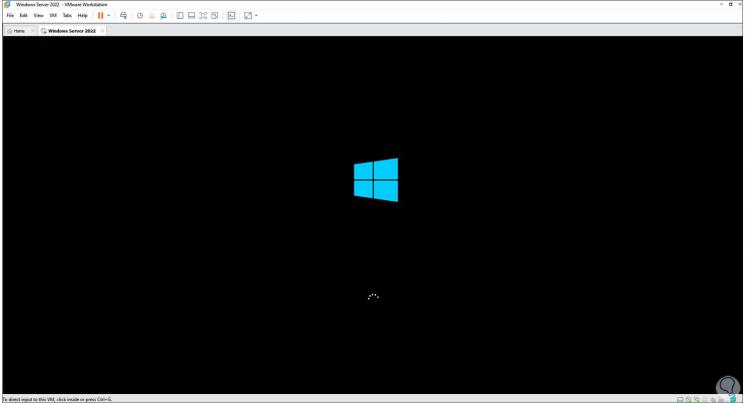
Restart the Windows Server 2022 virtual machine:
Step 10
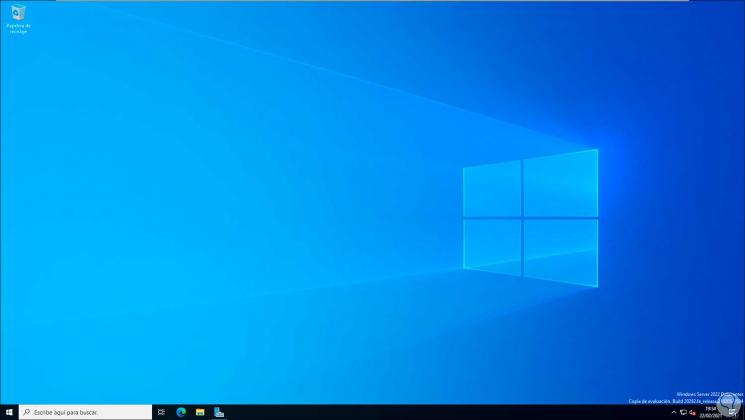
Log in and thanks to the VMware Tools it is now possible to access full screen mode:
Step 11
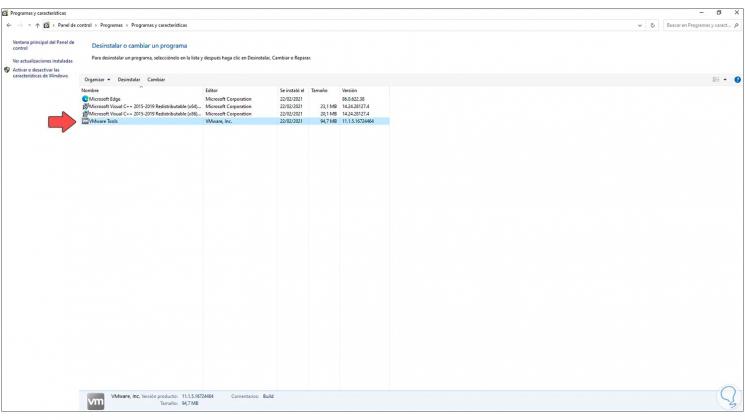
We access the Control Panel and in the option "Uninstall a program" we can see the VMware Tools installation performed:
Step 12
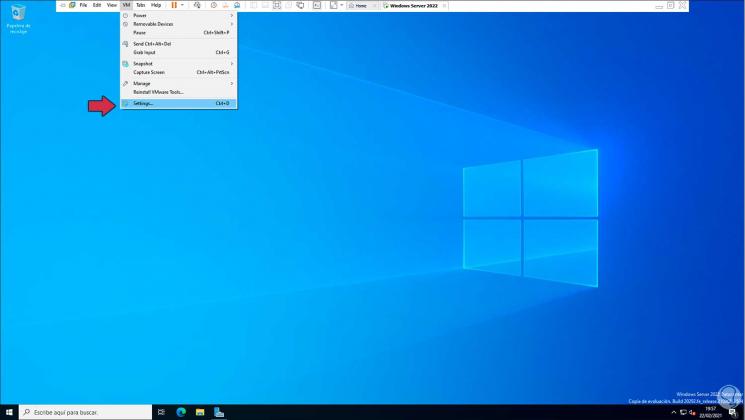
Go to the virtual machine settings from the VMware menu:
Step 13
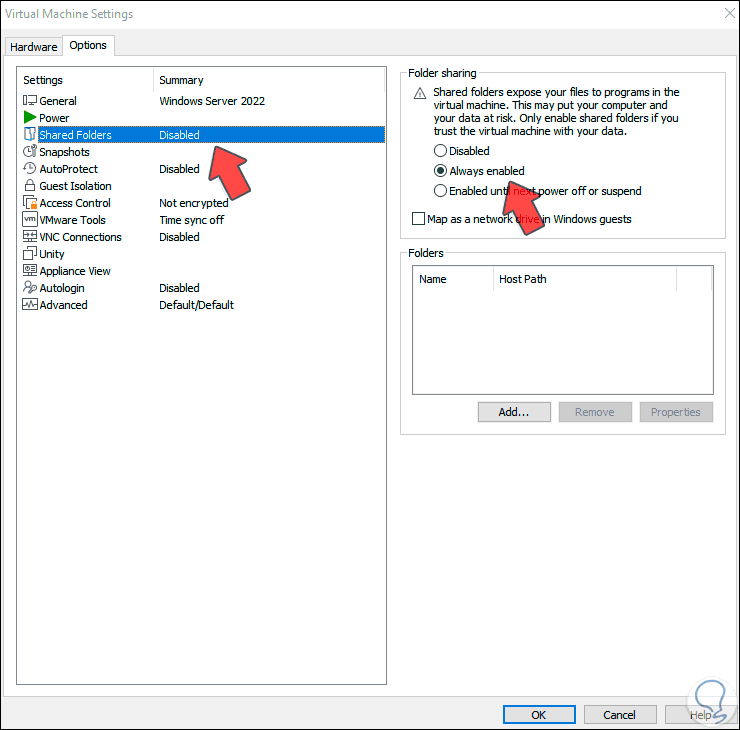
We go to the Options tab and there we go to the "Shared folders" section:
Step 14
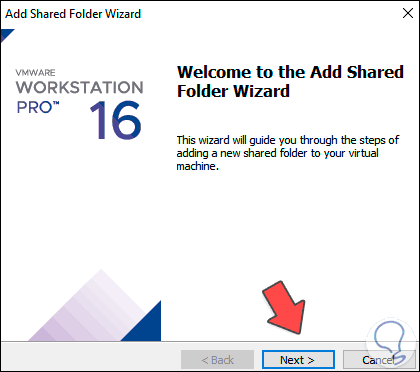
By default it is disabled, we activate the "Always Enabled" box and then click on "Add" to add the folder to share with the physical equipment, we will see the following wizard:
Step 15
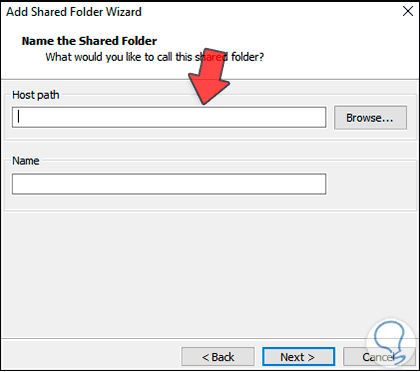
Click Next to see this:
Step 16
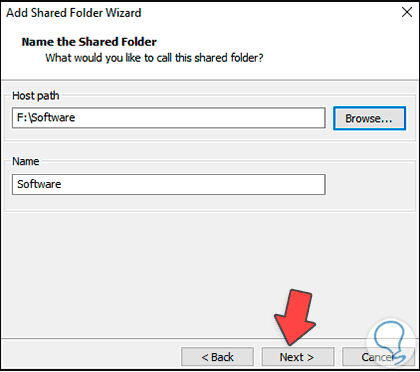
We click on "Browse" and select the shared folder:
Step 17
In the next window we define whether it will be read-only or will have access and editing permissions (Enable this share):
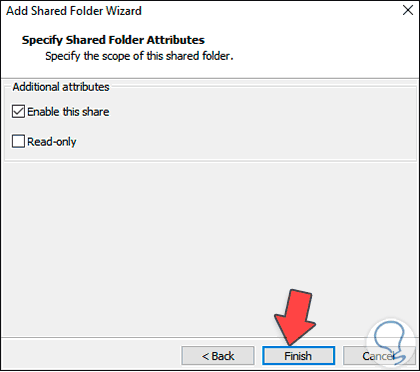
Step 18
Click Finish to see the shared folder:
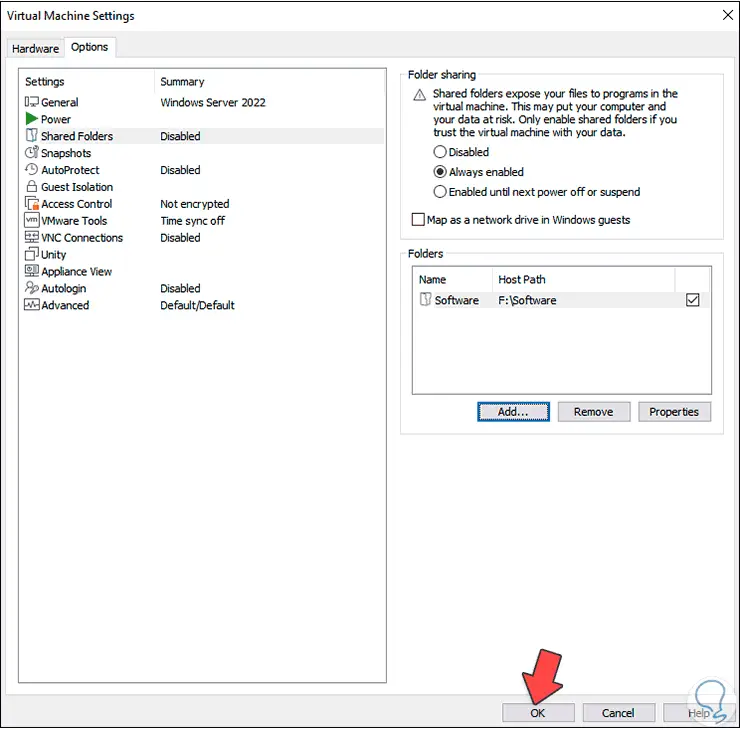
Step 19
Click OK to apply the changes and we check the shared folder from Windows Server Explorer:
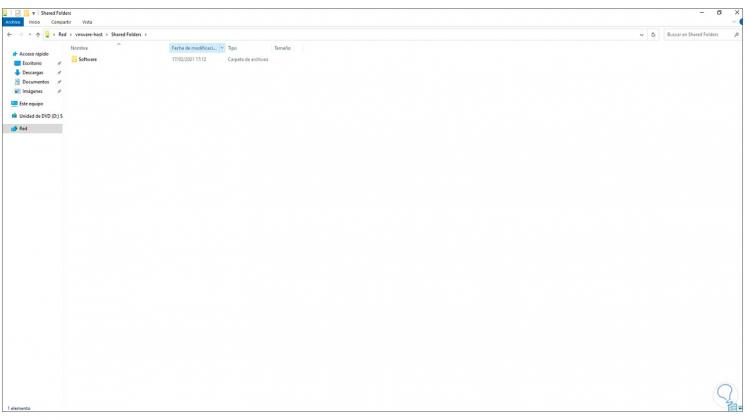
So we have installed the VMware Tools on Windows Server 2019/2022 to enjoy the full potential of VMware.