When it comes to choosing a photo editing program, people fall into two categories. Representatives of the first use professional tools like Adobe Photoshop and process every detail in the picture to get the perfect result. People in the second category want quick results and prefer the program to do most of the work for them..
Movavi Photo Editor is perfect for beginners and amateurs, as it is easy to understand, and there are enough functions to edit an image at a high enough level. Moreover, he knows how to work with almost all popular formats, including JPG, PNG, BMP and even RAW.
Removing objects
Sometimes it happens that a good shot is ruined by a person suddenly appearing in the frame. It is very difficult to get rid of such an intruder without degrading the background. But Movavi Photo Editor does the job quite well. The accuracy with which the unwanted object is removed is striking. If you don't see the before and after photo, you may not believe that there was something else on it before..
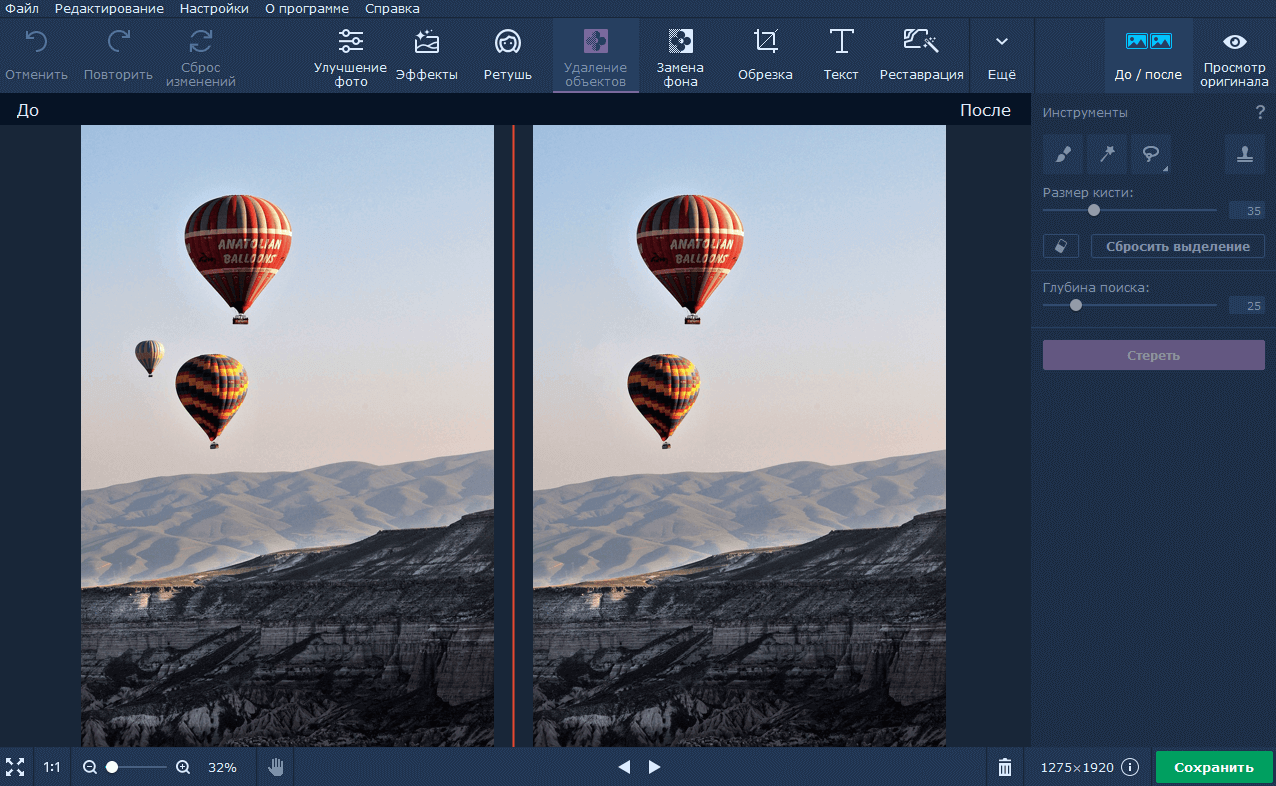
The processing process is pretty straightforward. You only need to select a tool to remove objects, and then paint over the areas that you want to get rid of. The program will take into account the image around the object to be deleted, and based on this, replace the background in this place. By the way, the same tool can be used to remove the date from the image.
Let's see how it works. The brush is necessary for free selection of the area, the Magic Wand selects adjacent similar shades, and with the help of the Lasso (regular and polygonal), you can select an object along the outline. Having selected an unnecessary object, you just have to press the "Erase" button to remove it. You can see the result in the screenshot above..
Retouching tools
One of the features that most users will find useful. Previously, retouching (removing acne, wrinkles, bruises and other skin imperfections) could be done with a Stamp or other tools. However, already from version 4 in the arsenal of the program there is a whole set of tools for correcting portraits.
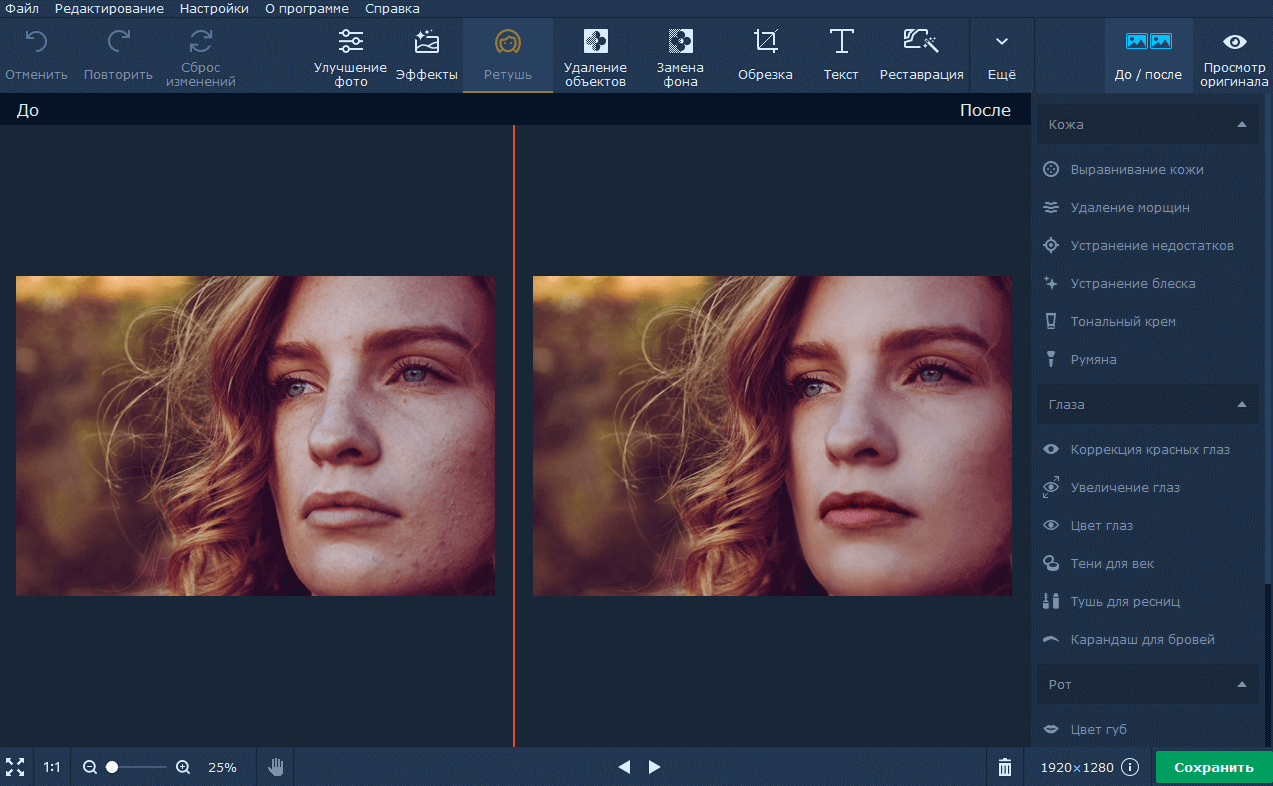
Instruments are divided into 4 groups:
- Skin: smoothing skin, removing wrinkles and shine, foundation, blush.
- Eyes: red eye correction, color change, eyeshadow, mascara, eyebrow pencil.
- Mouth: lip color, teeth whitening.
- Miscellaneous: hair color, face tapering, reshaping.
Thus, you can not only remove possible defects, but also completely transform your appearance: add makeup, change the shape of your face or the size of your eyes. Some tools, like red-eye correction, are automated.
Auto-enhancement
This is perhaps the most commonly used function. It will be especially useful for people with zero photo editing skills. You import the image and click the "Enhance Photo" button - that's all you need to do to make the picture look better. Using this feature is no more difficult than applying filters on Instagram. But the end result looks amazing.
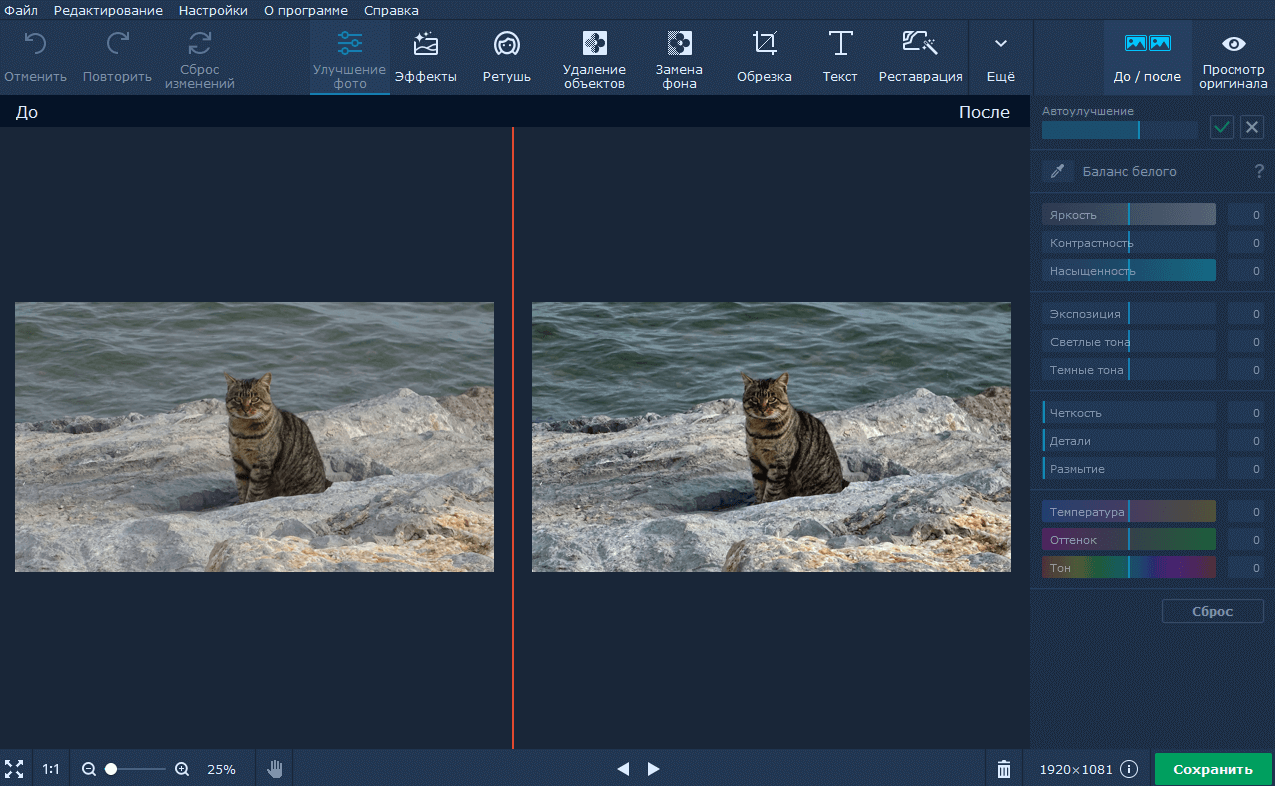
The application automatically recognizes the flaws in the photo and then corrects them. For example, it makes dull backgrounds brighter and blurry objects sharper.
Sometimes the magic button makes colors more saturated than you would like. The problem is easily solved with manual controls. They are located on the right side of the screen and allow you to change the brightness, exposure, contrast, saturation and color temperature. Just experiment with them to get the desired result.
Replacing the background
Suppose you have a photograph with a beautiful subject in focus, but the background does not match that subject. Using Movavi Photo Editor, you can either replace the existing background with any other (including a picture from the program's library) or make it transparent so that you can use only the selected object later.
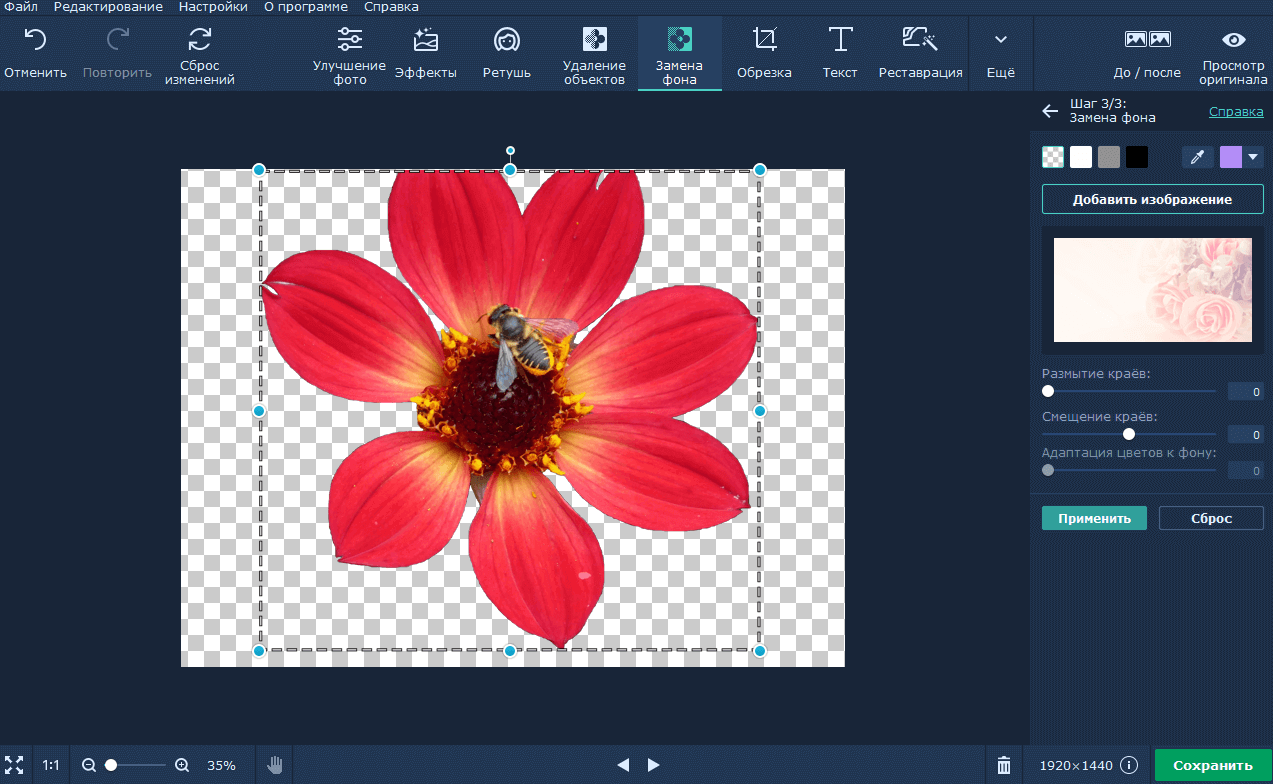
How to do it? Select the desired object with the Brush or Lasso, refine the edges (you can even select only the hair), and then replace the background with the one you want. Now click the "Save" button and select the PNG format. Ready!
Restoration of old photographs
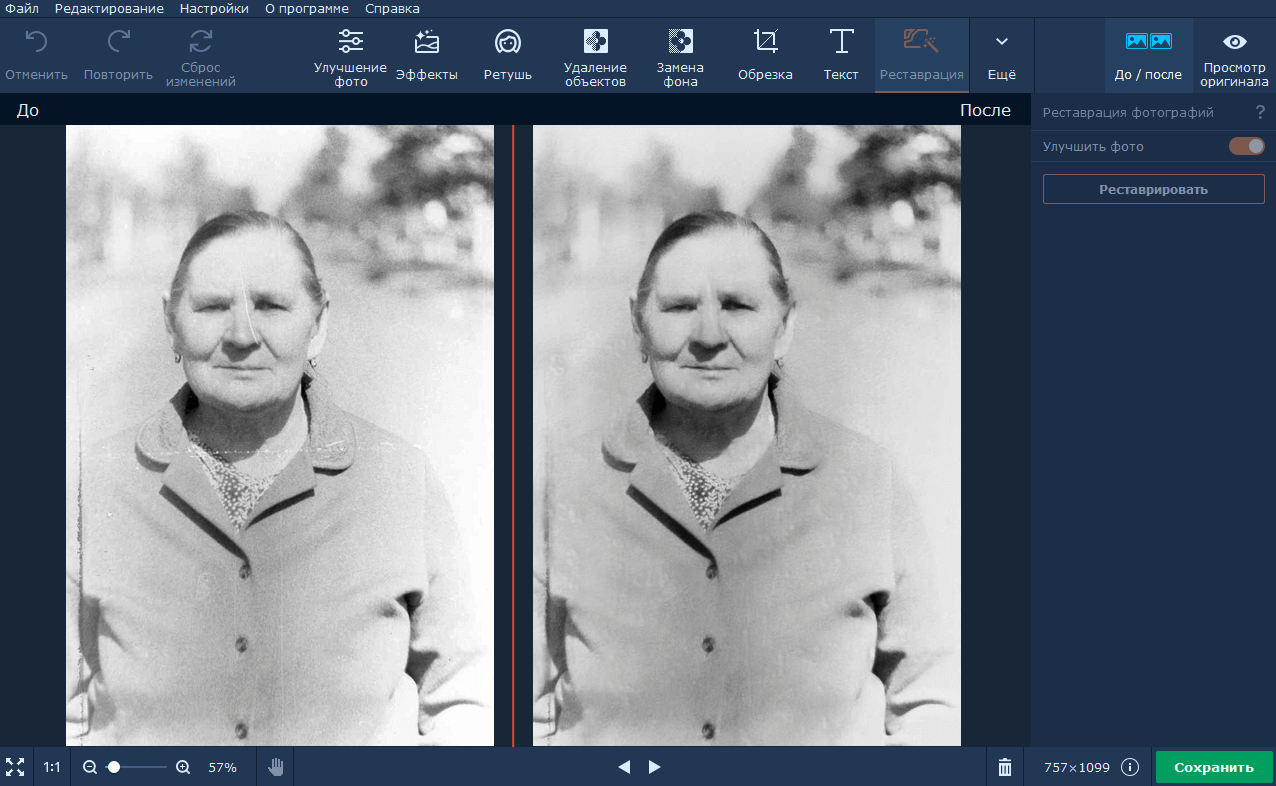
Recently, the editor has a tool for restoring old photos using neural networks. And it practically works magic: by uploading a scanned image from your grandmother's album, you can remove all scratches and kinks in one click, and also return the pictures to their former clarity. Unfortunately, the tool is only available on computers with a 64-bit system, and any restored photo becomes black and white.
Eliminate noise
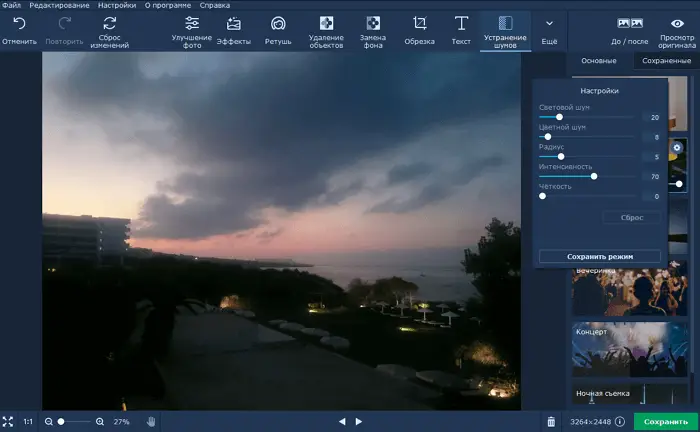
Another useful tool is grain removal for photos taken in low light or low quality cameras. Six filters of different intensities will help remove noise from a photo taken in any conditions: from a lit room to a night shooting.
Effects
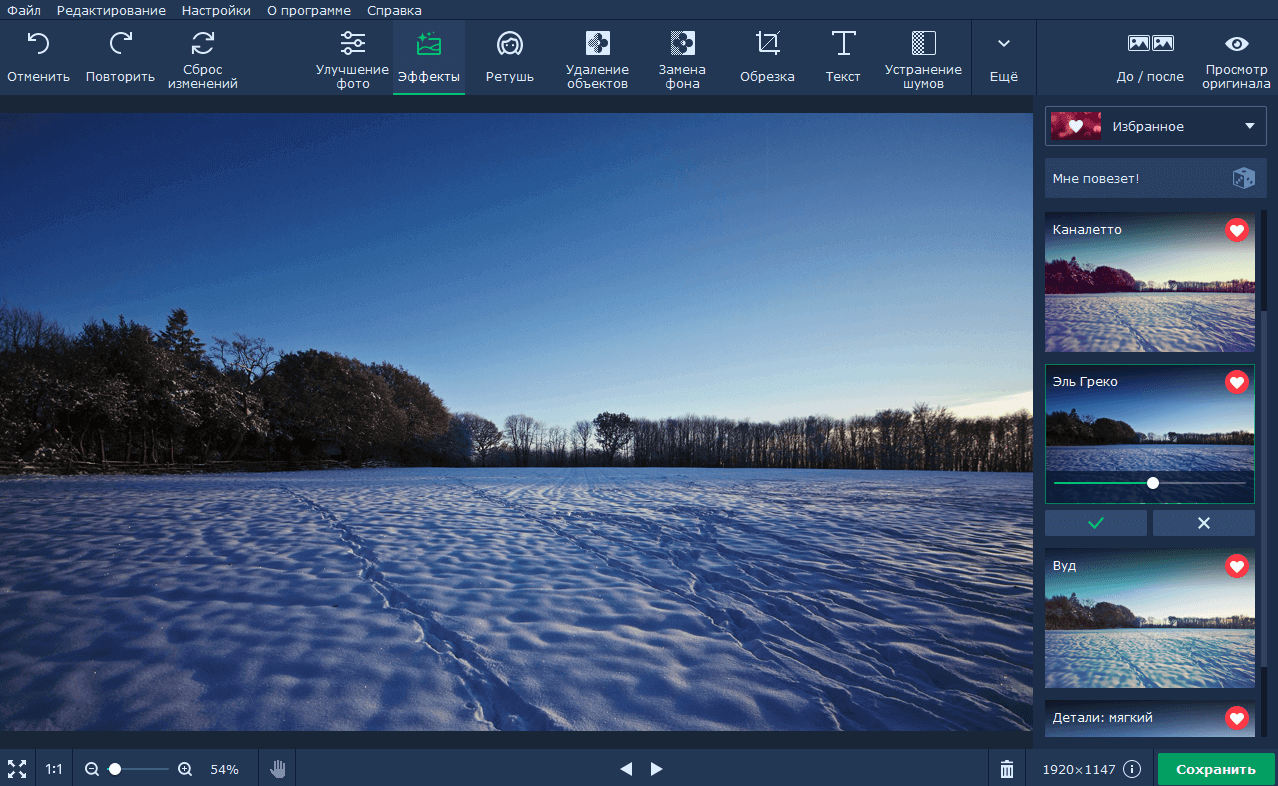
A set of filters, effects and textures is just what you need if you want to stylize your photos to make them more unique. Pick a filter that you like (or combine several by adjusting the intensity), add to your favorites, and then easily find it and apply to other images. More than a hundred effects are divided into groups to make it easier for you to navigate.
Text
The editor has the ability to add text to the photo: select the font, color, size and design, adjust the transparency of the inscription. The program works with all system and installed fonts, and also offers several of its own.
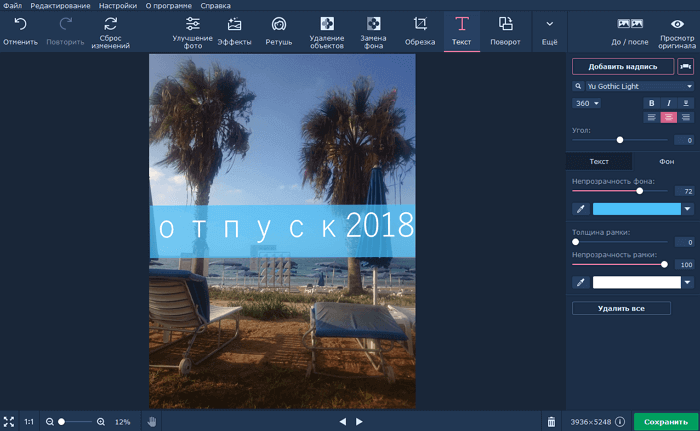
Just select a photo and add text to it anywhere you want. Do not be limited to the usual lettering. Experiment with character size, fonts, slant, letter color, and more. You can also add watermarks if you want to protect copyright. This will indicate that you are the owner of the snapshot.
Rotate photo
Have you ever taken a photo that you thought would look amazing, but then you found out that you were holding the camera incorrectly and the image turned upside down? Or maybe you photographed a breathtaking landscape, but the horizon was not straight and it spoiled everything? If you encounter a similar problem, then try using a special feature in Movavi Photo Editor that will correct this misunderstanding.
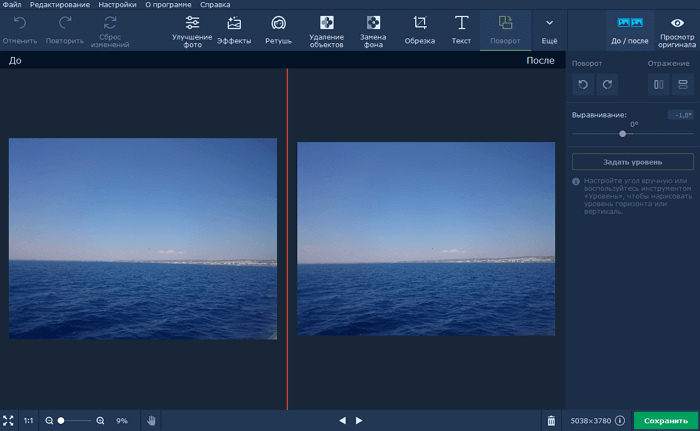
Once the image is loaded into the program, you just need to go to the tab labeled “Rotate” at the top of the interface. On the right side, a sidebar will open with several options, including a left arrow that you can use to rotate the image 90 degrees to the left, a right arrow that rotates it 90 degrees to the right, or a slider that you can adjust to tilt the photo. by a certain number of degrees.
Change of size
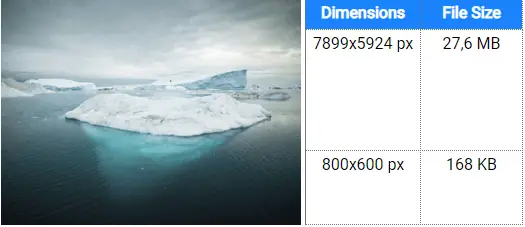
To reduce the file size, you can change the image resolution. However, it will come at a cost: a smaller copy will look just as good, but if you choose to print it or use it as wallpaper, then the smaller file will look significantly worse than the original.
Let's see how much disk space can be saved by changing the resolution. Below are the file sizes for a single image, and the difference is striking: resizing a large image to 800 × 600 pixels makes the file size more than a hundred times smaller.
Now let's move on from theory to practice. On the main toolbar, go to the "Size" tab. For your convenience, in the right pane you will find many presets - select the appropriate option or define the width and height of the image yourself in the "Fit to size" field.
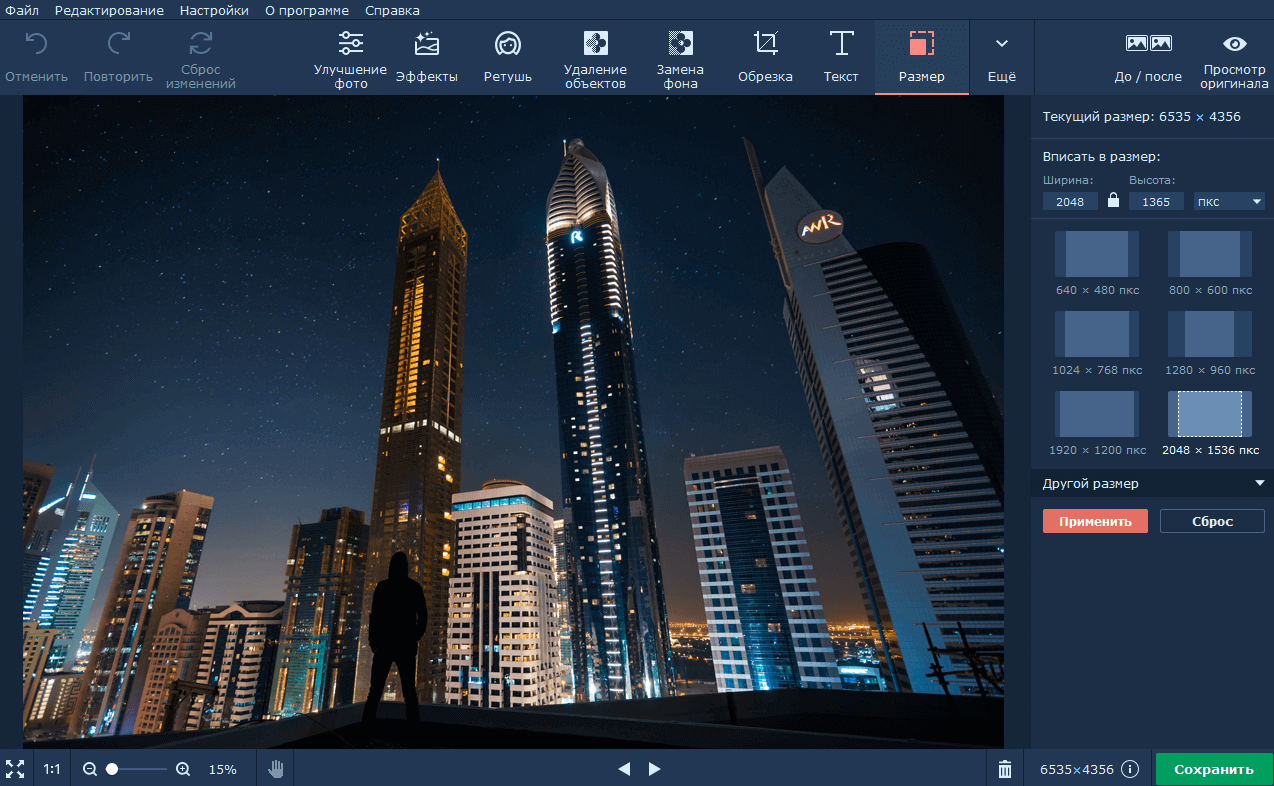
After you set the desired photo size, click the "Save" button to export the image in the appropriate format.
You can also reduce the size of images by changing the format and output quality. In the Save As dialog box, select JPEG Image and click the Quality button. Move the slider to the left to reduce the file size. High compression will result in poor quality, so we recommend setting the value to at least 90%.