Your Apple Mac contains files that are important to you and that you don't want to lose. Whether it's your collection of vacation photos or your graphic portfolio, you don't want to lose any files. This is why it is useful when you back up your MacBook, iMac, or Mac Mini. We explain how to do this on this page.
Back-up mit Time Machine
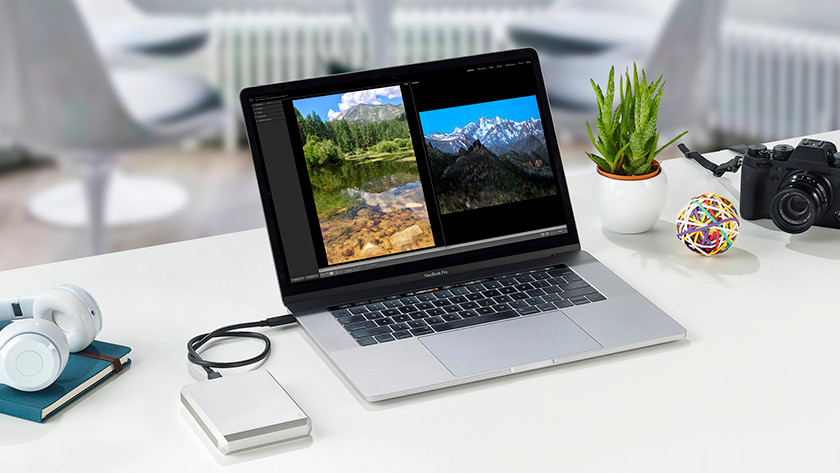
Time Machine is a program from Apple that allows you to easily copy the data on your Mac to an external storage device such as a hard drive. When doing a backup, make sure that you need a converter. Another point to consider is formatting the hard drive to make it suitable for macOS. When creating a backup, always use a drive with a larger storage capacity than the capacity of your Mac.
Step 1: Connect the external hard drive
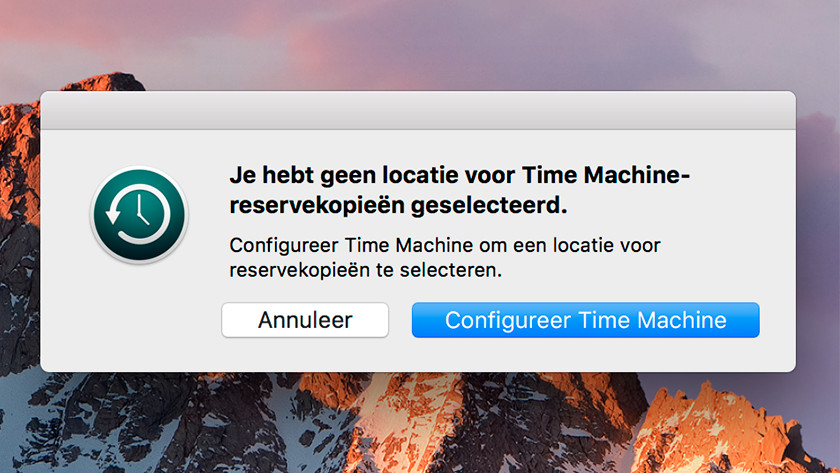
When you connect your external hard drive to your Mac, you will be asked to configure Time Machine. To select a storage location for your Time Machine backup, click on Configure Time Machine .
Step 2: Use your hard drive for a backup
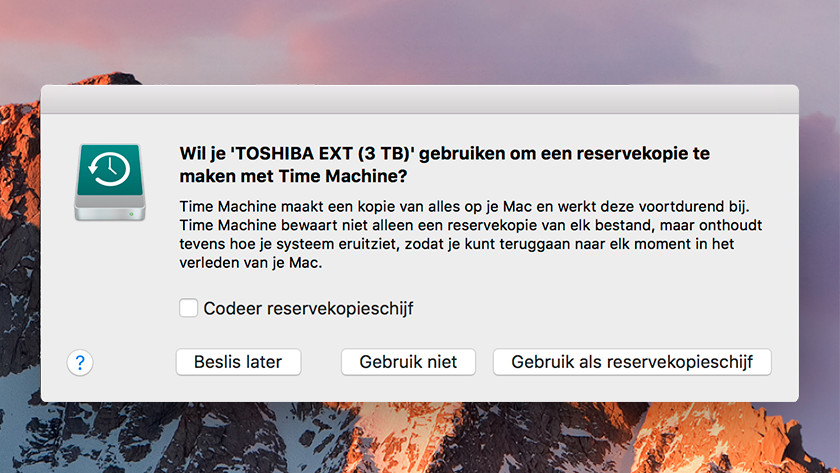
Your Mac will now display a window for creating a backup of the connected hard drive. Click Use as Backup Disk .
Step 3: Time Machine begins
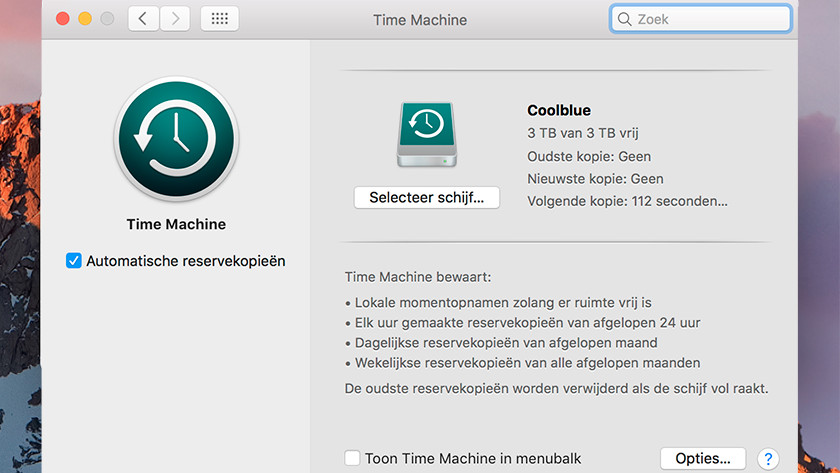
Time Machine will now use your external hard drive as storage space for backing up your Mac. Turn on Automatic Backups to have Time Machine continuously back up your Mac.
Create a backup in iCloud
With iCloud you save your files in the cloud on the Apple server and you can access iCloud with your Apple ID. In contrast to Time Machine, with which you create a full backup, you only save the parts in iCloud that fall under it. These are Contacts, Calendar, Mail, Reminders, iCloud Drive Photos, Safari, Notes, Siri, and Keychain.
Step 1: Open iCloud
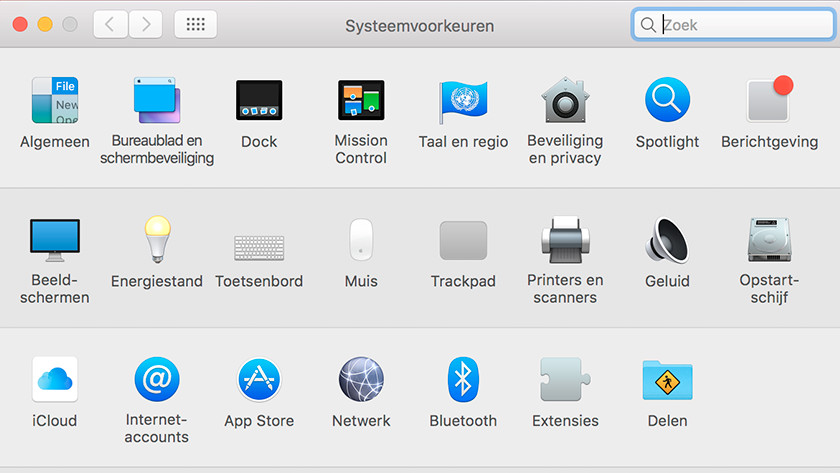
Click the Apple menu in the upper-left corner of your Mac's screen. Here you open the system settings . Then open iCloud , which you use to create a backup.
Step 2: Sign in with your Apple ID
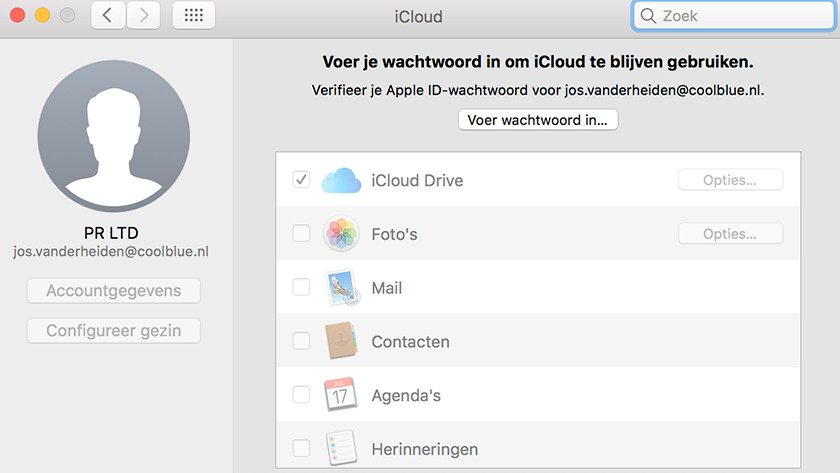
Click the iCloud program to enter password and login with your Apple ID.
Step 3: Choose iCloud Drive
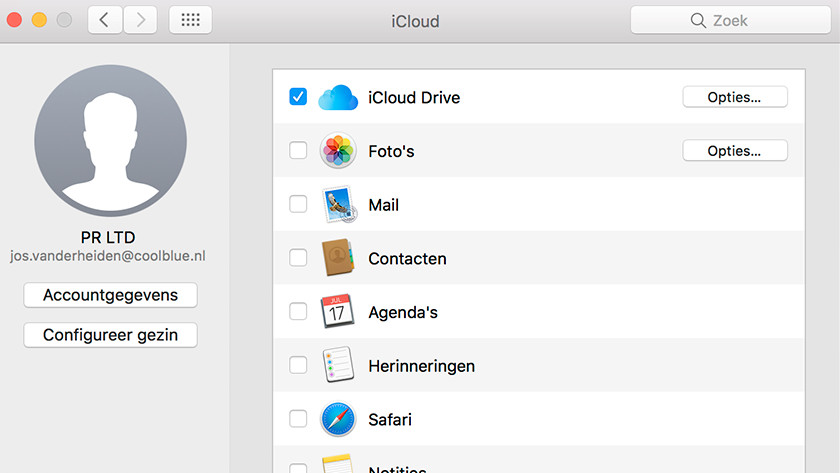
When you choose iCloud Drive , you save your files in iCloud. Select other programs here and save this data in iCloud. If you click Options behind iCloud Drive , you can select all the programs, documents, and data that you store in iCloud.
Step 4: Drag files to iCloud Drive
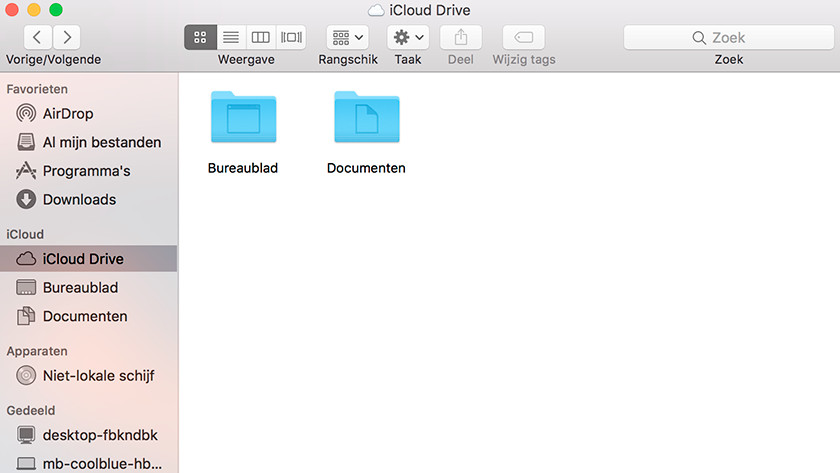
After setting up your iCloud drive, you can now also manually drag files and documents to the iCloud drive in the Finder.
Attention: extend iCloud
iCloud has a limited storage capacity of 5 GB. You can get this storage space free of charge from Apple. If you want to store more files on iCloud, buy additional storage space. These are the prices:
- € 0.99 per month for 50 GB of storage
- € 2.99 per month for 200 GB of storage
- € 9.99 per month for 2 TB storage