OpenVPN is a wonderful way to establish secure VPN connections with the home network or company network. For this purpose, an OpenVPN server can be set up on any PC in the company network.
Why use VPN?
VPN is not only suitable for anonymous surfing, but originally has a completely different purpose: They help to securely connect a computer outside of a company network to the company network via a so-called VPN tunnel over the Internet. The external computer then behaves as if it were directly connected to a network connection in the company and also surfs via the company's external IP address. This technology can also be used to connect to a home router such as the FritzBox when you are out and about. Unfortunately, the FritzBox VPN is not ideal for every purpose. In addition, many professional VPN solutions are chargeable, which is why it is advisable in both cases to operate your own VPN server that is responsible for the VPN connections. This is where OpenVPN helps.
OpenVPN: what is it?
OpenVPN is an open source program that helps set up a VPN. It can be used free of charge, which is why it is particularly suitable for private networks or small companies. But even large companies can benefit from OpenVPN. But first let's take a look at the requirements: In order to be able to use OpenVPN, you need a so-called VPN server, i.e. a computer that takes care of the management of the VPN connections. Since all network traffic from external computers is redirected via this computer with existing VPN connections, the device should above all be quickly connected to the network, Gigabit Ethernet is mandatory! Depending on how many VPN connections should run at the same time, it is sufficient to install OpenVPN on a regular PC that runs 24 hours a day..
Simply use OpenVPN: Here's how
Ideally, you should use a Linux computer as the VPN server. Its advantages are, in addition to the saved costs for the Windows license, the lower system requirements and possibly higher speed. As a rule, even a Raspberry Pi is sufficient for the first attempts at walking. Alternatively, a decommissioned PC, on which you install Ubuntu Linux, can also work. It is important that you use the wonderfully slim and beginner-friendly PiVPN instead of the official OpenVPN project : It can be easily installed under Raspbian, Ubuntu and other Debian Linux systems and has the advantage over the "original" that it is much more user-friendly.
Set up OpenVPN with PiVPN: Here's how
At this point, we simply assume that you have set up a running Linux PC with Ubuntu or a Raspberry Pi with Raspbian and have installed the necessary updates. The further installation steps are then quite easy to accomplish:
- Open a Terminal window and
sudo apt install curl start typing here to set up Curl. Confirm with Enter and then enter your user password for the Linux computer. Curl will be installed.
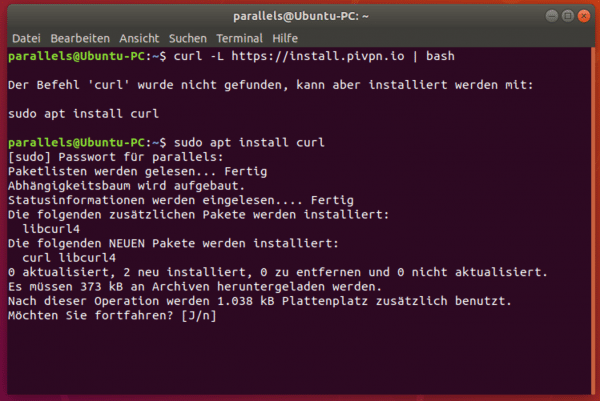 Before you can get started, Curl needs to be installed.
 - You can then call the PiVPN installer by entering the command
curl -L https://install.pivpn.io | bash .
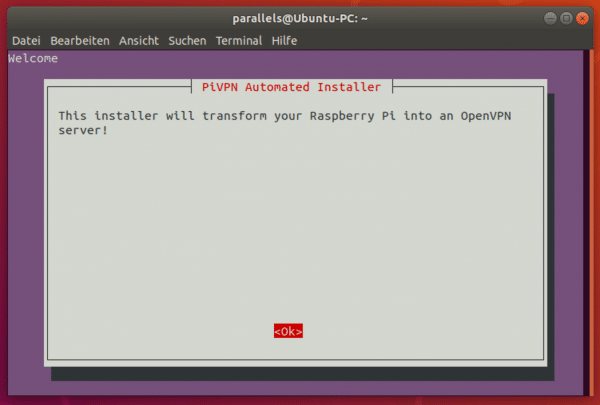
- Confirm " OK " in the following window with the Enter key.
 You can ignore that with the Raspberry Pi.
 - Confirm the message about the static IP address again with the Enter key.
- Under Ubuntu, PiVPN may still "grumble" about the missing static IP address. That doesn't matter at first, confirm with " OK ".
- PiVPN now asks for the local user who should manage the OpenVPN configurations. This can be your normal Linux user, who you use when you log in, or someone else. Confirm with " OK ". PiVPN then asks the user. In our case there is only the user “parallels” on the machine, which is why we select this one. Use the Tab key to highlight OK and press Enter.
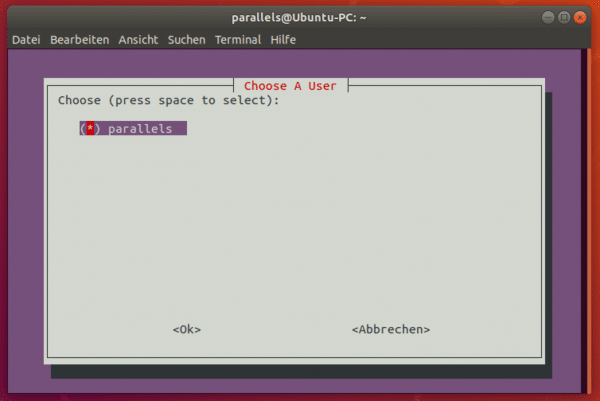 The user is responsible for managing the VPN connections.
 - Confirm the question about the “unattended upgrades” with “ OK ”.
- Confirm the activation of the unattended upgrades with " Yes ".
- The installer jumps back briefly to the command line, then asks whether you want to use TCP or UDP as the network protocol. In most cases, UDP is the right choice here. Confirm again with " OK ".
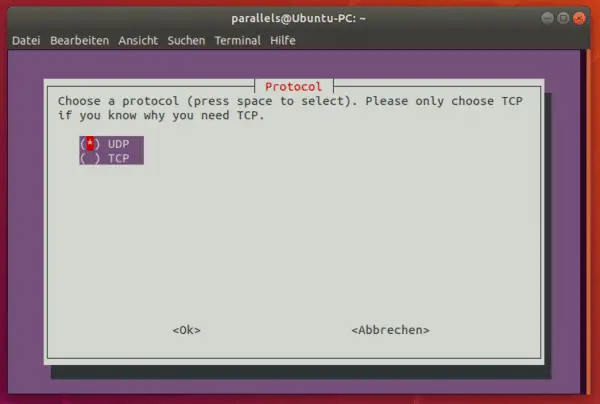 UDP is the best choice in most cases.
 - Now you have to be careful: In order to make the OpenVPN server accessible from the outside later, you have to set a port. The PiVPN installer suggests port number 1194 - you can usually accept this with " OK ".
- The installer then asks you for the settings again. Confirm with " OK ".
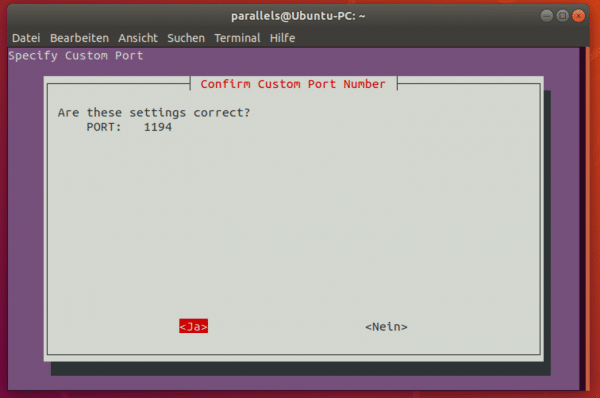 Port OK? Then next!
 - Finally, the installer asks whether you want to use the new, stronger encryption. At this point, too, you can confirm with " Yes ", since the OpenVPN clients support the newer encryption.
- Now the installer asks you to enter the password again in the terminal.
- The installer window opens again. Select the 256-bit certificate and confirm with " OK ".
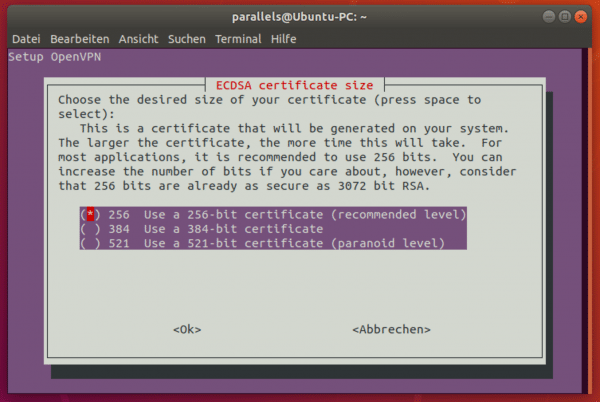 256-bit encryption is usually sufficient.
 - After another brief process in the terminal, the installer appears again. Select “ DNS Entry ” for the public DNS (for example a DynDNS address) if you do not have a fixed IP address and select “ OK ” again. If your Internet connection has a fixed address, you can choose the other option.
- Now enter the public DNS. You will receive this, for example, when you register a MyFritz account or when you register a DynDNS address. Enter this URL here and confirm with " OK ". The following window asks for this information again, confirm here with " Yes ".
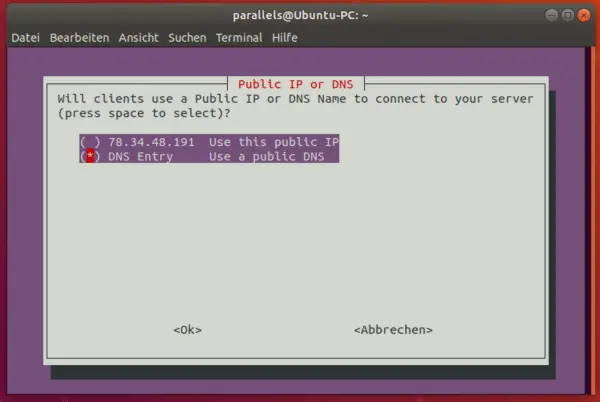 The DNS entry is important in order to reach the server from the outside.
 - Now select “ Google ” as the DNS provider. Alternatively, you can select " Custom " and enter the DNS server of your Internet provider in the following window.
- Now the installer asks whether you want to offer your own search on the VPN server. Select “ No ” here.
- That's it: The installer is ready and PiVPN is set up. Confirm with " OK " and restart the computer to complete the installation.
Use PiVPN
The OpenVPN server is now active on your Linux system via PiVPN. You can now set it up further, for example by creating a new user and password with the terminal command “pivpn add”. An OPNV file is generated in the process. This is required together with the user name, the password and the IP address / DynDNS address (see step 17/18) in order to connect clients to the VPN server. There is plenty of software that supports OpenVPN connections, such as Tunnelblick for MacOS or Pritunl Client for Windows, Mac and Linux as well as the official OpenVPN clients , which can be downloaded free of charge..