You have to leave one thing to the iPhone: It has a good camera that is always with you. That makes for great photos. However, they somehow have to find their way to the Windows PC: either for archiving or for further image processing. However, the process is surprisingly simple.
Transfer photos from iPhone to PC directly
Optional: First, you can install Apple's iTunes on your Windows PC . This is not absolutely necessary, but the player makes it easier, for example, to upload pictures and music to the iPhone. Download the installation file from https://www.heise.de/download/product/itunes-18786/download to your PC and install the Apple media player.
For Mac users: You can find out how to easily transfer your iPhone photos to Mac in this article..
Follow our step-by-step instructions , the explanatory video or the brief instructions .
1st step:
 The photo transfer also works without iTunes : Simply connect the iPhone to your Windows 10 PC with the supplied USB cable . As soon as Windows reports that you should take an action, everything is set up.
 2nd step:
 Now unlock your iPhone and select " Allow " in the window that appears .
 3rd step:
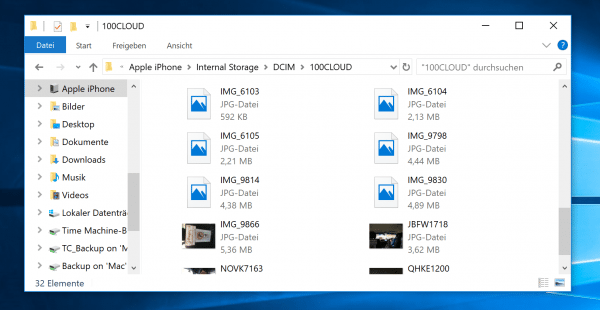 Now open an Explorer window: The iPhone is mounted as a device . There you will find the “ DCIM ” folder , in which you will find all the photos on the device. You may now easily transfer by dragging them to a folder on the PC copy .
 Video
Transfer photos to PC via iCloud
If you have activated Apple's iCloud photo library on the iPhone, the transfer is even easier: You no longer have to connect the iPhone to the PC via a USB cable, the image transfer is also carried out automatically. All you need is a little Windows software from Apple:
Follow our step-by-step instructions or take a look at the brief instructions ..
1st step:
 Download and install “ iCloud for Windows ” from Apple's website ( https://support.apple.com/en-us/HT204283 ). The software has all the necessary functions, in addition to photo synchronization , practical synchronization options for calendars, address books and bookmarks.
 2nd step:
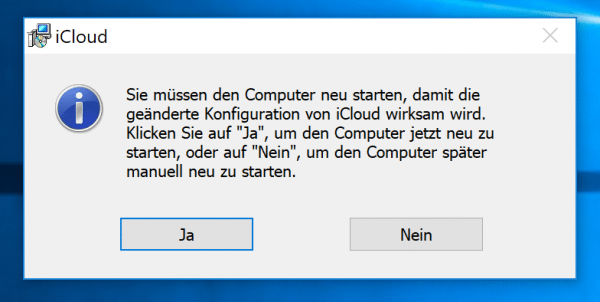 After the installation, the PC has to be restarted once . To do this, click on “ Yes ”.
 3rd step:
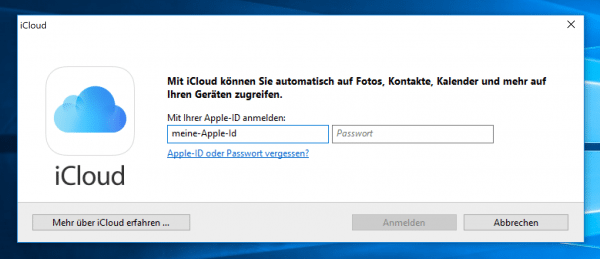 The iCloud control panel will now appear in the system tray . In addition, a login window opens automatically . Enter the Apple ID and the password that you also use on the iPhone.
 4th step:
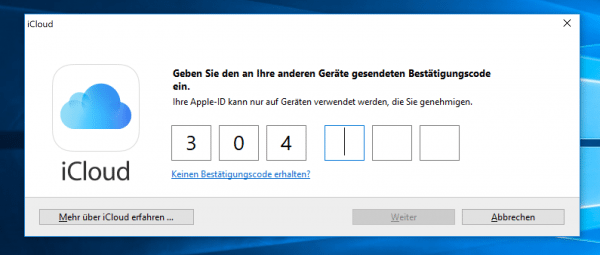 If you have activated two-factor authentication , you will now see a code on the iPhone that you have to enter in the iCloud window under Windows. Then click on “ Next ”.
 5th step:
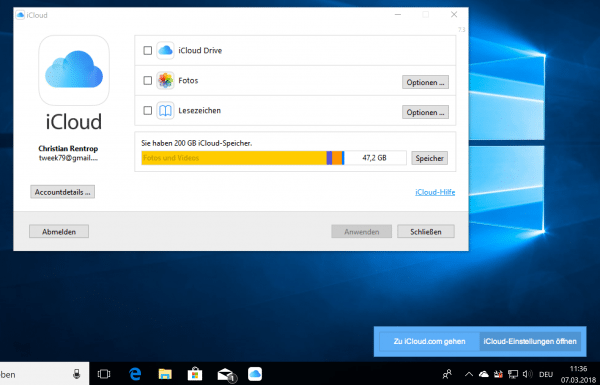 The iCloud for Windows is set up. However, you still have to activate the iCloud synchronization : Open the iCloud settings from the task bar and check the box next to "Photos" . A window then pops up: Click here on " iCloud Photo Library ".
 6th step:
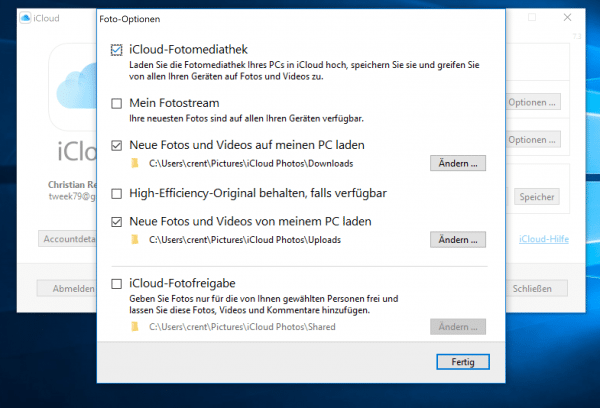 The menu then changes. You can accept the default settings. Then click on “ Done ”.
 7th step:
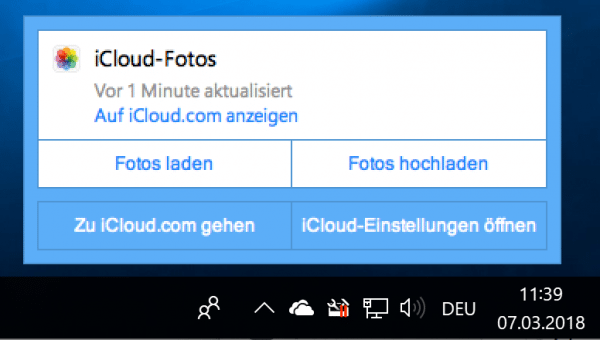 Now you have to click on the iCloud system tray icon again. Select " Load photos " here. The photo library is now being prepared, all images and videos from the cloud are loaded onto the PC. This can take a while, depending on the size of the media library.
 8th step:
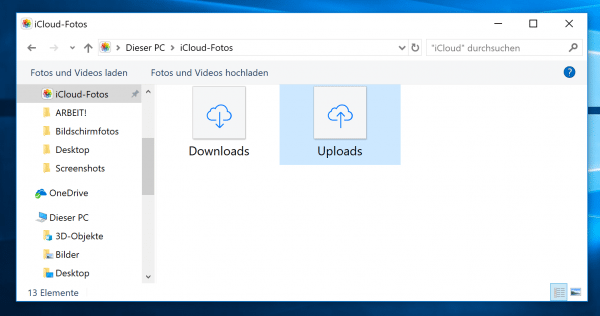 From now on you will always find the pictures in the “iCloud Photos” folder in Windows Explorer .
 Transfer photos to the PC via Dropbox
If you prefer to use other manufacturers instead of Apple software, Dropbox also offers you the option of transferring your iPhone photos to your PC. To do this, you need the Dropbox app on both your iPhone and PC:
Follow our step-by-step instructions or take a look at the brief instructions .
1st step:
 Open the Dropbox app on your iPhone and go to the Photos category . Then tap on " Select Photos ".
 2nd step:
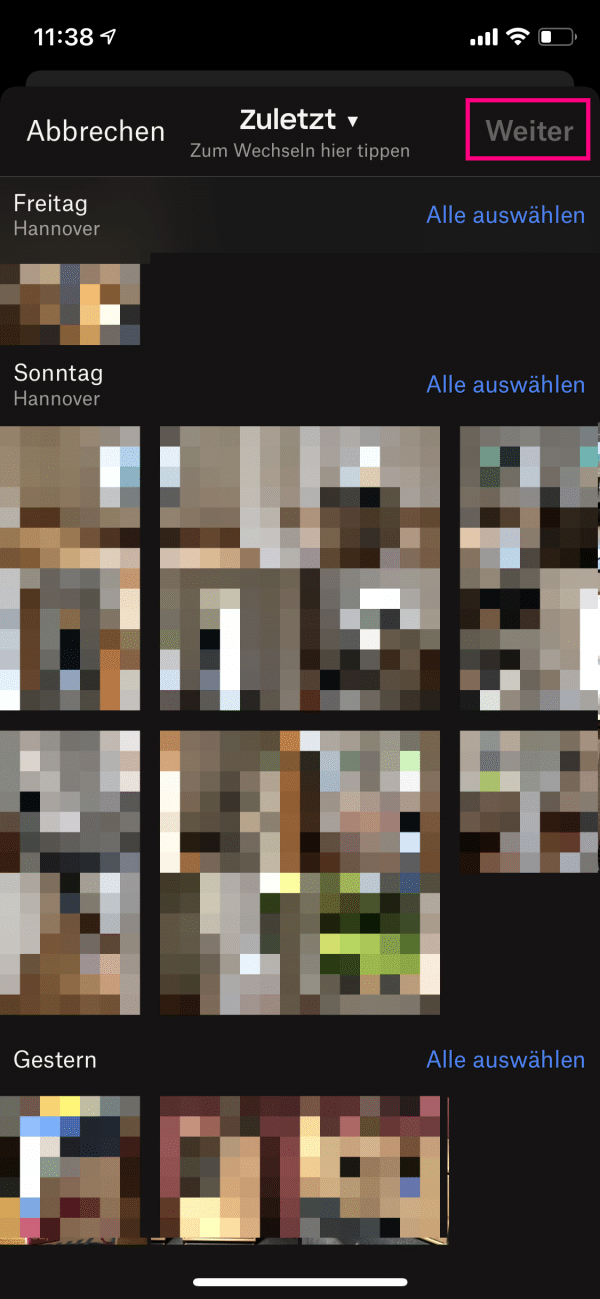 After allowing Dropbox to access your photo collection, select the photos that you want to transfer to your PC. Then click on " next ".
 3rd step:
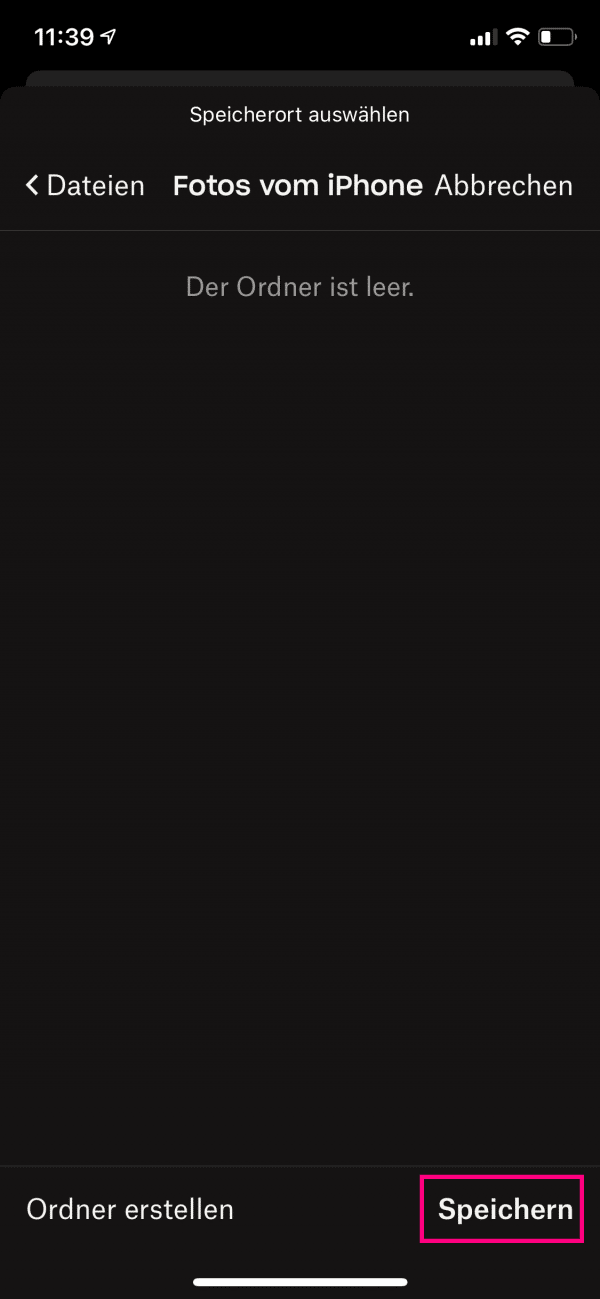 Now select the option " Specify storage location " and then the folder in which the photos are to be saved. If it doesn't exist, just create a new folder. Finally, tap on " Save " to save the photos in the Dropbox. After that, you can easily access the photos from your PC. Please note that you have to be logged in with the same account on both devices !
 Quick Start Guide: Transfer Photos Directly from iPhone to PC
- Connect your iPhone to the PC with a USB cable .
- Then unlock the iPhone and tap " Allow " in the window that appears .
- Then open the Explorer . There you will find the iPhone under " Devices ". You will find the images in the " DCIM " folder , which you can now simply copy to the PC.
Quick guide: Transfer photos to your PC via iCloud
- Download " iCloud for Windows " ( https://support.apple.com/en-us/HT204283 ) and restart the PC after the installation.
- iCloud will now appear in the system tray. A login window will also open in which you can log in with your Apple ID and the associated password . If you have activated two-factor authentication , you must now enter the code in Windows and click on " Next ".
- Then open iCloud from the taskbar and put a check in the "Photos" . In the window that appears, click on " iCloud Photo Library ". Now the menu changes. Click on " Done ".
- To transfer the photos to your PC, open iCloud again via the taskbar and click on " Get Photos ". You will then find the iPhone pictures in Explorer in the "iCloud Photos" folder .
Quick guide: Transfer photos to the PC via Dropbox
- Open the Dropbox app on the iPhone.
- Go to " Photos " and allow access to them.
- Select the photos that you want to back up on your PC.
- Select the storage location in the Dropbox and tap " Save ".
- The photos are now available in the Dropbox, you can now access the Dropbox from your PC. Please note that you have to be logged in with the same account.