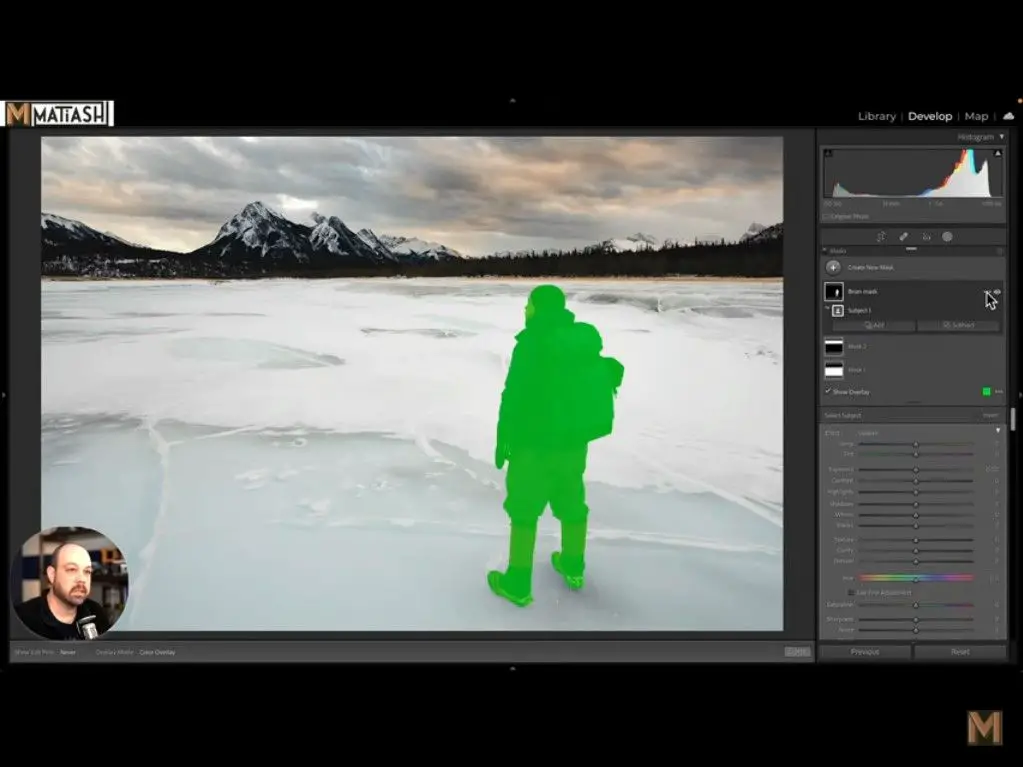
- Lightroom Classic, the famous Adobe program, has excelled with one of its latest enhancements: the ability to combine different masking modes to achieve highly selective adjustment areas
- It is a tool that takes advantage of 100% the potential of Artificial Intelligence to allow us to select areas within areas, being much more precise when applying modifications
Lightroom is not only one of those apps to edit photos on iOS and Android that you should try, but it is also a software that we can take advantage of, and a lot, on our computer. Some users even make small modifications to it before moving to Photoshop. If this is your case, and you want to give your photo a special touch, discover how to combine masks in Lightroom Classic to reduce the area you are working on ..
The fact is that, from just a few weeks ago, we can take even more advantage of Adobe Lightroom Classic thanks to a series of novelties introduced by its developers, which basically have to do with the possibility of combining different masking modes to achieve highly selective adjustment areas .
Lightroom mask improvements
As we said before, a substantial update to Lightroom Classic introduced in the last quarter of 2021 brought new masking tools to one of the main image editing programs..
In this way, although the previous solutions in Adobe application skins were not bad, now it uses Artificial Intelligence to select themes. Even so, today we are interested in the intersection as a solution.
What is the advantage of these new functions introduced by the developers of the firm? Basically, the most important benefit is that you can combine various types of masks to reduce the work area ..
To give you an idea about how to use it, think, for example, of first selecting that object in the image on which you want to apply some changes, and then in an area within that first selected object. For example, focus first on the person in the photo, and then on his hat .
So how can I combine masks in Lightroom Classic?
Well, we know that things can still be a bit complicated to interpret, and that is why we are going to use a professional in the matter. This is the photographer Brian Matiash, author of the video tutorial that you have here above .
There, you can see how to carry out the procedure to work directly on his jacket in the photo . Using a mask and Artificial Intelligence, he first selects himself, and then crosses with a second mask, leaving only the area of the photograph that corresponds to the jacket marked.
Of course, if the fit is not perfect, you can brush the result a little to improve it and leave it perfect .
The intersection of masks is simple. You simply create the new mask, click the three-dot icon to the right of the mask name, then click "intersect mask with", and we could say done. In Lightroom Classic, you will be shown a list of skin types that you can combine the current skin with.
From there, you can get absolutely creative with Lightroom's mask combinations .
Other things to keep in mind
To further narrow your selection, you can turn on the mask overlay and use the "Refine" slider with some masks , such as the color gamut mask, which should be quite useful. To see exactly which areas of the image are masked, hold down the Option key on Mac or the Alt key on Windows, and then drag the slider. You will see it white on a black background.

Conclusions.
Once you are familiar with this concept, you will see that you can use it practically to edit everything. You have the possibility of taking advantage of it to change someone's eyes, modify an outfit, or whatever else comes to your mind, and that you believe or feel will improve the final results.
A suggestion? Try combining masks in Lightroom on old photos and adding more modern objects . Your friends and families will go crazy with the results you can achieve in just a few minutes.
If this tutorial is helpful, you can also see how to add presets to Lightroom.