- GIMP is an interesting option for those people who haven't quite grasped the famous Photoshop, and the truth is that with it we can blur images and backgrounds without problems
- In fact, this platform has multiple blur tools, which we are going to review, so that you know exactly which one you should apply to each of your photos or images
While it is true that when it comes to photo retouching, most users intend to start directly in Photoshop, we still have many more recommended programs for newbies. Precisely, if you want to give your photos a different touch, and you are not achieving it with the most famous software, it is better to learn how to blur images and backgrounds with GIMP, a good alternative to Photoshop ..
As we said, GIMP is an image editing application that allows you to add effects or create designs. In addition, it has the advantage that it is completely free, and we can make it look like Photoshop.
That said, several of its tricks and processes are more straightforward. Therefore, if you do not have much experience in this regard, we consider that the most appropriate thing is to start with it to avoid wasting time ..
Blur images and backgrounds, a basic trick
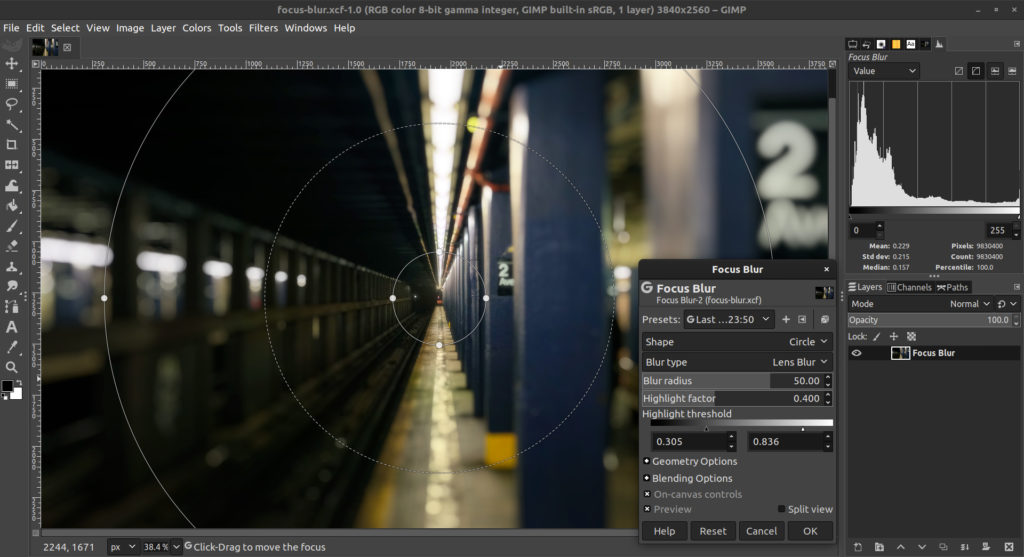
That said, we know that blurring images and backgrounds is one of the basic tricks in these photo enhancement apps. And in the case of GIMP, that not only gives good results, but we also have different effects. Many of them specially developed to blur a part of your images.
In fact, with a background blur you can achieve the traditional portrait or bokeh effect, very fashionable today..

What are the types of blur filters in GIMP?
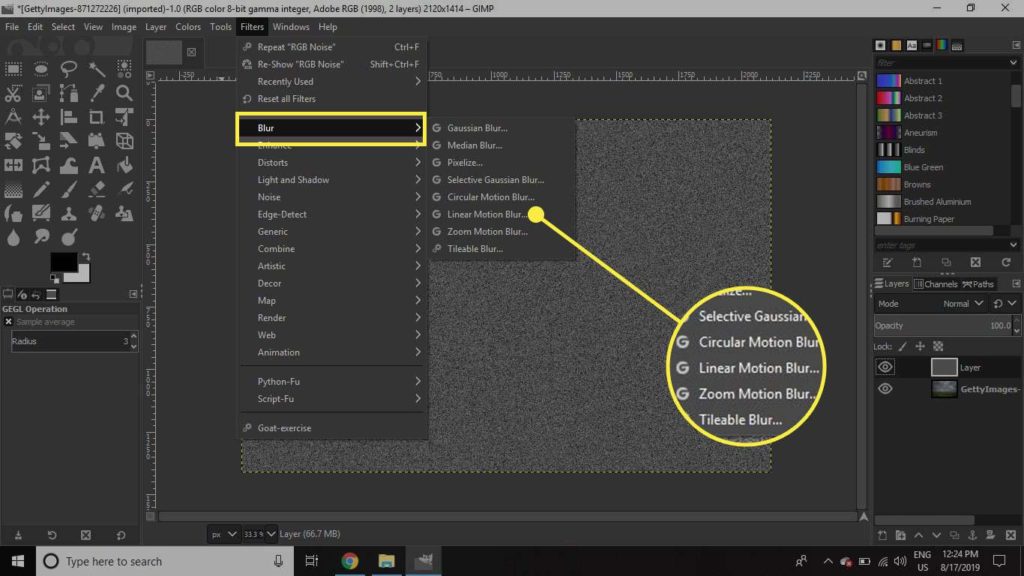
- Gaussian Blur – The most commonly used blur in GIMP, it offers efficient operation that allows you to create a very fuzzy blur in a relatively short time, and is the one you should learn to apply with.
- Medium Curvature Blur – This filter uses the medium curvature to blur the edges while preserving the image, so it's a bit more advanced than the previous one and may take you some time to master.
- Median Blur – This filter applies the blur by calculating the median.
- Pixelate Blur – This filter converts the image into a set of large square pixels.
- Selective Gaussian Blur – This filter, as the name suggests, allows you to set a threshold so that only pixels that are similar to each other are blurred together, so in some cases it may be ideal.
- Circular Motion Blur : This filter blurs in a direction of rotation around a center that you can set, so again, we think there will be very few occasions where this will work.
- Linear Motion Blur – This filter blurs a direction that can be custom pointed.
- Zoom Motion Blur – This filter blurs in a radial direction around a specific center.
- Tilting Blur – This filter is the same as a Gaussian blur, except that it wraps around the edges of an image to help reduce edge effects that occur when multiple layers overlap.

And how to blur images and backgrounds using GIMP?
Having analyzed the different types of blurs in GIMP, it's time to get to work with them.
- Open GIMP and load the image or photo you want to work on
- Click on Selection in the Toolbox
- Move the cursor to the place you are going to blur
- Click on the Filter tab, and then on Blur
- Select the type of blur effect
- Adjust the configuration details
- Click OK when you are confirmed with the preview of the effects
- Repeat the process if necessary and, if you are satisfied, export the image
As you can see, it is a really simple process. It shouldn't take you more than a few minutes. Obviously, the more time you spend on it, the closer you will be to becoming an expert .
If this article is helpful to you, you'll also want to know how to perform other essential tweaks in GIMP.