Information security is one of the most fundamental keys for any type of organization and each operating system and application manages its own rules focused on increasing the security of this information and Microsoft Excel 2019 does not lag behind on this issue..
Security is essential in Excel 209 spreadsheets or workbooks since the information we record there, regardless of its type, can be confidential. If you get to work in an incorrect way the results will be wrong or simply the formulas and functions will not be executed as it should be. Sometimes we can complement the concealment of sheets or formulas along with the protection of the file from their own access, thus preventing any user from accessing the contents of the spreadsheet.
For this reason, TechnoWikis will explain how we can hide our sheets or formulas in Excel 2019 and thus add more security to the work on them..
To keep up, remember to subscribe to our YouTube channel! SUBSCRIBE
1. Hide a formula in the Excel 2019 formula bar
The first process that we will see involves preventing the formulas that we have registered from being visible in the Excel 2019 formula bar from where they could be edited or configured, this process will also prevent the cells where the formula is hosted from being modified.
Step 1
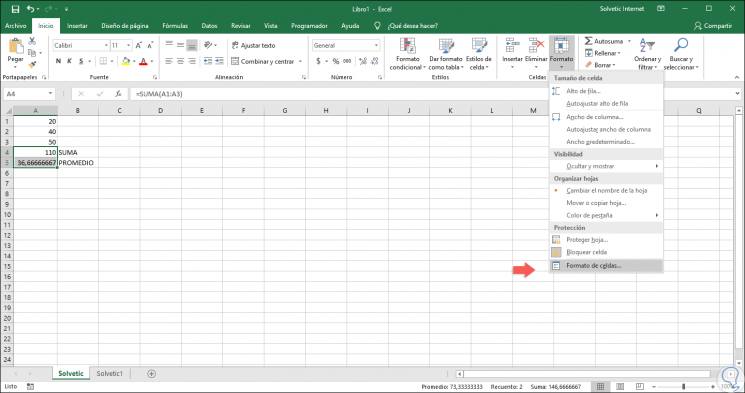
To do this, we will select the range of cells where the formulas that we are going to hide are located, Excel 2019 also allows us to select non-adjacent ranges or the entire sheet. Now we go to the "Start" menu, group "Cells" and there we will click on "Format" and in the options displayed we select the option "Format Cells":
Note
It will also be possible to access this option as follows:
+ 1 Ctrl + 1
- By right clicking on the cell and selecting Format Cells.
Step 2
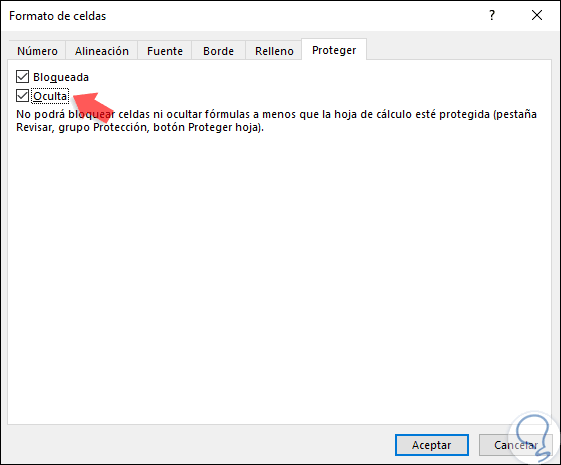
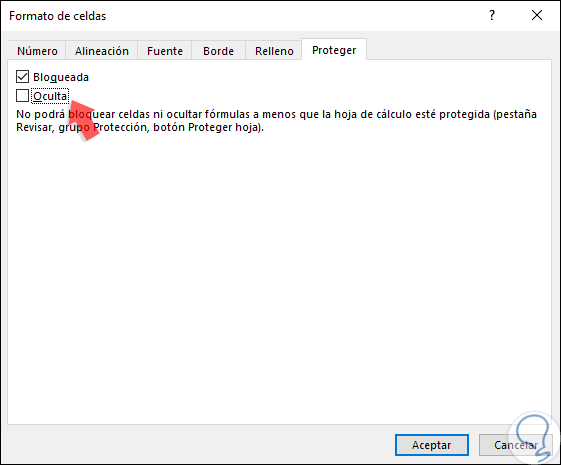
In the displayed window we will go to the “Protect†tab and there we activate the “Hidden†box:
Step 3
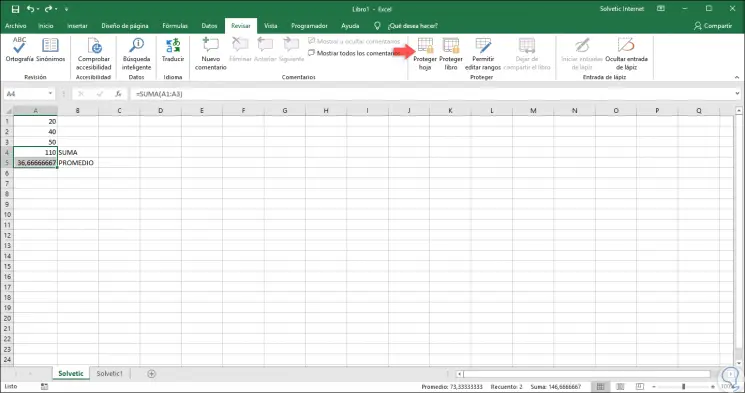
We click on Accept to apply the changes, now we will go to the “Review†menu and in the “Protect†group we click on the “Protect sheet†option:
Step 4
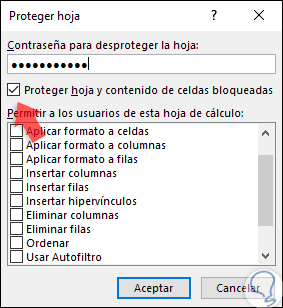
In the window that is displayed, we validate that the “Protect sheet and contents of locked cells†boxes are selected later, click on Accept:
Step 5
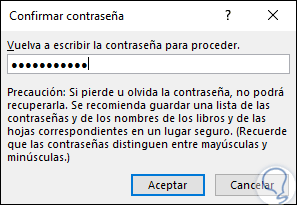
If we wish we can assign an unlock password. If we assign password it will be necessary to confirm it:
Step 6
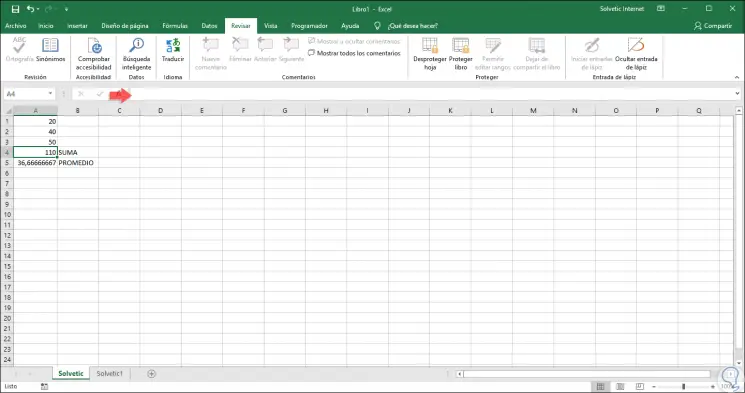
Thus, when we select the cell where the formula is located, we can verify that it is not visible in the formula bar:
2. Switch between displaying formulas and results in Excel 2019
This is a simple method that consists of using our keyboard to toggle between the formulas and their result, for this we must simply press the CTRL + `keys (serious accent) and so we will see these changes.
+ ` CTRL + `
3. Show hidden formulas by removing protection in Excel 2019
Step 1
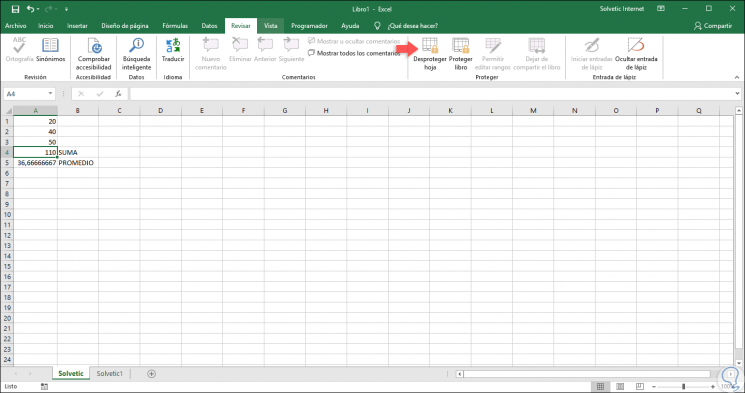
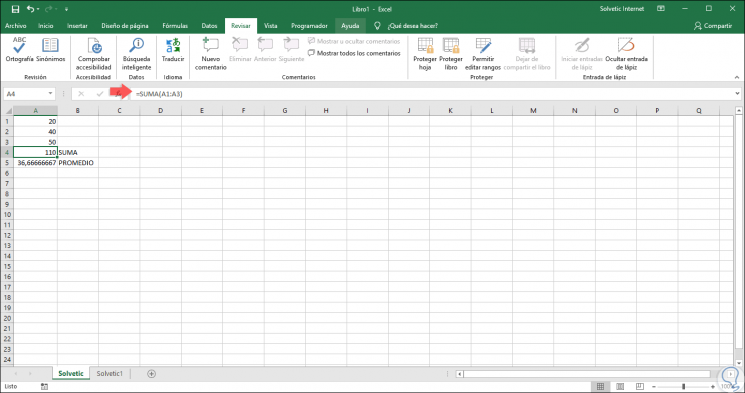
In the case that we consider it necessary to remove the protection of the cells where the formulas are located, we must go to the “Review†menu and in the “Protect†group click on the “Unprotect sheet†option:
Step 2
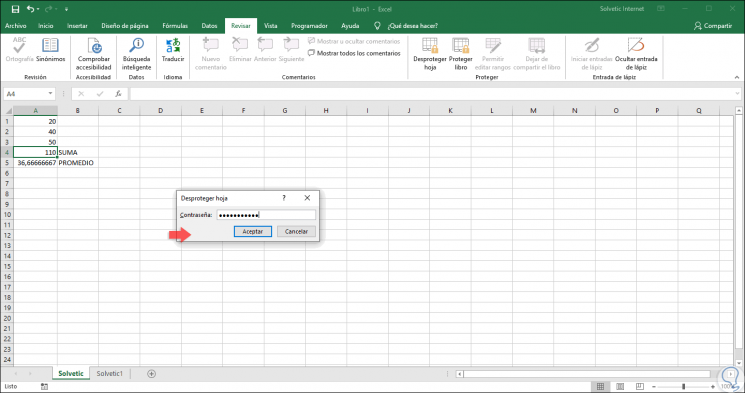
If we have protected the sheet with password it will be necessary to enter it there:
Step 3
Click OK and we will see that the formulas in the cells are visible again:
Note
In case the option “Check out sheet†is not available, we must first deactivate the Shared Book feature.
Step 4
Now, if we do not want the formulas to be hidden when the sheet is protected later, we must right click on the cells and select the “Format cells†option and in the window that will open we will go to the “Protect†tab and then deactivate the "Hidden" box. Click on OK to apply the changes.
4. Hide Excel sheets 2019
We have seen the process to hide formulas directly from the formula bar, but it may also be required that we hide spreadsheets in their entirety due to the information contained in them.
Step 1
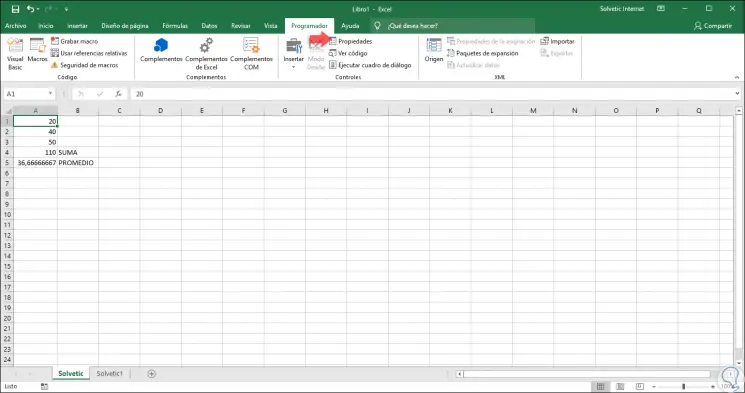
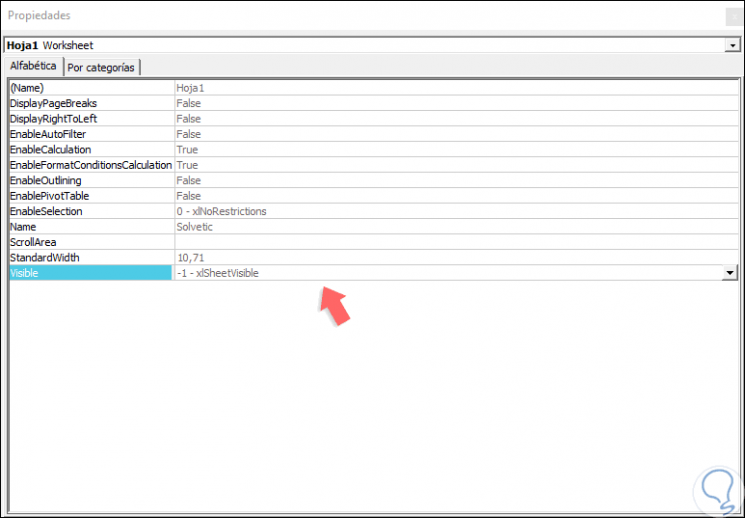
To do this we must go to the Excel sheet to hide and after this we go to the "Programmer" menu and in the "Controls" group we click on the "Properties" option:
Note
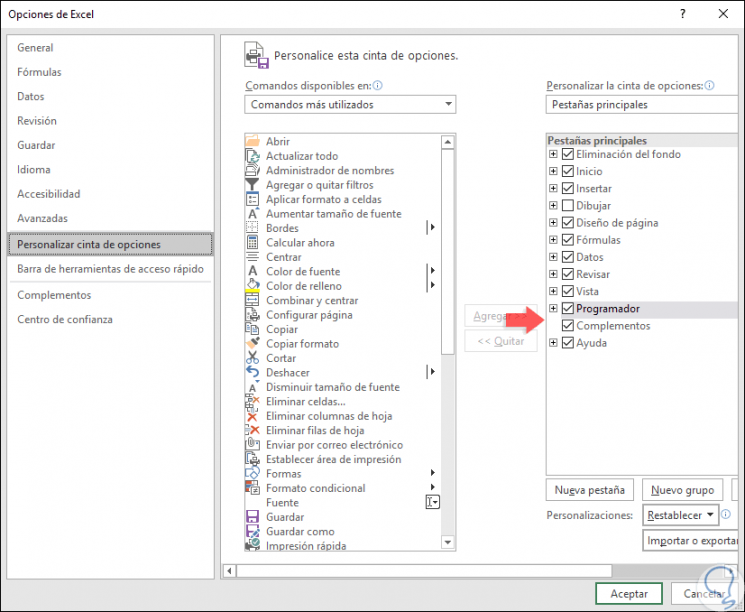
If the Programmer menu is not available, we must go to “File / Options†and then go to the “Customize Ribbon†section and on the right side, activate the “Programmer†box. Click on OK to apply the changes.
Step 2
By clicking on "Properties" we will see the following:
Step 3
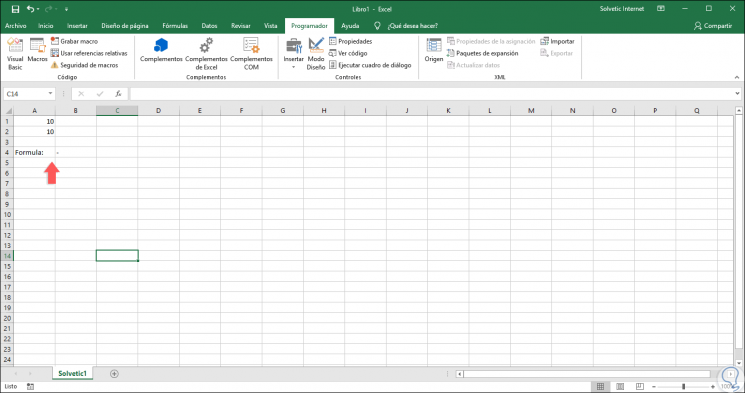
There we go to the line "Visible" and in the drop-down field we select the option "-2- -xlSheetVisible" and automatically the spreadsheet, in this case called "TechnoWikis" will be hidden. This same process can be repeated for all the spreadsheets to hide.
Note
If we want to prevent a user from hiding or blocking the spreadsheets, we will be able to block the entire Excel 2019 workbook and apply a password, for this we must use the following keys, go to the “Insert / Module†menu and there Paste the following indicating the name of the sheet to be protected:
+ F11 Alt + F11
Hidden Sub Sheet () Sheets (“TechnoWikisâ€). Visible = xlVeryHidden End Sub
Step 4
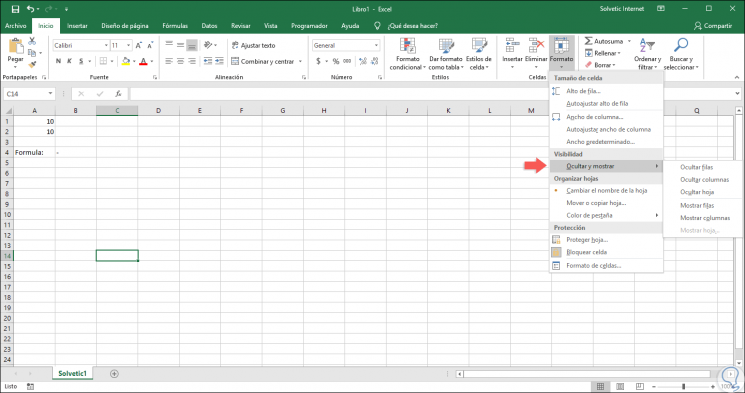
To verify that the sheet has been hidden correctly we will go to the Start menu, group “Cells†and then click on “Format / Hide and show†and we will see that the option “Show sheet†is not active:
Step 5
If we want to visualize the hidden sheet, we will use the following keys to access the VisualBasic editor.
+ F11 Alt + F11
Step 6
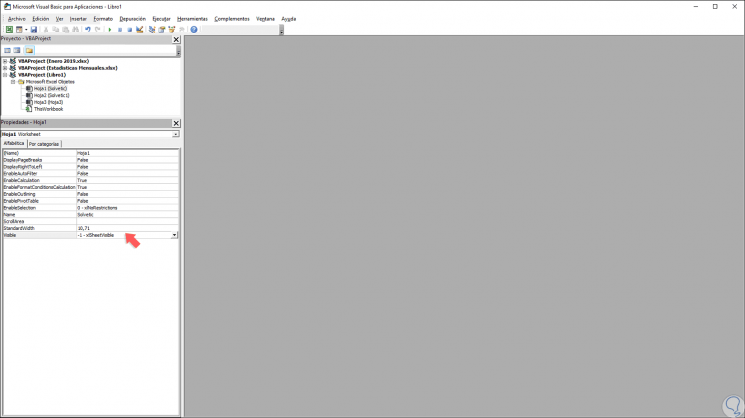
Then we use the following keys to access the project explorer, there we select the sheet that has been hidden and press the F4 key or go to the "View / Properties window" menu. In the options displayed we go to the line "Visible" and in the drop-down field we select the option "-1- xlSheetVisible":
+ R Ctrl + R
Step 7
We close the editor and we can see our Excel 2019 sheet visible again:
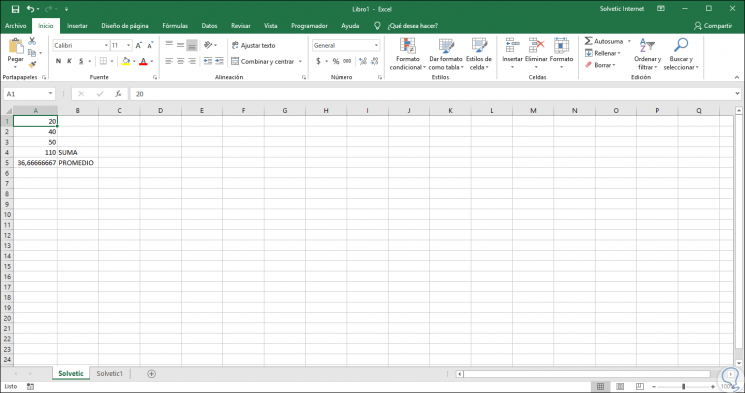
Step 8
It will also be possible to visualize the hidden sheets by creating the following VBA module:
Hidden Sub Sheet () Sheets ("TechnoWikis"). Visible = True End Sub We have learned various methods that will give us the possibility of protecting both formulas and sheets in Excel 2019 and in this way we will prevent the information stored there from being violated.