When in our roles is the administration of Linux operating systems it is ideal to know various commands with which the support and management tasks will be much more bearable since thanks to them we will obtain critical information that will later be of great help for analysis or reports..
Undoubtedly, one of the most delicate aspects in any type of organization is the management of users and especially if more than one has access to the system since if an error occurs, it will be much more complex to determine who and when I generate these failures .
To solve this type of management we find the Finger command which gives us an overview of the users who are currently connected to the system and based on this information to cross details to know their activities and impact on the system and its operation . TechnoWikis will make a complete analysis of this valuable command in Linux and thus you will have one more ally for the administration tasks..
1 . How to install and use Finger on Linux
Step 1
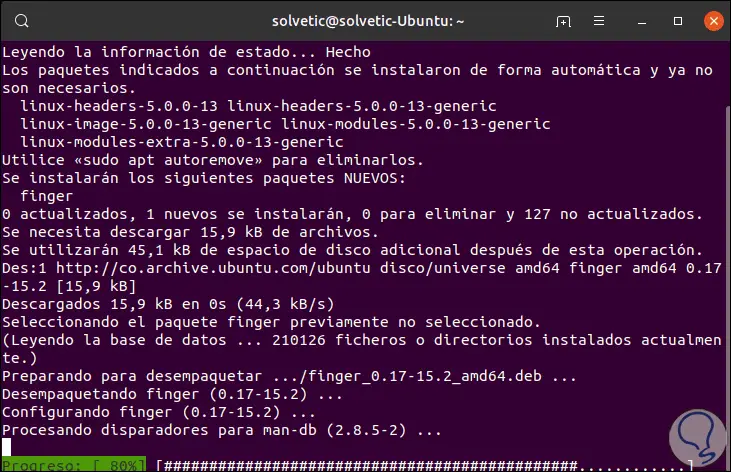
As a rule, Finger is not installed on Linux, in this case we talk about Ubuntu 19, so we must run the following for installation:
sudo apt install finger
Step 2
In case of using Fedora we must execute the following:
sudo dnf install finger
Step 3
Once Finger is installed in the system, this will be the general usage syntax:
finger [-lmsp] [user ...] [user @ host ...]
The parameters indicated here are the following:
-s
Displays the user's login name, real name, device name and writing status, idle time, login time and other available parameters, in this case the login time has The format of month, day, hours.
-l
This parameter generates a format with different lines where we will see all the information of the -s option, adding the user's home directory, the phone number, the login shell, email status, as well as the content of the files ".plan", ".project", ".pgpkey" and ".forward" directly the user's home directory.
-P
Prevent the -l option from generating the contents of the ".plan", ".project" and ".pgpkey" files.
-m
Skip user name matching
If no parameter is specified, the results of the value are assumed - and the Finger command will print an entry associated with each user that is connected to the operating system.
Step 4
Additionally, we can search for data on remote computers using the user @ host or @host format.
When we run finger we will see the following:
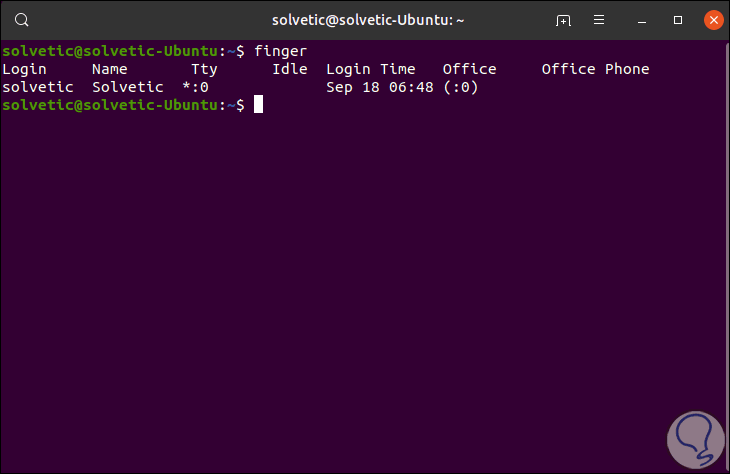
There we find the following values:
Login
Is the username that initiated the current session
Yam
It is the real name of the connected user
Tty
It refers to the type of terminal where we are connected, the value “: 0†indicates the physical keyboard and the screen associated with the physical equipment
Idle
It is the idle time of the current user, in case of seeing a single digit this will indicate that it is minutes and if we see two points it will indicate hours and minutes and if we see a letter "d", it will be days and hours.
Login Time
It is the time when you logged in
Office
It is an old value in which the user's office data was displayed, but currently the IP address of the device is displayed and the value ": 0" again refers to the physical keyboard and the screen of the device.
Office Phone
There the office number is displayed, but if root has not registered any phone number we will see a blank space.
Step 5
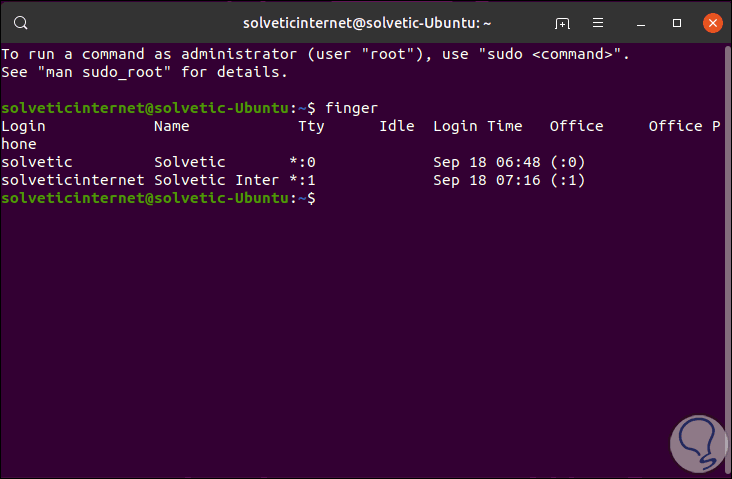
Now, if there are several users connected we will see something similar to this:
2. How to use Finger command for a particular user
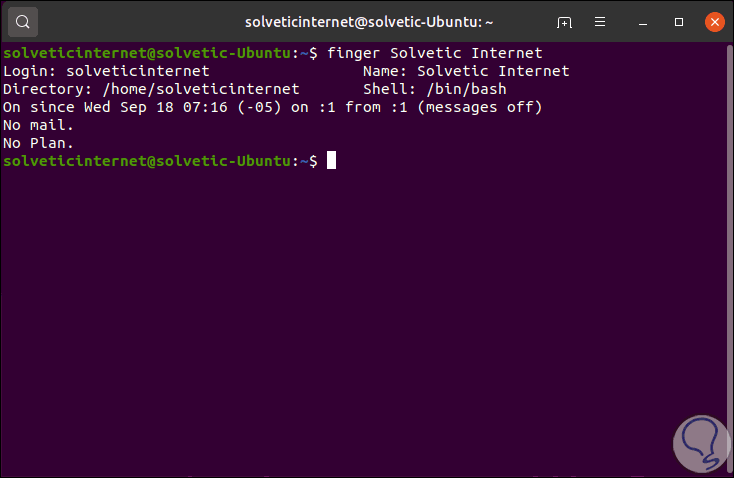
Finger allows us to specify a particular user and not all users of the system, for this it is enough to execute the following syntax:
finger "user"
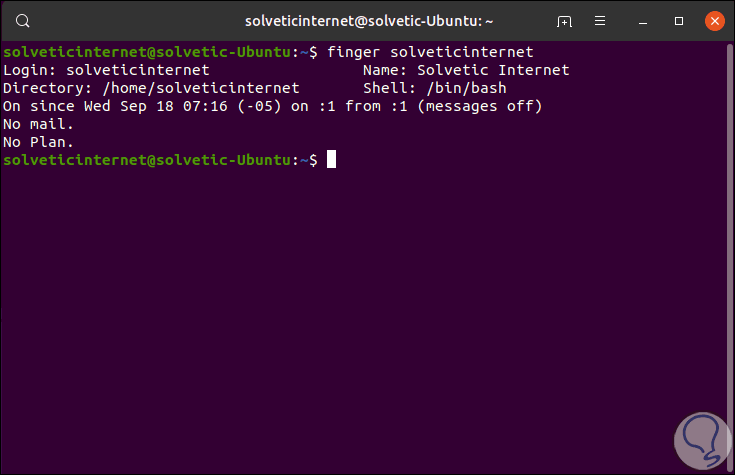
We can find different aspects of the user such as:
Directory
It is the home directory of the indicated user
Shell
It is the shell used
On Since
Indicates the time and date on which the user logged in, from what tty and with which IP address.
Mail
Show the user's email (if you have one) and if the email has been checked, it will display the review time
Plan
In case the user creates a ".plan" and ".project" file in the home directory and adds information in it, it will be displayed here.
Another way to access a user's information is by using their real name:
3. Display results by skipping the .plan and .project files Finger command on Linux
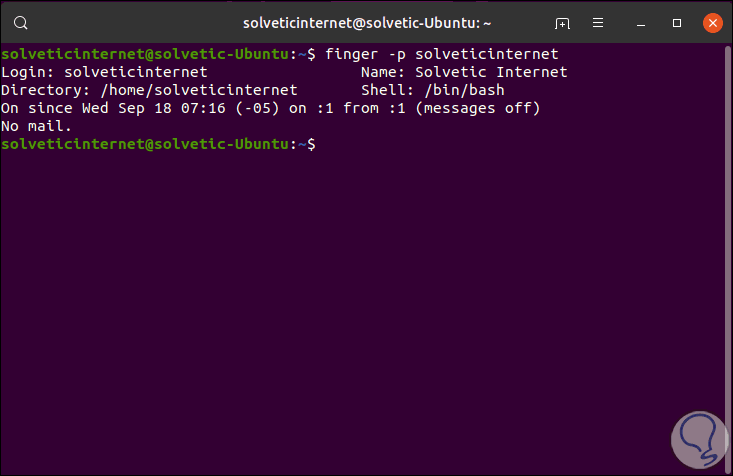
If we want the Finger command to give us the data of a user, but omitting these two files we must execute the following:
finger -p "user"
How to use the extensive listing option
This is a way to visualize all users in an extensive format, for this we add the -l (large) parameter:
finger -l
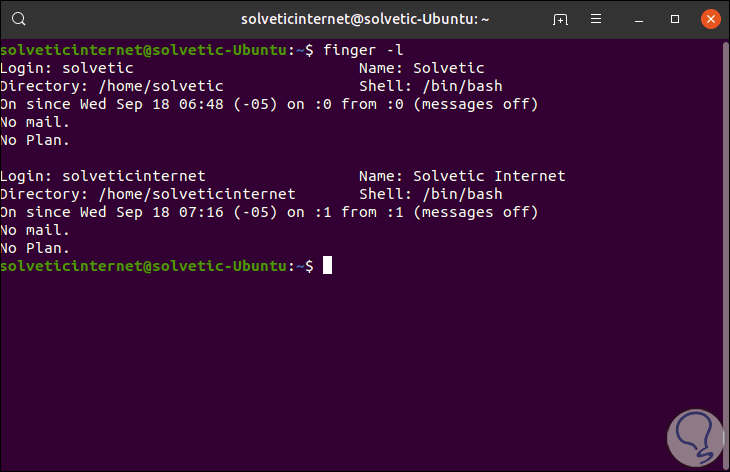
This will list all active users of the system.
Adjust columns
With the -s parameter we can adjust the display of the columns when we run Finger:
finger -s "user"
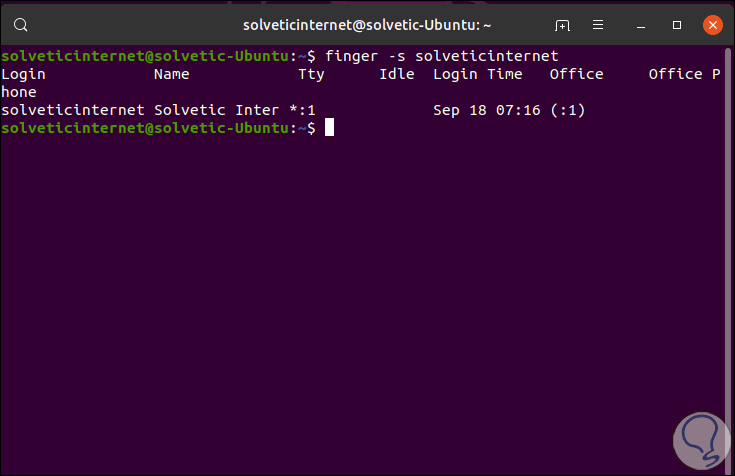
We see how Finger is a dynamic command where we can obtain specific details of each user and thus keep the best control of each of them..