Simple steps to change the sound of an app on Android
That each notification sounds different on our mobile depending on the application to which it corresponds can be very useful. It saves us time and makes it possible for us to only unlock the smartphone if something really arrives that we are waiting for or that interests us. And it is very simple to do it. How to change the sound of an app on Android?
Simple steps to change the sound of an app on Android
As the title states, this tutorial only works on phones running Android OS. The procedure to place personalized notifications is quite simple, although it may vary a bit depending on the mobile model we have. And it is that each manufacturer places its own customization layer with its interface, categories or destination routes. However, even if it differs somewhat from this brief manual, the steps to follow will be understood. If the steps do not appear literally, surely there is a similar section..
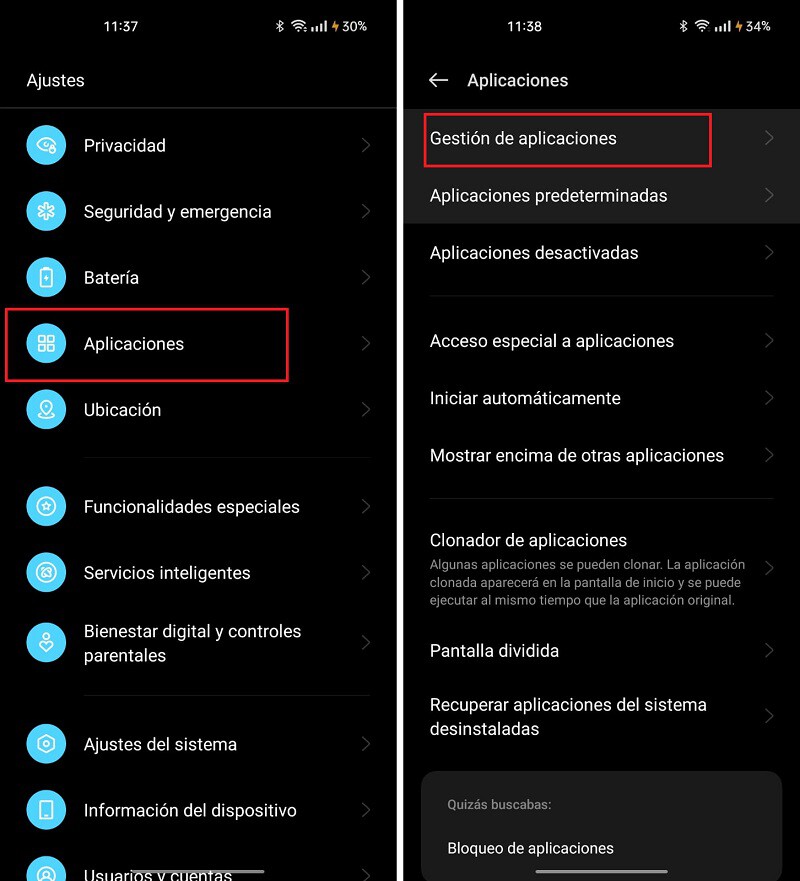
- The first thing we have to do is enter the settings of our phone and go to a section that refers to applications. It can be called like this: ' Applications '. To find it more easily, the settings usually include a search bar.
- Once there, we enter the section intended to manage them. It may appear as ' Application Management ' or as 'Manage Applications' . Here we will enter the list of apps that we have installed at that time, in alphabetical order.

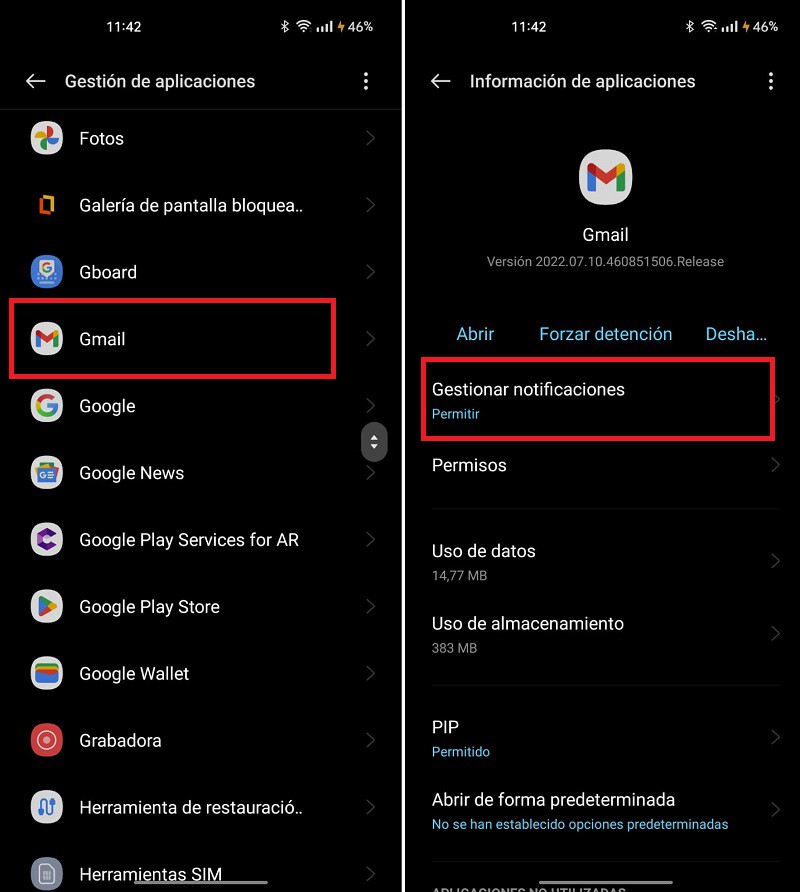
- Now, we have to find that application that we want to sound in a certain way. For example, if we prioritize email notifications over WhatsApp messages, it will be convenient to set a different ringtone to the Gmail and WhatsApp apps , for example. This way we will know if what we receive is an email or a message.
- We chose Gmail. Within its section, we enter 'Manage notifications' or just 'Notifications'.

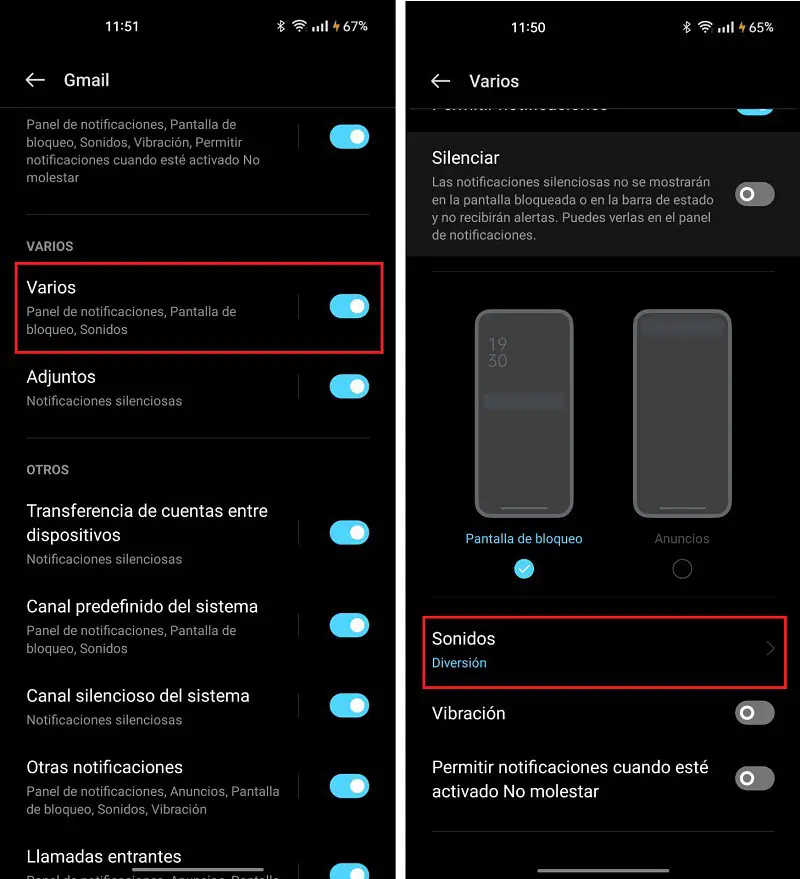
- Here we will find everything related to the notifications of that specific application. If we want it to sound or not, if we want notifications to arrive or change their tone , which is what matters. To do this, we enter the 'Various' section. Then 'Sound'.

- This is the last step. We will only have to choose the melody or tone that we like the most from the list and click on it . Automatically, that sound will have been assigned to Gmail notifications. Now, you just have to follow the same steps but choosing different apps so that each one has a perfectly identifiable melody for you.