One of the security measures that Windows 11 has integrated is BitLocker, this is a form of drive encryption focused on data protection which is available in Windows 11 by default and is a weapon against threats of data theft, exposure of data on lost computers or that were taken unauthorized, as a BitLocker add-on has greater maximum protection when used with the Trusted Platform Module (TPM) version 1.2 or higher, remember that this is one of the requirements to install or upgrade to Windows 11, BitLocker has two tools that are:
Bitlocker Tools
- BitLocker Recovery Password Viewer – As the name implies, it gives us the opportunity to search and view BitLocker Drive Encryption recovery passwords that have been backed up.
- BitLocker Drive Encryption Tools: These include the manage-bde and repair-bde command-line tools as well as the BitLocker cmdlets for Windows PowerShell and can perform direct encryption tasks with them.
TechnoWikis will explain the method to activate BitLocker in any of the hard drive partitions..
To stay up to date, remember to subscribe to our YouTube channel!
SUBSCRIBE ON YOUTUBE
How to activate BitLocker in Windows 11
Step 1
We are going to:
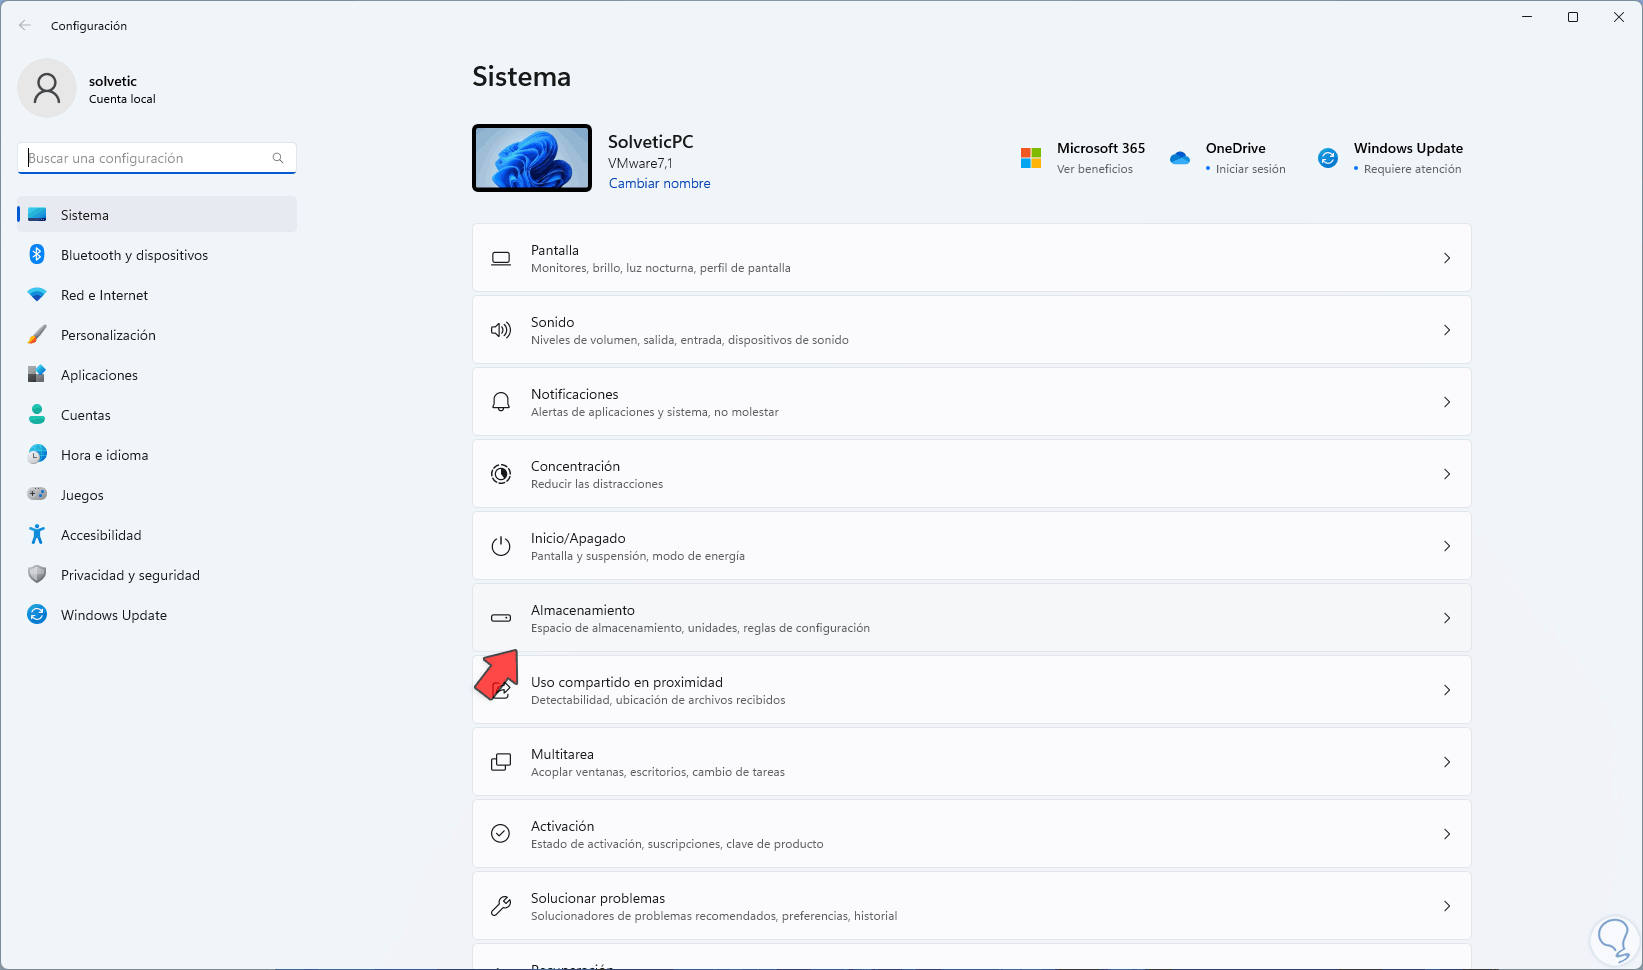
Step 2
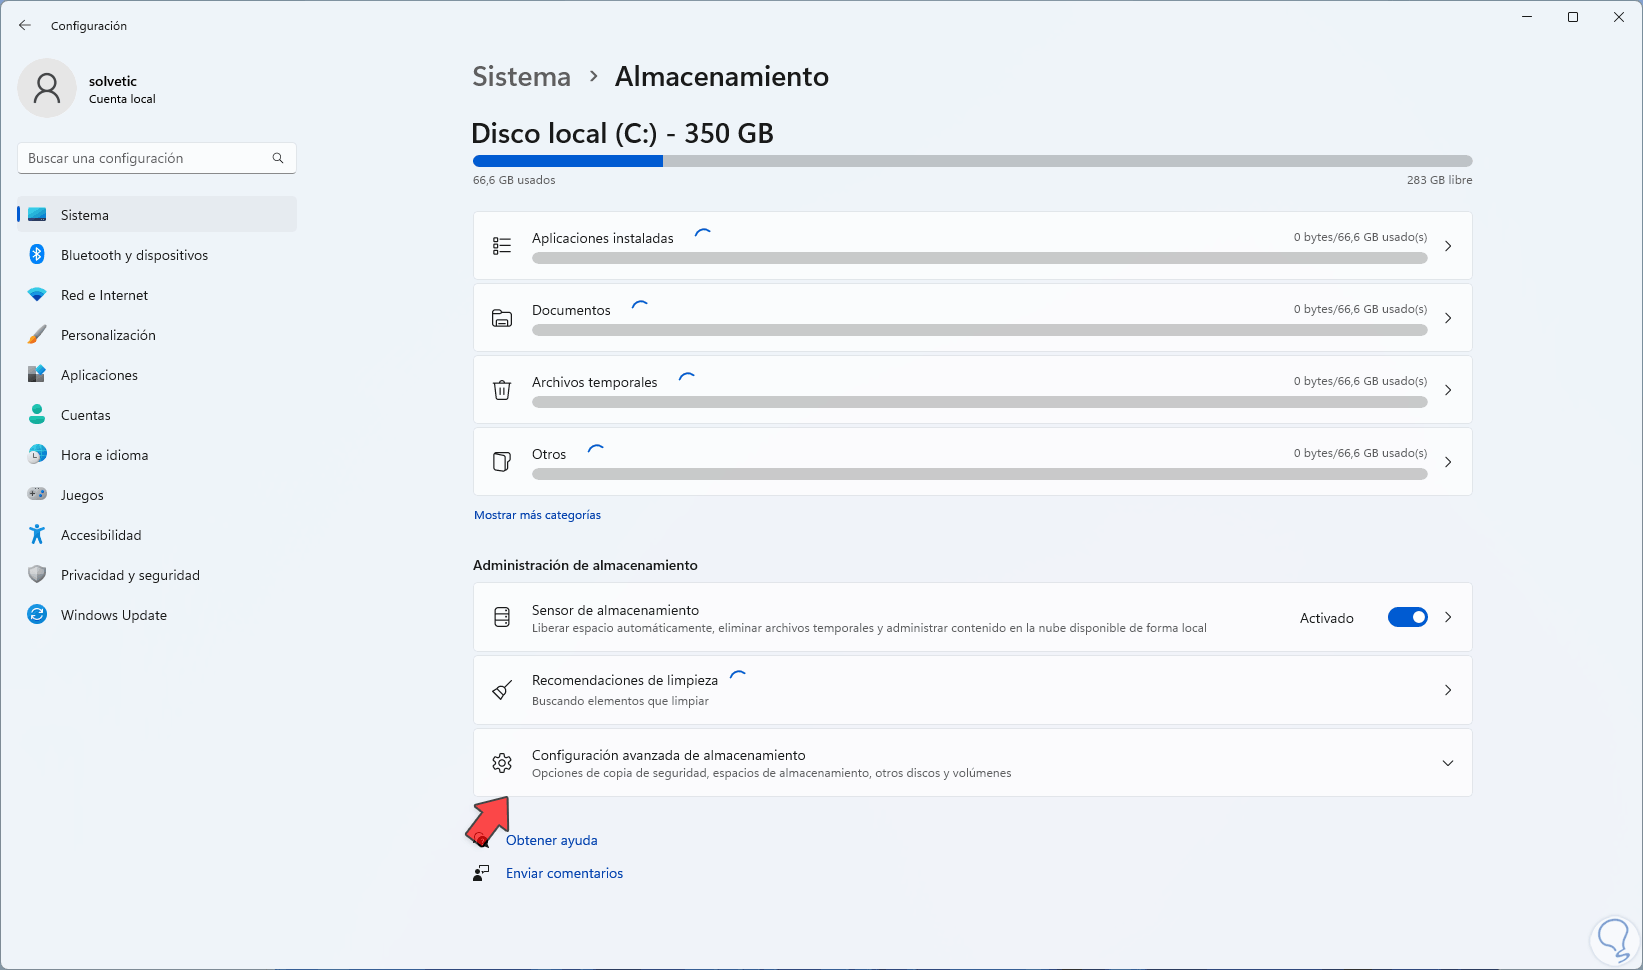
By clicking there we will see the following. We click on "Advanced storage settings"
Step 3
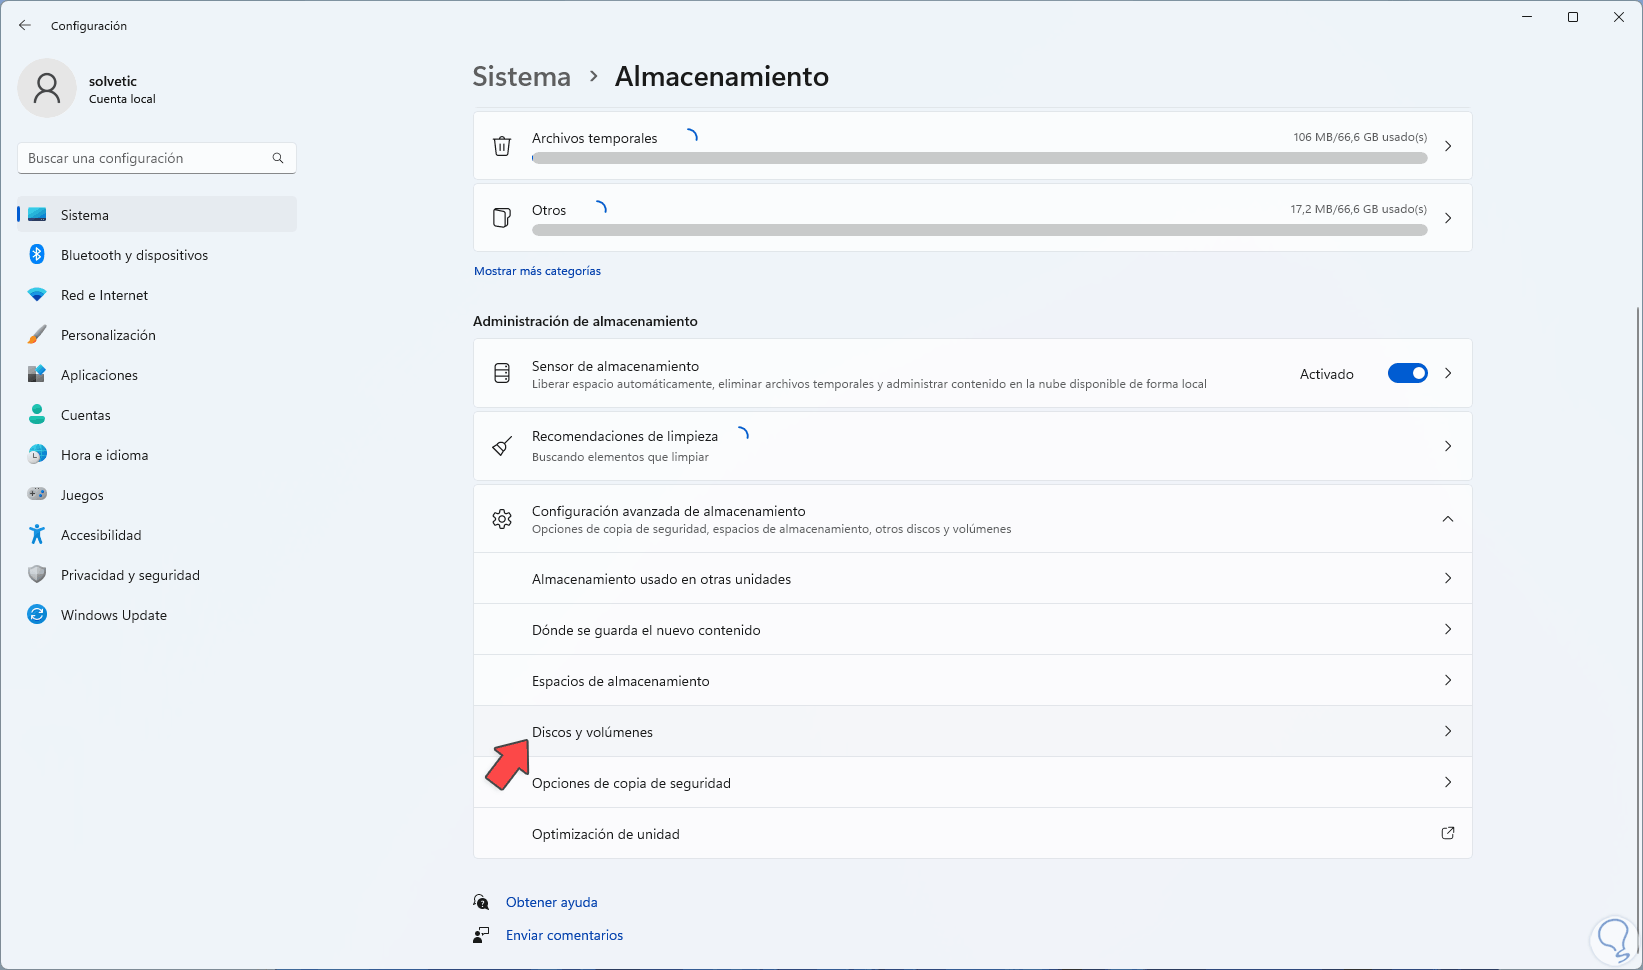
We will see the following options. We click on "Disks and volumes"
Step 4
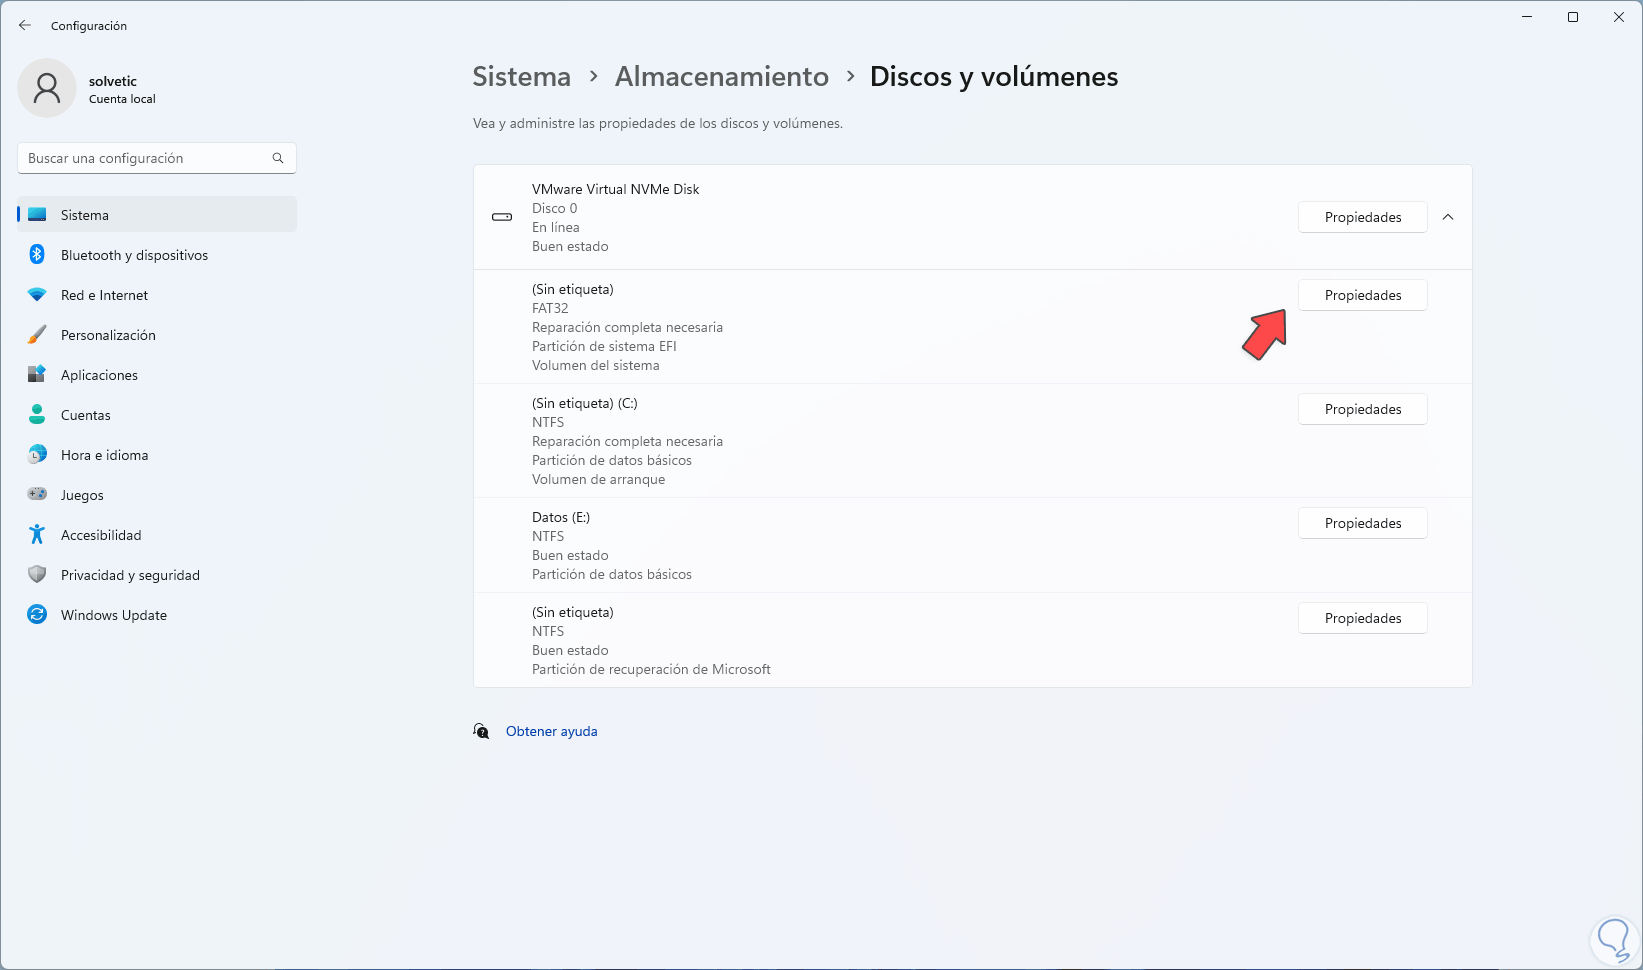
We will have access to the various units available on the computer. We click on "Properties" on the desired partition to see some characteristics.
step 5
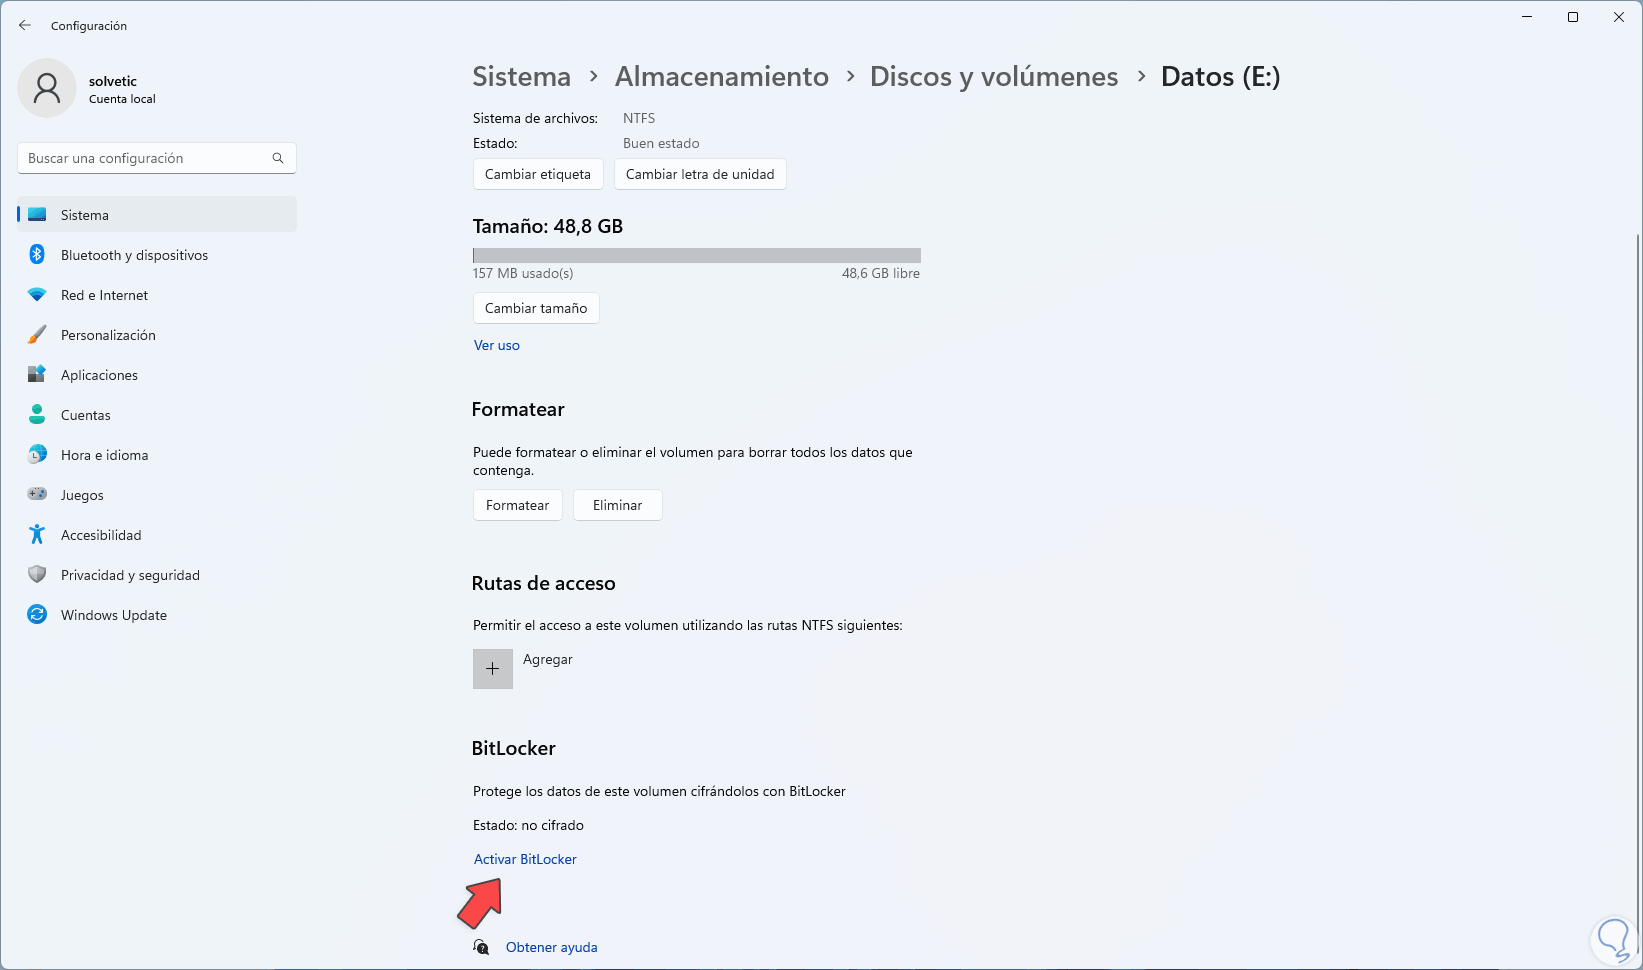
There at the bottom we click on "Activate BitLocker":
step 6
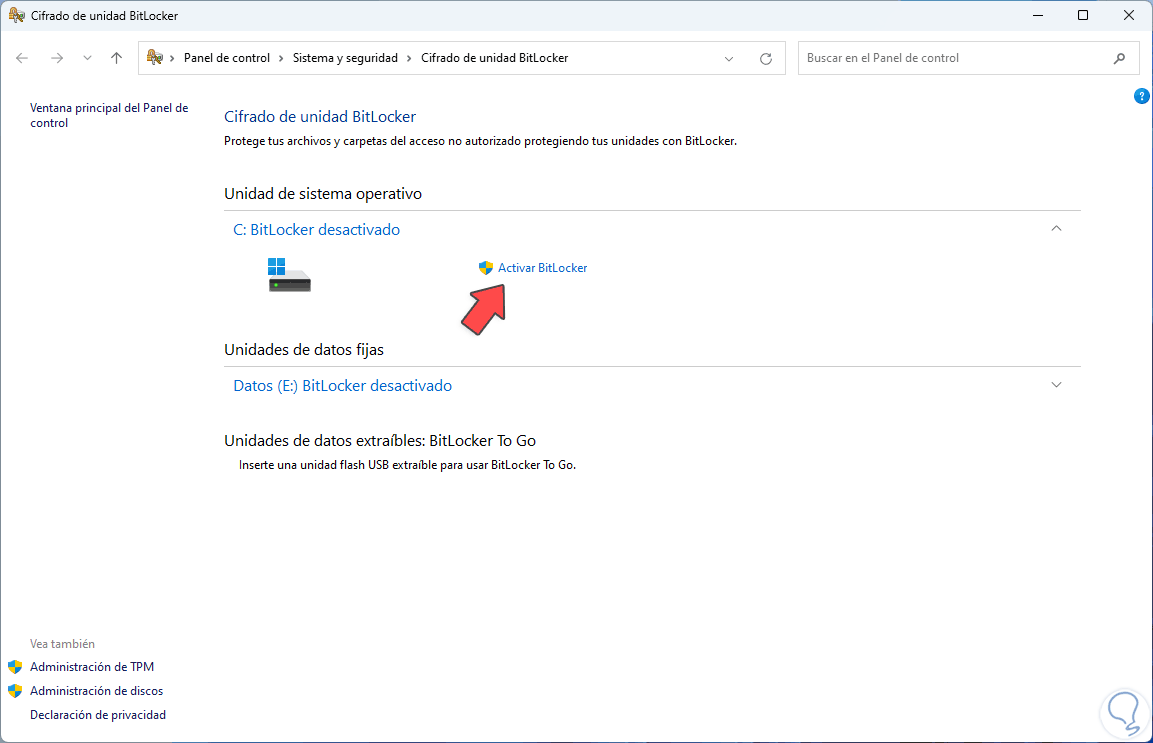
By clicking there we will be redirected to the Control Panel and there we click on "Activate BitLocker" in the respective unit:
step 7
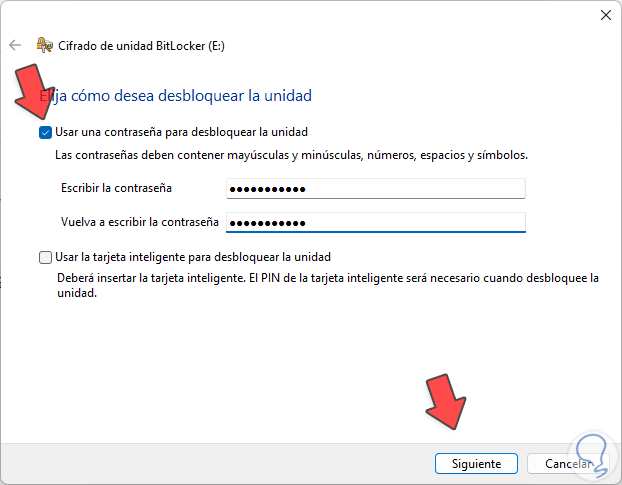
In the displayed wizard we activate the "Use a password to unlock the unit" box and assign the desired password. We click Next to see this:
step 8
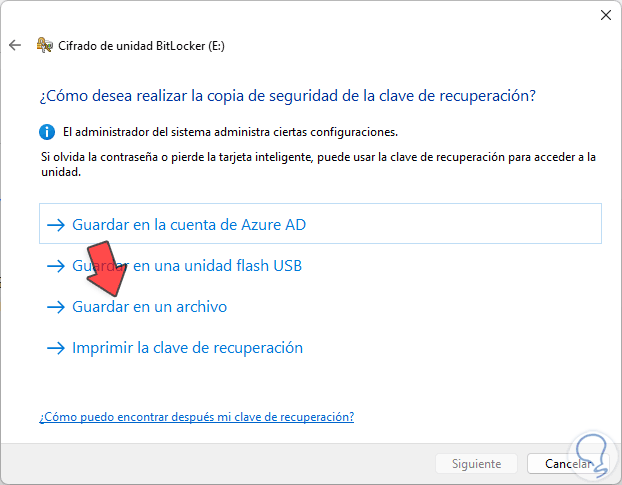
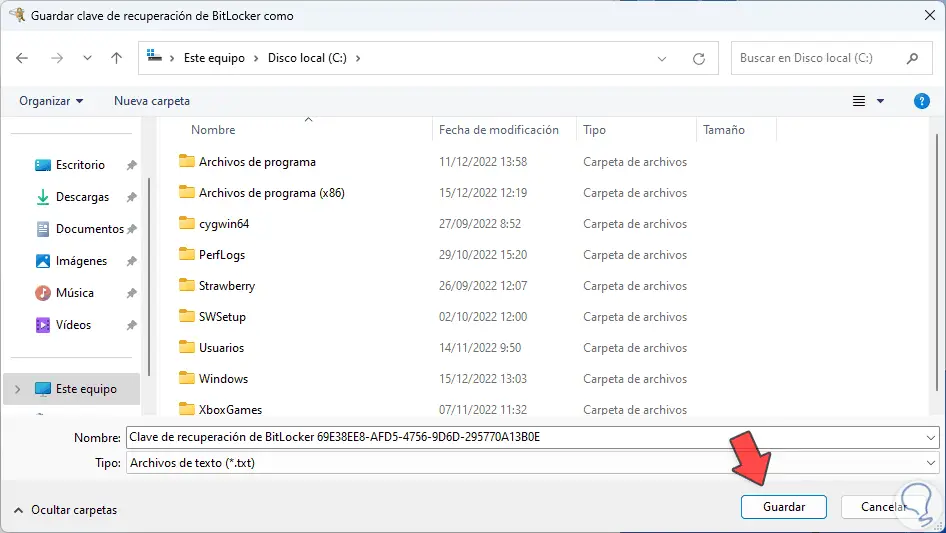
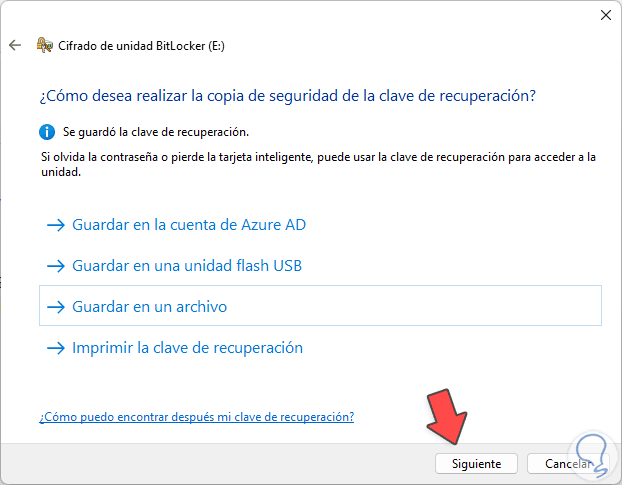
We select where to save the backup copy of the key, in this case we click on "Save to a file":
step 9
We will see that the key has been saved:
step 10
Click on "Next":
step 11
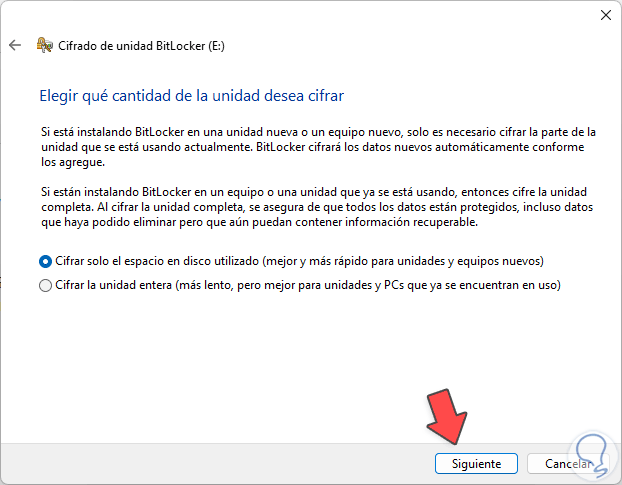
In the next window we define the amount of space to encrypt:
step 12
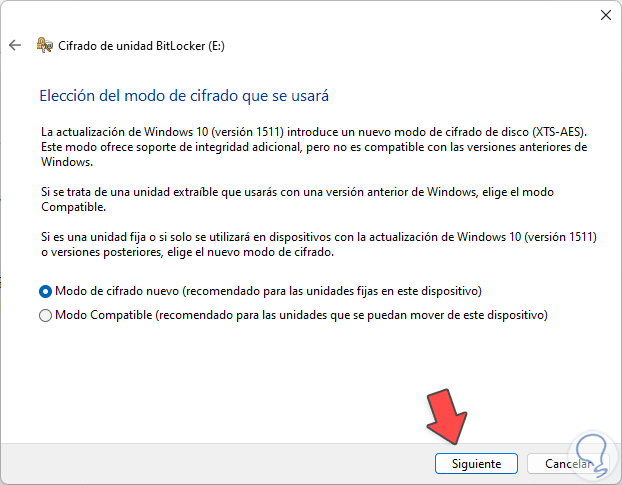
There we can leave the default option so that the entire disk is not encrypted but only the space that has been used, after this we choose the encryption mode to use. We leave the recommended option for performance issues
step 13
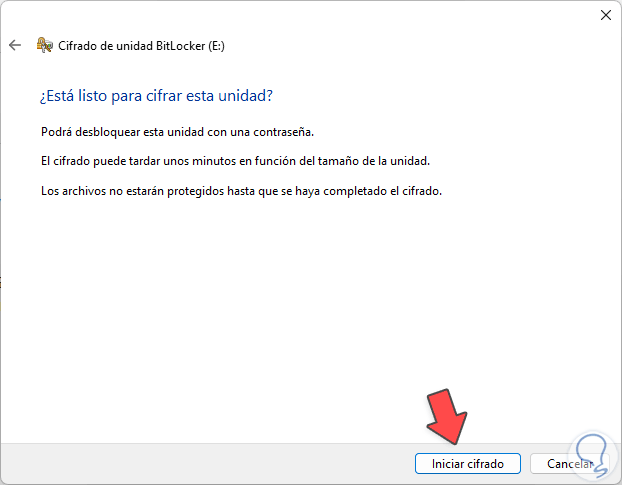
Now we will see the following. We click on "Start encryption" to proceed with BitLocker on the selected unit:
step 14
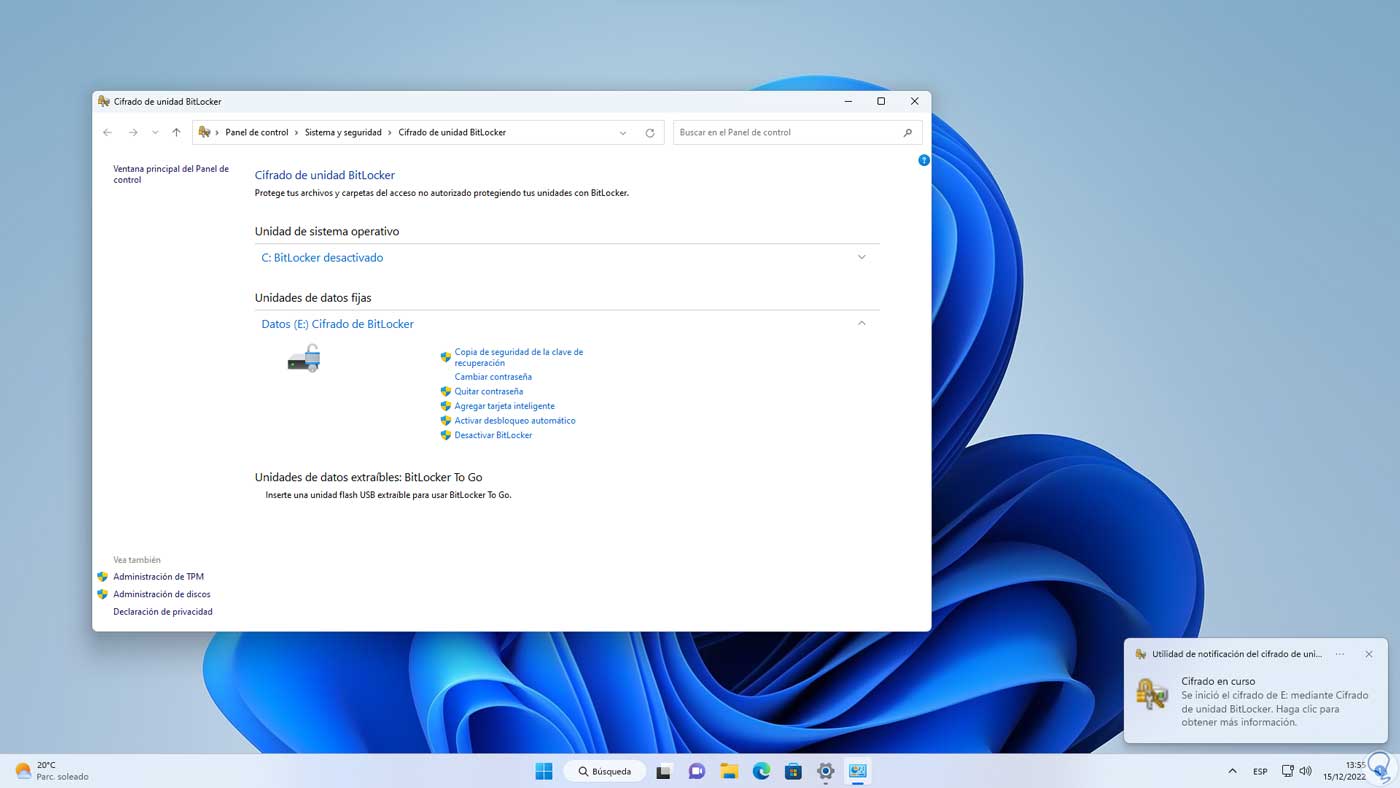
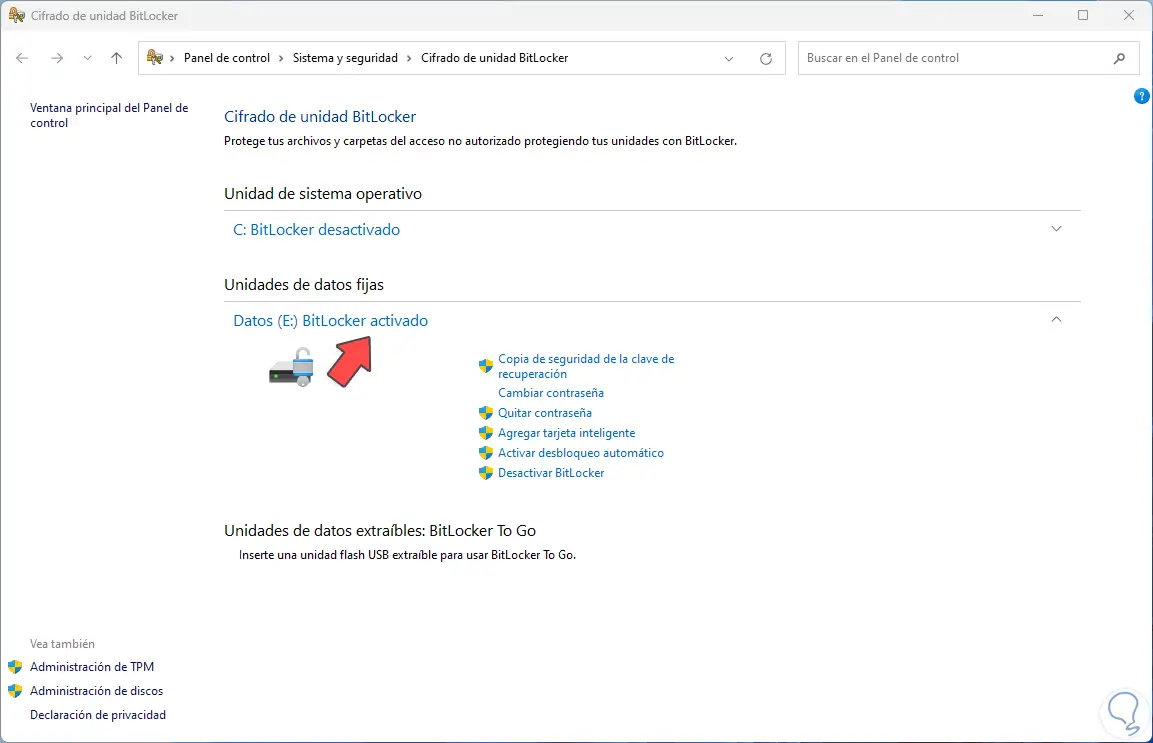
We can see that when BitLocker is active there are some extra functions in the Control Panel:
step 15
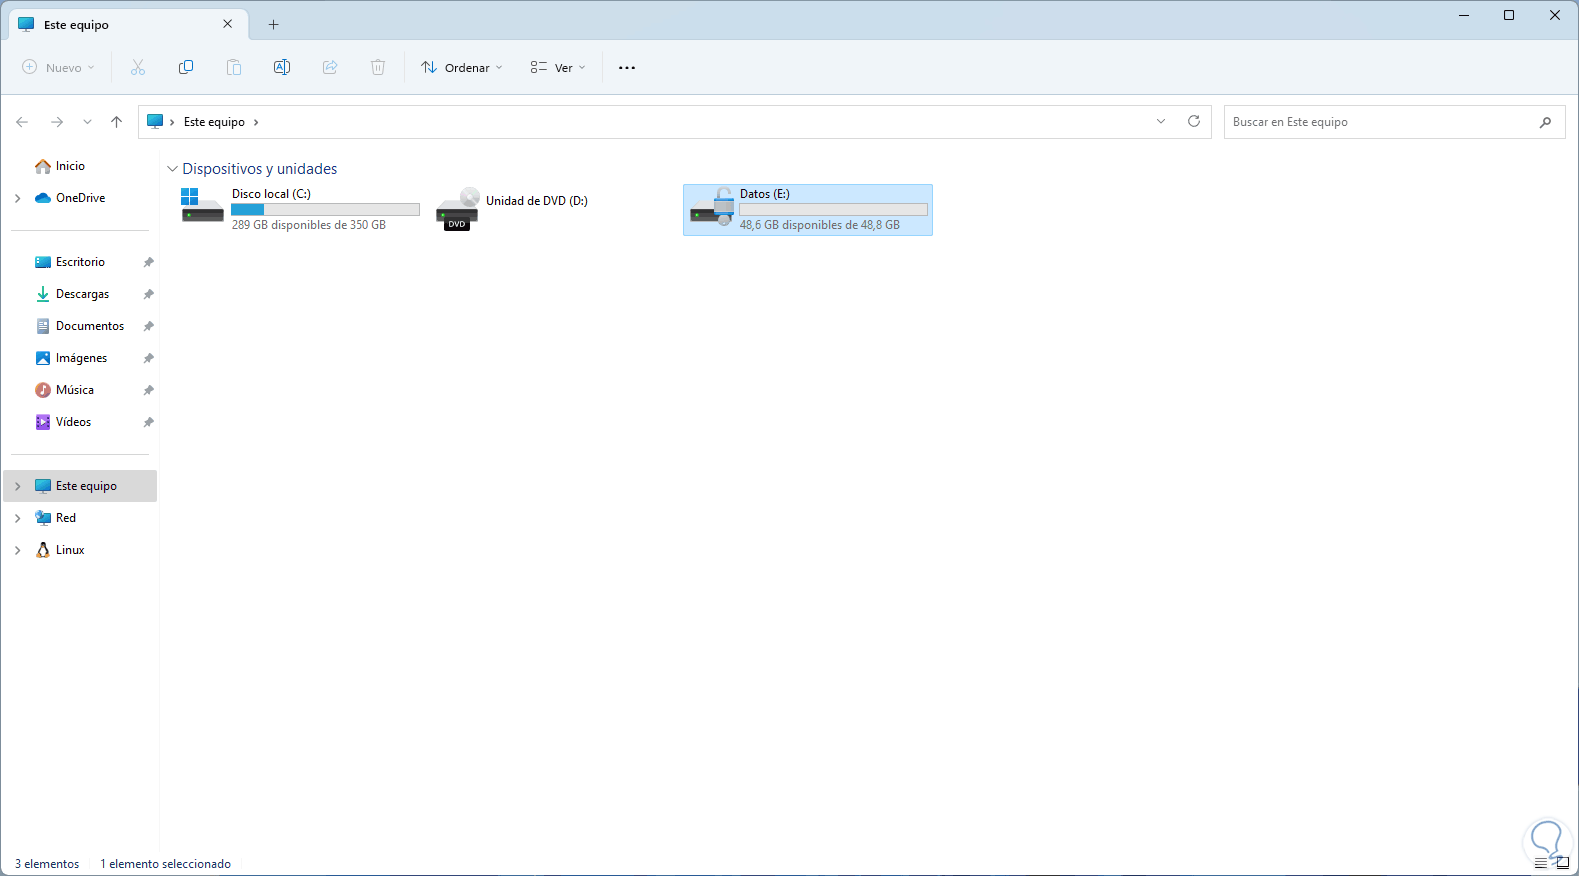
We open the File Explorer and the unit will have the lock icon indicating that BitLocker is active:
step 16
We see the padlock associated with the locked unit:
step 17
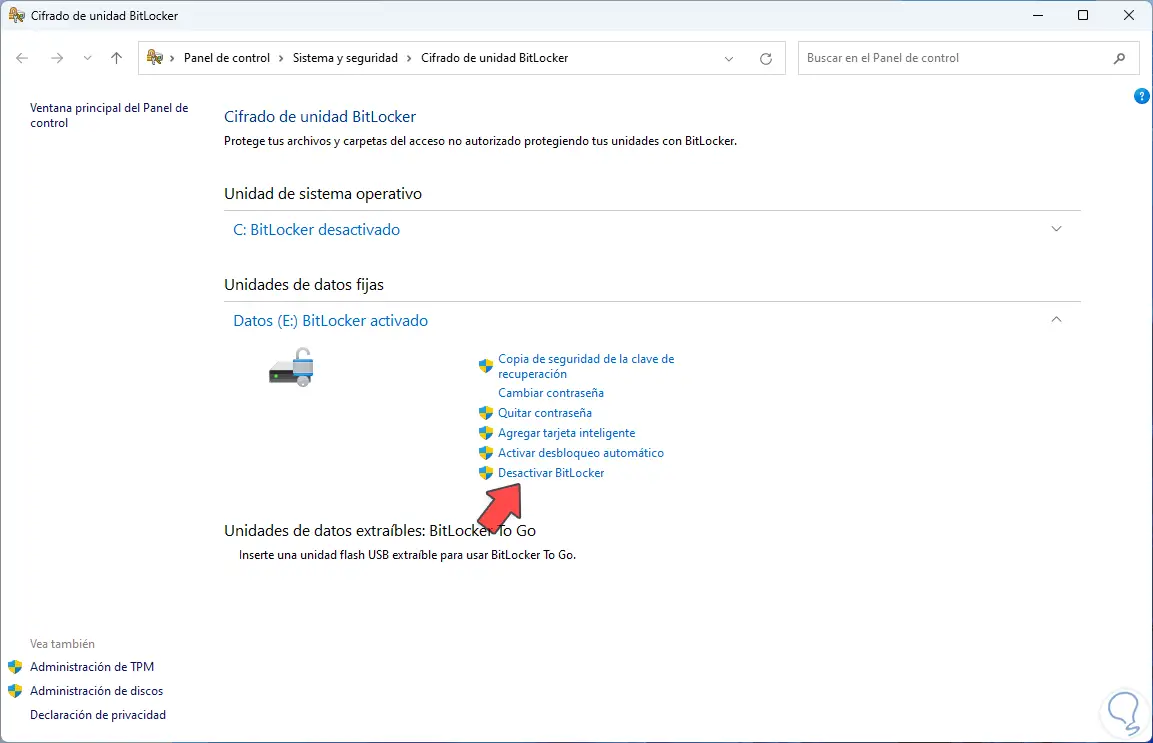
To remove BitLocker we go to the Control Panel and click on "Disable BitLocker":
step 18
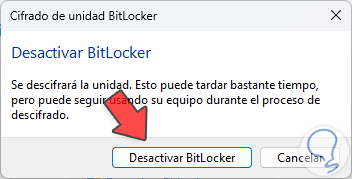
By clicking there we will see the following:
step 19
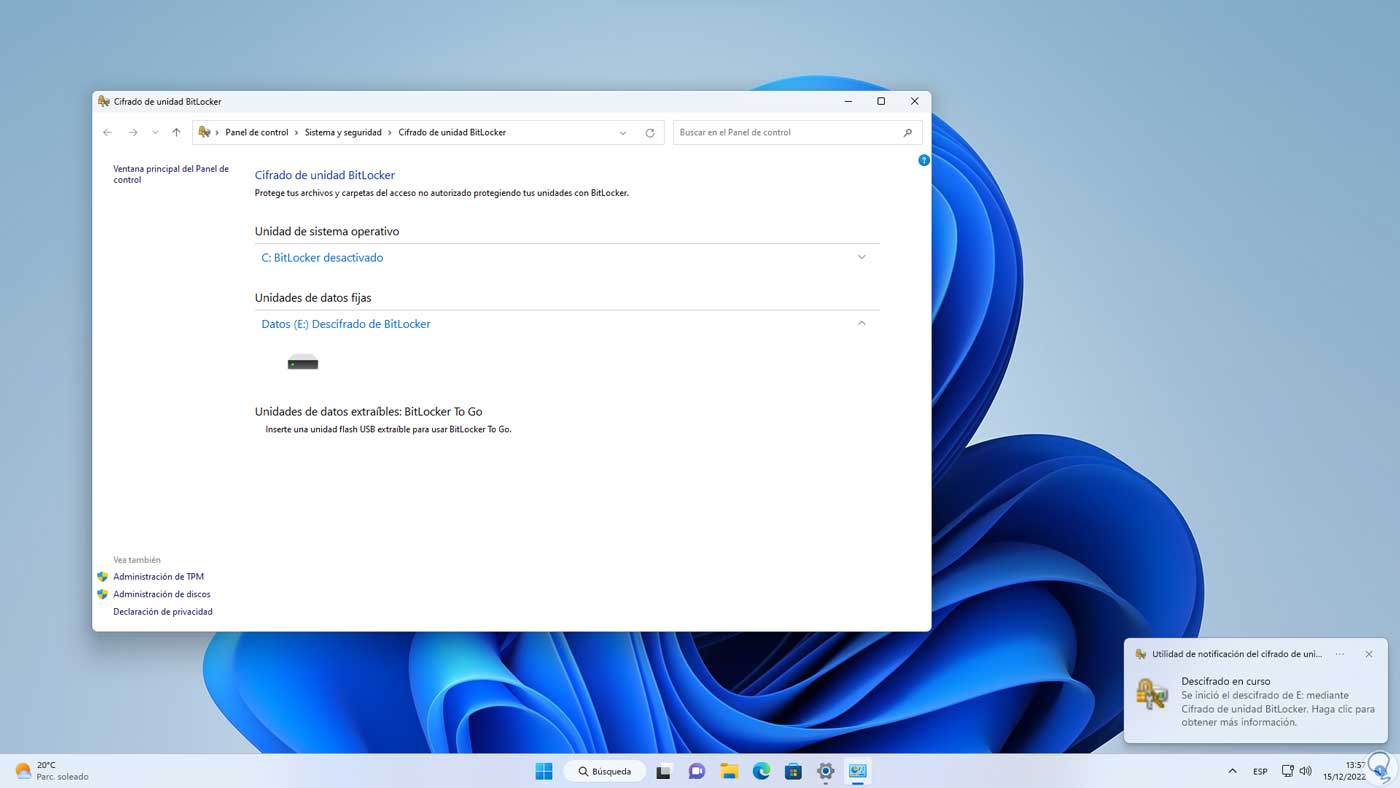
Confirm the process to start with the deactivation:
step 20
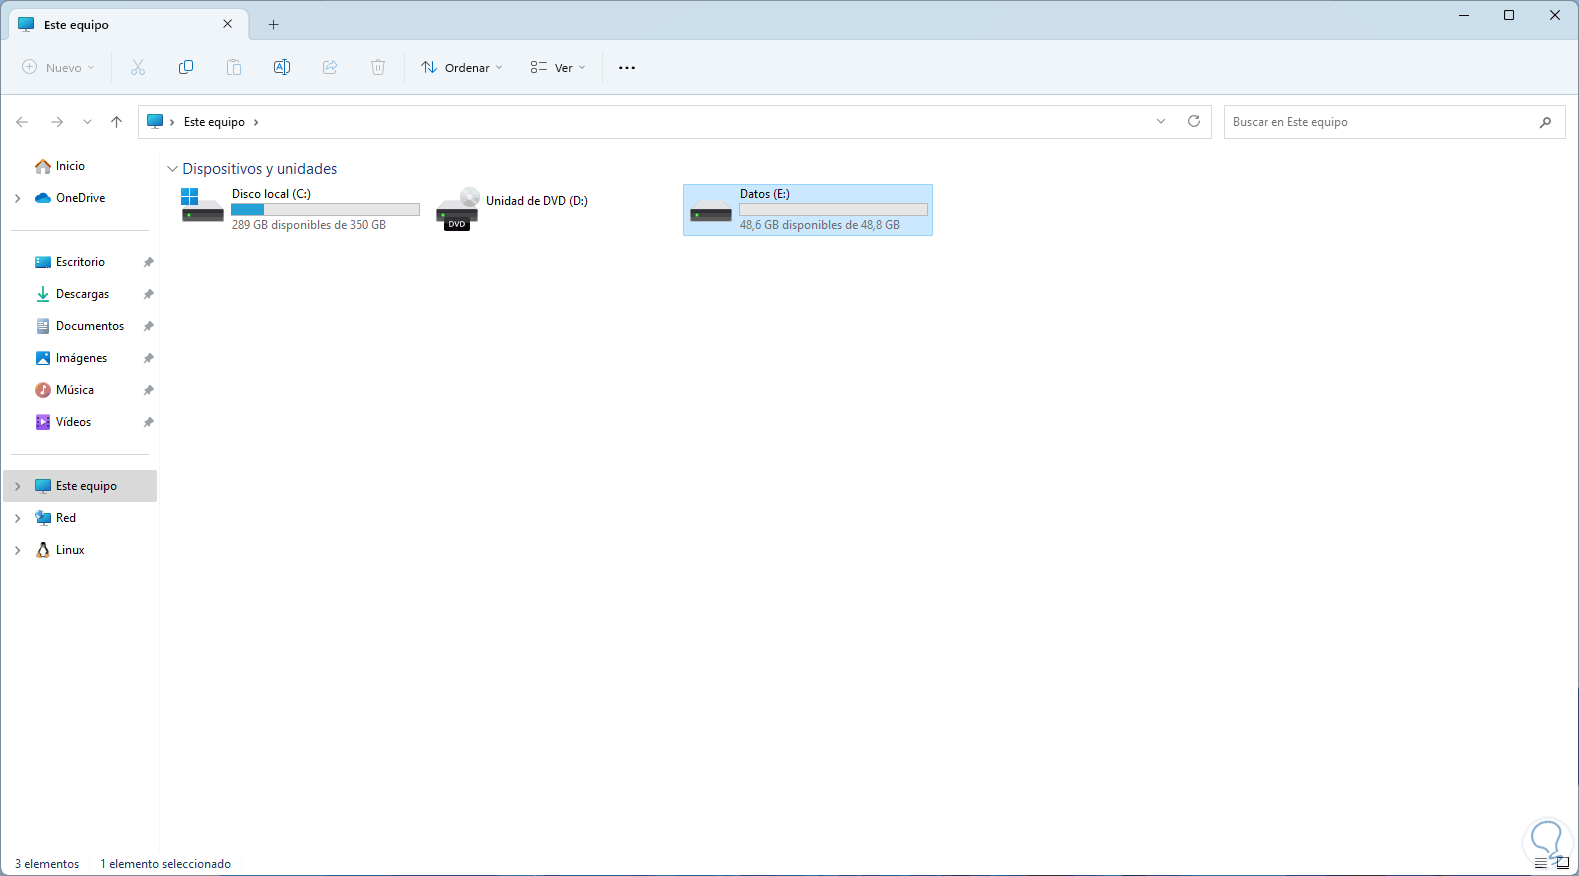
Once finished in File Explorer the drive will be unprotected:
step 21
To consider:
- BitLocker supports offload encryption for encrypted hard drives
- Supports single sign-on.
- BitLocker requires the recovery key to be entered only when disk corruption occurs or the PIN or password is lost.
Thus BitLocker becomes a security solution that protects our data from unauthorized access.